Auth0 Configuration
Complete Tutorial
Adding Auth0 to an Ionic Angular App Using Auth Connect - Auth0 Blog
In the tutorial, you’ll use the Ionic Framework’s UI components to create a Login page and a Home page within an Ionic Angular app. With just a few lines of code, you’ll secure the Home page by adding Auth0 login/logout functionality using the Auth Connect native plugin.
Demo App
For reference, a complete demo app is available that serves as a companion to the Auth0 article.
Configuration Details
Create Auth0 Account and Create App
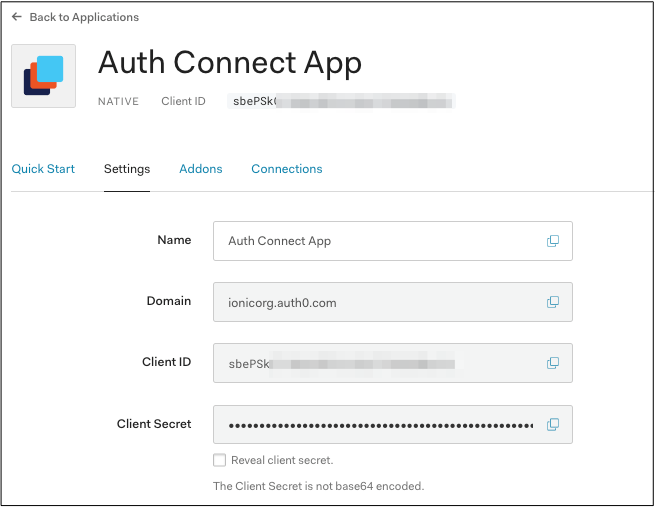
Before integrating Auth Connect into your Ionic app, you’ll need to get Auth0 up and running. If you don’t have one already, create a free Auth0 account then head over to the Applications page and click the “Create Application” button. Give your new app a name, then choose “Native” for application type. Note the Domain and Client ID - you’ll need those later.

Next, choose your globally unique App Id, which is used both in Auth0 configuration as well as Cordova/Capacitor as well. Typically, this takes the form of “company-AppName” or reverse DNS style - “com.company.app.”
With that in hand, set the Allowed Callback URLs. After the app user signs into Auth0, this tells Auth Connect which page to redirect to in your app. Use the formula “uniqueId://page”, such as “company-AppName://callback.”
Similarly, set the Allowed Logout URLs, which tell Auth Connect where to redirect to after the user logs out of Auth0. Again, use the “uniqueId://page” format. Usually, the app would redirect the user to a login page, so consider using “company-AppName://login.”
Auth0 is now ready to use in your Ionic app.
Install Auth Connect
Run the following command to install the Auth Connect plugin. For the AUTH_URL_SCHEME variable, use the globally unique App Id (ex: com.company.app) you decided on when configuring the Auth0 app above.
Installation
If you have not already setup Ionic Enterprise in your app, follow the one-time setup steps.
Next, install the plugin:
- Capacitor
- Cordova
npm install @ionic-enterprise/auth
npx cap sync
ionic cordova plugin add capacitor-compat-plugin
ionic cordova plugin add @ionic-enterprise/auth --variable AUTH_URL_SCHEME=com.company.app
Configure Auth Connect
It's recommended to create an AuthenticationService class that encapsulates Auth0 and Ionic Auth Connect’s login functionality.
Generate this class using the ionic generate command:
ionic generate service services/authentication
Extend the IonicAuth class, then configure all Auth0 details in the IonicAuthOptions object:
import { IonicAuth, IonicAuthOptions } from '@ionic-enterprise/auth';

export class AuthenticationService extends IonicAuth {

constructor() {
    const auth0Config : IonicAuthOptions = {
        // the auth provider
        authConfig: 'auth0',
        // The platform which the app is running on
        platform: 'cordova',
        // client or application id for provider
        clientID: 'FILL_IN',
        // the discovery url for the provider
        // OpenID configuration
        discoveryUrl: 'FILL_IN',
        // the URI to redirect to after log in
        redirectUri: 'FILL_IN',
        // requested scopes from provider
        scope: 'openid offline_access email picture profile',
        // the audience, if applicable
        audience: 'FILL_IN',
        // the URL to redirect to after log out
        logoutUrl: 'FILL_IN',
        // The type of iOS webview to use. 'shared' will use a webview that can
        // share session/cookies on iOS to provide SSO across multiple apps but
        // will cause a prompt for the user which asks them to confirm they want
        // to share site data with the app. 'private' uses a webview which will
        // not prompt the user but will not be able to share session/cookie data
        // either for true SSO across multiple apps.
        iosWebView: 'private'
    };

    super(auth0Config);
    }
}
Some of these IonicAuthOptions values are unique, and must be set based on your Auth0 app’s details:
platform: Use “cordova” or “capacitor” accordingly.clientID: Your app’s Client ID.discoveryUrl: Consists of your Auth0 Domain plus “.well-known/openid-configuration”. Example: https://ionicorg.auth0.com/.well-known/openid-configurationredirectUri: The URI to redirect to after the user has logged in. Use the same AUTH_URL_SCHEME variable value (App Id) from when the Auth Connect plugin was installed. Example: com.company.app://callbacklogoutUrl: The URI to redirect to after the user has logged out. Example: com.company.app://login?logout=true
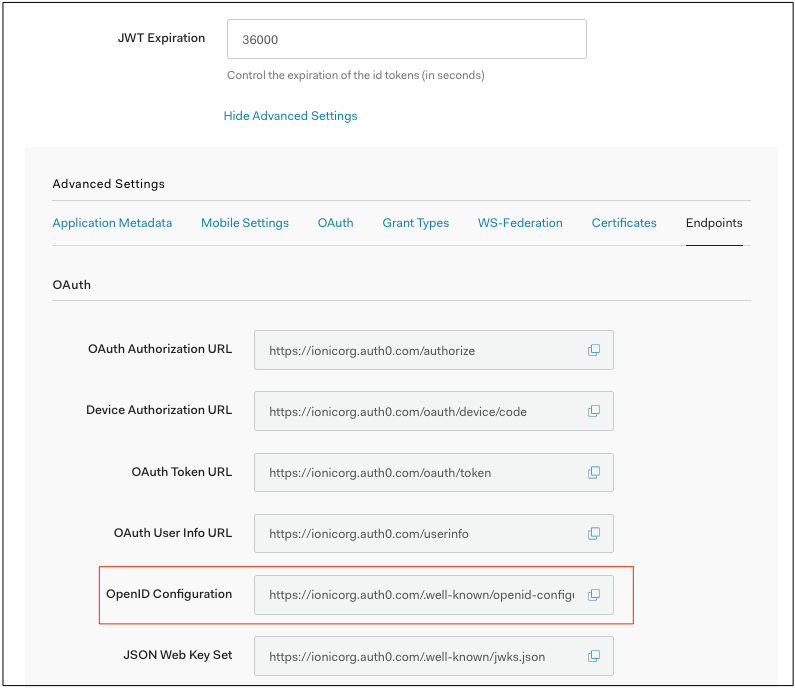
The Discovery URL can be found under Application Details -> Show Advanced Settings -> Endpoints tab:

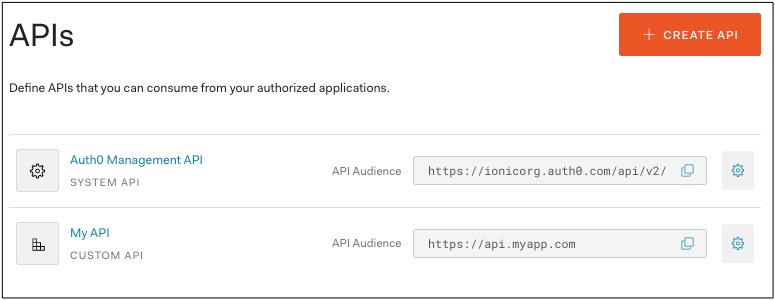
The audience field comes from your custom API of choice — the API Audience field:

What's Next?
Check out the full list of configuration options available, then implement the other steps in the Auth Connect workflow. A complete working example can be found on GitHub.