How to use with Module Federation
The first thing you will need to do when implementing Federated Capacitor is choose a web based micro frontend solution. The most common is Module Federation.
Module Federation Implementation
The most common use case for module federation is sharing modules across web applications. This allows you to stitch together micro frontends from many different applications into your own. The caveat with this approach is that you become dependent on network access and latency. On web this isn't a problem but within mobile applications it can create a poor user experience.
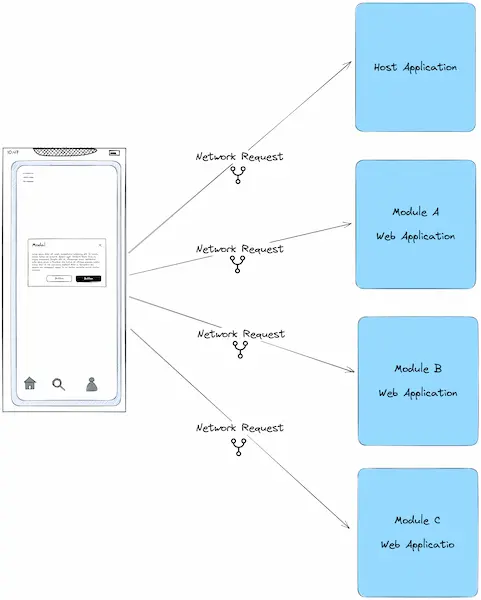
We aim to solve this problem with Federated Capacitor. You are still using module federation to stitch together independent modules, but the modules are located physically on the mobile device. Updates are pushed to the device using AppFlow and Live Updates to update each of these modules independently.
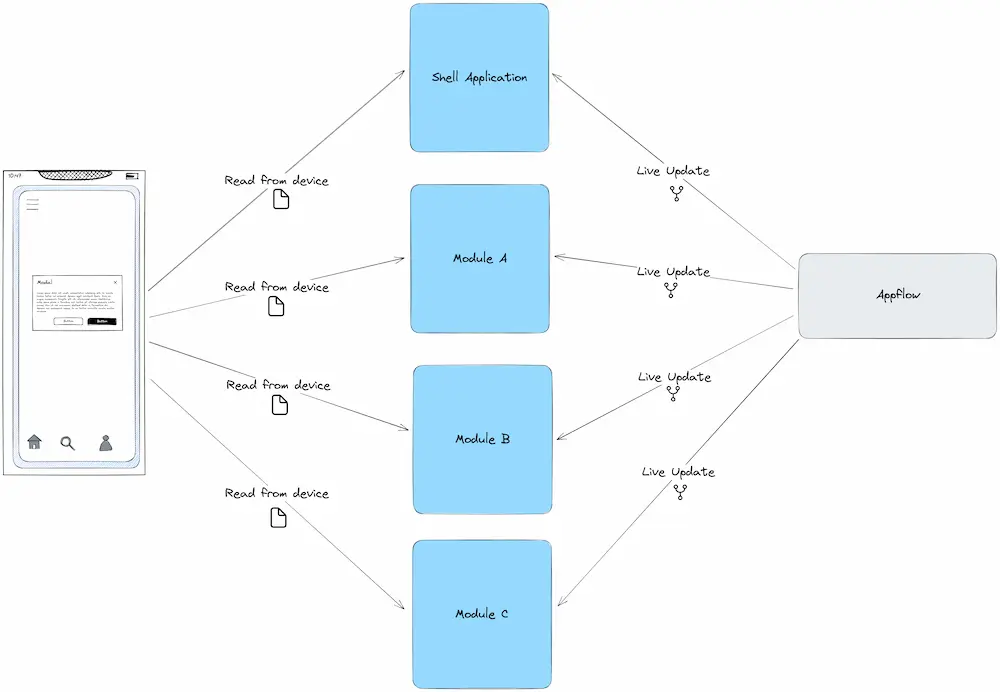
Serving the files from the local device vs serving from a remote location creates a dramatically improved First Contentful Paint (FCP) and it also allows for an offline experience.
Local vs Mobile Configuration
After you have chosen and setup module federation between your apps you will need to configure it for Capacitor. One way to do this is to add an environment variable to your npm build script.
In this case we are setting the variable CAP_BUILD to true. In the example below we are using cross-env to set the environment variable within our npm build script.
"scripts: {
  "build": "cross-env CAP_BUILD=true nx run-many --target=build --all",
  ...
}
This variable is then accessed within your module federation configuration as a way to identify when to use the Capacitor paths for your remotes. You can see below that we have three different MFEs that we are pulling into our primary Capacitor application (account, checkout, helpinfo).
const isCapBuild = process.env.CAP_BUILD;

const remotes =
  isCapBuild == null
    // Configuration for when developing locally
    ? {
        account: 'account@http://localhost:3004/remoteEntry.js',
        checkout: 'checkout@http://localhost:3005/remoteEntry.js',
        helpinfo: 'helpinfo@http://localhost:3006/remoteEntry.js',
      }
    // Configuration for when building for capacitor
    : {
        account: `account@account/remoteEntry.js`,
        checkout: `checkout@checkout/remoteEntry.js`,
        helpinfo: `helpinfo@helpinfo/remoteEntry.js`,
      };

module.exports = {
  name: 'shell',
  remotes,
  ...
}
Now when you run npm run build it will generate a build that is built to work with Federated Capacitor.
Capacitor Configuration
The next step is to configure Capacitor so that it knows where these files exist on the initial application build. You can see that there is configuration for the shell or main application and then config for the MFEs that are separate.
Monorepo
The webDir paths are relative your the base directory of the shell application (where this configuration file lives). The names correspond to how you named the directories within the module federation config (account, checkout, helpinfo). The shell application webDir is defined at the top-level as is customary for vanilla Capacitor applications
const capacitorConfig: CapacitorConfig = {
  appId: "io.ionic.fedcap.ecommercewebapp",
  appName: "FederatedCapacitor Web App",
  webDir: "./build",
  plugins: {
    // Federated Capacitor configuration
    FederatedCapacitor: {
      shell: {
        name: "shell",
      },
      apps: [
        {
          name: "account",
          webDir: "../account/build",
        },
        {
          name: "checkout",
          webDir: "../checkout/build",
        },
        {
          name: "helpinfo",
          webDir: "../helpinfo/build",
        },
      ],
    },
  },
};
After this configuration is complete you should be able to build the shell application and see everything tied together in your native emulator. To test in iOS run npx cap open ios and then build in Xcode.
Polyrepo
Having your applications in separate repos requires additional setup for each individual application:
1. Add the web applications to Appflow
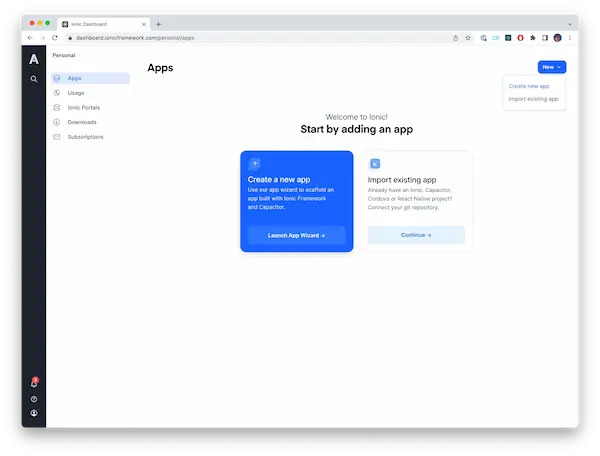
After logging into your Appflow account go to the Apps page.
In the upper right hand corner you will be able to select Import existing app.
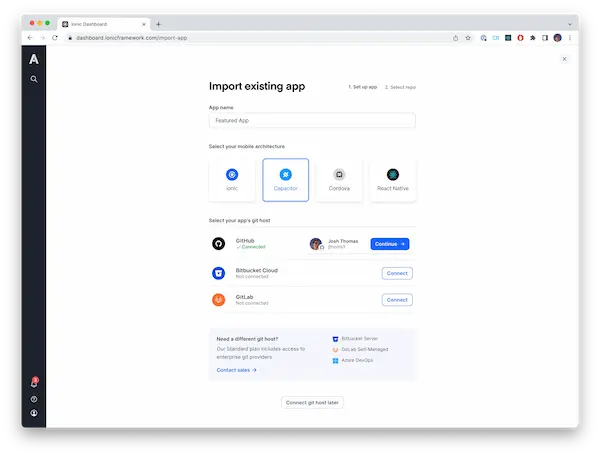
- Provide an
App Name. Capacitor, as the mobile architecture- Choose your git host. In this example we have selected
Github
2. Web application builds
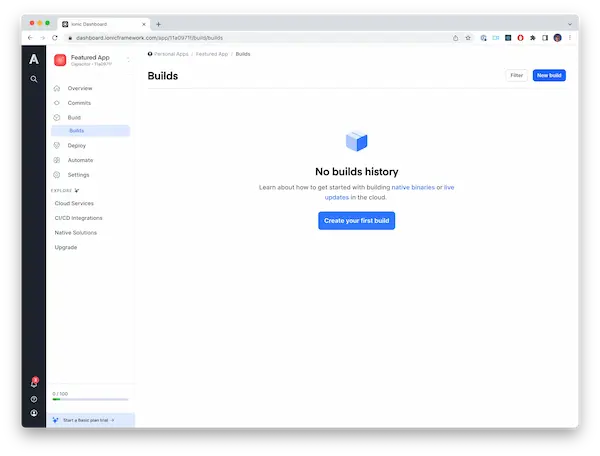
After the app has been created you will want to go to the Builds page. This is where you will create new builds and see previous builds. Anytime you want to deploy a new version of the web application you will need to create a build from this screen or by using the Ionic Cloud CLI (which we will cover later).
Also in the top left corner of these screens you will see the Appflow App id. In this case it is 11a0971f. This id will be used when we configure FederatedCapacitor in the Capacitor configuration.
3. Build the connected application
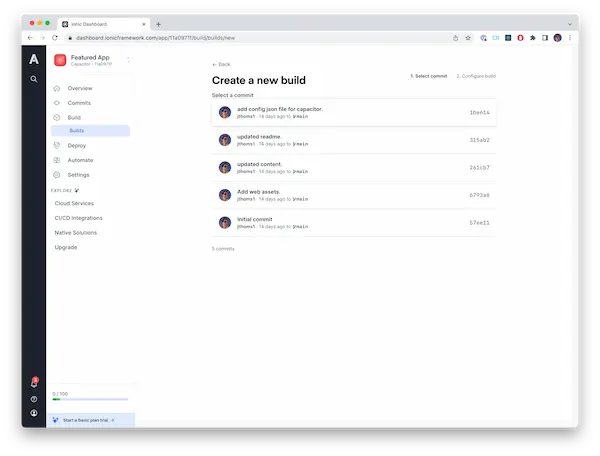
After the application has been added to Appflow you will need to create your first build so that it is available to seed the Microfrontend in the Native App.
This can be done by hitting the New Build button on the 'Builds' page. Then you will choose a the most recent commit to create the build from.
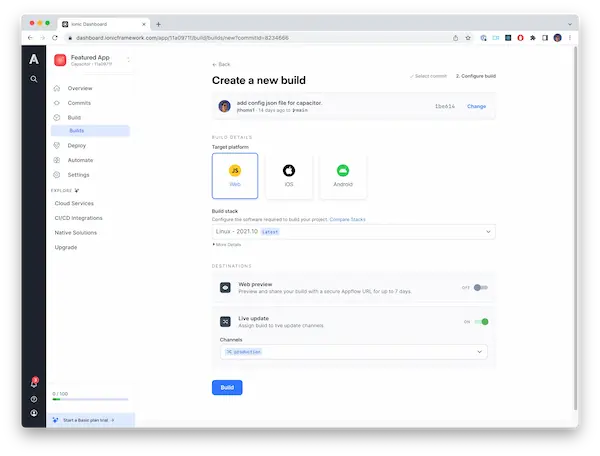
When creating a new build there are a few values that we need to change on the initial build for the app.
Target Platformshould beWebBuild Stackshould just be the default which is the latest.Live updateshould be turned on andChannelshould be set toproduction
4. Create a Personal Access Token
Now that we have the web applications all setup in Appflow and built we need to get our local environment setup to be able to pull them from Appflow.
The first step in setting up our local environment is generating a personal access token.
This is done from Personal Settings in the Personal Access Token tab.
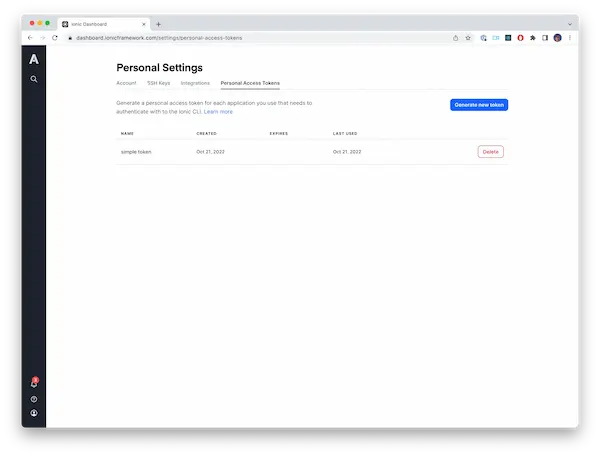
Click the Generate new token button. While creating the token it is a best practice to give it an optional expiration date but not required.
After the token is generated you will need to copy it to clipboard because it will be required for the next step. Usually the token follows the format of ion_XXXXXXXXXXXXX.
5. Install the Ionic Cloud CLI
Install the Ionic Cloud CLI within your local dev environment. This CLI will allow us to interact with Appflow programmatically. So that we can pull the latest Build files during native builds. (https://ionic.io/docs/appflow/cli/overview)
curl -sL https://ionic.io/get-ionic-cloud-cli | bash
To make authenticated requests using the Ionic Cloud CLI, you must either set an environment variable named IONIC_TOKEN containing your Personal Access Token or create a cloud configuration file.
(Optional) Create a cloud configuration file
Now create a yaml configuration file in your native project. This file will be used to authenticate against Appflow for your cloud interactions. Usually you will place this file in your native applications source root. It will be referenced by a build script in your native application.
TOKEN: ion_XXXXXXXXXXXXX
Be sure to set this to ignore in your .gitignore Learn more about the configuration file.
6. Configure the applications
The webDir paths are an output directory for where you want your microfrontends to be downloaded and extracted to. The names correspond to how you named the directories within the module federation config (account, checkout, helpinfo).
const capacitorConfig: CapacitorConfig = {
  appId: "io.ionic.fedcap.ecommercewebapp",
  appName: "FederatedCapacitor Web App",
  webDir: "./build",
  plugins: {
    // Federated Capacitor configuration
    FederatedCapacitor: {
      shell: {
        name: "shell",
      },
      apps: [
        {
          name: "account",
          webDir: "microfrontends/account",
          liveUpdateConfig: {
            appId: "abcd1234",
            channel: "production",
            autoUpdateMethod: "background",
          },
        },
        {
          name: "checkout",
          webDir: "microfrontends/checkout",
          liveUpdateConfig: {
            appId: "efab5678",
            channel: "production",
            autoUpdateMethod: "background",
          },
        },
        {
          name: "helpinfo",
          webDir: "microfrontends/helpinfo",
          liveUpdateConfig: {
            appId: "cdef9012",
            channel: "production",
            autoUpdateMethod: "background",
          },
        },
      ],
    },
  },
};
7. Run the SWAD command bundled with @ionic-enterprise/federated-capacitor
From the root of your web application, run the following command:
npx ionic-swad
If all previous steps were completed successfully, ionic-swad will pull the latest builds of the configured applications into their respective webDir locations.
In case you were wondering, 'SWAD' stands for Simple Web App Deployment