iOS Quick Start
This is a walkthrough on how to get a single Portal + web application setup. To begin this walkthrough it will be assumed that you have a valid and active commercial agreement with Ionic to use Portals.
First have your web application ready. We will add some configuration to it and then get it setup in Appflow. At the end of this walkthrough:
- The web application will be setup in Appflow.
- Each new Xcode iOS application build will pull the latest version of the web application from Appflow.
- The iOS application will have a Portal setup pointing to the web application files.
1. Create a Capacitor config
Create a capacitor.config.json file to the root of your web project. We will not need to add Capacitor to the web project but this configuration file will help us configure some options for the Portals that are displaying this web application.
{
  "appId": "com.ionicframework.featured-products",
  "appName": "Featured Products",
  "webDir": "build"
}
These configuration values are required for web applications added to Appflow.
appId: a unique id that you provide to your web applicationappName: the name of your web applicationwebDir: the directory where your compiled web code will be placed
There are many options that you can provide to a Capacitor configuration file we will only need a few to get started. These options are defined in the config schema.
2. Add the web application to Appflow
Now that we have the application source configured we will need to add it to Appflow. Appflow can be used for deploying the web application into the Portal later using Live Updates.
During the Native App build process the most recent build of the web application will be used to seed the Portal, and then after the Native App deployment every subsequent build can be deployed as an over the air Live Update.
Connect the repo
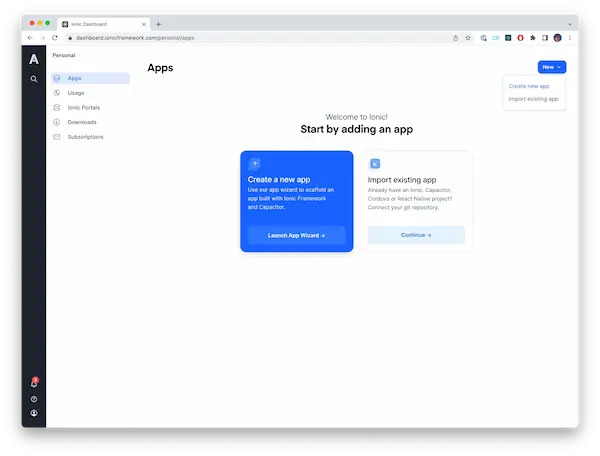
After logging into your Appflow account go to the Apps page.
In the upper right hand corner you will be able to select Import existing app.
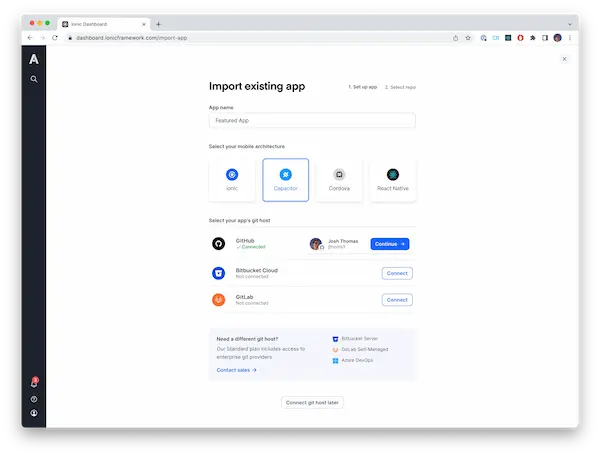
- Provide an
App Name. Most likely using the same you provided in thecapacitor.config.jsonfile in the previous step Capacitor, as the mobile architecture- Choose your git host. In this example we have selected
Github
Web application builds
After the app has been created you will want to go to the Builds page. This is where you will create new builds and see previous builds. Anytime you want to deploy a new version of the web application you will need to create a build from this screen or by using the Ionic Cloud CLI.
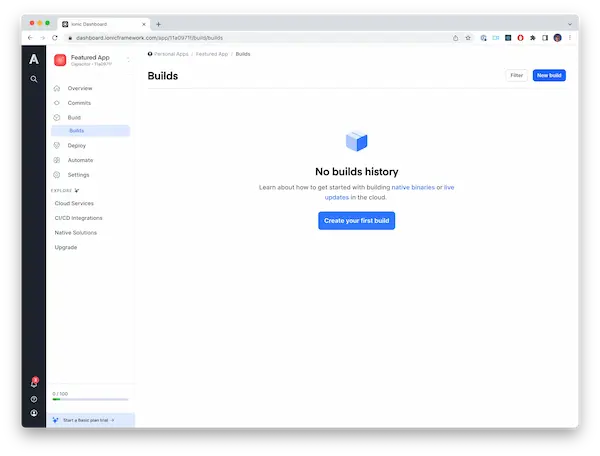
Also in the top left corner of these screens you will see the Appflow App id. In this case it is 11a0971f. This id will be used when we configure the native application.
Build the connected application
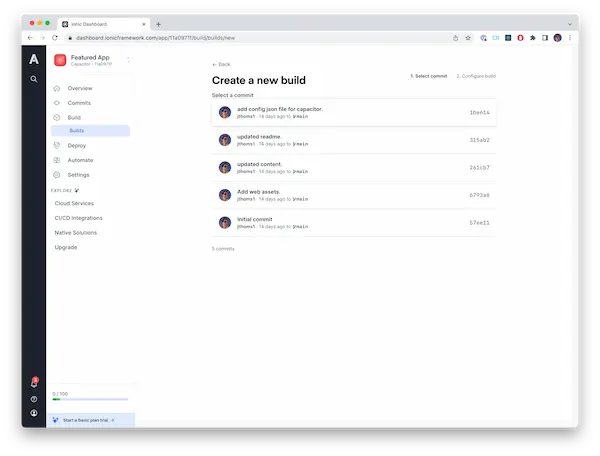
After the application has been added to Appflow you will need to create your first build so that it is available to seed the Portal in the Native App.
This can be done by hitting the New Build button on the 'Builds' page. Then you will choose a the most recent commit to create the build from.
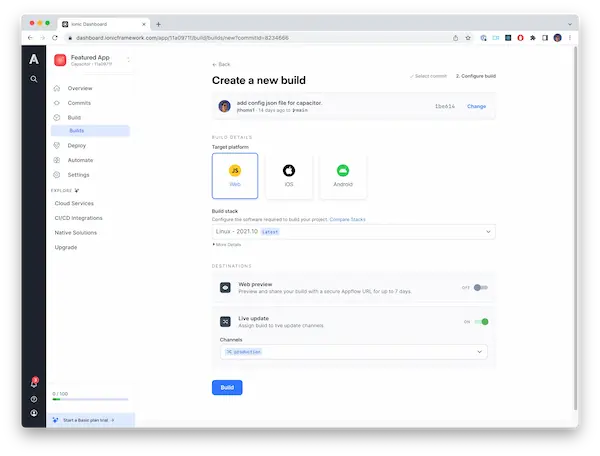
When creating a new build there are a few values that we need to change on the initial build for the app.
Target Platformshould beWebBuild Stackshould just be the default which is the latest.Live updateshould be turned on andChannelshould be set toproduction
3. Setup local dev environment
Install the Portals CLI
Now that we have the web application all setup in Appflow and built we need to get our local environment set up to be able to pull it from Appflow.
The first step in setting up our local environment is installing the Portals CLI within your local dev environment. This CLI will allow us to interact with Appflow programmatically, so that we can pull the latest Build files when building the Native App.
Create a Personal Access Token
You will need to generate a personal access token in order to pull down Build files using the Portals CLI.
This is done from Personal Settings in the Personal Access Token tab.
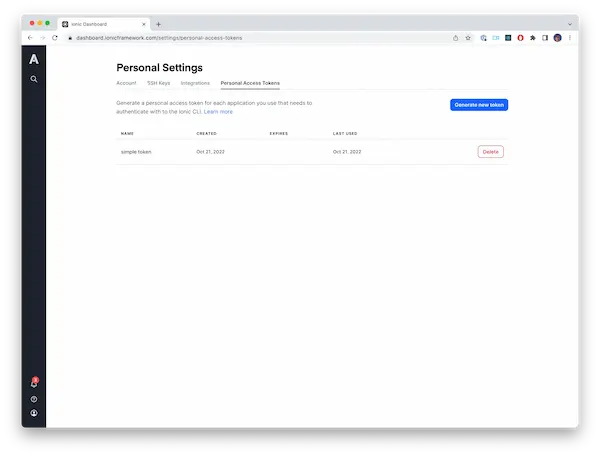
Click the Generate new token button. While creating the token it is a best practice to give it an optional expiration date but not required.
After the token is generated you will need to copy it to clipboard because it will be required for the next step. Usually the token follows the format of ion_XXXXXXXXXXXXX.
Create a sync configuration file
Now create a yaml configuration file in your native project. This file will be used to define the web application to download from Appflow, and where to place it, when running the portals sync command. Usually you will place this file in your native application's source root. It will be referenced by a build script in your native application.
sync:
  - app-id: 11a0971f
    channel: production
    directory-name: featured_products
token: ion_XXXXXXXXXXXXX
Sync Appflow at build time
The last step in setting up the local environment is adding a script to the project in Xcode so that it will run the portals sync CLI command to download the latest web application build from Appflow every time the iOS application is built.
Open Xcode and go to your Project settings. Add a new build phase of type New Run Script Phase.
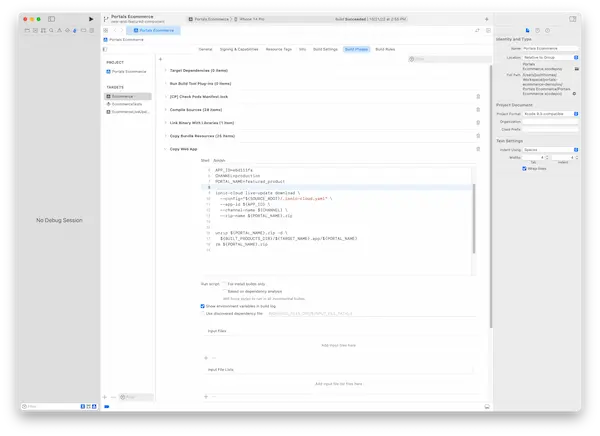
The following bash code should be added to the build process:
export PATH=$PATH:/opt/homebrew/bin
portals sync
Adjust the script as needed based on your installation method or system configuration to ensure the CLI is accessible in the iOS build process.
4. Setup Portals in your iOS App
Install the Portals iOS Library
- Swift Package Manager
- Cocoapods
To add Portals to your iOS project, add https://github.com/ionic-team/ionic-portals-ios in the Xcode "Swift Package Dependencies" tab in the project configuration.
The suggested version range is "Up to Next Minor Version" to prevent auto-updating to a breaking version before Ionic Portals iOS reaches version 1.0
IonicPortals requires using Cocoapods 1.10 or greater.
To add Portals to your iOS project, put the following line to your Podfile:
pod 'IonicPortals', '~> 0.14.0'
And then run pod install.
Create the first Portal
Now that Portals has been installed, all we need to do is define and add the Portal to a view. By default, a Portal will use the name property as the directory to load web content from (relative to the root of Bundle.main). You can also specify another directory for the content.
import IonicPortals

extension Portal {
  static let featuredProducts = Portal(
    name: "featured_products",
  )
}

class ViewController: UIViewController {
  override func loadView() {
    self.view = PortalUIView(portal: .featuredProducts)
  }
}
Finished with setup
Thats it! Portals is now setup in your application and you can add new Portals at any time. Now it is time to build the iOS app in Xcode and see it working in the emulator or on device. Now any time a new deployment is done to the production channel subsequent Xcode builds will pull in the latest version.
Next step would be to setup Live Updates within your application.