Creating Apple Wallet Passes
Creating Apple Wallet Passes must occur on a backend server as mobile apps are restricted from generating them.
This tutorial will walk you through a sample backend service that generates Apple Wallet Passes developed in NodeJS using a Cloudflare Worker. The principles applied in this tutorial apply to other server stacks and their programming languages.
A Sample Project is available if you would prefer to look at code.
There are 3 main steps in creating a pass:
- Designing - Similar to HTML, a pass needs to be designed to show the information you want on it.
- Signing - A pass file needs to signed to prove that it was issued by your app.
- Delivering - Sending the pass to your app via an API.
Designing
Apple documents the manual content and design of a pass but there are 3rd party designers like Passkit Visual Designer to help.
You can use the sample project as a design template: The model folder contains the necessary images and pass.json file that defines the structure of the pass:
_31{_31 "formatVersion": 1,_31 "passTypeIdentifier": "pass.io.ionic.example",_31 "serialNumber": "nmyuxofgna",_31 "teamIdentifier": "F53WB8AE67",_31 "webServiceURL": "https://192.168.1.254:80/",_31 "authenticationToken": "vxwxd7J8AlNNFPS8k0a0FfUFtq0ewzFdc",_31 "relevantDate": "2022-12-08T13:00-08:00",_31 "locations": [_31 {_31 "longitude": -122.3748889,_31 "latitude": 37.6189722_31 },_31 {_31 "longitude": -122.03118,_31 "latitude": 37.33182_31 }_31 ],_31 "barcodes": [_31 {_31 "message": "123456789",_31 "format": "PKBarcodeFormatQR",_31 "messageEncoding": "iso-8859-1"_31 }_31 ],_31 "organizationName": "Apple Inc.",_31 "description": "A Booking pass",_31 "foregroundColor": "rgb(255, 255, 255)",_31 "backgroundColor": "rgb(253, 123, 35)",_31 "boardingPass": {}_31}
Signing a Pass
A pass is signed digitally using a developer and WWDR certificates.
This sample code uses a node library passkit-generator which takes the following inputs:
signerCert- This is your signing certificatesignerKey- This is your signing keysignerKeyPassphrase- This is your signing key passphrasewwdr- This is the WWDR Certificate
To get these properties we need to create a Pass Type identifier, set our team identifier, create a certificate and finally use these properties and files to sign a pass. These steps are outlined below:
1. Create a Pass Type Identifier
Visit your Apple Developer Account and register a new Pass Type ID with Apple (This is found in Certificates, Identifiers & Profiles > Identifiers > + button).
Take this value and paste it in index.ts in the variable passTypeIdentifier or paste it into the passTypeIdentifier property in models/pass.json.
2. Set Team ID
In index.ts set the variable teamIdentifier to the team ID found in your Apple Developer Account.
3. Create a Certificate and Key
First, create a private key via the command line:
_10openssl genrsa -out my-key.key 2048
We then create a Certificate Signing Request (CSR) using the private key:
_10openssl req -new -key my-key.key -out request.certSigningRequest
Important: You must specify a challenge password (used for SIGNER_PASSPHRASE later).
In the Apple Developer Portal select the Pass Type Identifier you created earlier and click the Create Certificate button.
Provide a certificate name and select Choose File to upload your CSR.
Click the Download button and save the pass.cer file.
We need to convert this cer file to pem format:
_10openssl x509 -inform DER -outform PEM -in pass.cer -out pass.pem
4. Download the WWDR Certificate
You'll need the WWDR (Apple WorldWide Developer Relations) G4 Certificate which can be downloaded here.
You'll need to convert this cer to pem format as well:
_10openssl x509 -inform DER -outform PEM -in AppleWWDRCAG4.cer -out wwdr.pem
The 3 important secret files: wwdr.pem, pass.pem, my-key.key are text based and passed into our node application in index.ts. From here the implementation is specific to CloudFlare Workers.
CloudFlare Worker Setup
CloudFlare Workers are node apps that run on CloudFlare. A CLI tool called Wrangler should be installed to deploy your worker.
In wrangler.toml set the name to a unique name for your worker.
Run npx wrangler deploy which will login to CloudFlare and deploy the CloudFlare worker. After deploying you can login to CloudFlare, click Workers & Pages and see your worker under Overview.
You should go the CloudFlare workers Settings > Variables and create the variables for SIGNER_CERT, SIGNER_KEY, SIGNER_PASSPHRASE and WWDR with the values from the text files and password you created in previous steps.
Test the Pass
When you visit the url for your Cloudflare Worker (eg in a web browser) it should attempt to download a pkpass file. If it does not, look in Logs > Real-time Logs and see what error has been reported. The usual problems will be:
SIGNER_CERTvariable was not set to the text content of thepass.pemfile you createdSIGNER_KEYvariable was not set to the text content of themy-key.keyfile you createdSIGNER_PASSPHRASEvariable does not match the challenge password you entered when creating the certificate signing requestWWDRvariable was not set to the text content of thewwdr.pemfile or the certificate was generated from something other than the G4 certificate- A certificate has expired
You can now test your cloudflare worker url for a pass in the front end application. Common failures found in the front end include:
- Your
teamIdentifiernot matching your Team Identifier in your Apple Developer Account - Your application needing CORs access to download the
pkpass
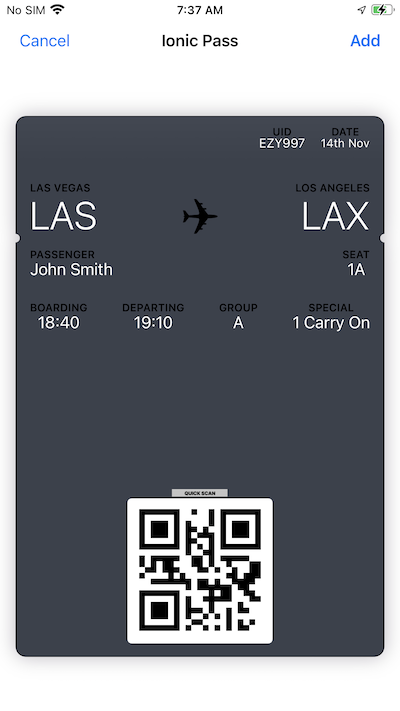
If the pass correctly generates and downloads you should see a screen like below after a second or two:
Other Documentation
See the passkit generator repo for similar examples and additional information.
Apple Documentation
Apple provides a good introduction to creating your first pass, designing passes and distributing passes.
While you can manually create passes it is best to have a backend server create the pass and provide it to the app. This is because passes are digitally signed using a Pass Type ID and Production Certificate created in your Apple Developer Account.
Changing Passes
A pass can change over time. For example: an airline pass can be changed if a plane is delayed, a ID Card can change after it has expired or a ticket can change when it has been transferred to another person.
Apple provides a way to change a pass through push notifications. See Working with Passes.