Installation - Android
Android Installation#
Configuring Gradle Plugin#
On Android, the Intune App SDK functions by wrapping key Android API classes with Intune-managed ones, using a Gradle plugin to replace Android API class references at build time. This Gradle plugin must be manually configured in your app to enable Intune MAM features in your app.
To start, open your app in Android Studio.
If using Capacitor, run one of the following commands. If using Cordova, manually open your platforms/android folder in Android Studio.
npx cap open android# orionic capacitor open androidInstall Gradle Plugin#
Next, open the build.gradle file for your main application (this is typically listed first and named build.gradle (Project: android) in the Gradle Scripts dropdown in Android Studio when opening your project).
At the top, there should be a buildscript definition, and two new dependencies below need to be added to the dependencies definition:
buildscript {
    repositories {        google()        jcenter()    }    dependencies {        classpath 'com.android.tools.build:gradle:8.13.0'        classpath 'com.google.gms:google-services:4.4.4'
// ADD THIS: classpath "org.javassist:javassist:3.29.2-GA" // Capacitor users: add reference to the gradle plugin classpath files("../node_modules/@ionic-enterprise/intune/android/ms-intune-app-sdk-android/GradlePlugin/com.microsoft.intune.mam.build.jar") // Cordova users: add this line instead // classpath files("./app/src/main/libs/com.microsoft.intune.mam.build.jar") }}Capacitor only:
Next, there's an issue with the current version of the Intune App SDK for Android that requires the following maven repo for the Duo-SDK-Feed to be added to the allprojects repositories definition below the above buildscript definition:
allprojects { repositories { google() jcenter() maven { // ADD THESE TWO LINES: url 'https://pkgs.dev.azure.com/MicrosoftDeviceSDK/DuoSDK-Public/_packaging/Duo-SDK-Feed/maven/v1' name 'Duo-SDK-Feed' } }}Capacitor only:
Open the build.gradle file for the Module: android.app and add the following lines to make sure the Intune App SDK Gradle plugin properly transforms these external libraries. Add any extra libraries your app uses that also need to be transformed:
apply plugin: 'com.microsoft.intune.mam'dependencies { ... implementation files("../../node_modules/@ionic-enterprise/intune/android/ms-intune-app-sdk-android/Microsoft.Intune.MAM.SDK.aar")}Open the gradle.properties file and adding the following line:
android.enableResourceOptimizations=falseSetting Android Manifest Configuration#
Add to your <application declaration this attribute at the end:
android:name="com.ionicframework.intune.IntuneApplication"For Android 16+ compatibility: Also add the following attribute to opt out of predictive back animations (required because the MS Intune SDK has not yet implemented the new back navigation APIs):
android:enableOnBackInvokedCallback="false"So your <application> declaration will look similar to:
<application android:allowBackup="true" android:icon="@mipmap/ic_launcher" android:label="@string/app_name" android:roundIcon="@mipmap/ic_launcher_round" android:supportsRtl="true" android:theme="@style/AppTheme" android:name="com.ionicframework.intune.IntuneApplication" android:enableOnBackInvokedCallback="false">To use brokered auth with Microsoft Authenticator or the Intune Company Portal app, add these <queries> to the top level of your AndroidManifest.xml file (directly inside the top-level <manifest> declaration). Note: this is required as of Android 12 API Level 30, apps targeting older versions may function fine without it.
<queries> <package android:name="com.azure.authenticator" /> <package android:name="YOUR_PACKAGE" /> <package android:name="com.microsoft.windowsintune.companyportal" /> <!-- Required for API Level 30 to make sure the app detect browsers (that don't support custom tabs) --> <intent> <action android:name="android.intent.action.VIEW" /> <category android:name="android.intent.category.BROWSABLE" /> <data android:scheme="https" /> </intent> <!-- Required for API Level 30 to make sure the app can detect browsers that support custom tabs --> <!-- https://developers.google.com/web/updates/2020/07/custom-tabs-android-11#detecting_browsers_that_support_custom_tabs --> <intent> <action android:name="android.support.customtabs.action.CustomTabsService" /> </intent></queries>Finally, a new intent filter needs to be added inside your root <application>. Replace the YOUR_PACKAGE and YOUR_HASH with the relevant values:
<!-- Must be specified to allow users to login via MSAL --><activity android:name="com.microsoft.identity.client.BrowserTabActivity">    <intent-filter>        <action android:name="android.intent.action.VIEW" />
        <category android:name="android.intent.category.DEFAULT" />        <category android:name="android.intent.category.BROWSABLE" />
<!-- Add in your scheme/host from registered redirect URI note that the leading "/" is required for android:path --> <data android:host="YOUR_PACKAGE" android:path="/YOUR_HASH" android:scheme="msauth" /> </intent-filter></activity>Setting Auth Configuration#
Configuring Auth involves two steps: finding your app's signing signature hash, and copying the MSAL config for your app's Redirect URIs from Azure AD
Finding the Signature Hash#
MSAL requires your app's signature hash in order to correctly use your app's Redirect URIs. To find this hash, read the MSAL FAQ for Redirect URI Issues.
If you are still struggling to find the correct hash for your app, this code may be dropped into the MainActivity onCreate method to log the package hash key for development, but keep in mind this should only be used for development mode. For production, follow the above FAQ:
try { PackageInfo info = getPackageManager().getPackageInfo("your.package.name", PackageManager.GET_SIGNATURES); for (Signature signature : info.signatures) { MessageDigest md; md = MessageDigest.getInstance("SHA"); md.update(signature.toByteArray()); String something = new String(Base64.encode(md.digest(), 0)); Log.e("hash key", something); }} catch (Exception e) { Log.e("exception", e.toString());}Once you have the correct hash, register your Redirect URI in the Azure AD dashboard:
Creating Configuration JSON File#
The Intune App SDK for Android reads the JSON portion of your Azure AD auth configuration to configure the underlying Microsoft Authentication Library (MSAL).
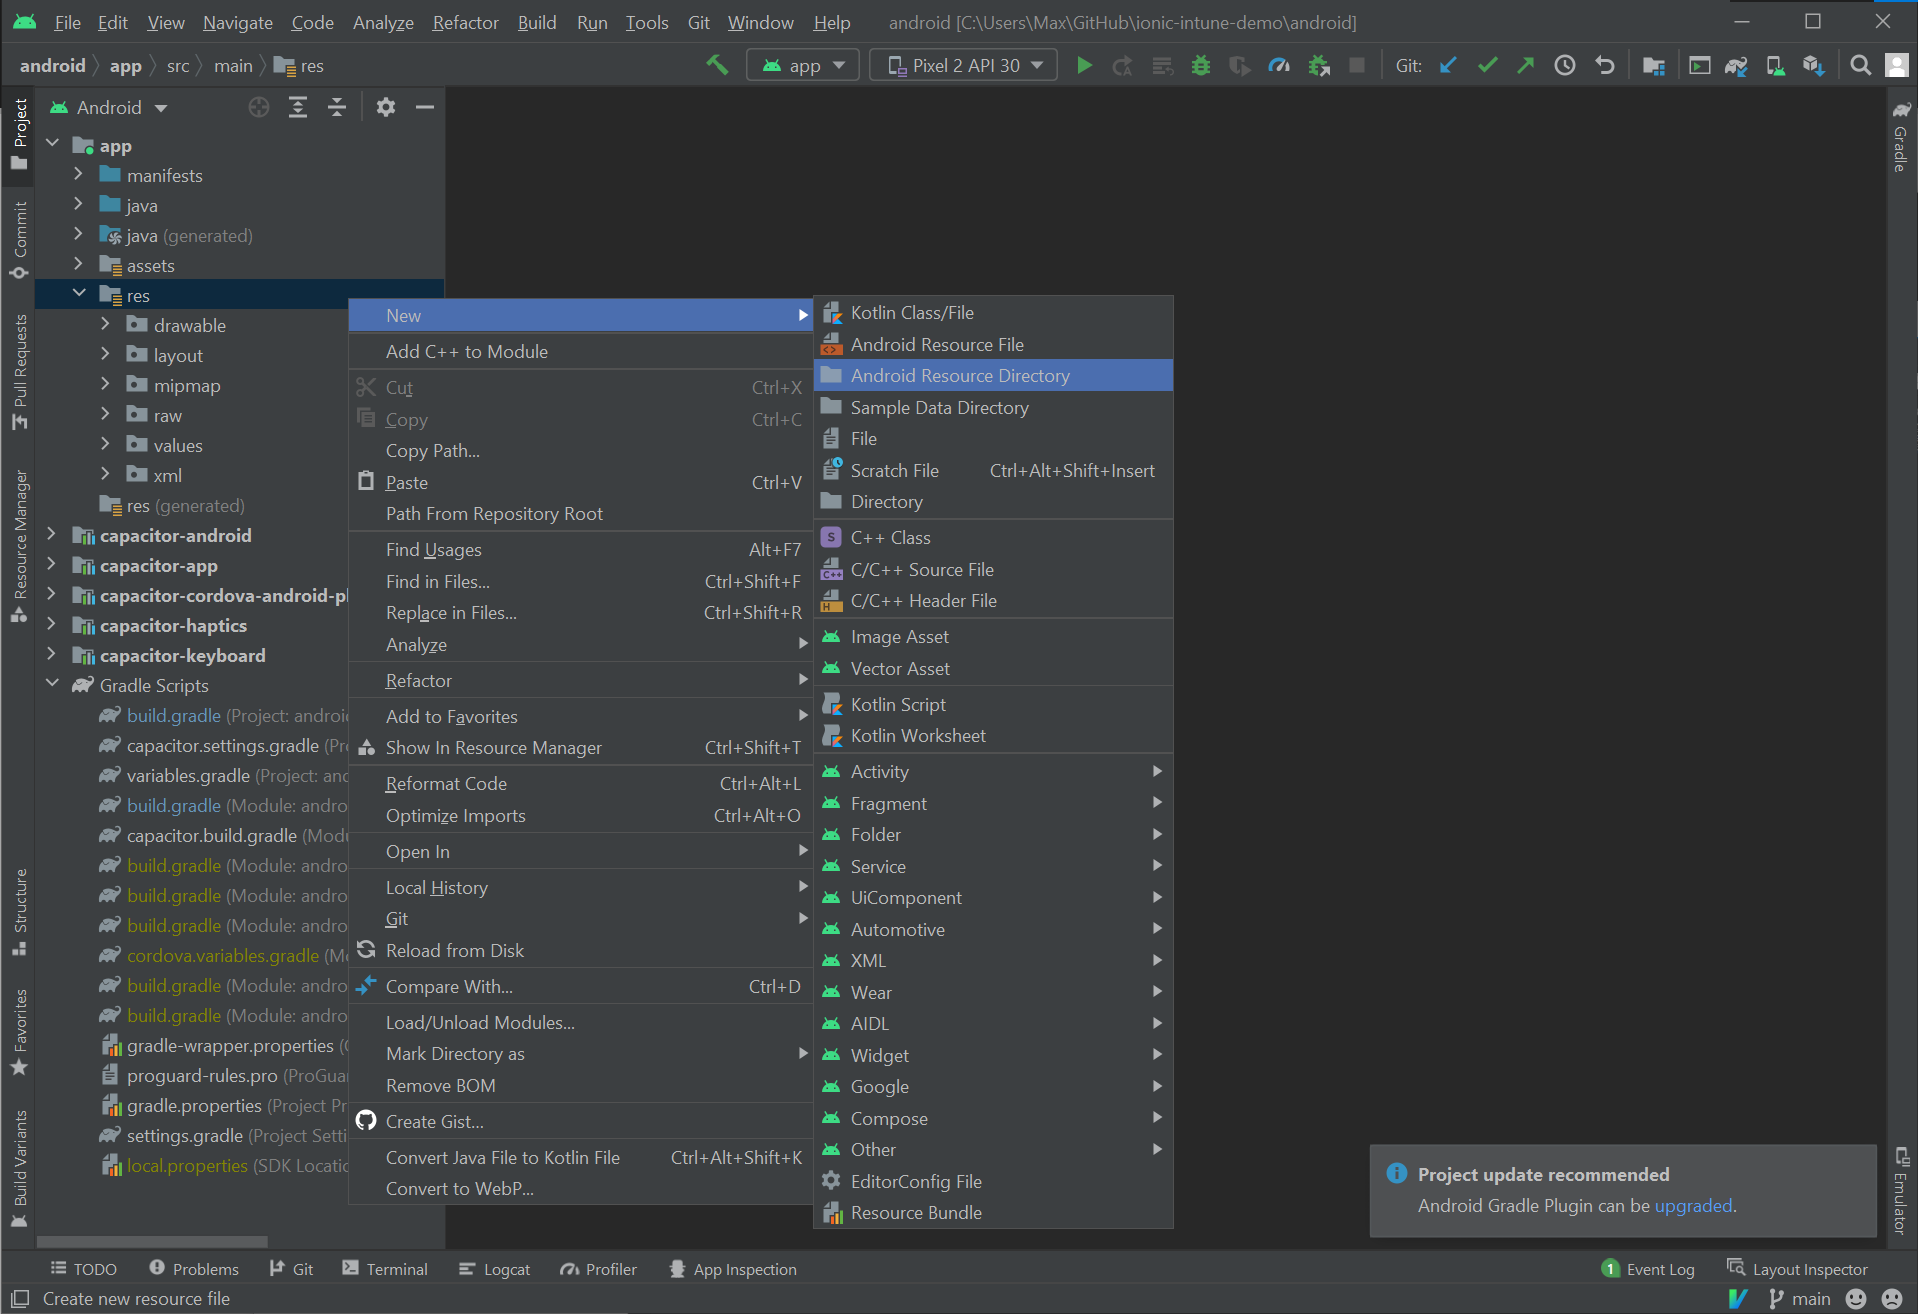
This file must be named auth_config.json and placed in a new raw resource directory in your app. First, create the new resource directory by right-clicking on the res folder and choosing New -> Android Resource Directory:
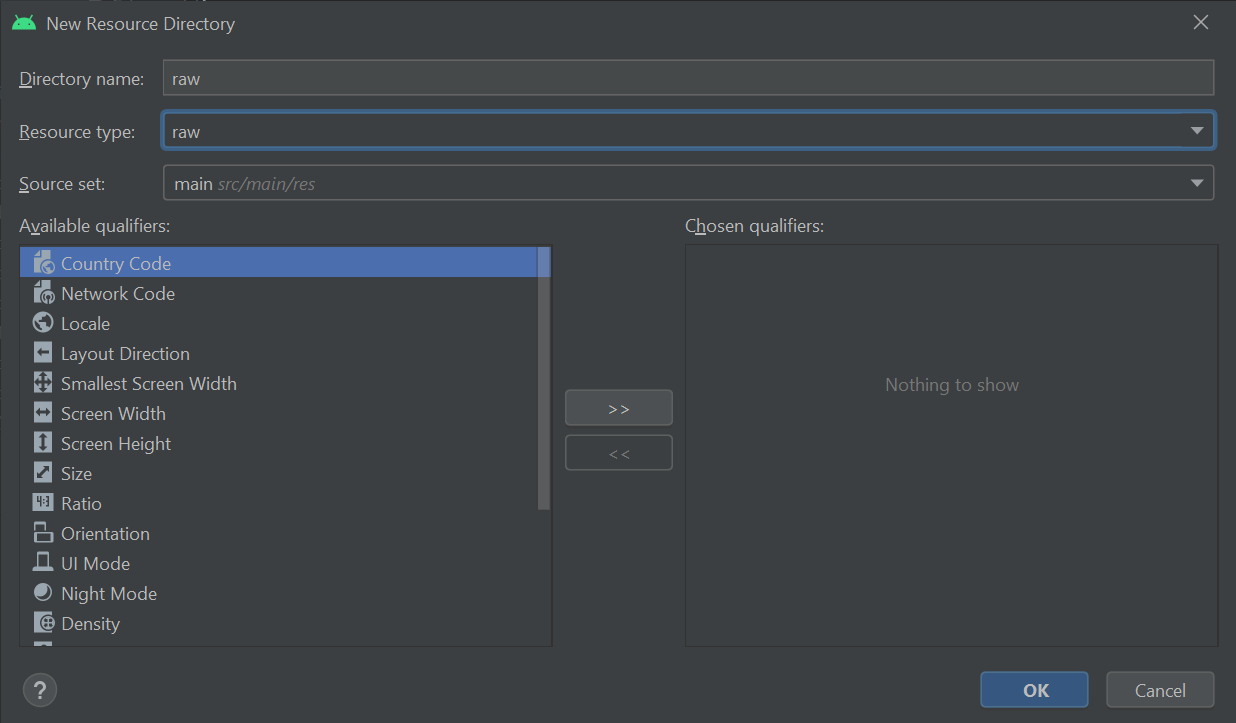
Then, in the wizard that pops up, choose raw from the Resource type: dropdown and click OK:
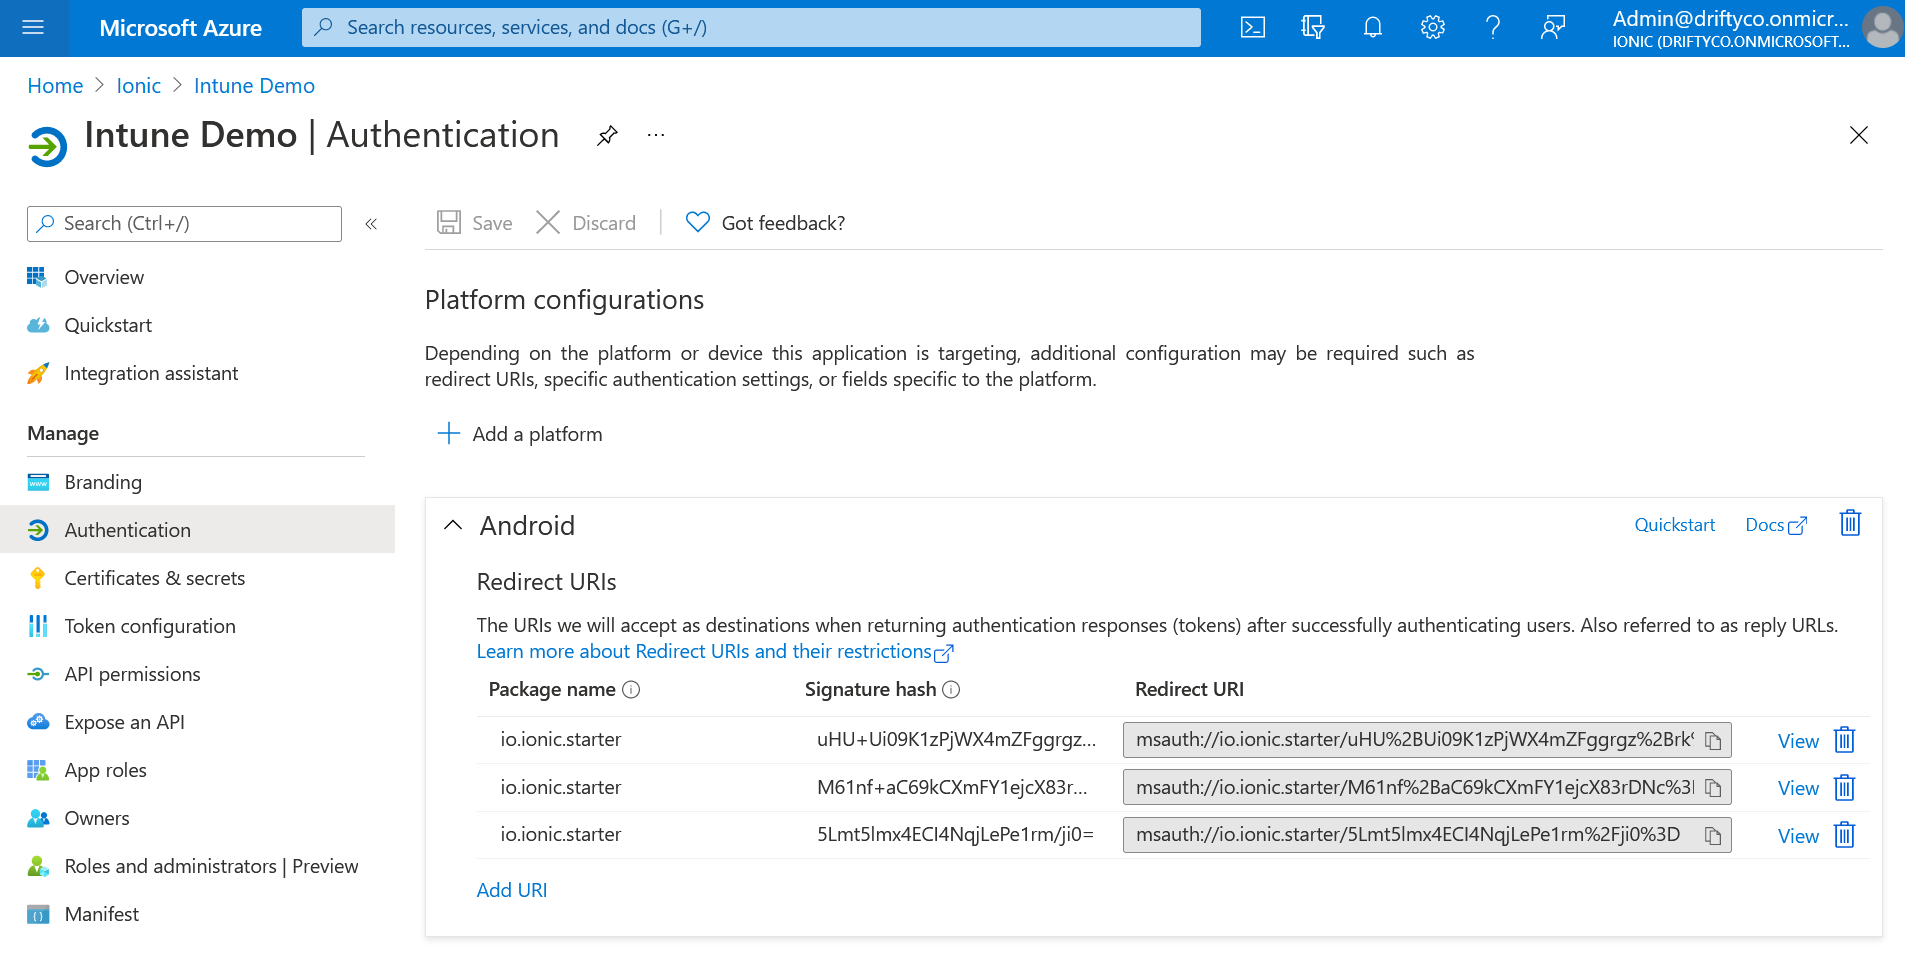
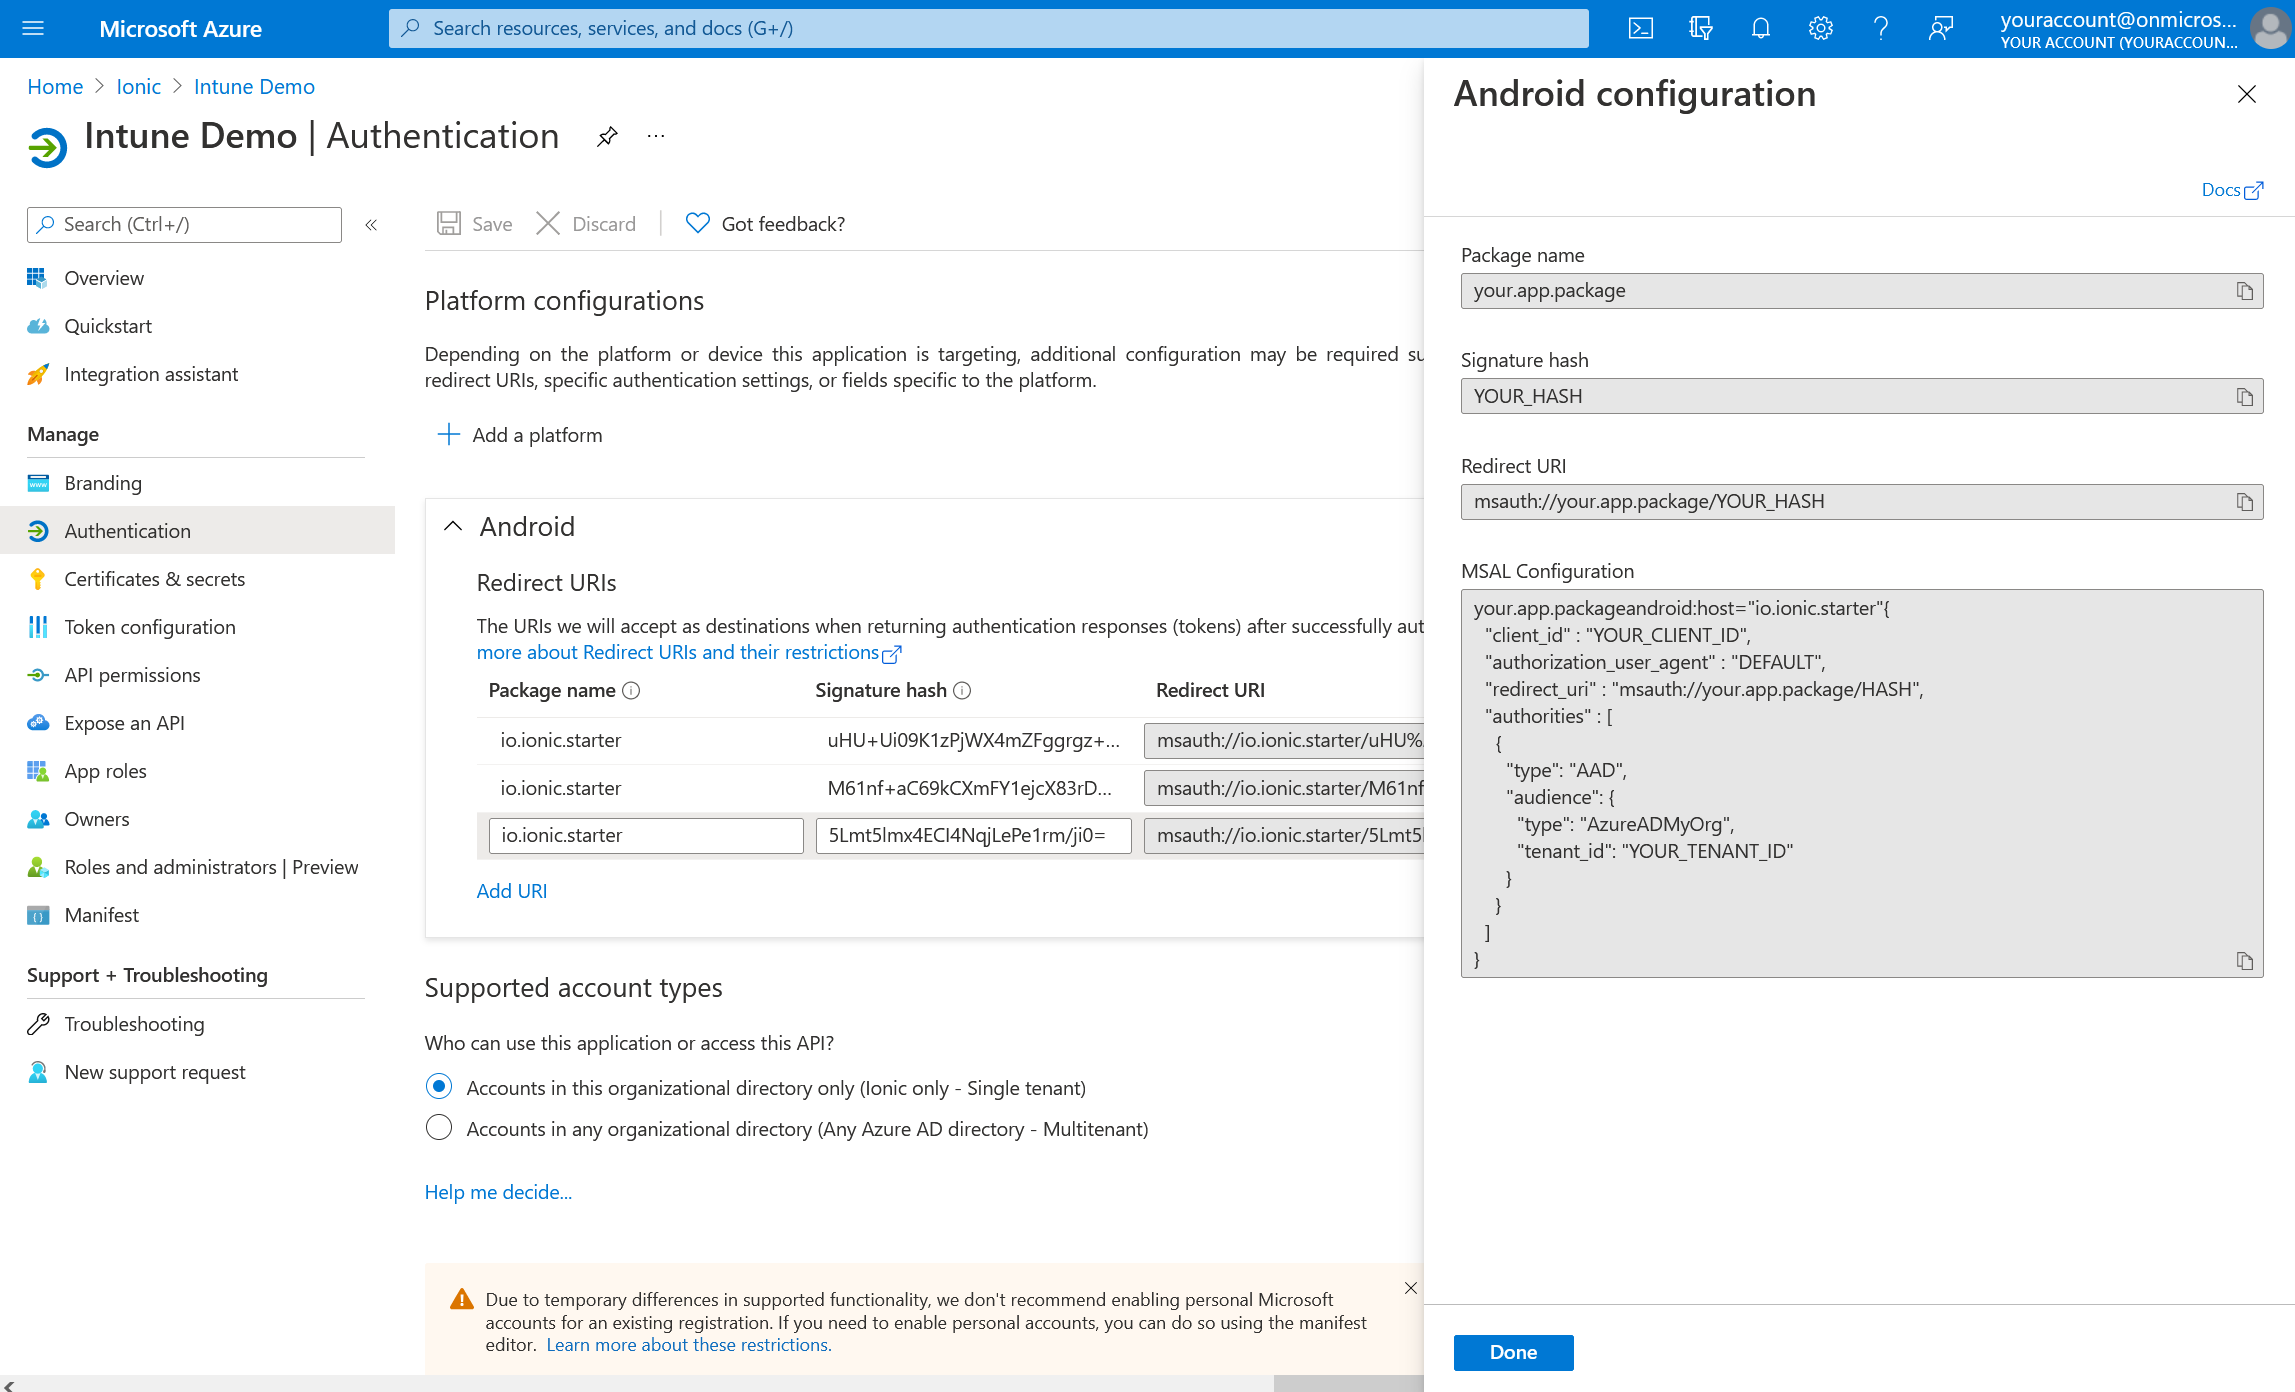
Finally, right click on the new raw directory and click New -> File. Name the file auth_config.json and paste in the JSON portion of the auth config found in the Azure portal. This configuration can be found in
Azure Active Directory -> App registrations -> Your App -> Authentication -> Platform configurations -> Android
When selecting View on a Redirect URI entry: