Installation - iOS
The following steps attempt to distill the official Intune App SDK iOS integration documentation to the basics needed to integrate into your Ionic/Capacitor app. Please refer to that documentation for the most up-to-date authoritative installation instructions.
0. Before starting#
Note that version 7.x of @ionic-enterprise/intune requires a deployment target of iOS 14 or higher and requires Xcode 15+.
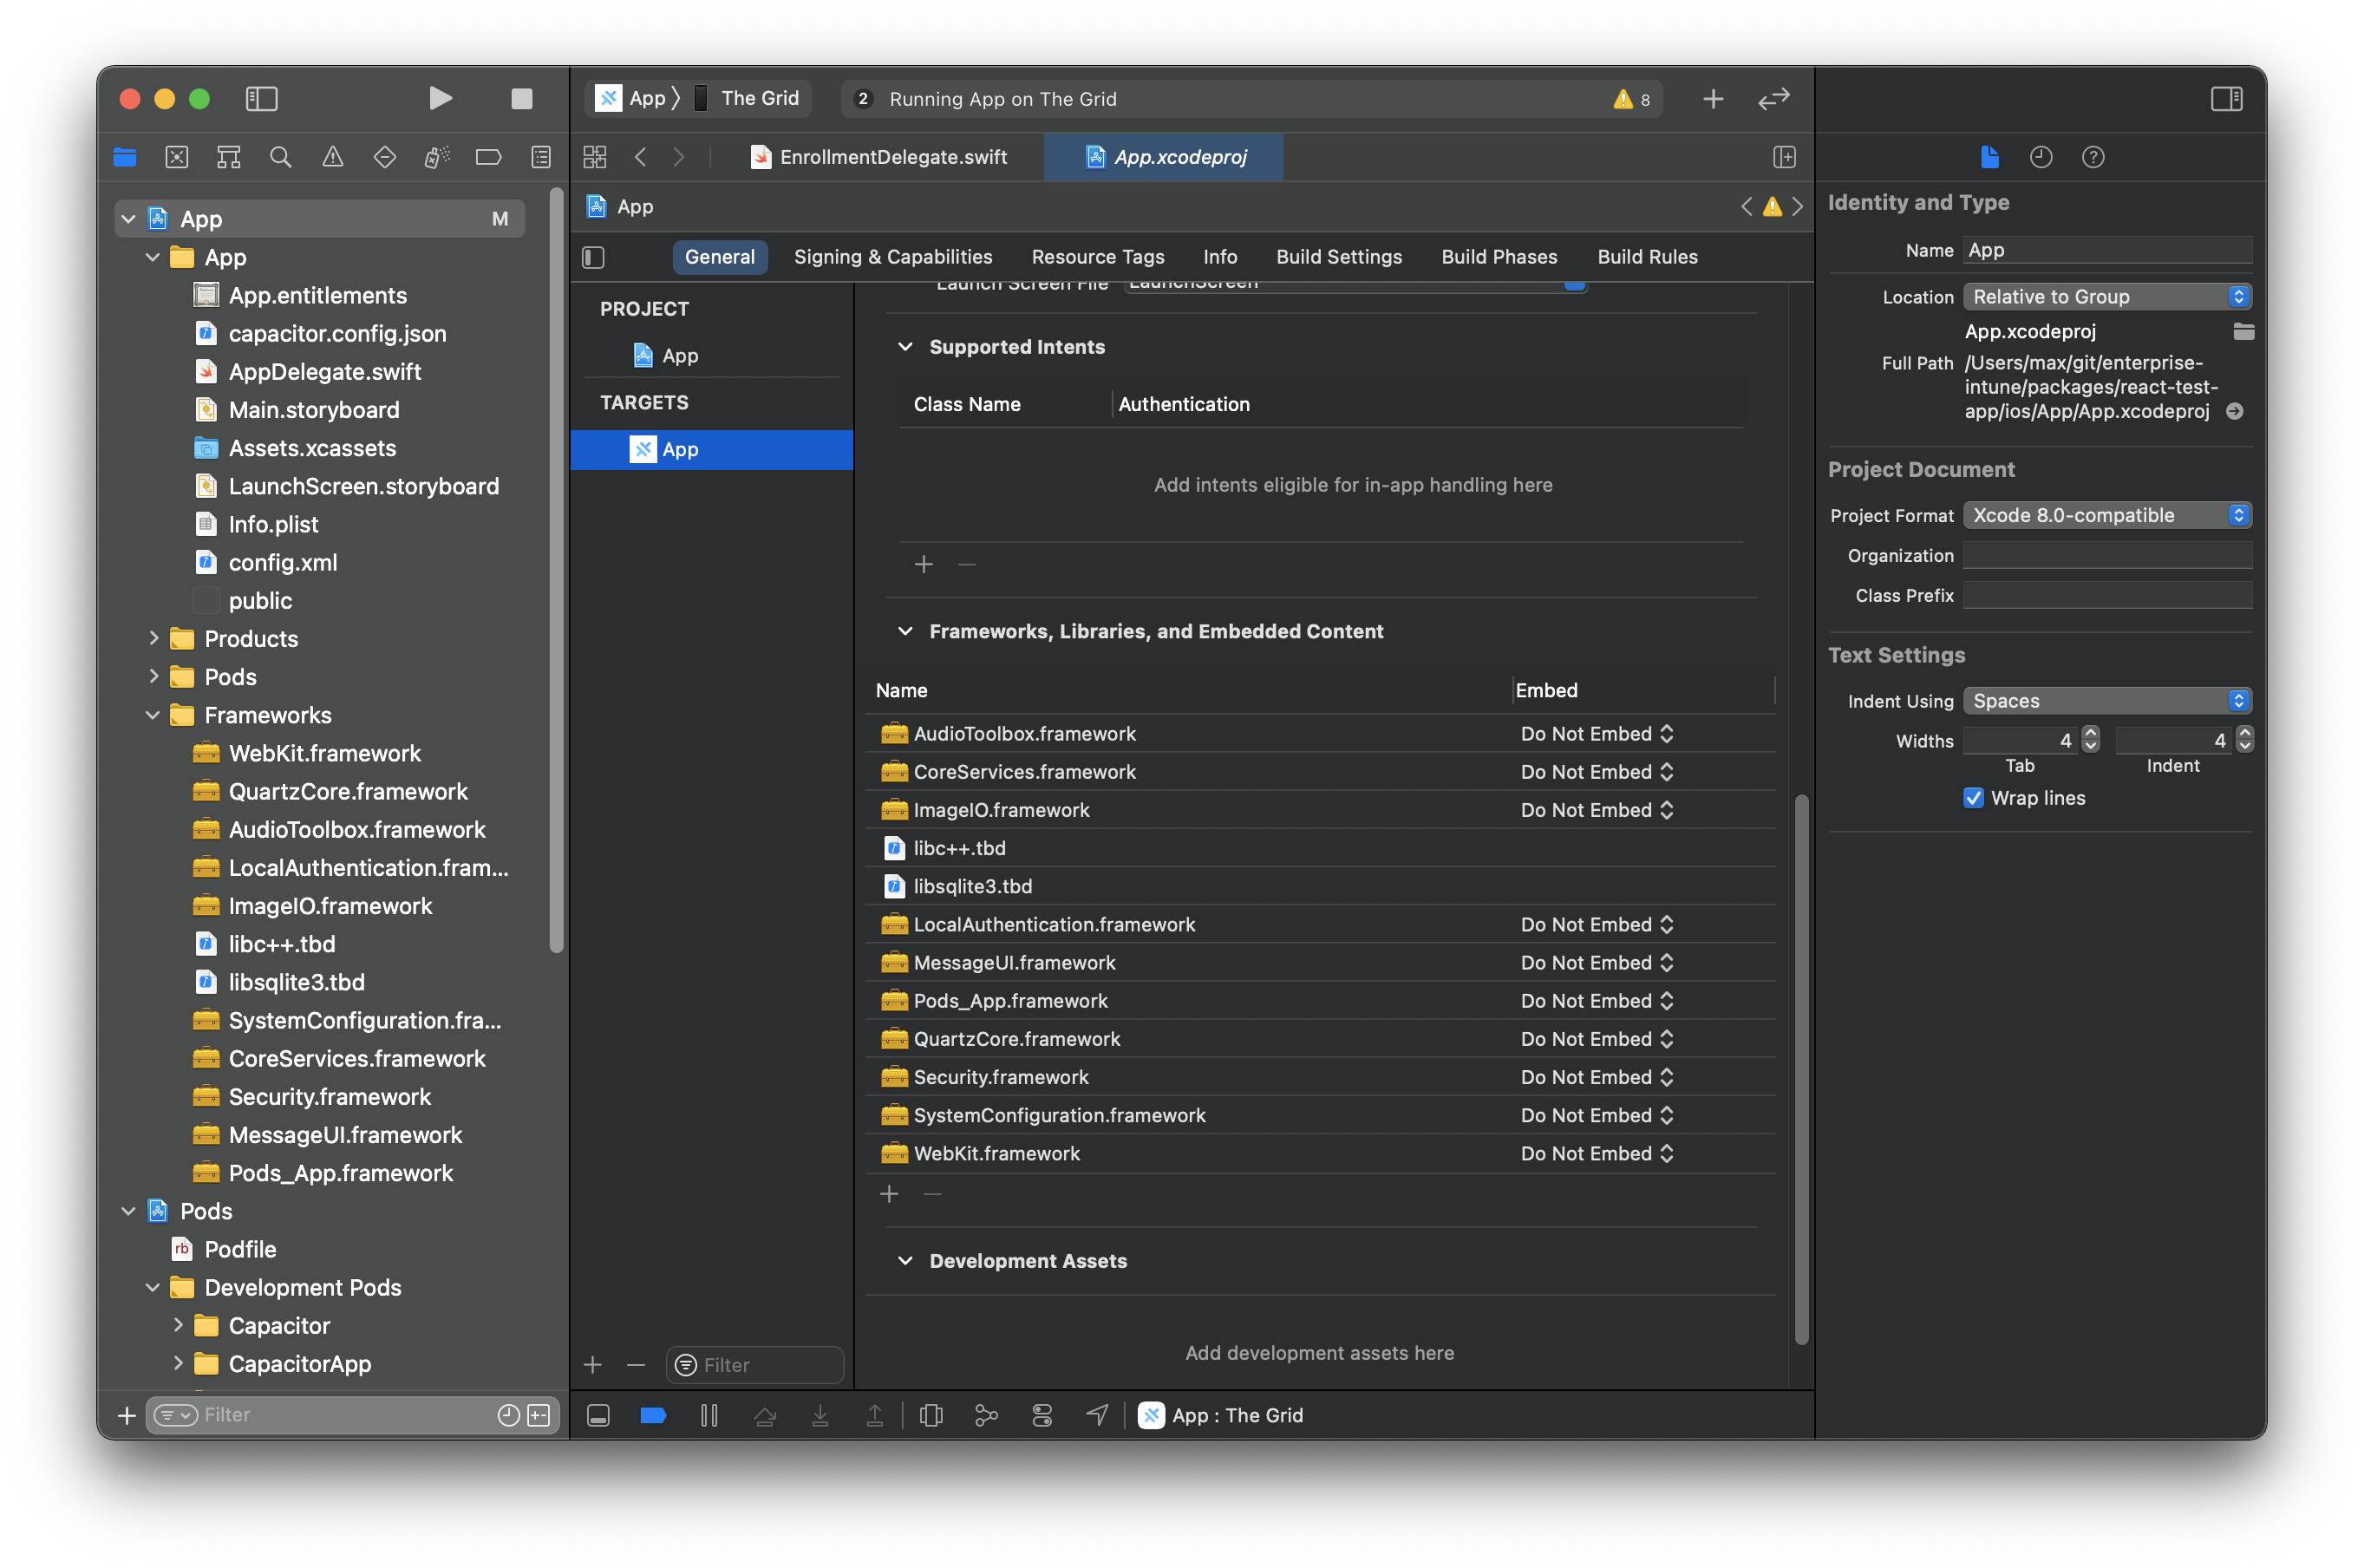
1. Add Frameworks#
The Intune App SDK requires the following Core iOS frameworks be added to your app project:
- AudioToolbox.framework
- CoreServices.framework
- ImageIO.framework
- libc++.tbd
- libsqlite3.tbd
- LocalAuthentication.framework
- MessageUI.framework
- QuartzCore.framework
- Security.framework
- SystemConfiguration.framework
- WebKit.framework
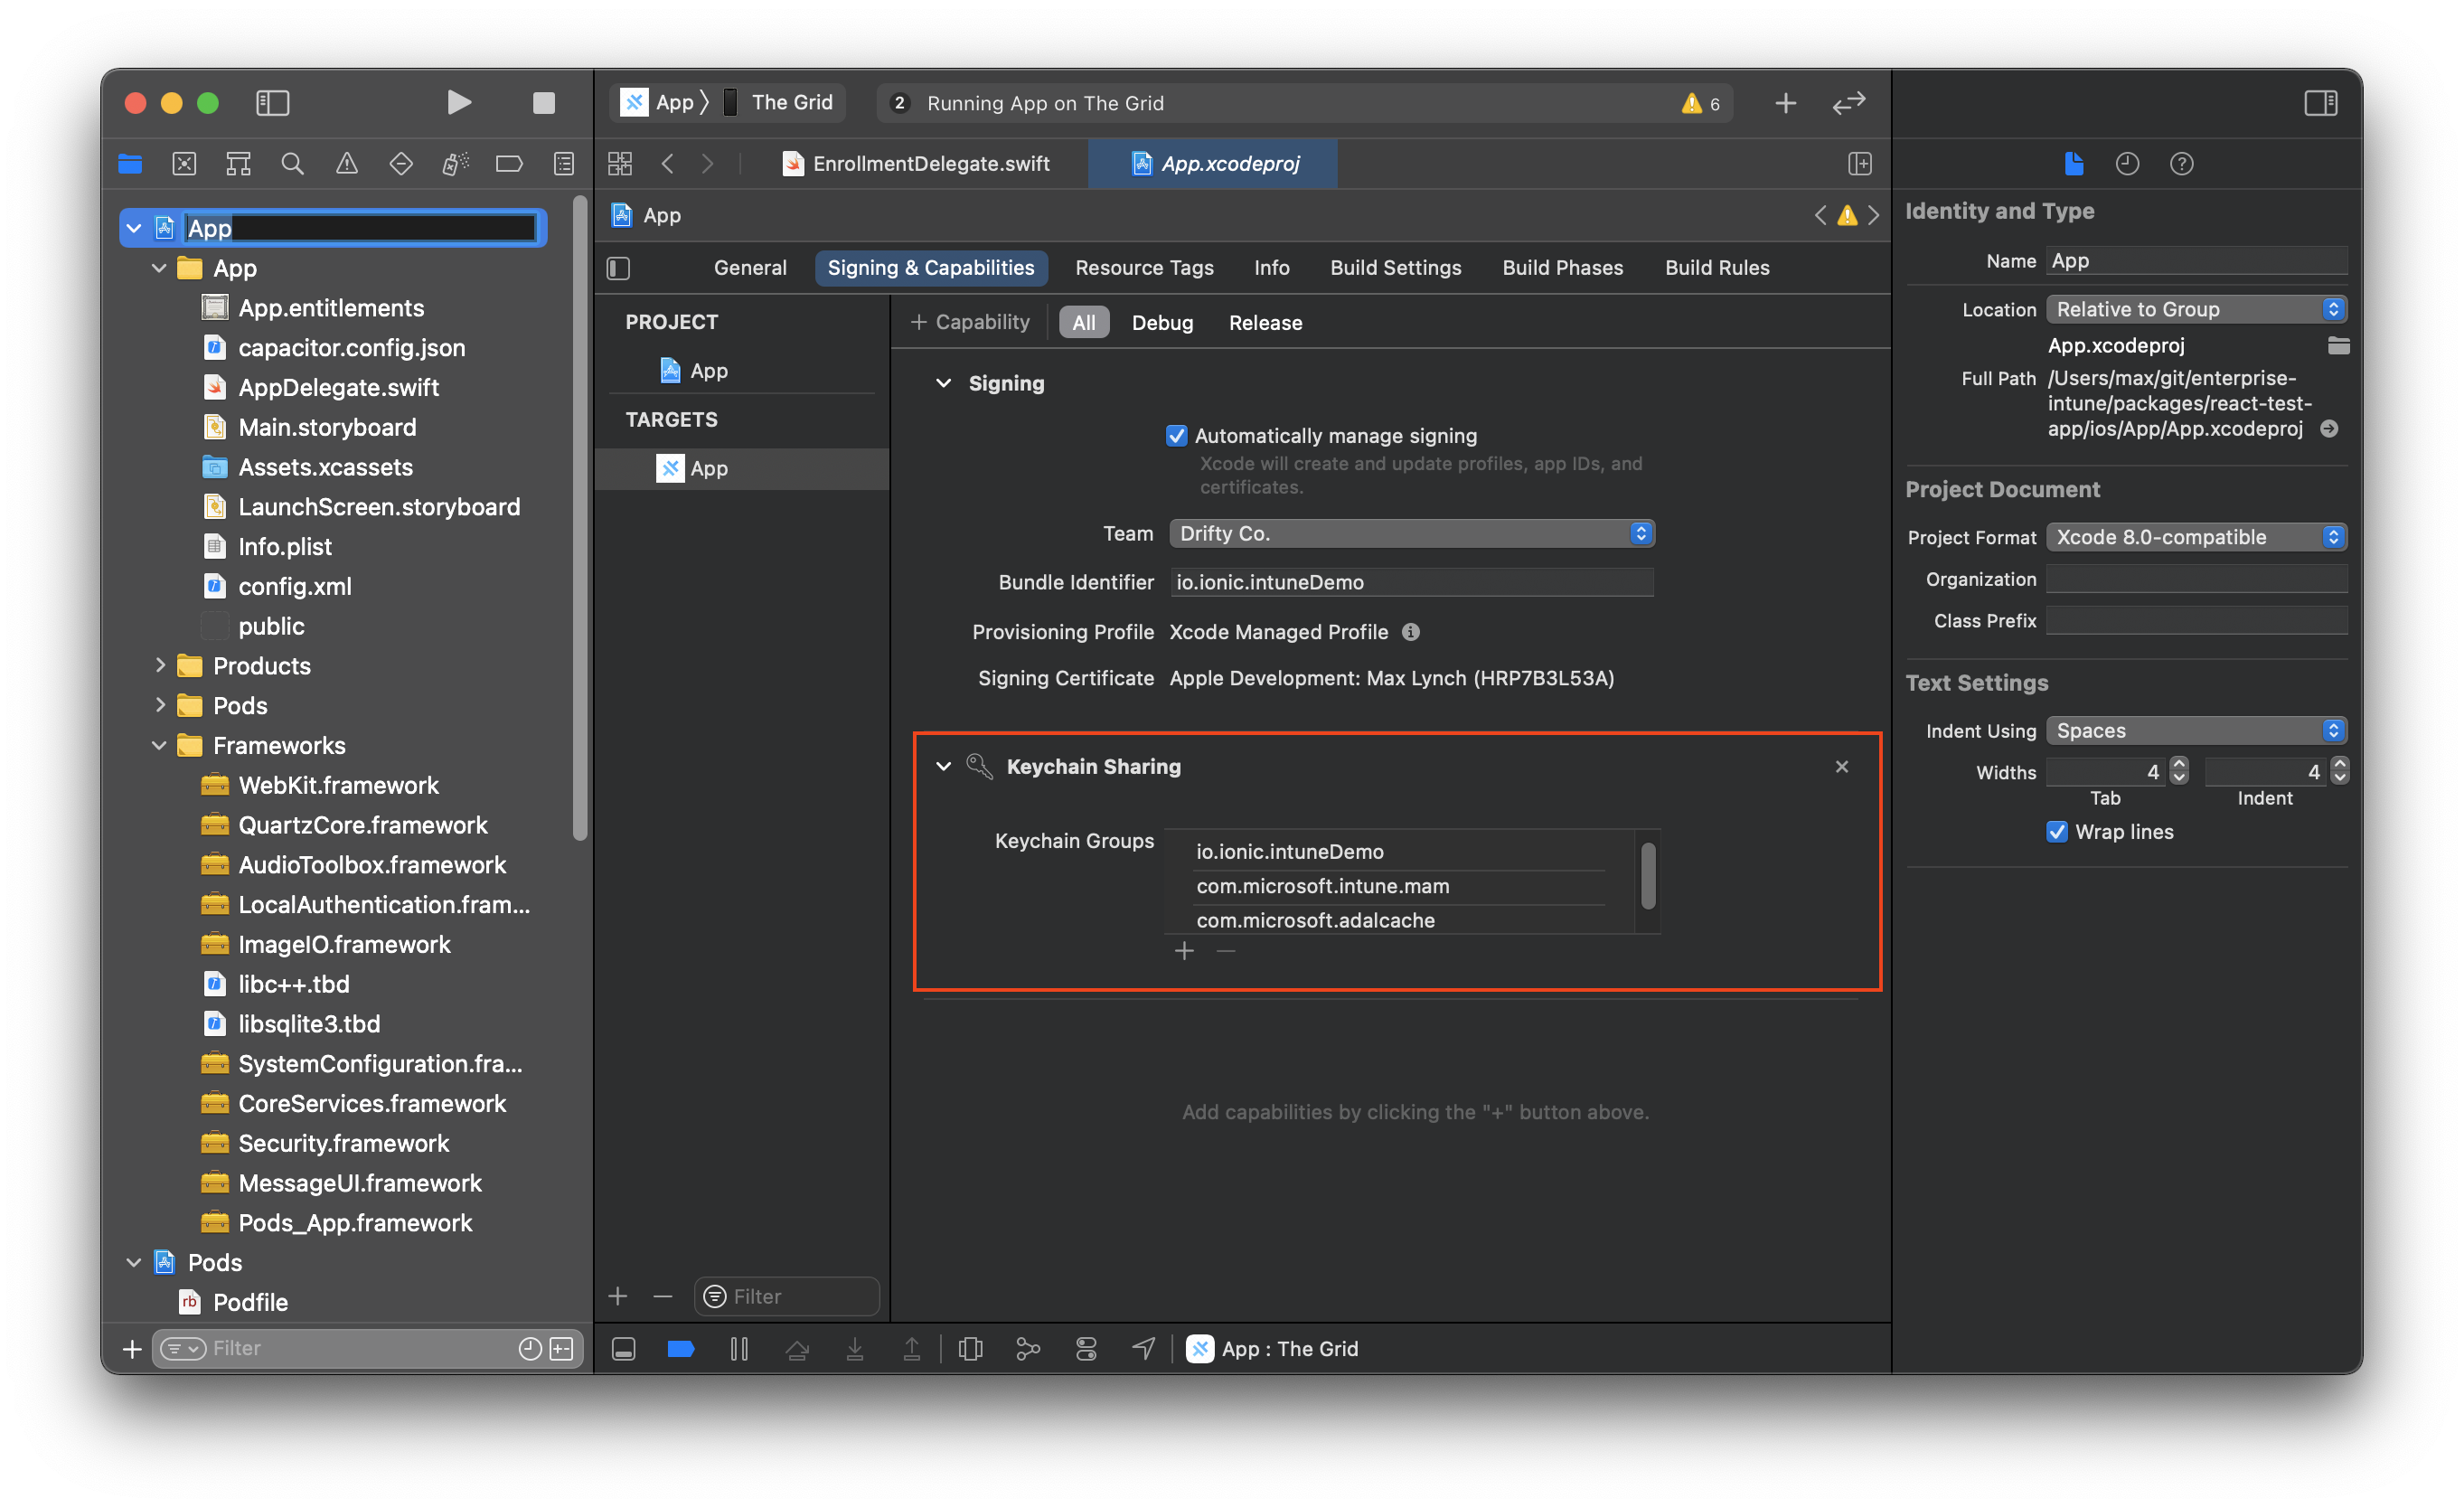
2. Configure Keychain#
Add the following keychain groups under Signing & Capabilities, making sure to substitute your app's Bundle ID for the first group:
com.microsoft.intune.mamcom.microsoft.adalcache
3. Enable Application Queries Schemes#
Open Info.plist and add a new Row with the name LSApplicationQueriesSchemes of type Array containing all of the protocols your app will attempt to open, for example by using the App Launcher API in Capacitor.
Any custom protocols your app launches must have two entries: the original protocol and a new one with -intunemam appended.
Additionally, the following intune-specific protocols must be added :
<key>LSApplicationQueriesSchemes</key><array> <string>msauthv2</string> <string>msauthv3</string> <string>mvisionmobile</string> <string>scmx</string> <string>lookoutwork-ase</string> <string>lacoonsecurity</string> <string>zips</string> <string>skycure</string> <string>smart-ns</string> <string>smsec</string> <string>betteractiveshield</string> <string>wandera</string> <string>https-intunemam</string> <string>http-intunemam</string> <string>intunemam-mtd</string> <string>microsoft-edge-https-intunemam</string> <string>microsoft-edge-http-intunemam</string> <string>ms-outlook-intunemam</string> <string>companyportal</string></array>4. Set a NSFaceIDUsageDescription#
To enable Face ID support, add a description for NSFaceIDUsageScription also known as Privacy - Face ID Usage Description in Info.plist
5. Update Target iOS Version#
The Intune App SDK supports iOS 13 and above, make sure to set the Deployment target for your app to 13 or higher (or 12.2 if you are using version 2.x of the plugin):

6. Disable Bitcode#
The Intune App SDK does not support Bitcode. In the Build Settings for your app in Xcode, set Strip Swift Symbols and Enable Bitcode to NO:


Also add these lines to the Podfile in your app's ios/App directory. This will make sure bitcode is not enabled on any Pod targets:
post_install do |installer| installer.pods_project.targets.each do |target| target.build_configurations.each do |config| config.build_settings['ENABLE_BITCODE'] = 'NO' end endend7. Run IntuneMAMConfigurator#
As a final step, Microsoft has provided a command line utility to finish configuring your app. To use it, follow step #7 on the official SDK integration docs from Microsoft.
For example, these commands will clone, copy and run intuneMAMConfigurator:
git clone https://github.com/msintuneappsdk/ms-intune-app-sdk-ios tmp --depth 1cp tmp/IntuneMAMConfigurator .rm -rf tmpchmod +x IntuneMAMConfigurator./IntuneMAMConfigurator -i ios/App/App/Info.plist -e ios/App/App/App.entitlementsWhen the command is successful it will report IntuneMAMConfigurator[99999:999999] Success!!!. If IntuneMAMConfigurator is not executable then you will get an error permission denied.
8. Configure MSAL#
MSAL configuration is required to enable brokered auth and other common Azure Active Directory authentication integrations.
Follow the MSAL Configuration docs to finish setting up MSAL in your app.
Additionally, in AppDelegate.swift, import MSAL and override the application(_:open:options:) method:
import MSAL
@UIApplicationMainclass AppDelegate: UIResponder, UIApplicationDelegate {    func application(_ app: UIApplication, open url: URL, options: [UIApplication.OpenURLOptionsKey: Any] = [:]) -> Bool {        // Called when the app was launched with a url. Feel free to add additional processing here,        // but if you want the App API to support tracking app url opens, make sure to keep this call        // return ApplicationDelegateProxy.shared.application(app, open: url, options: options)        return MSALPublicClientApplication.handleMSALResponse(url, sourceApplication: options[UIApplication.OpenURLOptionsKey.sourceApplication] as? String)    }