Packaging and Publishing your App
Once your app is developed and you're ready to release it to users, the next step is to package and publish your app.
Note: the official Packaging UWP Apps guide from Microsoft can be consulted for additional detail on the following steps, though some of the information may not apply.
App Information (name, icons, etc)#
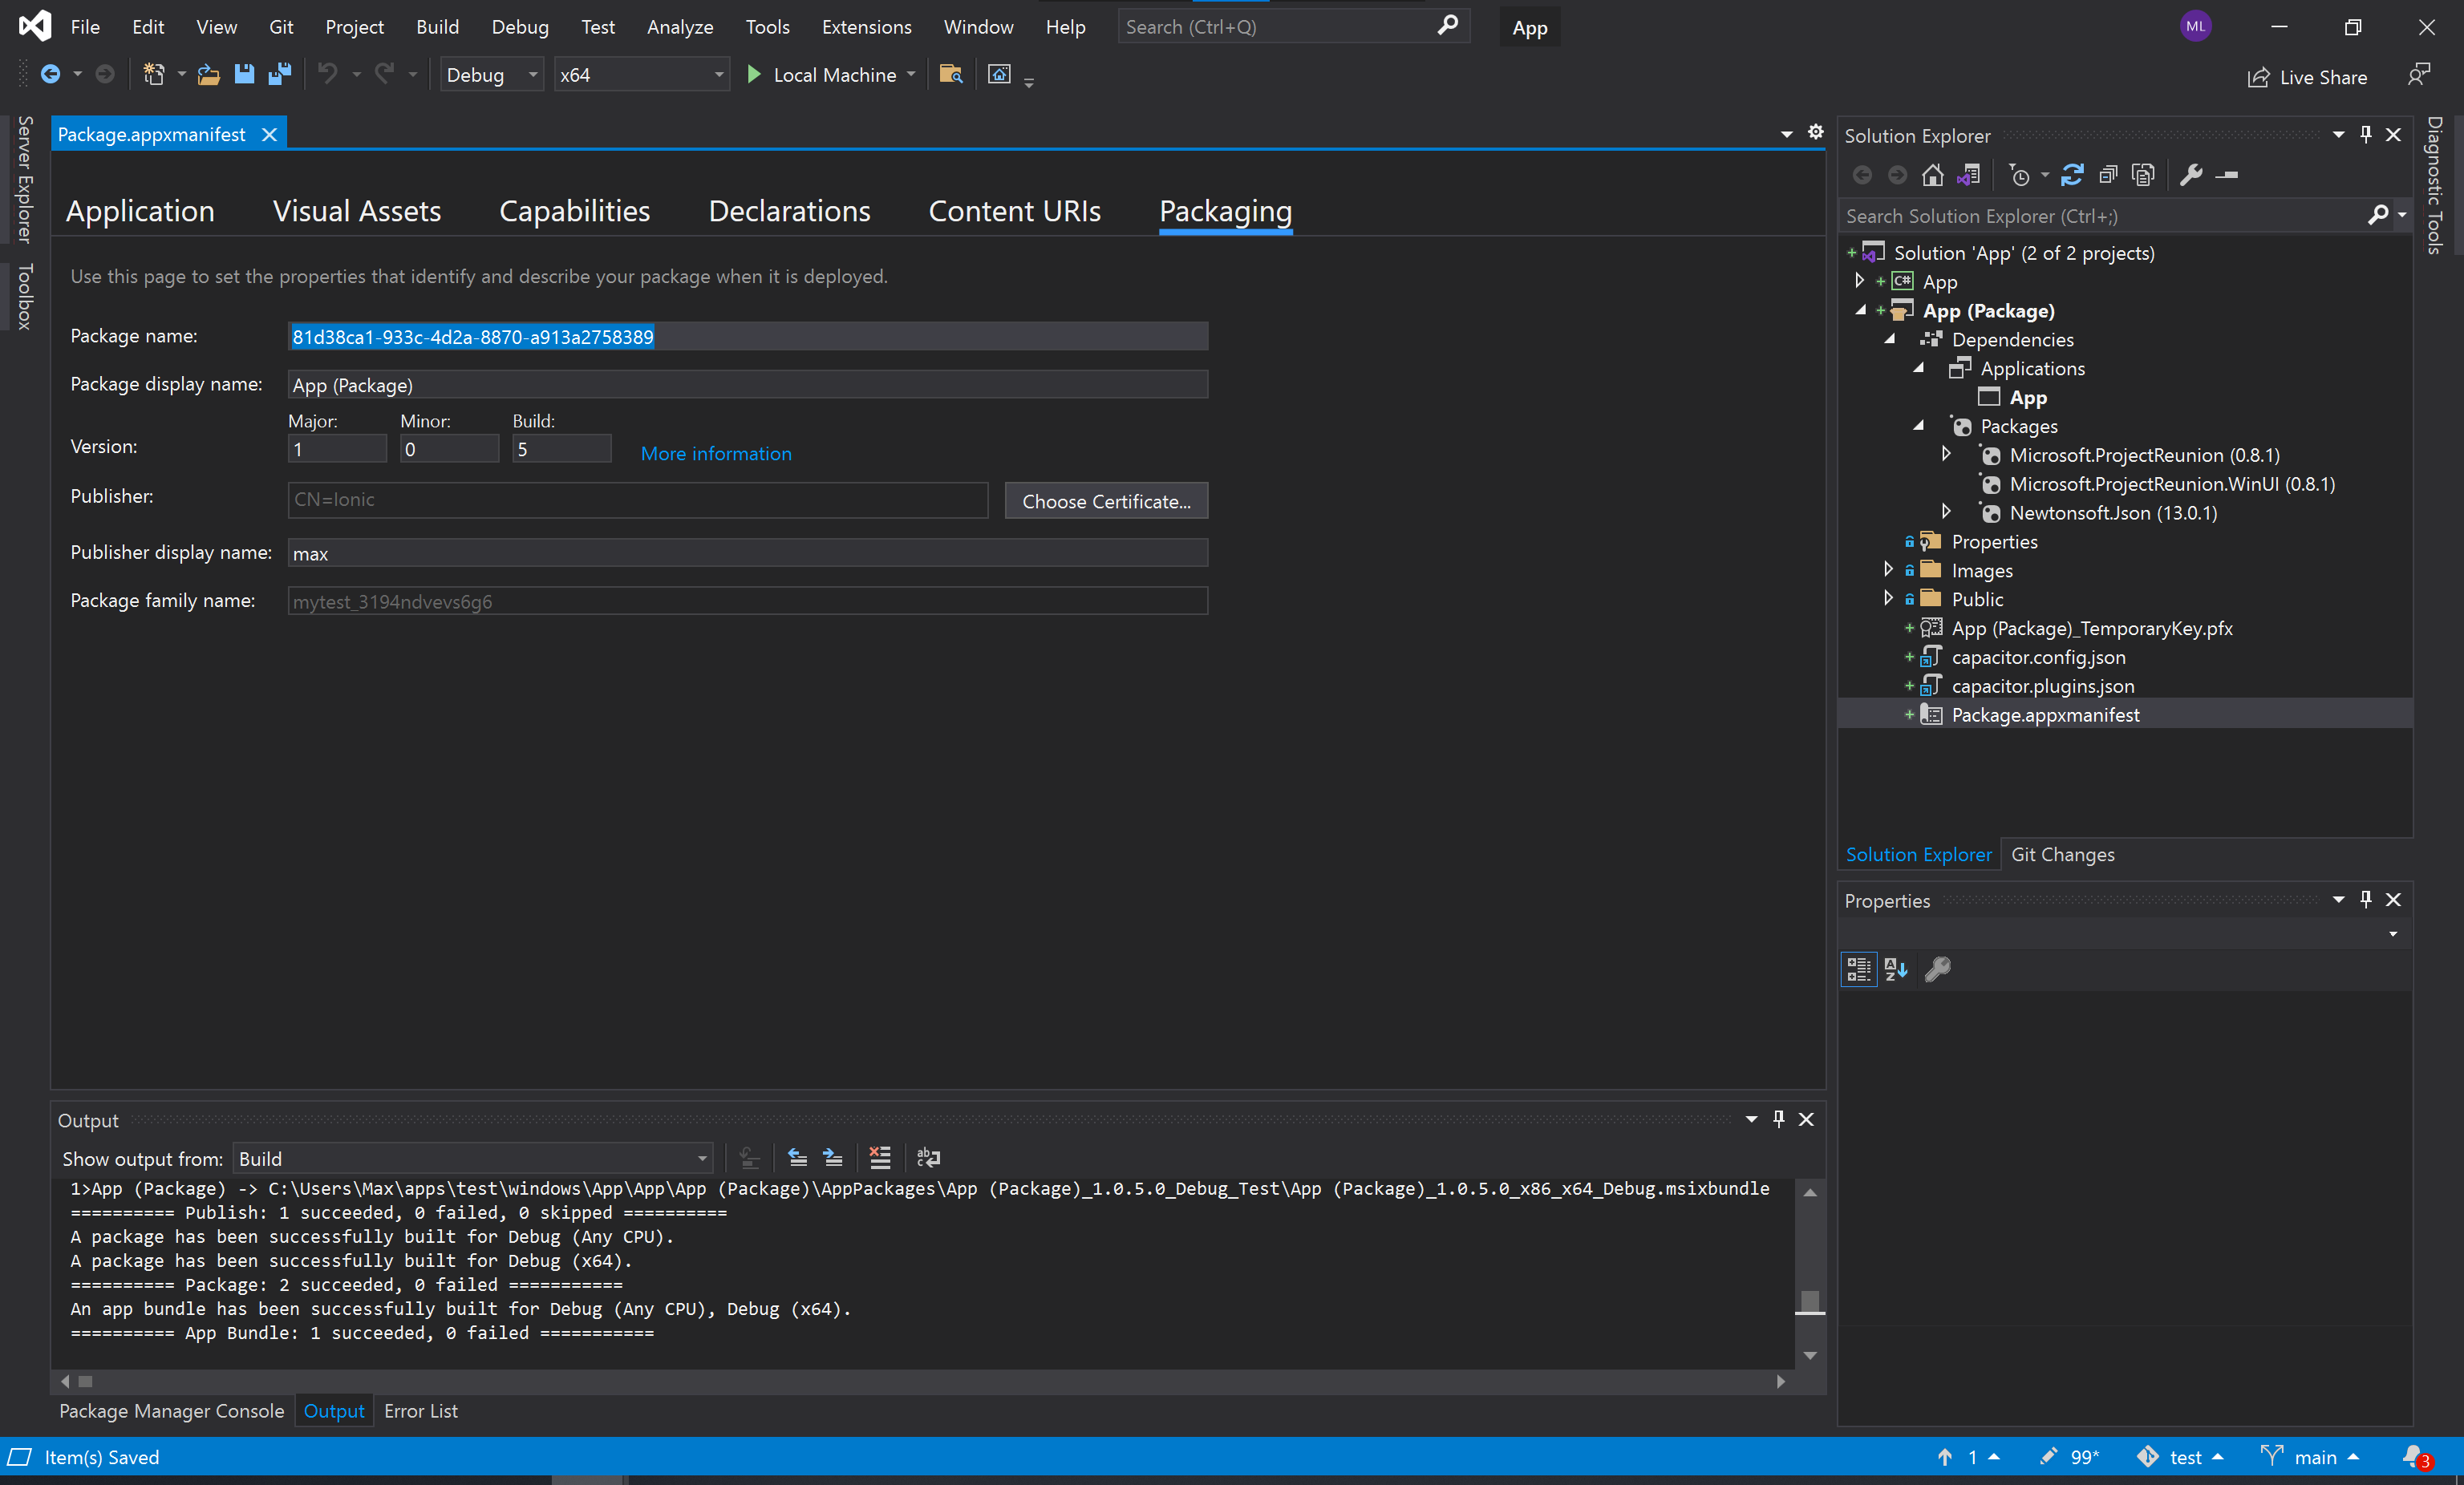
Before packaging and publishing your app, open the Package.appxmanifest file in Visual Studio and make sure all of the settings for your app are correct, and that you've supplied the desired settings for your app. In particular, set the Display name and Description in the Application tab, then icons and other images in the Visual Assets tab. Finally, open the Packaging tab and set values for Package name and Package display name, overwriting any existing defaults.

Packaging and Signing#
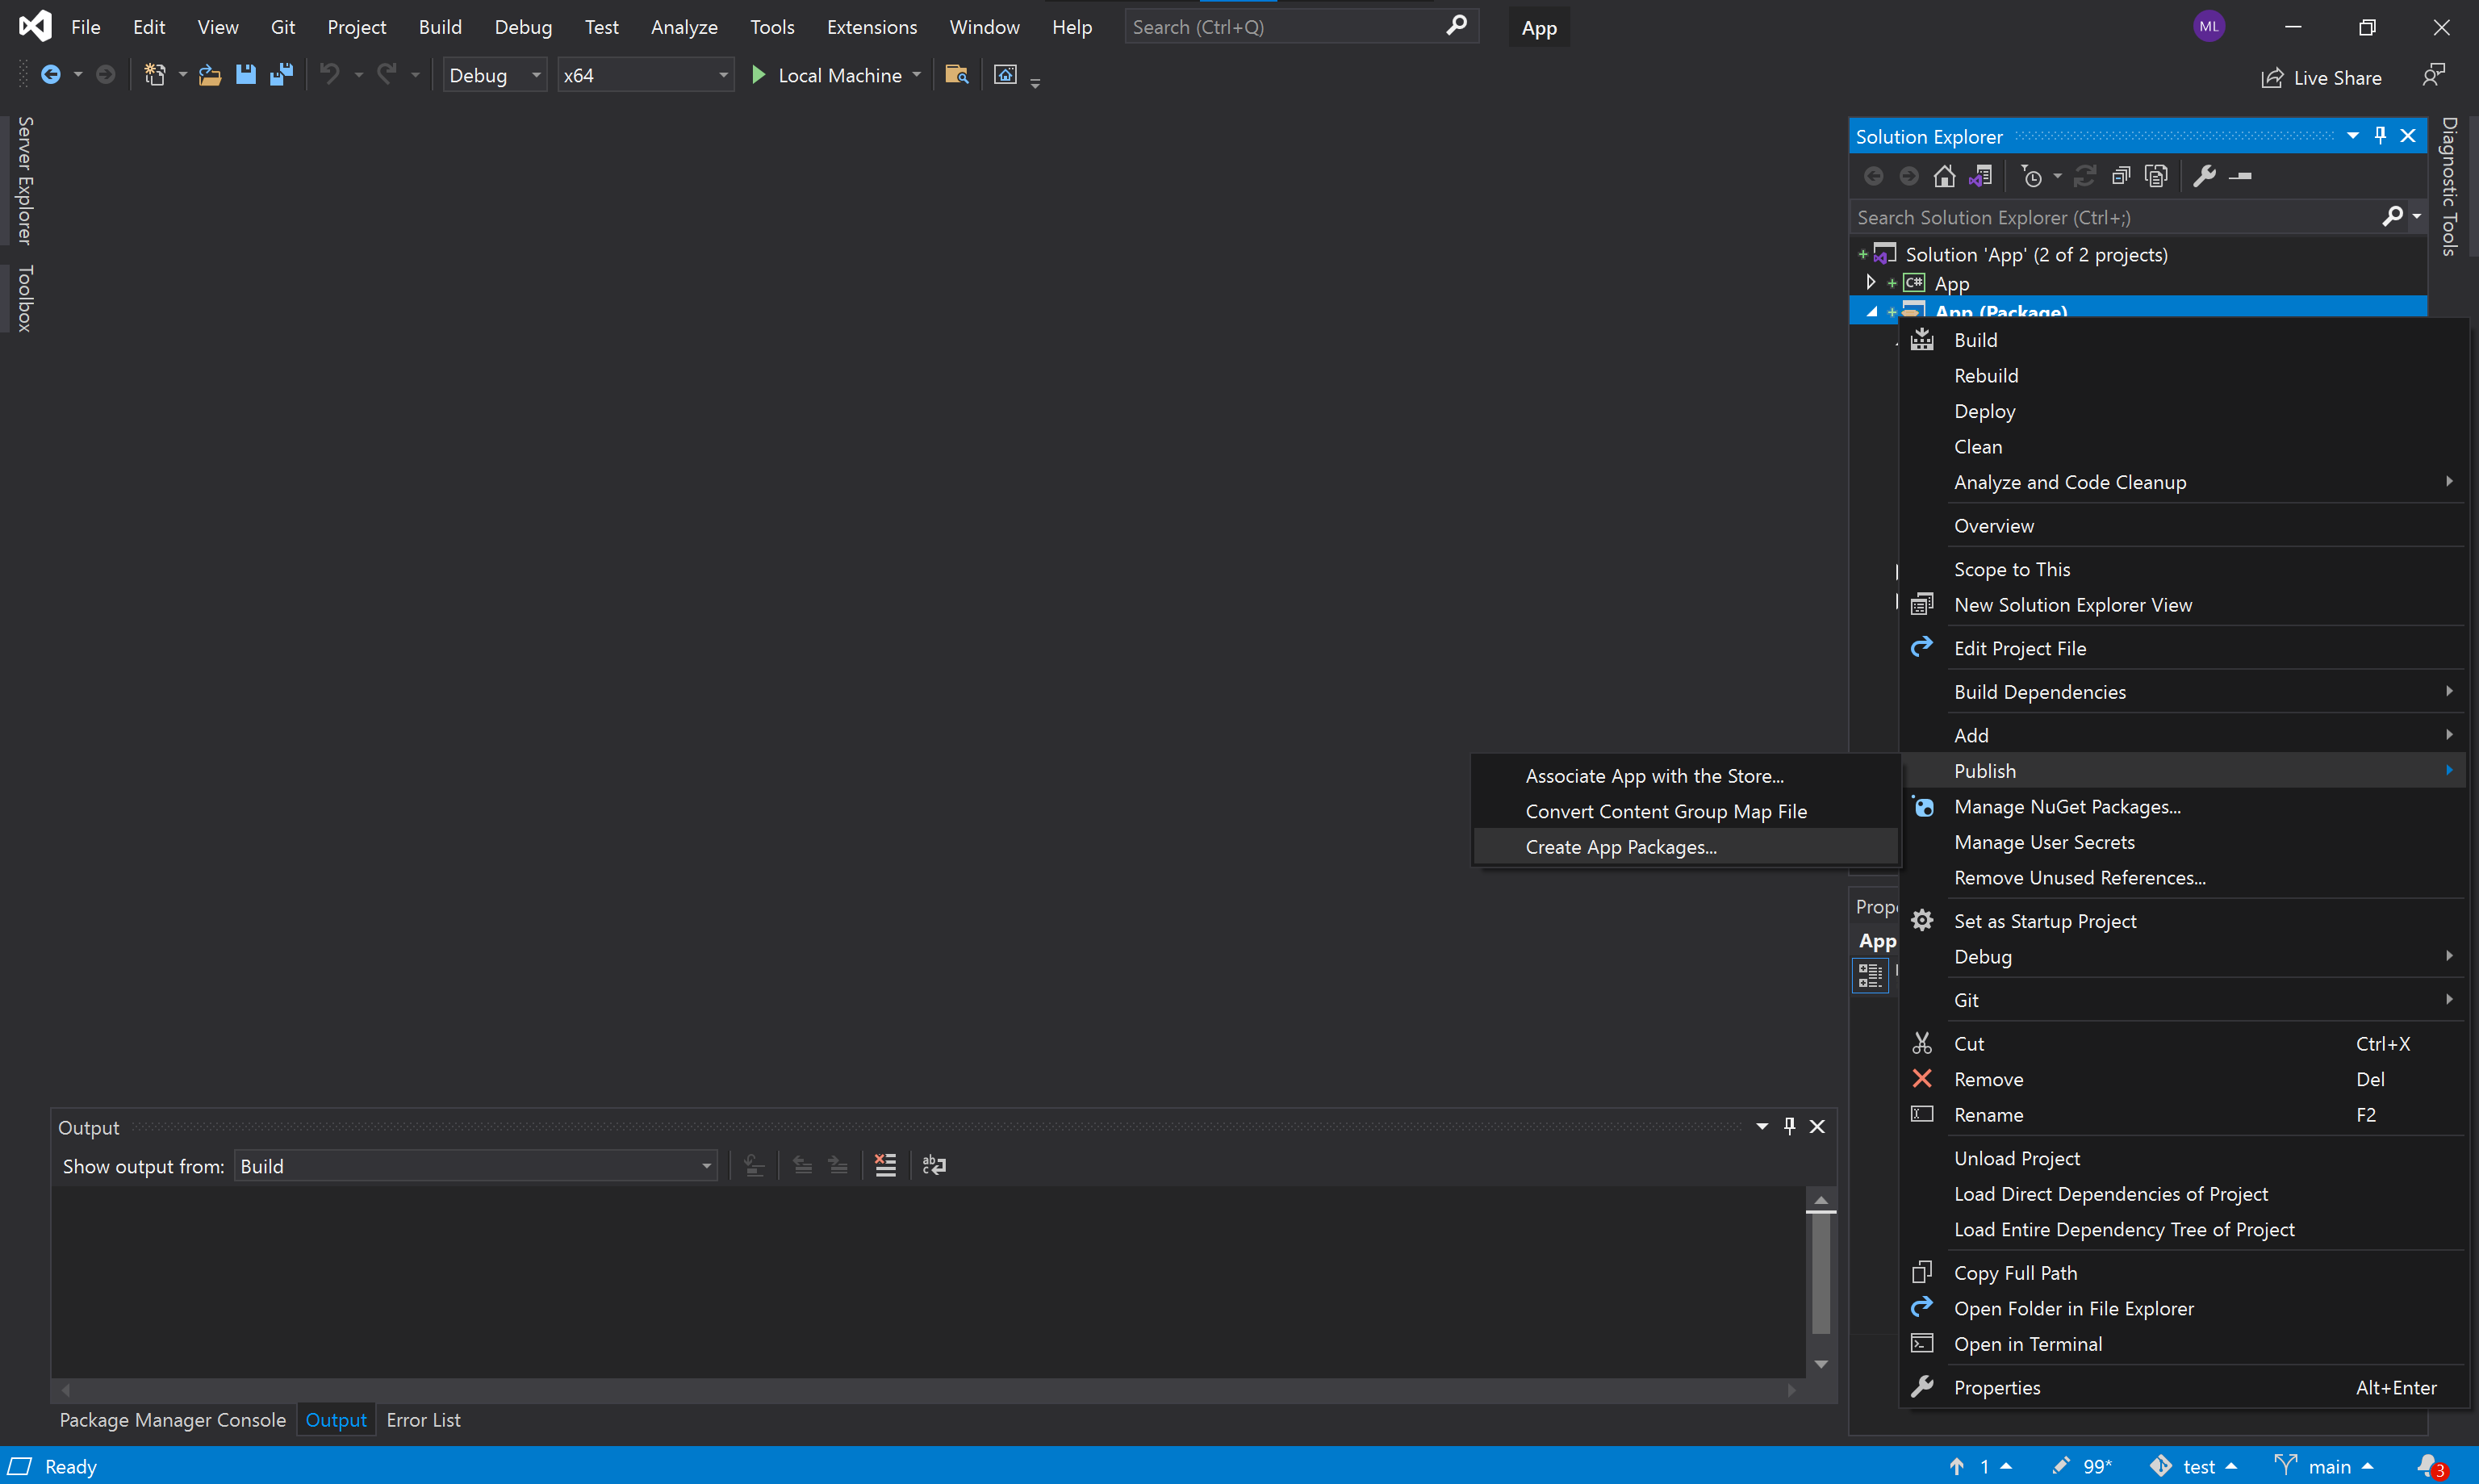
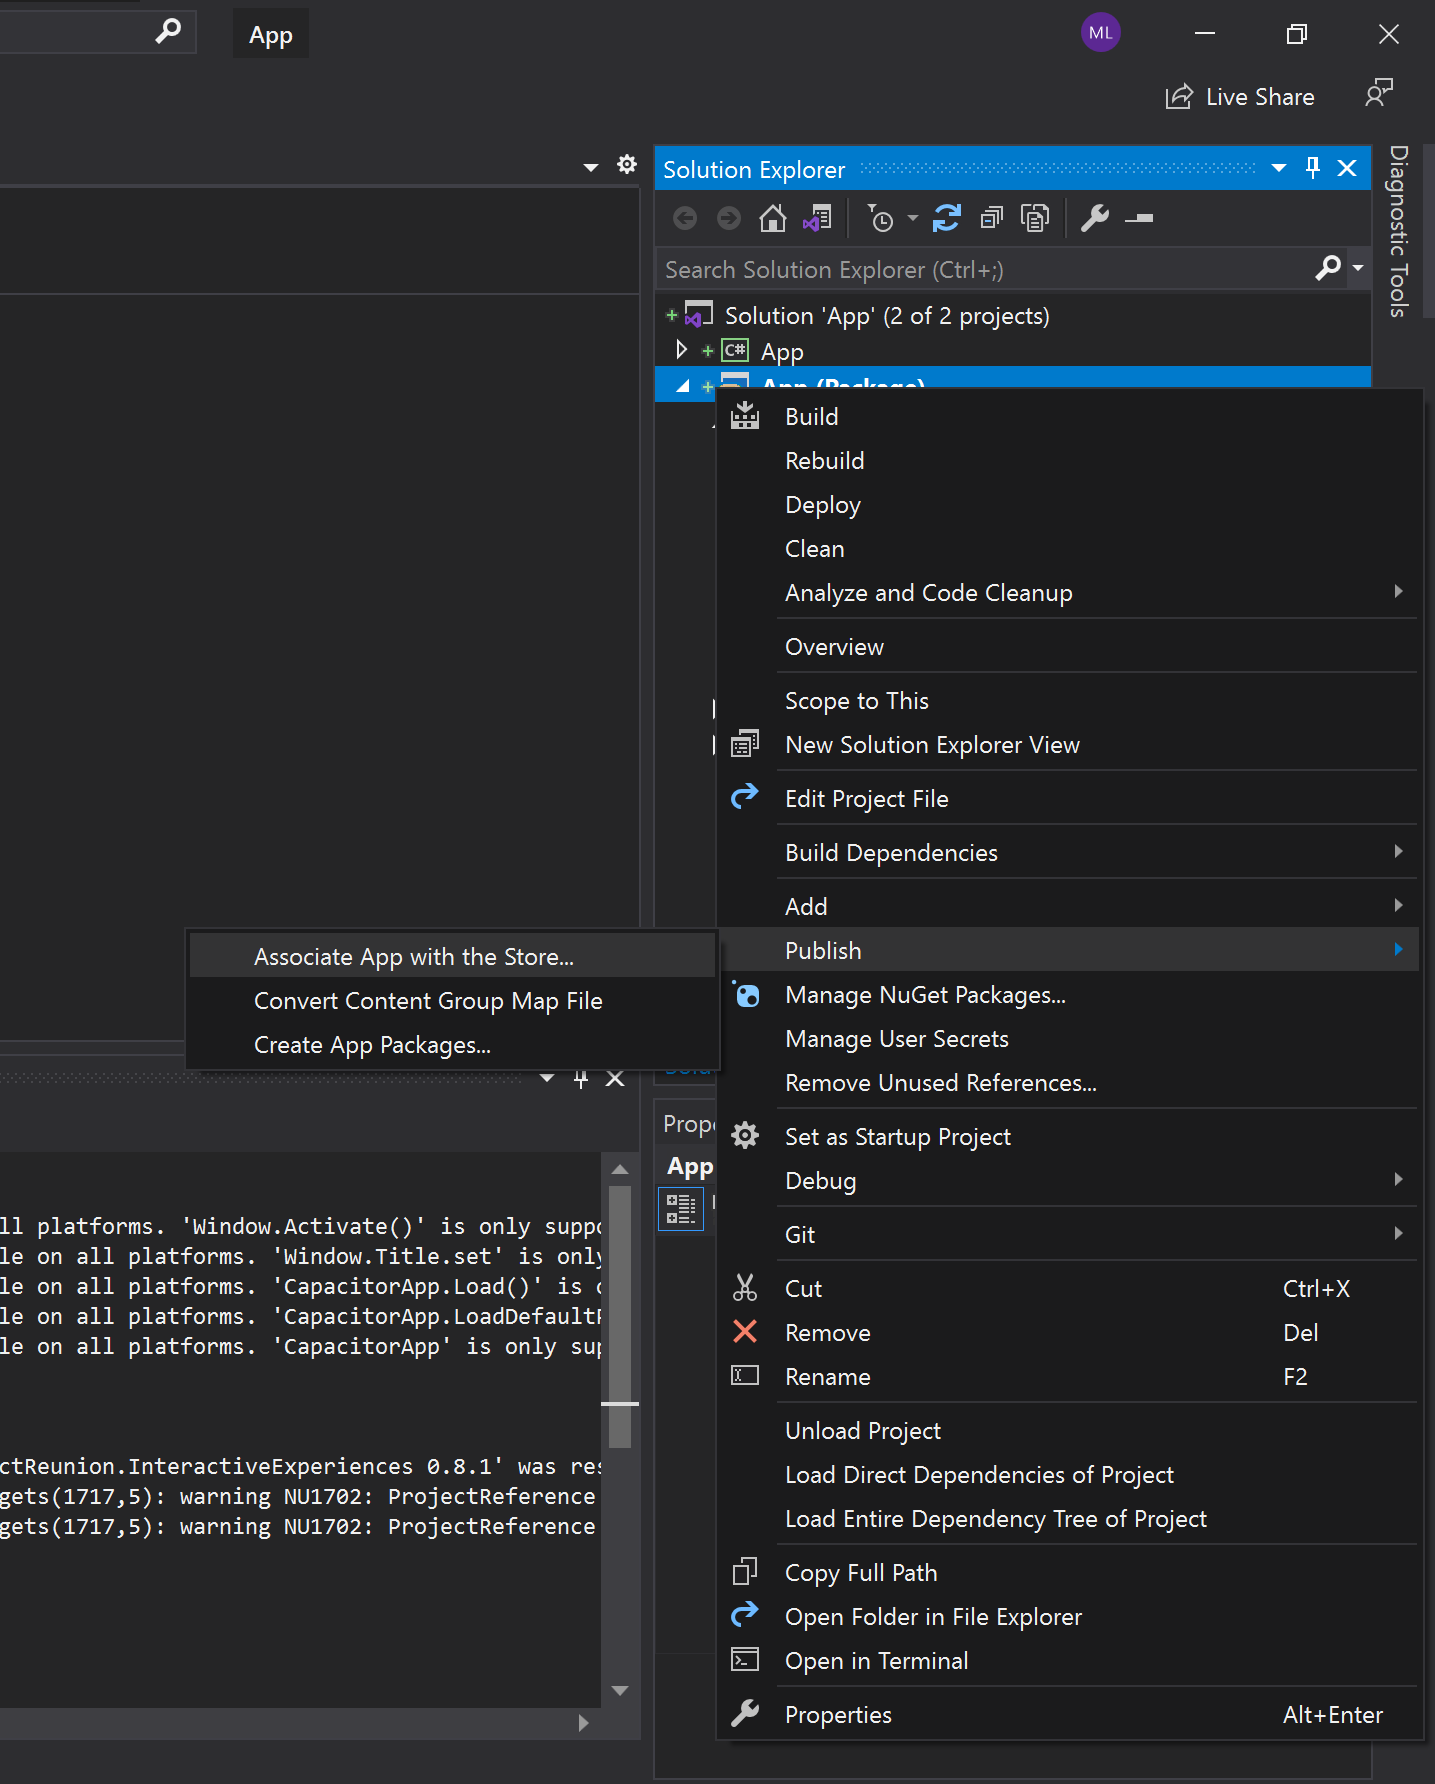
To start the packaging and signing process, right click on the App (Package) project, and select Publish -> Create App Packages.
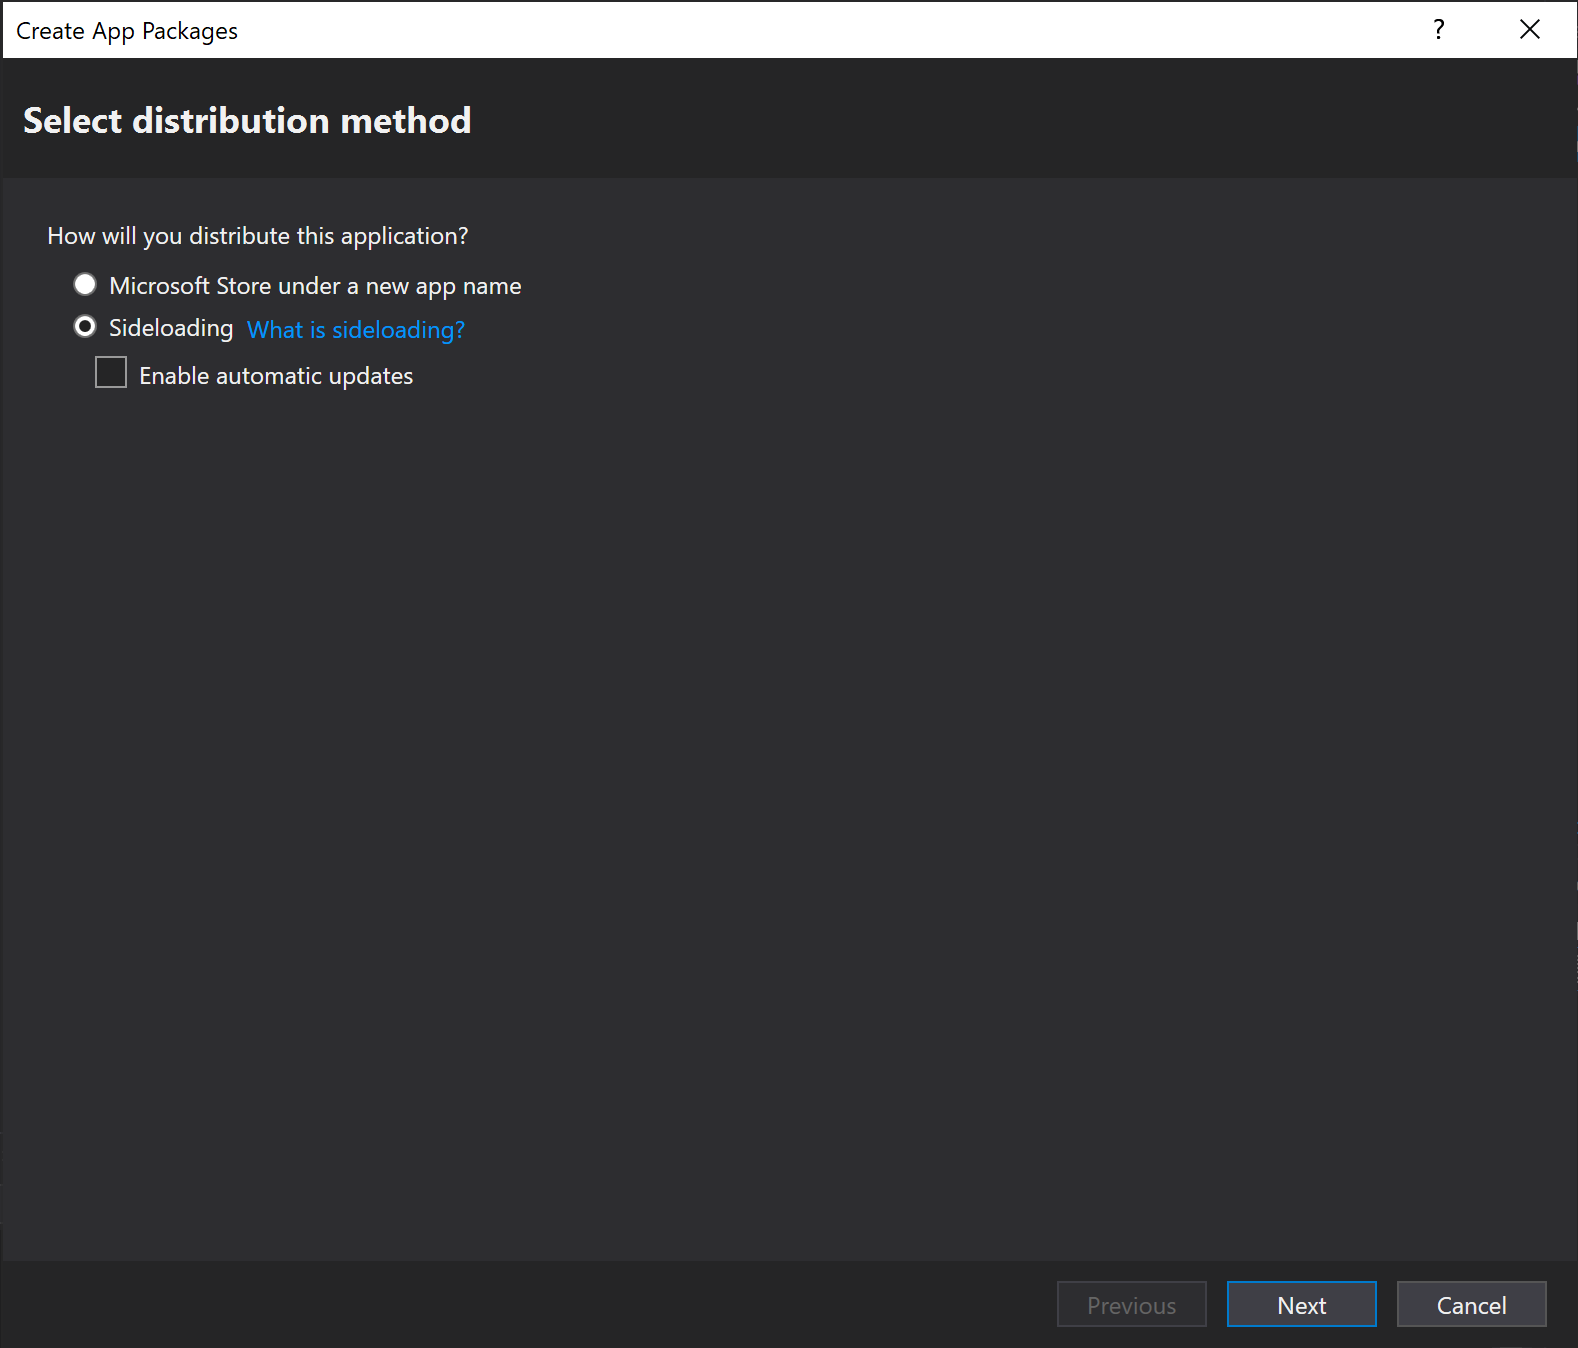
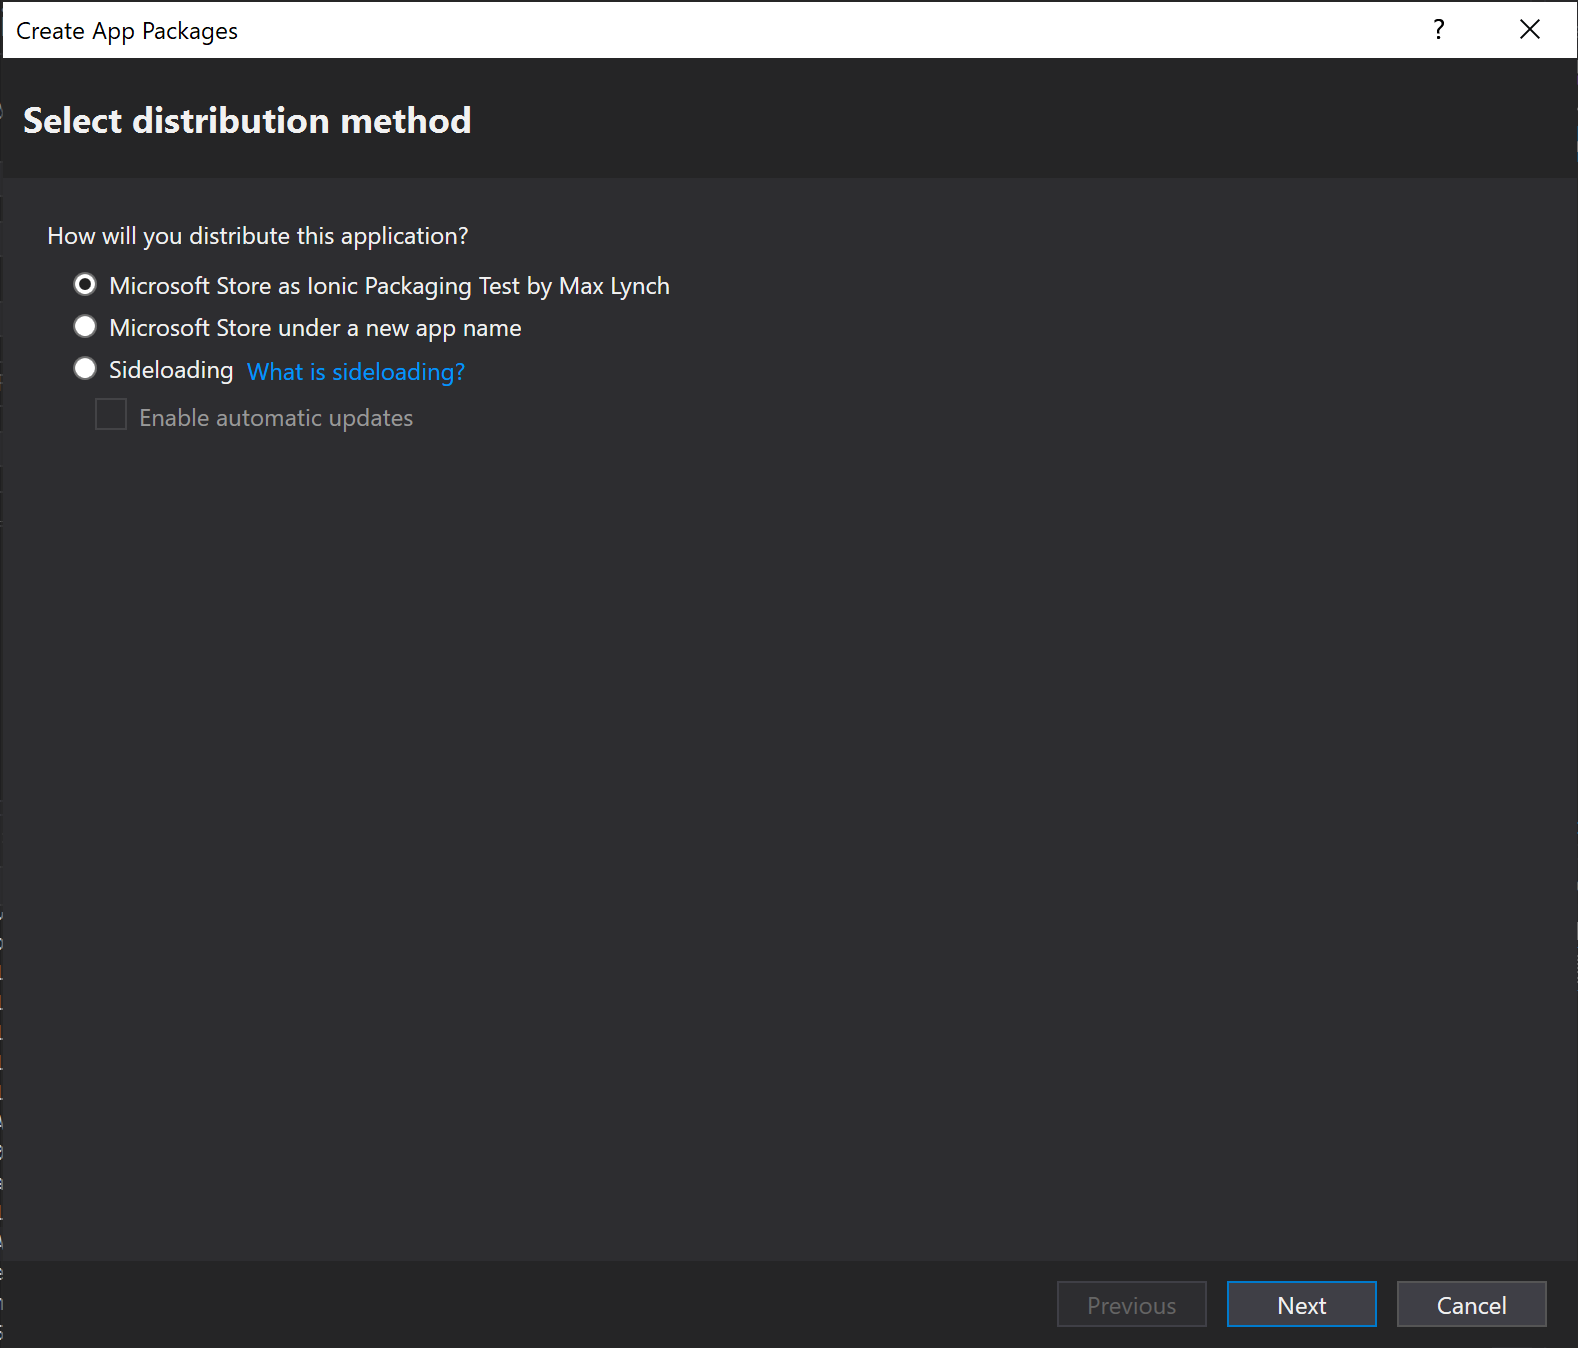
Then, choose the distribution method you plan to use. For enterprise-specific apps, most likely you will be self-distributing, so select "Sideloading" in that case. Uncheck "Enable automatic updates" unless you plan to configure automatic update support at this time.
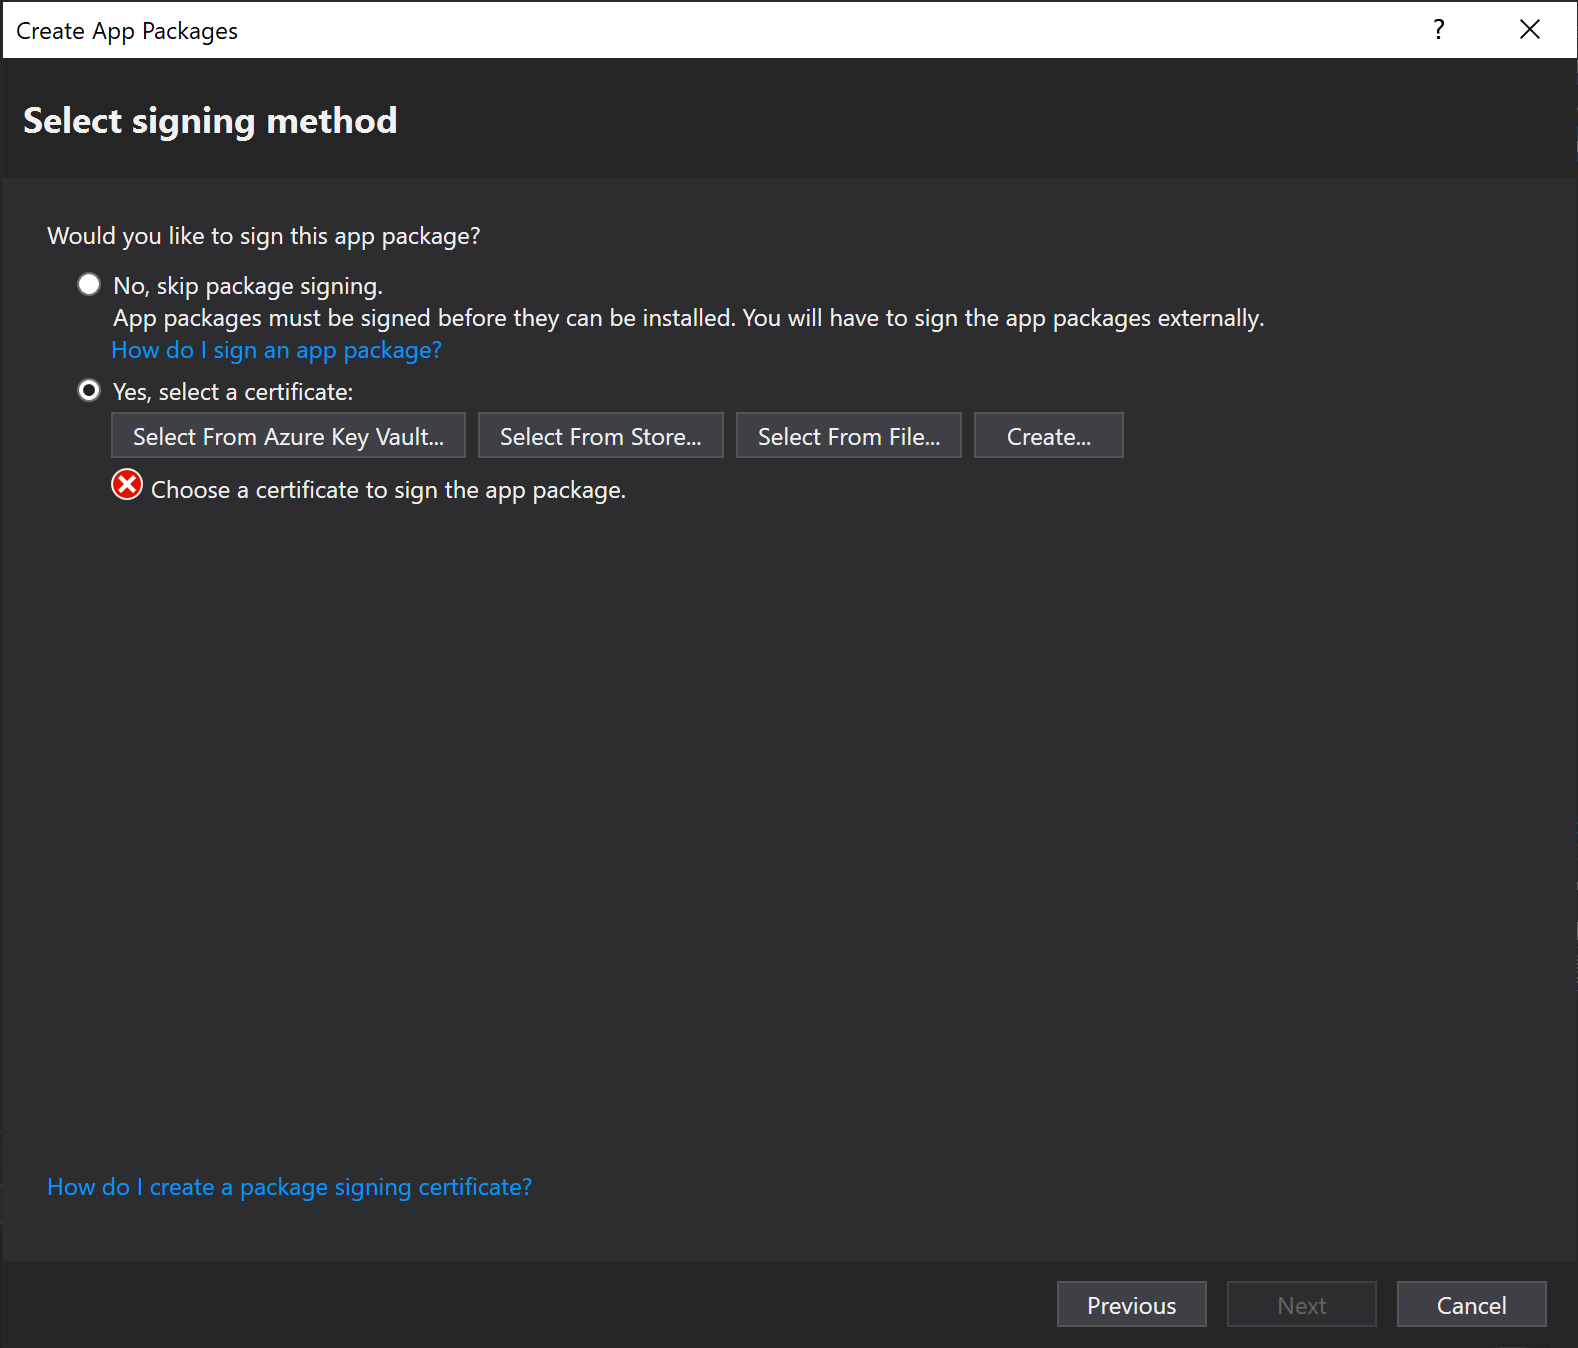
Signing#
The next step involves configuring signing. Signing is required in order to install and launch your app. Unless you plan to handle signing manually (not documented here), select "Yes, select a certificate". For production signing, most likely you will be provided a signing certificate to use. Select that one from Store or File.
However, for development, a self-signed can be used by choosing "Create" and following the self-signed certificate creation wizard:
Once the cert has been created, choose "Trust" to install it in your local certificate chain. This requires developer mode enabled on your machine which you would have done in the installation section of this documentation.


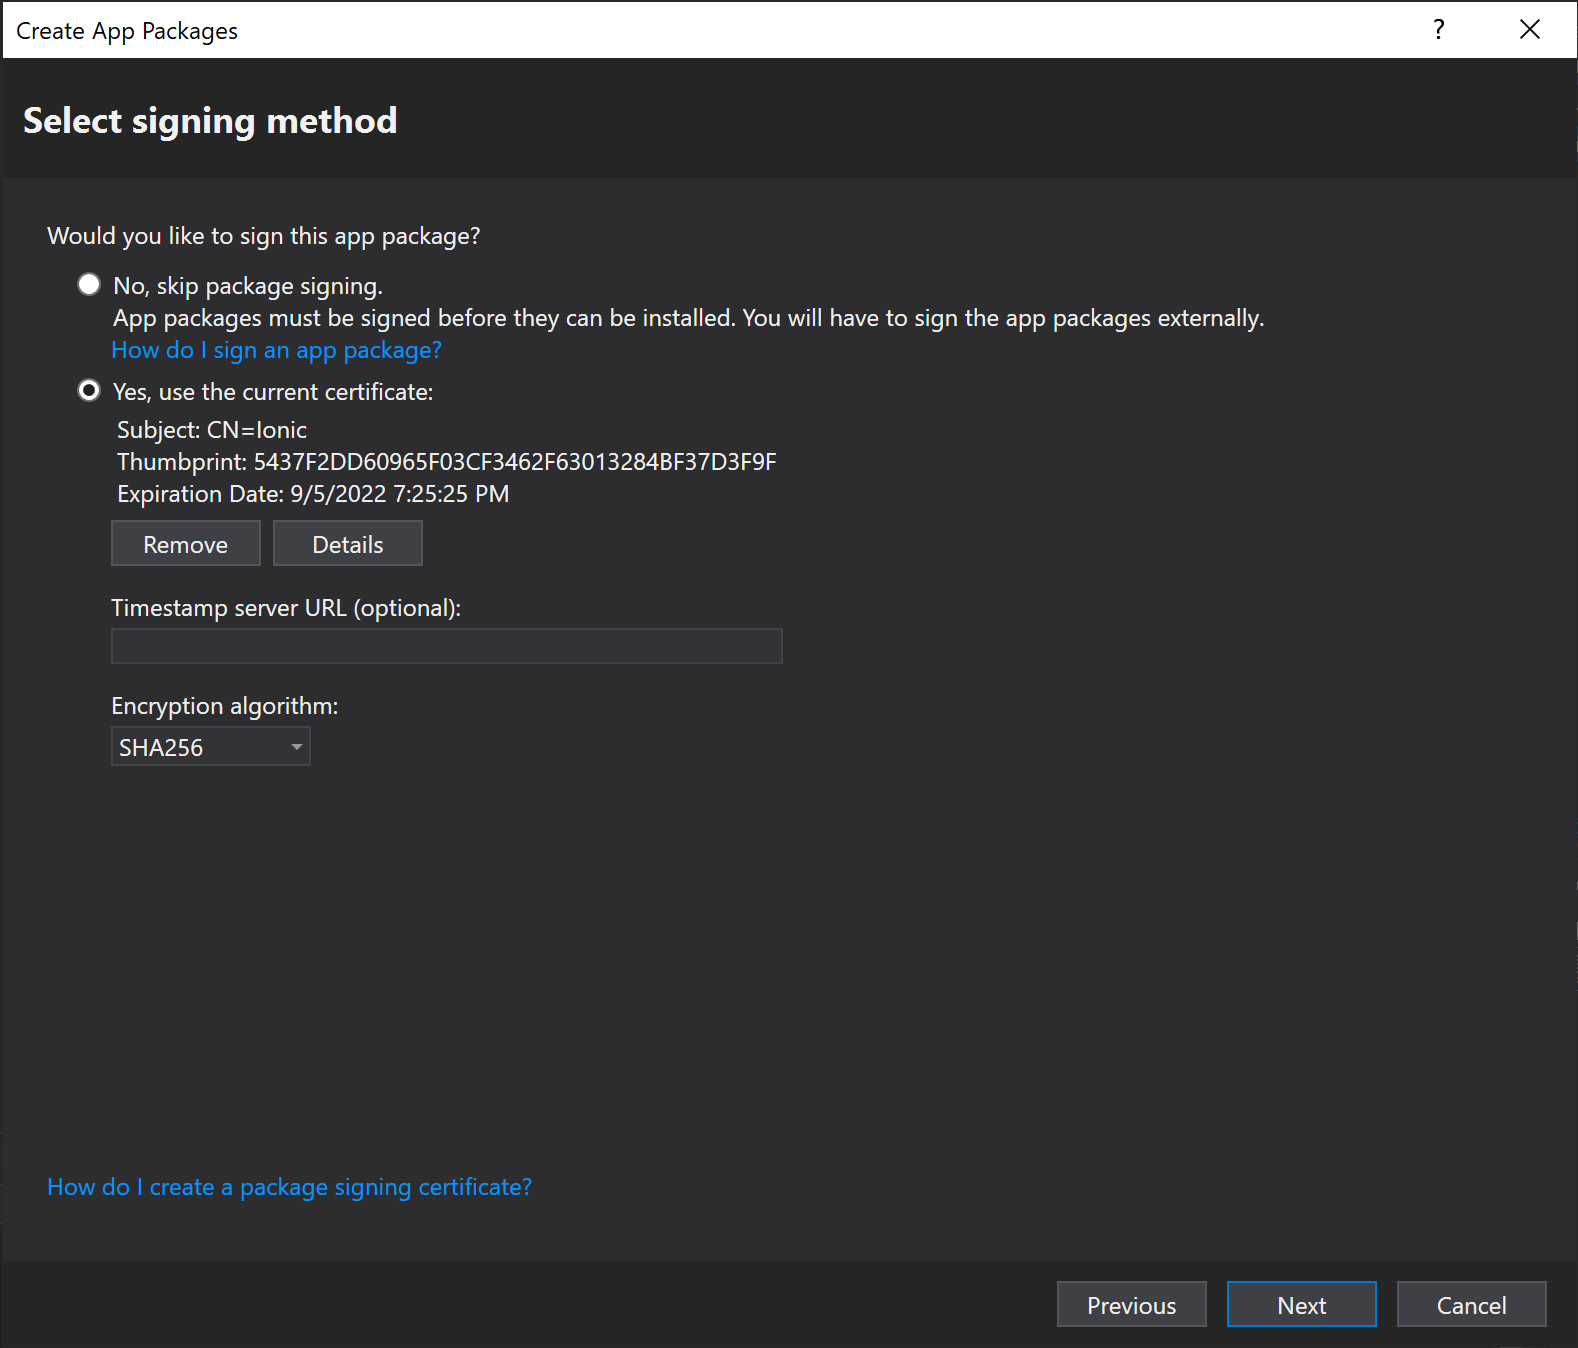
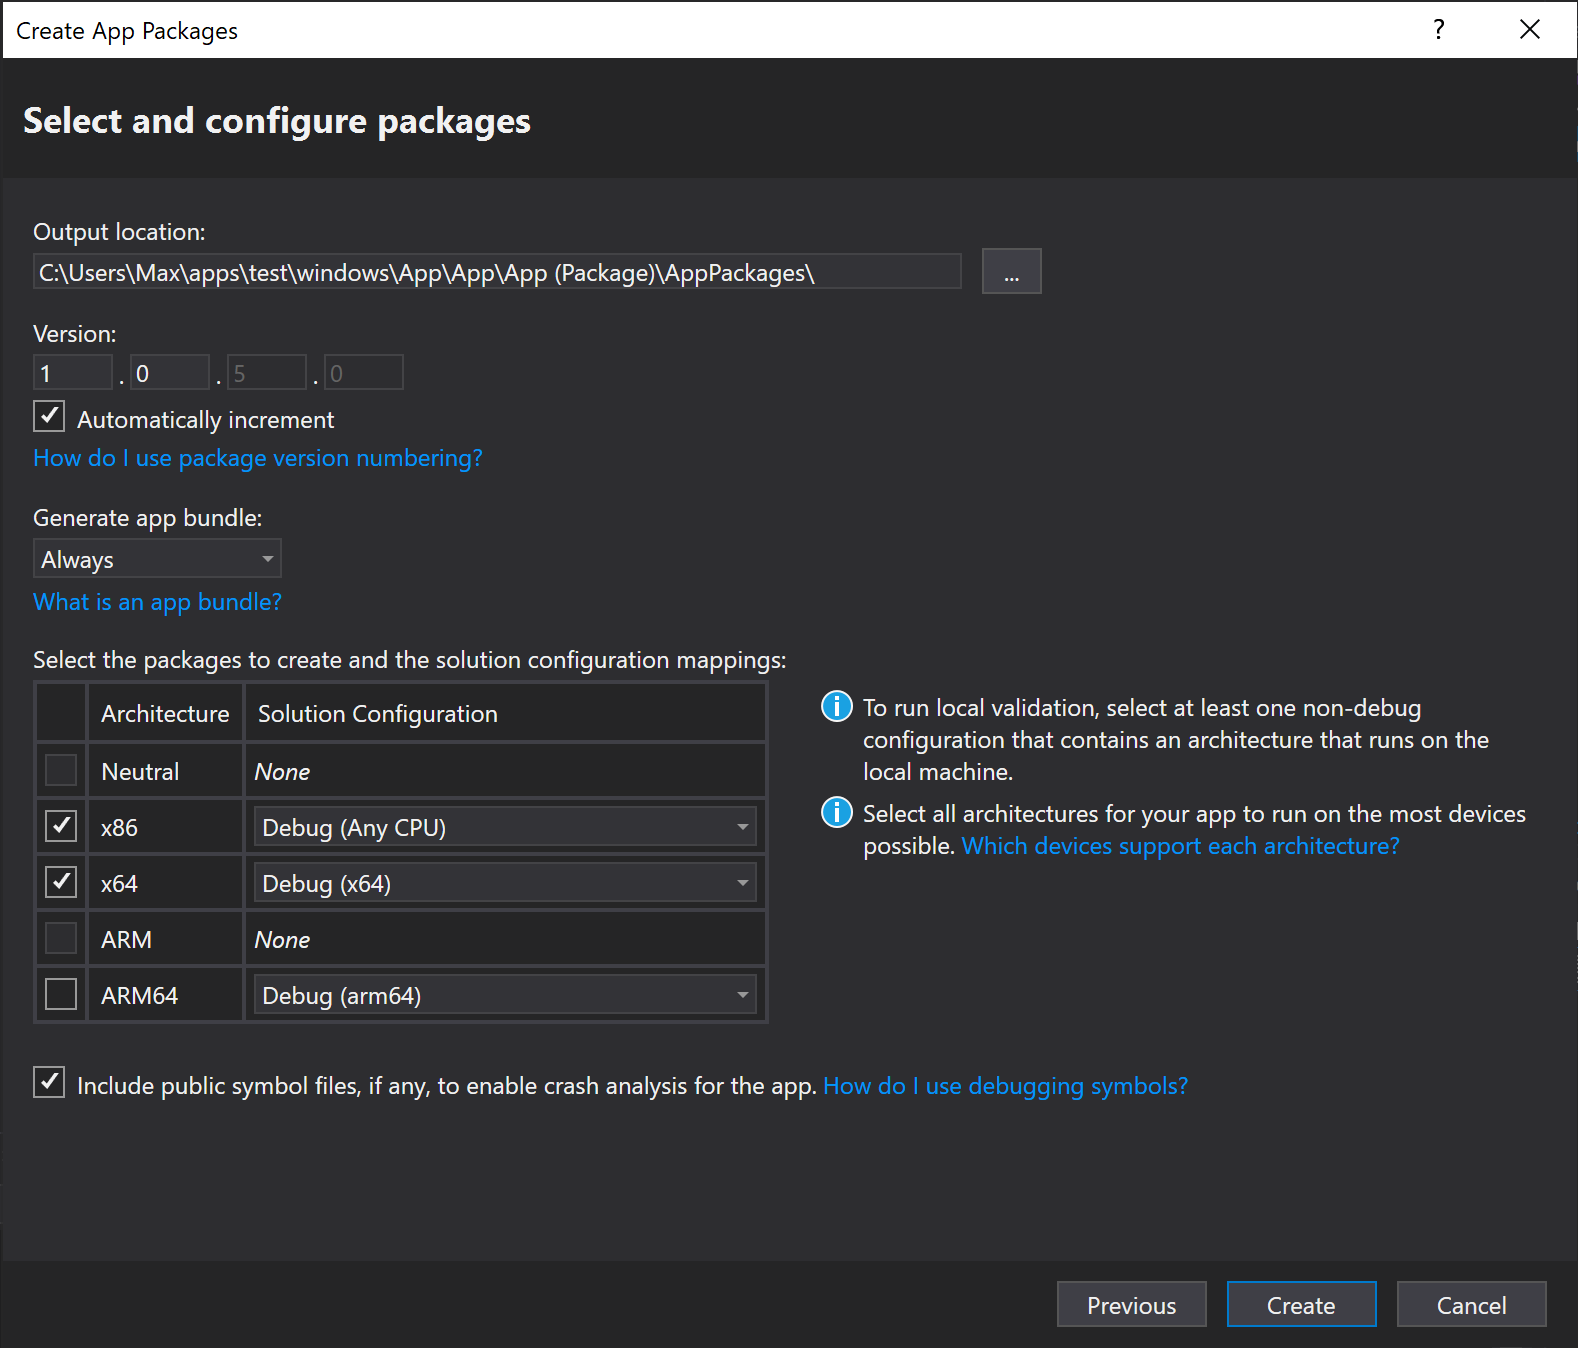
Once the certificate is trusted, select Next to continue. Most likely the defaults can be accepted here. Choose "Create" which will run a build and package process.
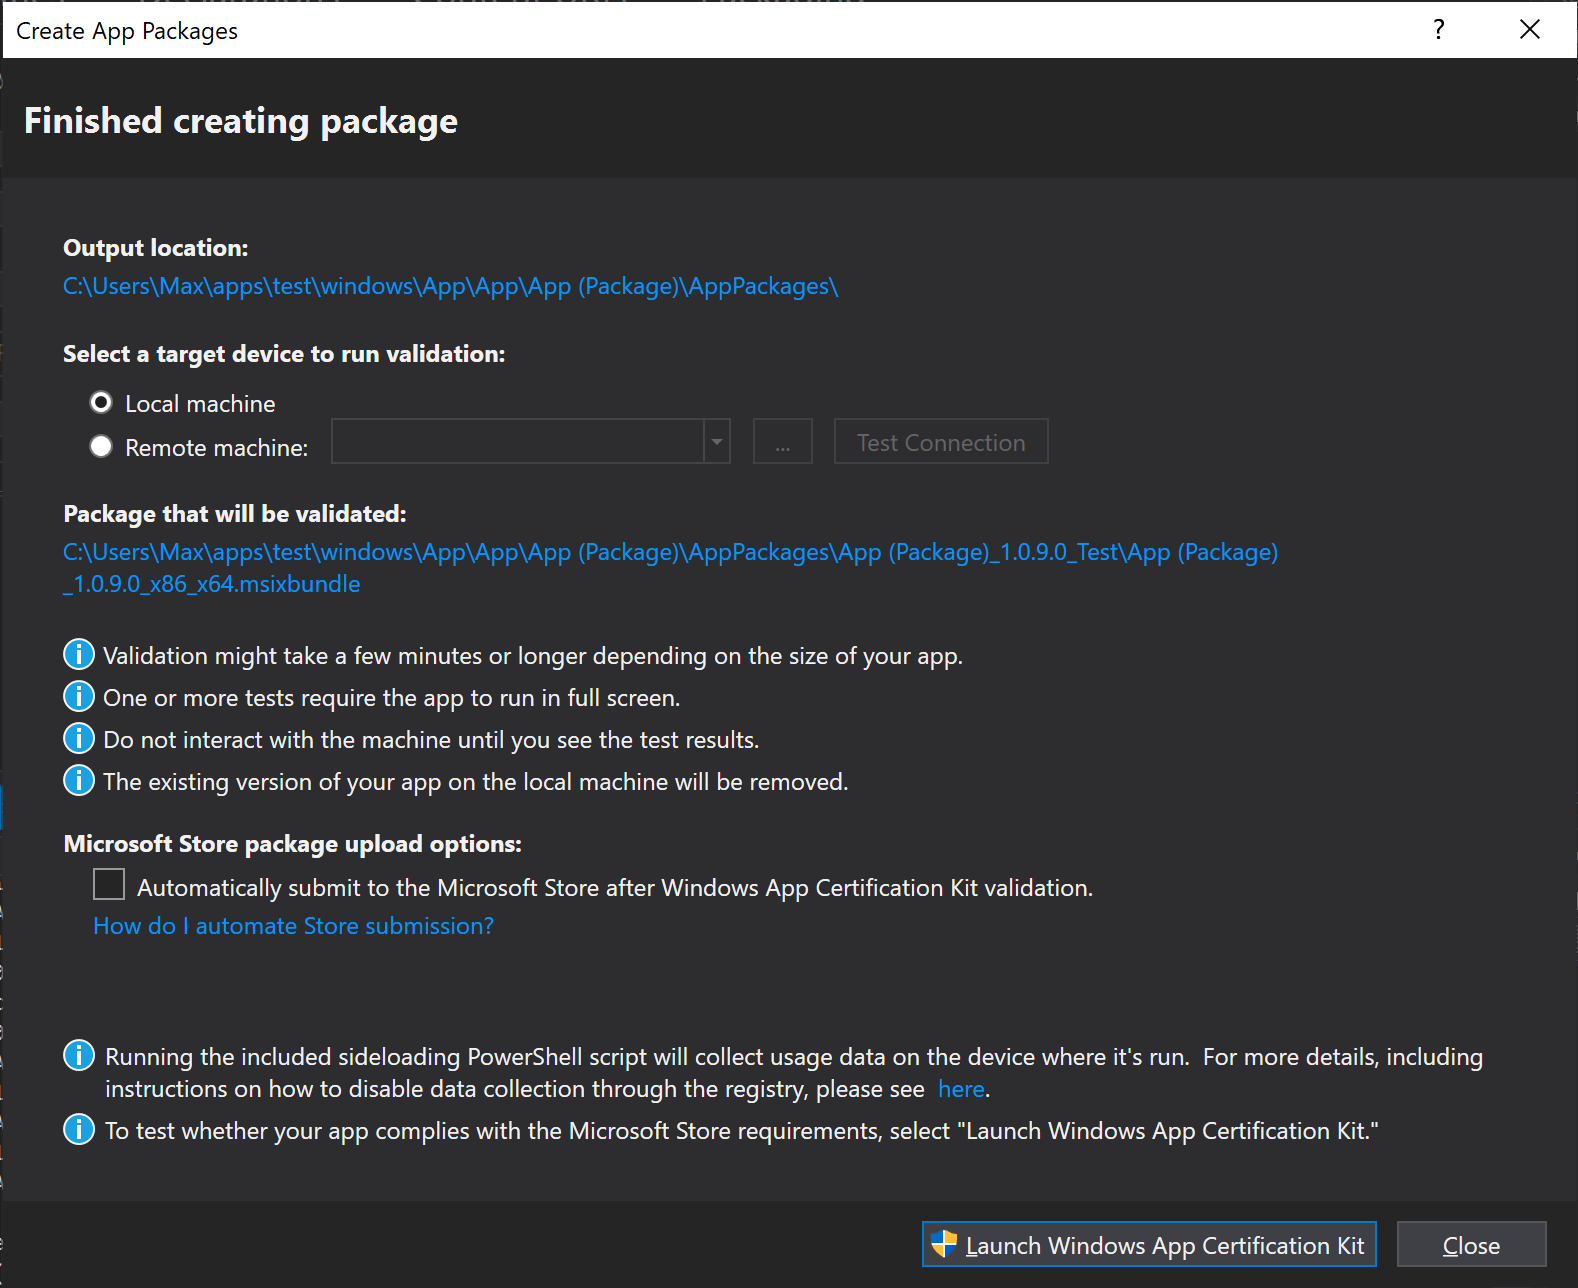
When the Create step is complete, your built package can be accessed by clicking the file path provided.
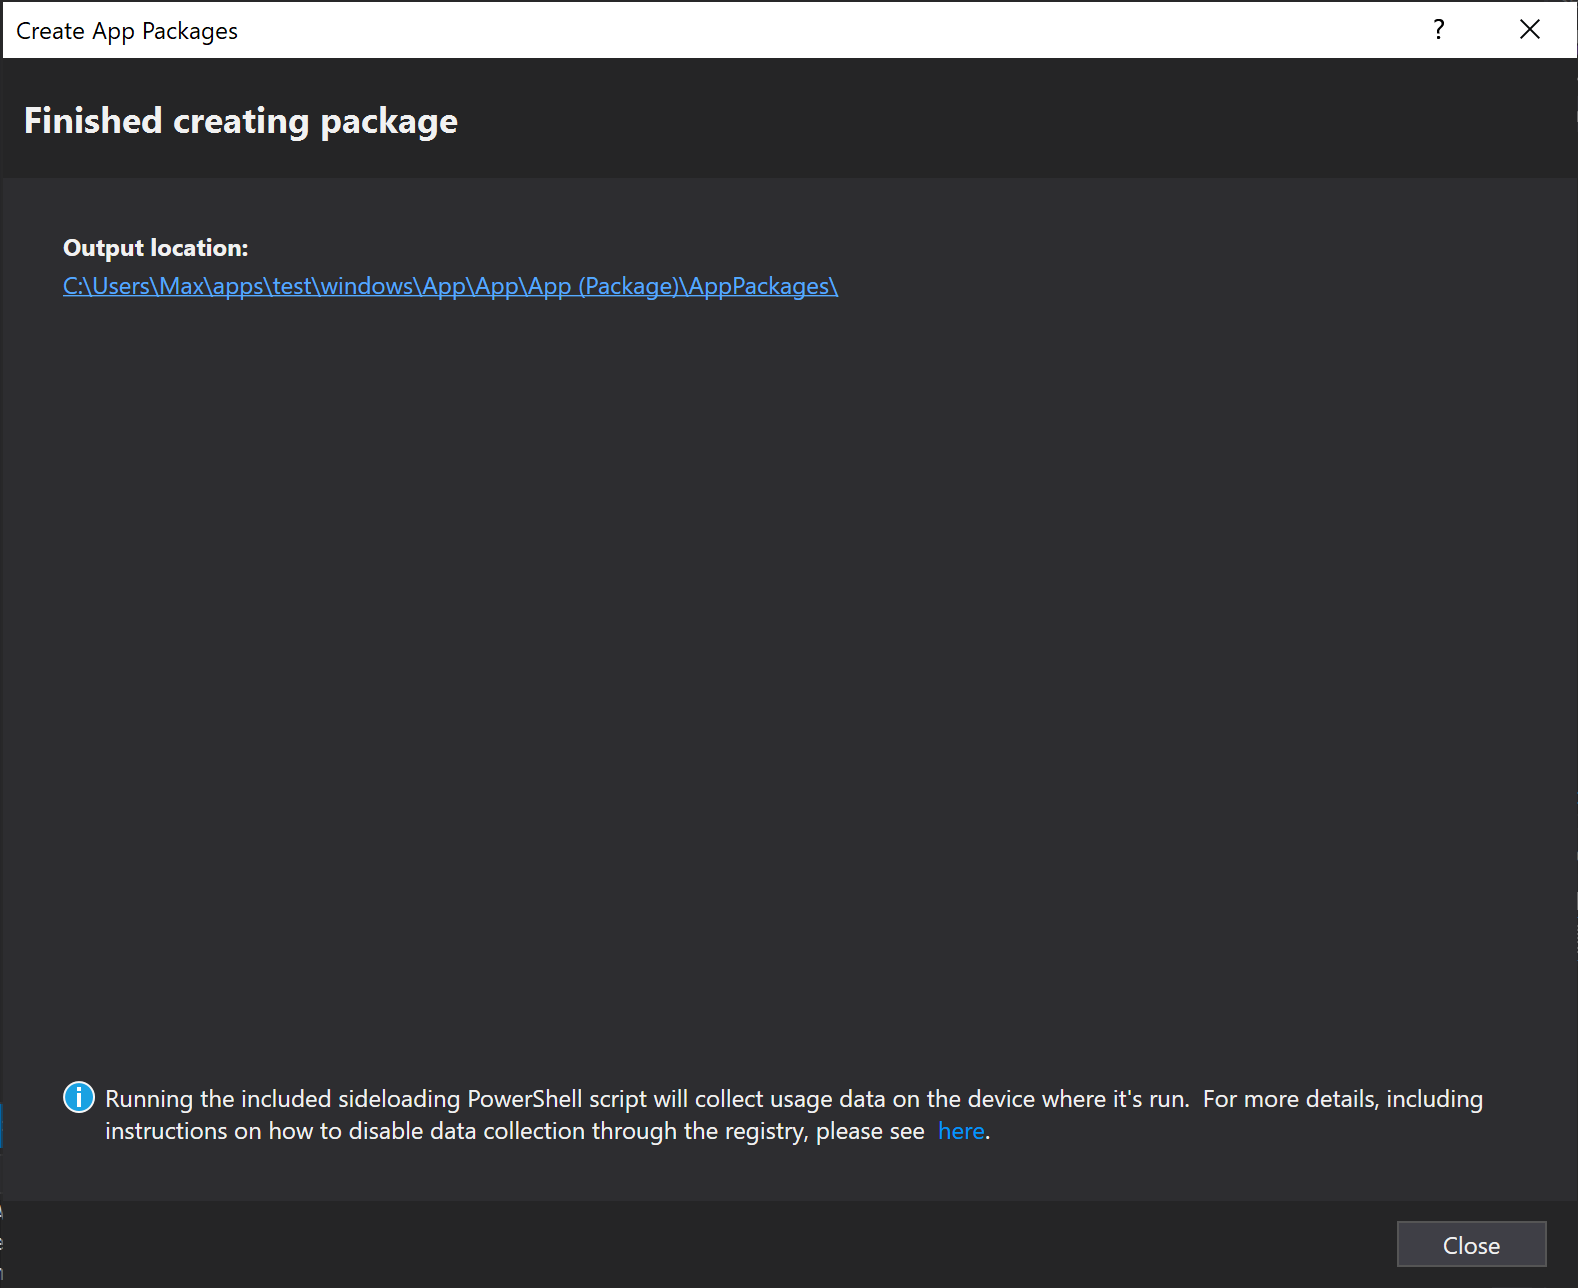
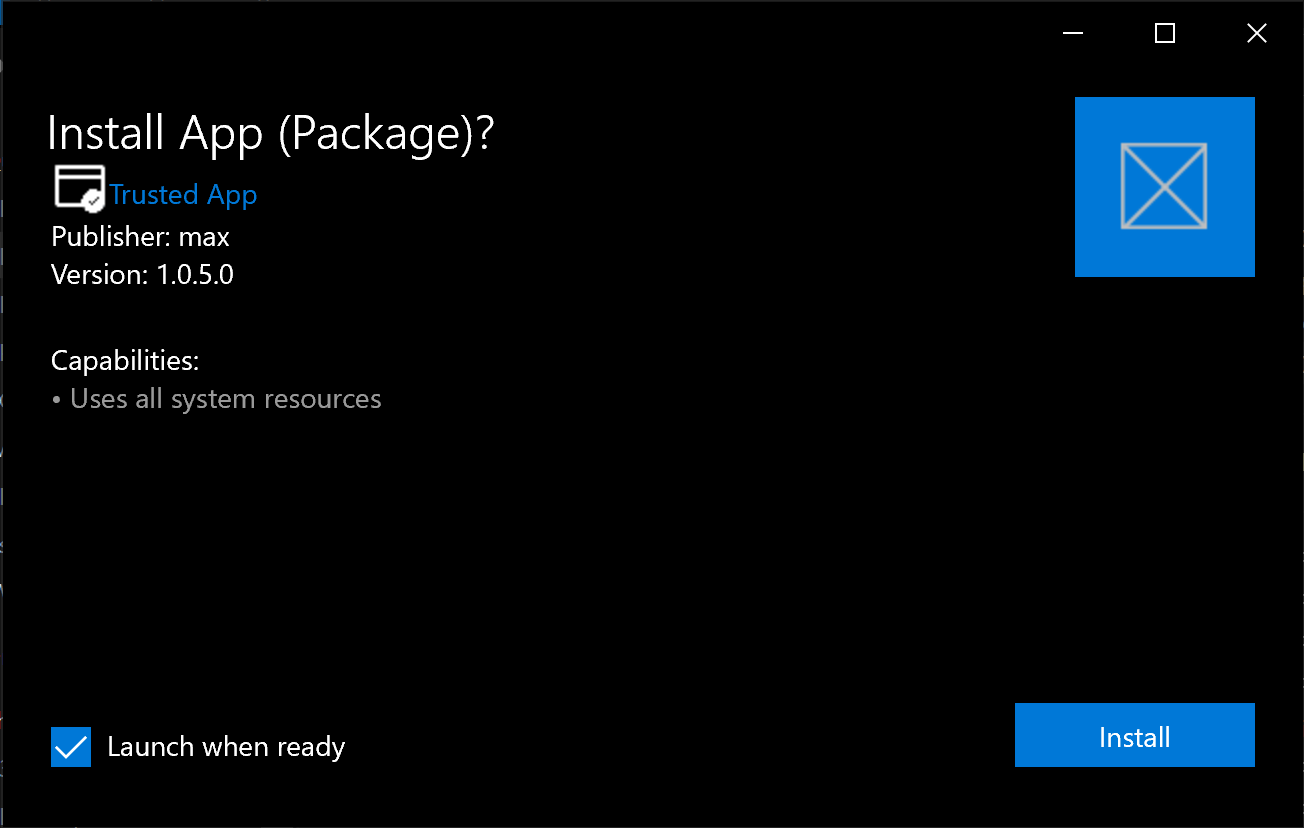
The created .msixbundle package can be shared with others who can install and use your app. Test the package by installing it yourself and ensure the correct app icon and app information are displayed:
Sideload Distribution#
To distribute your app and install it through sideloading, share the generated .msixbundle with users.
Store Distribution#
To distribute your app on the Microsoft Store, an app must be registered and associated with your local app.
Note: consult the Microsoft official App package requirements documentation for further details on the following steps
Registering and Associating App in Store#
Visual Studio can associate your project with a registered Microsoft Store app to speed up configuration time.
To do this, first register an app on the Microsoft Store, which will require you to log in and pay a registration fee ($99 for companies, $19 for individuals, at the time of this writing).
Next, once you have an app registered in the Store, right click on your App (Package) project, and choose Publish -> Associate App with the Store...:
Assuming you are logged into Visual Studio with the same account that registered the Store app, you will be able to select and pull in settings from the app.

Capabilities#
Your app will need to declare any capabilities it needs in the Package.appxmanifest in the Capabilities section.
Additionally, the default capabilities has an entry for the Restricted Capability runFullTrust which is not displayed in the Visual Studio Package.appxmanifest UI, so if this capability is not required, edit the Package.appxmanifest directly to remove it from the <Capabilities> entry. This capability will require approval during Store submission.
Publishing#
To publish the app bundle with the updated settings, run the Packaging and Signing steps above, except this time select the registered app:
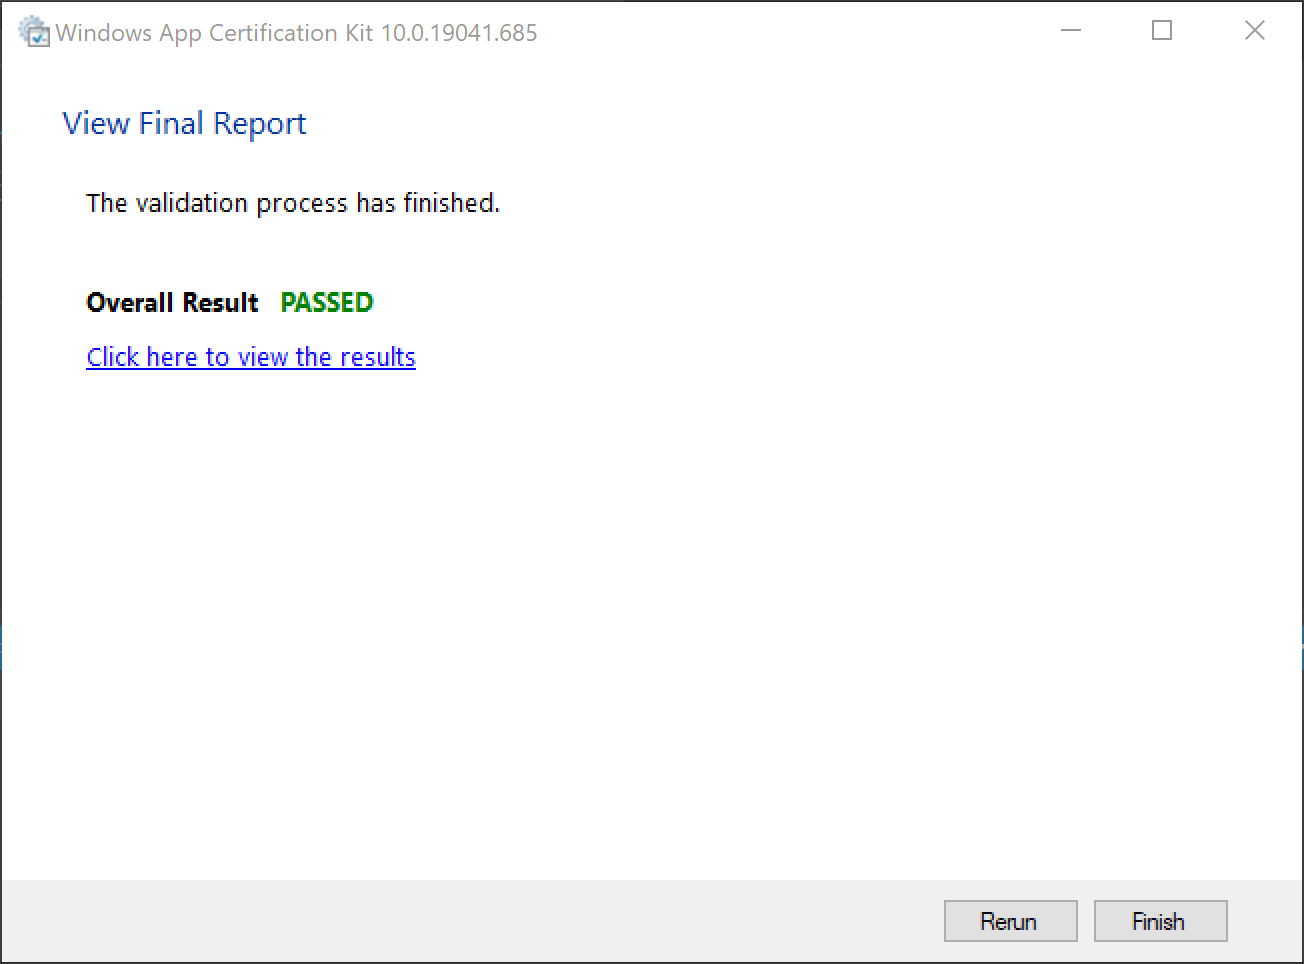
After running Create again, then choose "Launch Windows App Certification Kit" which will validate your package to ensure the app will be submitted successfully to the store. There is an option to automatically submit after the compliance test but that process is not part of this documentation.
This test should pass without any failures:
Once the certification test has completed, the .msixbundle generated in the publish process can be updated to the Packages section in your app in the Microsoft Store Partner Center.