Unpackaged Win32 Apps
Unpackaged apps use the classic Win32 application paradigm instead of the modern Windows packaged app system. This means they can be distributed as exe's with full system access, but have some limitations when it comes to using the latest Windows APIs.
In order to have full access to modern Windows APIs, build a packaged app and distribute it using MSIX. The documentation on other pages follows the packaged app approach. If, for any reason, you cannot use MSIX or packaged apps, then follow the below guide to build an unpackaged app.
info
Unpackaged Ionic Windows apps use WPF instead of the Windows App SDK. This is due to one or more limitations in the Windows App SDK and WebView2 for unpackaged apps (one such issue).
This may impact compatibility with other Ionic Windows plugins that depend on the Windows App SDK.
We hope this limitation is resolved by Microsoft in the coming months and we can move back to using the Windows App SDK for unpackaged apps.
Required Configuration#
To use the unpackaged app template for Ionic Windows, set the following configuration option in capacitor.config.ts before running the add command:
import { CapacitorConfig } from '@capacitor/cli';
const config: CapacitorConfig = {    // ...}
// Add this:(config as any).windows = {    unpackaged: true,    appName: 'Your App Name'}
export default config;the appName controls things like the folder name used in the AppData directory, among other things.
note
If you've already added a windows platform without this flag you will need to delete it and recreate it using the above command.
Starting Template#
npx cap add @ionic-enterprise/capacitor-windowsInstaller - Microsoft Visual Studio Installer Projects 2022#
There are many tools for building installer projects for your Windows app. One option is the Microsoft Visual Studio Installer Projects 2022 extension for VS 2022.
To install this extension, open VS 2022 and from the Extensions menu choose Manage Extensions -> Search -> Microsoft Visual Studio Installer Projects 2022. Install it and then restart VS 2022.
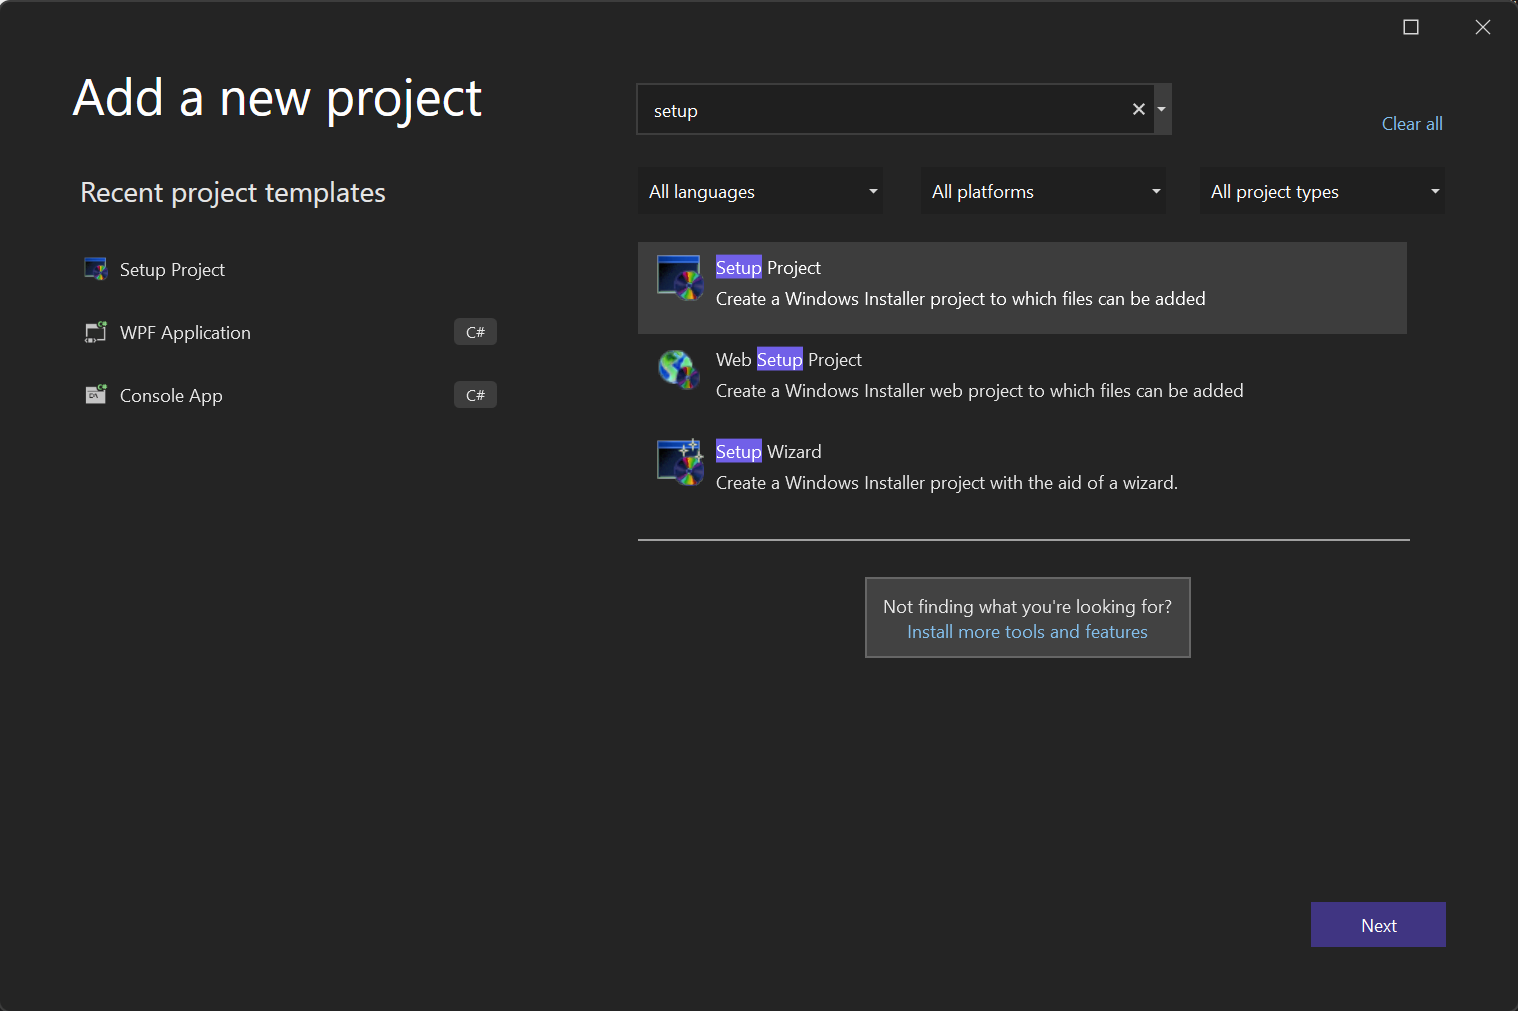
Next, right-click on your solution and go to Add -> New Project. Find the Setup project and add it, giving it a useful name like 'Setup' or 'Installer':
Configure the Setup Project#
Next, we need to configure the setup project.
First, we can set some values for the setup project that match our organization and app information:
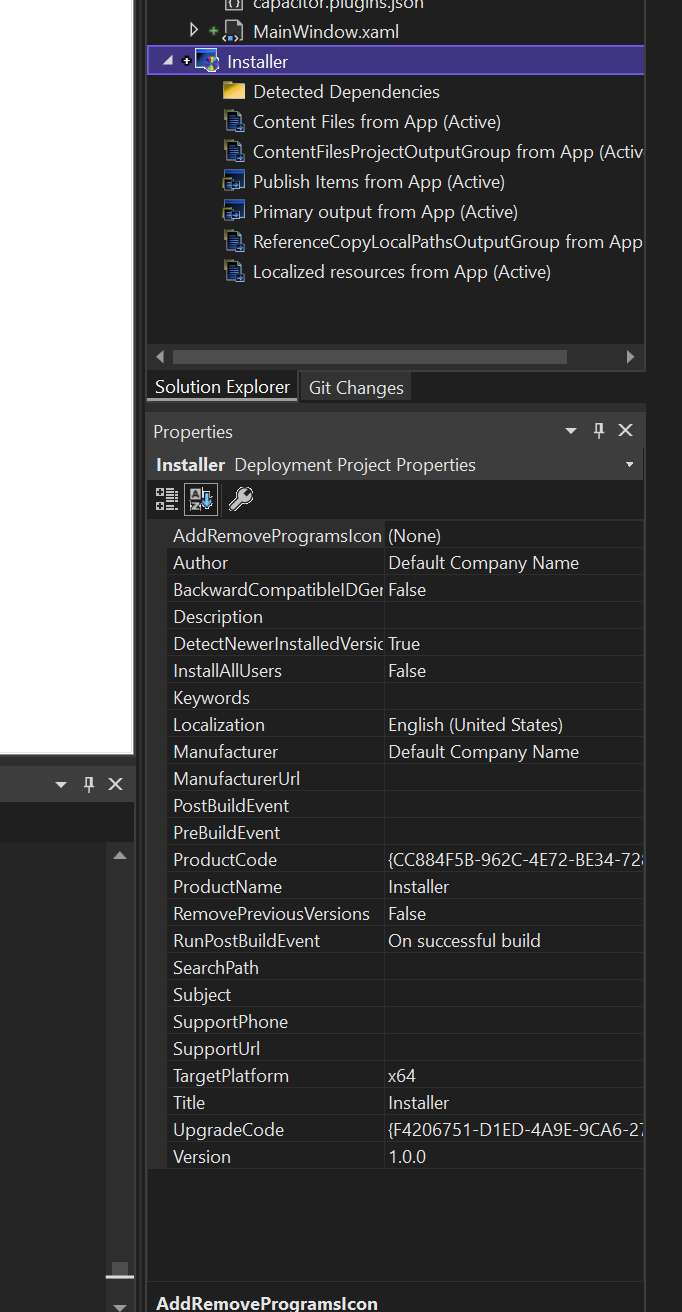
Additionally, make sure to set the TargetPlatform to x64.
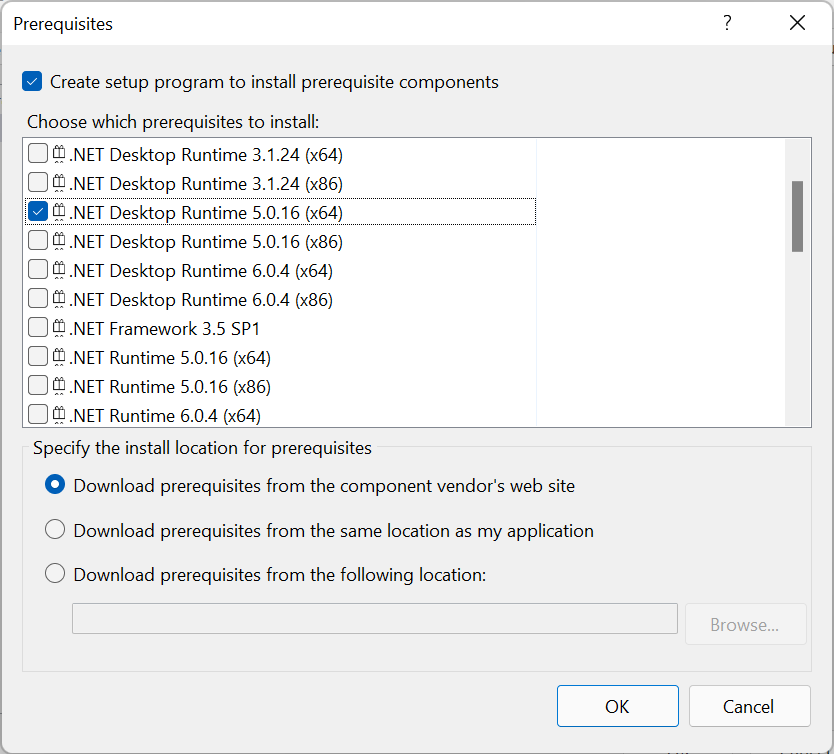
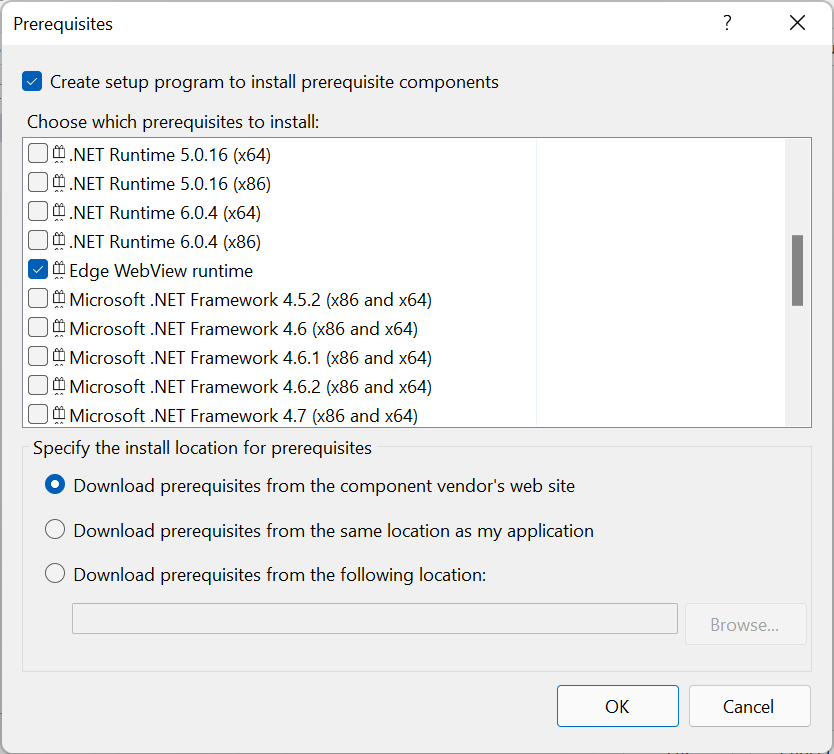
Prerequisites#
On install, we need to make sure the setup project installs any necessary runtime libraries, in this case .NET 5 and Edge WebView.
Right click on the project properties and then click the Prerequisites button:
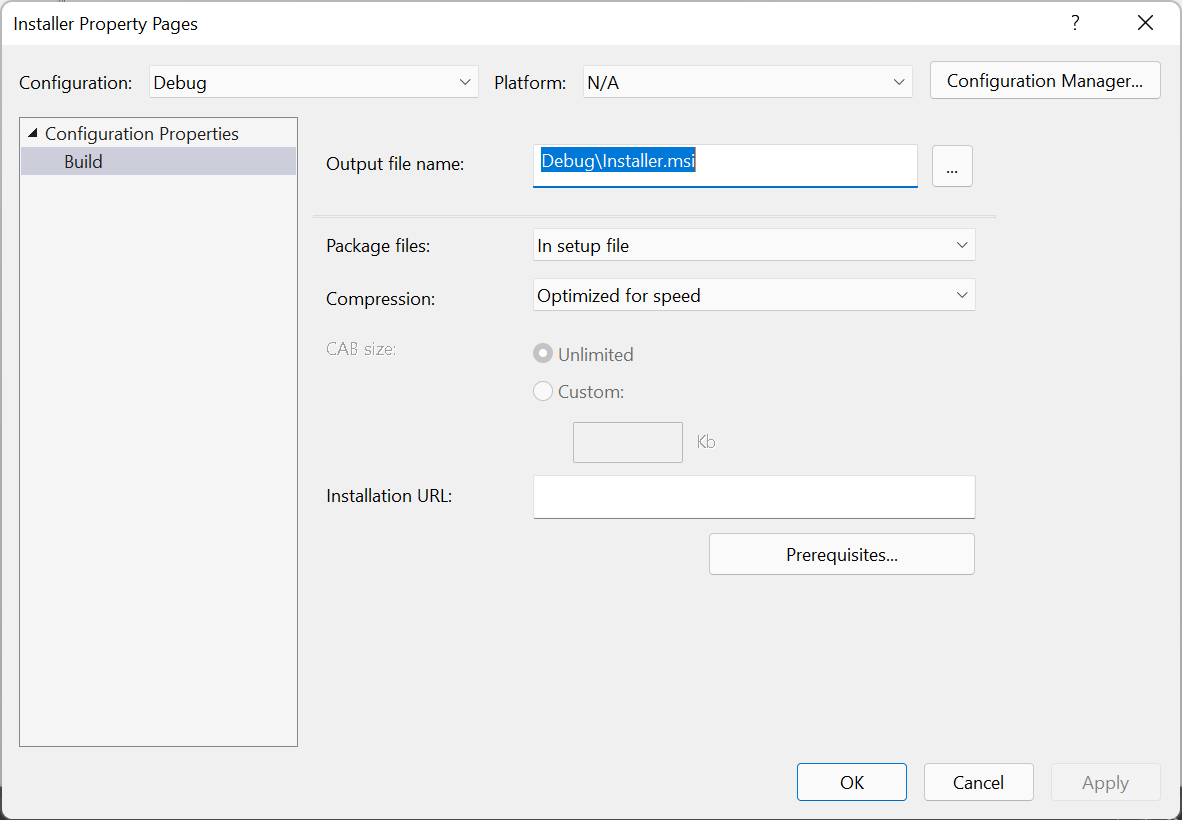
Then, choose a matching .NET Desktop runtime for your project (likely 5.x):
Next, find and check the Edge WebView Runtime entry:
Add Project Outputs#
Close the properties window and tight click on the Installer project and go to View -> Filesystem. Then, double click on Application Folder in the right pane:
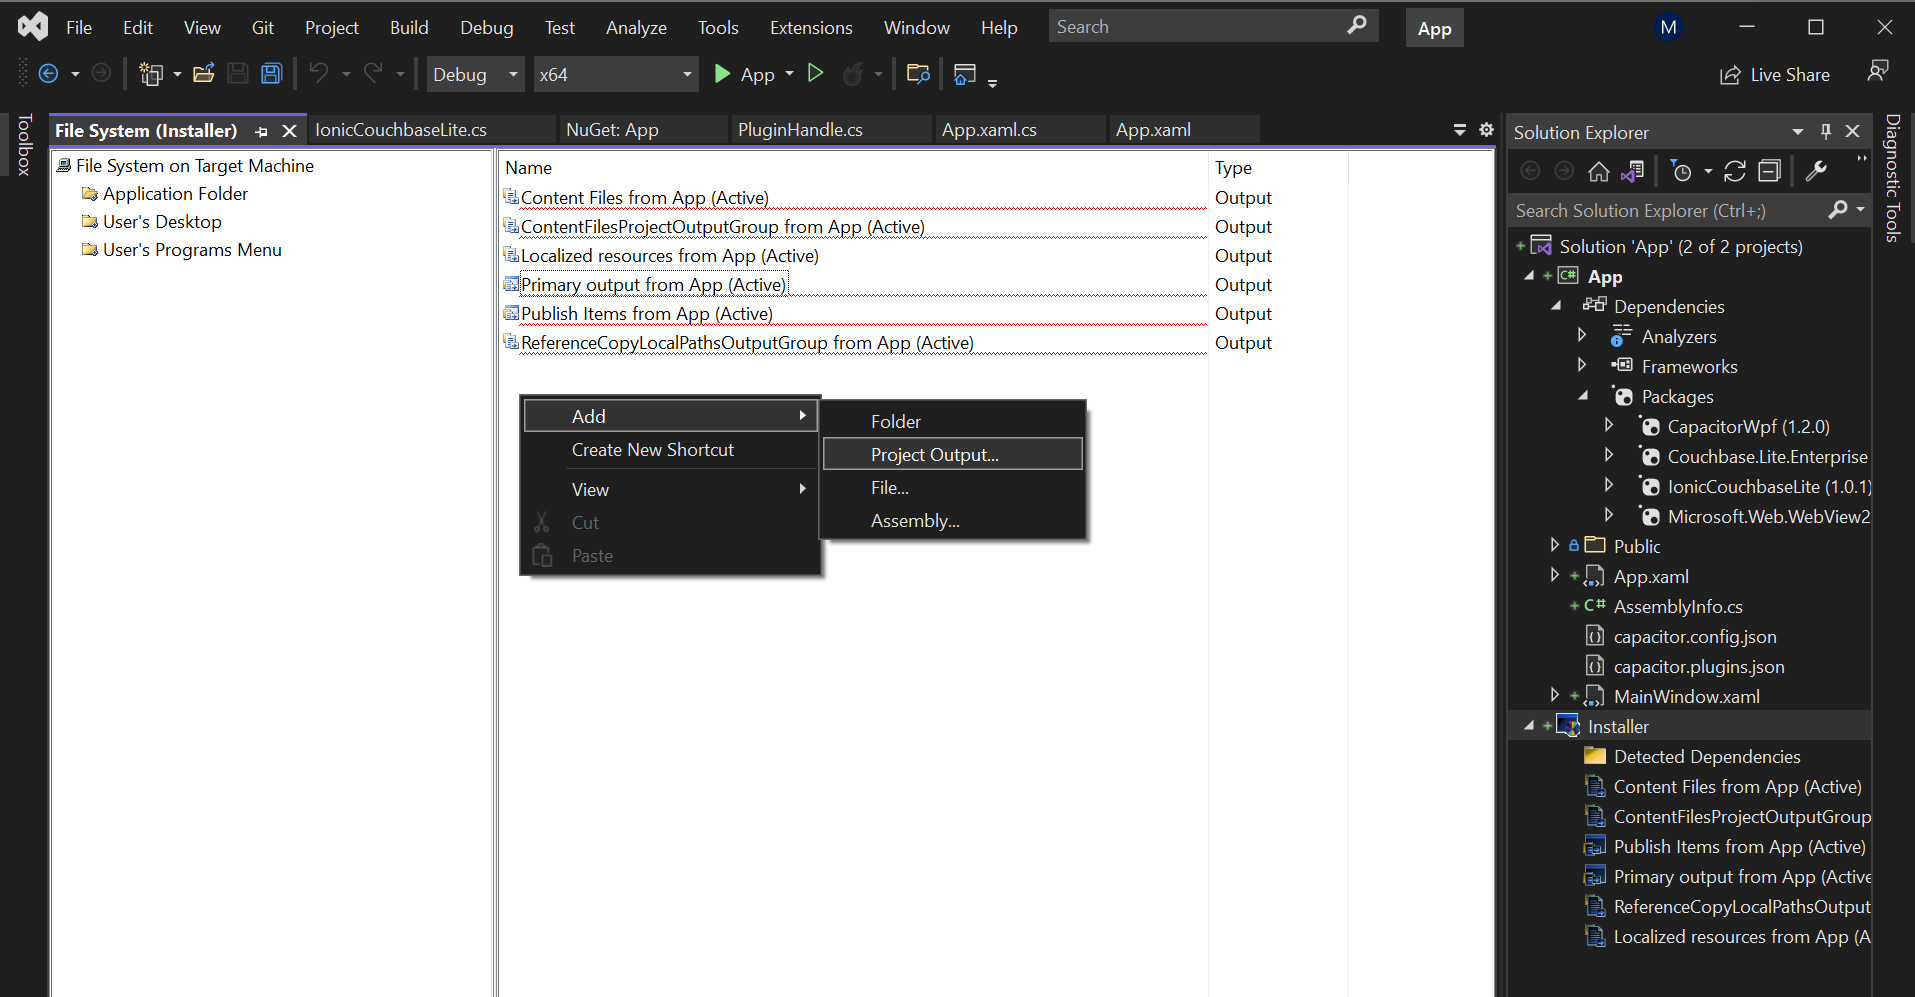
Then, right click in the main content area and go to Add -> Project Output, and select the following Project Output options. These will be:
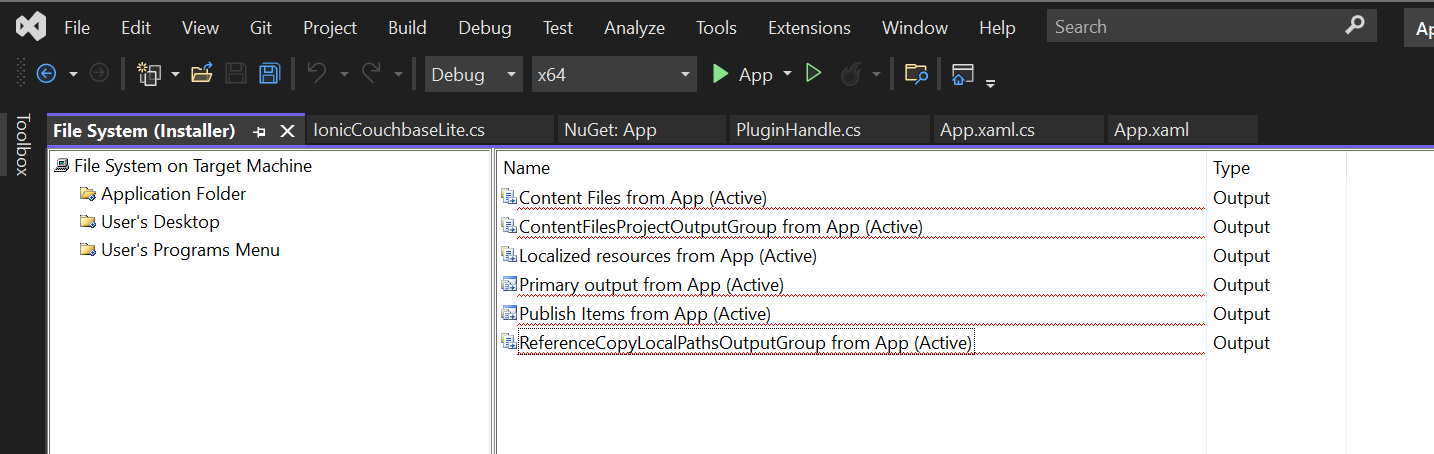
- Content Files
- ContentFilesProjectOutputGroup
- Localized resources
- Primary output
- Publish items
- ReferenceCopyLocalPathsOutputGroup
These ensure the appropriate files and dependencies are copied to the install output directory:
Build the Installer#
To build the installer, right click on the installer project and choose build. Find the installer by right-clicking on the Installer project and going to Open Folder in File Explorer, then find the installer in bin/Debug/x64 or bin/Release/x64. This installer can be distributed to users. See Advanced Topics below for code signing and other topics that are out of scope of this document.
UninstallHelper#
Unpackaged apps using WebView2 will create temporary files that must be removed on uninstall. To do this we need to create a custom console executable and assign it to run during uninstall.
To do this, first create a new Console Project (.NET) in the solution (Add -> New Project on the Solution), and call it UninstallHelper. Edit Program.cs inside of the new UninstallHelper and put this code in:
using System;using System.Diagnostics;using System.IO;
namespace UninstallHelper{    class Program    {        static void Main(string[] args)        {            // Get the base directory where the executable is located.            string baseDirectory = AppDomain.CurrentDomain.BaseDirectory;
            // Construct the full path to the batch script.            string scriptName = "uninstall.bat";            string scriptPath = Path.Combine(baseDirectory, scriptName);
// Start the batch script. ProcessStartInfo psi = new ProcessStartInfo(scriptPath) { RedirectStandardOutput = false, UseShellExecute = false, CreateNoWindow = true, }; Process process = new Process { StartInfo = psi }; process.Start(); process.WaitForExit(); } }}Important: build the project once to generate a UninstallHelper.exe file for the next step.
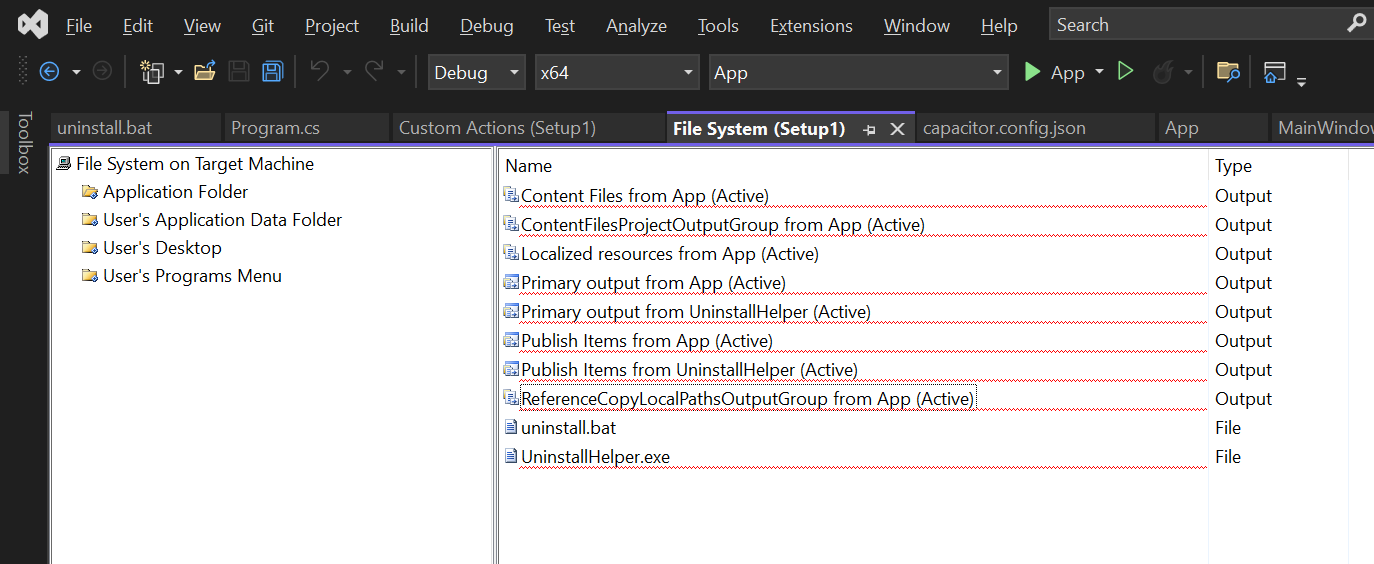
Next, create a new file inside of the App project called uninstall.bat and put this code in:
@echo offsetlocalset APP_NAME=YourAppNameset APP_USER_DATA_FOLDER=%AppData%\%APP_NAME%rmdir /s /q "%APP_USER_DATA_FOLDER%"endlocalThen, edit the Setup project's File System and, using the same process as we use in the installer instructions above, add four more items to it: the Publish Items and Primary output from UninstallHelper, and then select the uninstall.bat file and UninstallHelper.exe file. Your File System settings for the Setup project should look like this:
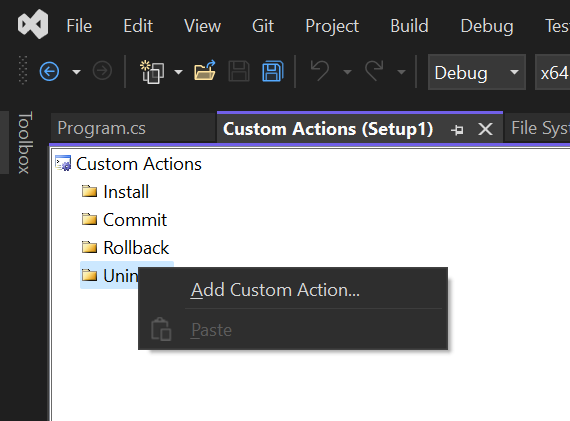
Finally, we need to assign a custom action to the Setup project to run our UninstallHelper.exe when the app is uninstalled. Right click on the Setup project and go to View->Custom Actions, then right click on Uninstall and choose Add Custom Action.... Then, double click on Application Folder and select UninstallHelper.exe:
This will ensure any files created by the project are cleaned up on uninstall.
Advanced Topics#
For more advanced topics, such as code signing, see the official extension documentation.