Setup App Tabs
~Insert Video of creatings tab pages~
When the app was generated using the VSCode extension and the tabs starter template, a few default tabs were created. This came with some default routing configuration as well. In our app, we are going to have a Home Page, Search Page, and Account Page. Now, we can either rename what we already have. Or, we can create new pages, update the tabs routing, and delete what we don't need from the default setup.
Create New Tabs#
In this example, let's create the new pages and update the default setup. To start we will issue a few commands to get the new pages generated:
ionic g page pages/homeionic g page pages/searchionic g page pages/accountWe can then update the app-routing.module.ts file routes array:
...const routes: Routes = [ { path: 'tabs', loadChildren: () => import('./tabs/tabs.module').then((m) => m.TabsPageModule), }, { path: 'login', loadChildren: () => import('./pages/login/login.module').then((m) => m.LoginPageModule), }, { path: '', redirectTo: 'tabs', pathMatch: 'full' },];...The above change sets us up nicely to eventually put a routing guard within the tabs path. Also, it ensures that when we already have a user logged in, we go directly to the first tab rather than going to the /login path, only to be redirected.
The updates to the tabs-routing.module.ts file routes array will look as follows:
...const routes: Routes = [ { path: '', component: TabsPage, children: [ { path: 'home', loadChildren: () => import('../pages/home/home.module').then((m) => m.HomePageModule), }, { path: 'search', loadChildren: () => import('../pages/search/search.module').then( (m) => m.SearchPageModule ), }, { path: 'account', loadChildren: () => import('../pages/account/account.module').then( (m) => m.AccountPageModule ), }, { path: '', redirectTo: '/tabs/home', pathMatch: 'full', }, ], },];...Finally, we can update the html for the tabs to match these changes:
<ion-tabs>  <ion-tab-bar slot="bottom">    <ion-tab-button tab="home">      <ion-icon name="home"></ion-icon>      <ion-label>Home</ion-label>    </ion-tab-button>
    <ion-tab-button tab="search">      <ion-icon name="search"></ion-icon>      <ion-label>Search</ion-label>    </ion-tab-button>
<ion-tab-button tab="account"> <ion-icon name="person"></ion-icon> <ion-label>Account</ion-label> </ion-tab-button> </ion-tab-bar></ion-tabs>With those changes made, the default tab folders/files that were generated in the beginning can be deleted.
Configure Account Page#
The AccountPage is what will show the logged in user's information, as well as house the ability to log out. We can quickly add some logic to initialize the user object via the AuthenticationService:
import { Component, OnInit } from '@angular/core';import { AuthenticationService } from 'src/app/services/authentication.service';
@Component({  selector: 'app-account',  templateUrl: './account.page.html',  styleUrls: ['./account.page.scss'],})export class AccountPage implements OnInit {  public user: any;
  constructor(private authService: AuthenticationService) {}
async ngOnInit() { this.user = await this.authService.getIdToken(); }}The user, on initialization of the AccountPage, will be populated with the details supplied through the getIdToken() function inherited in the AuthenticationService via the IonicAuth class.
The user object will look something similar to the following:
{ "nickname": "user", "name": "Ion Enterprise", "picture": "https://s.gravatar.com/avatar/909f40778b1e201d1c1a7b1a5bf6f8b9?s=480&r=pg&d=https%3A%2F%2Fcdn.auth0.com%2Favatars%2Fus.png", "updated_at": "2022-05-04T14:13:39.987Z", "email": "user@enterprise.com", "email_verified": false, ...}Rounding out the AccountPage logic, a logout() function can be added. This ultimately pushes the user back to the LoginPage upon click of a button:
async logout() { await this.authService.logout();}Update Authentication Service#
With the AccountPage logic updated, the AuthenticationService needs to be amended:
...import { Router } from '@angular/router';
...export class AuthenticationService extends IonicAuth {  constructor(private router: Router) {    super(Capacitor.isNativePlatform() ? nativeAuthOptions : webAuthOptions);  }
  ...
async onLogout() { return await this.router.navigate(['login']); }}With the onLogout() function in place, we now have the ability to handle what should occur once the user has logged-out from Auth0.
Account Page Layout#
Now, we will jump into the newly created AccountPage and quickly churn up a layout, with some minor styling, that will accommodate our needs:
<ion-header>  <ion-toolbar>    <ion-title>Account</ion-title>    <ion-buttons collapse="true" slot="end" (click)="authService.logout()">      <ion-button color="primary">        <ion-icon slot="icon-only" name="log-out"></ion-icon>      </ion-button>    </ion-buttons>  </ion-toolbar></ion-header>
<ion-content [fullscreen]="true">  <ion-header collapse="condense">    <ion-toolbar>      <ion-title size="large">Account</ion-title>      <ion-buttons slot="end" (click)="authService.logout()">        <ion-button color="primary">          <ion-icon slot="icon-only" name="log-out"></ion-icon>        </ion-button>      </ion-buttons>    </ion-toolbar>  </ion-header>
<ion-card *ngIf="user" class="ion-text-center"> <ion-card-header> <ion-avatar> <img src="{{ user.picture }}" /> </ion-avatar> </ion-card-header> <ion-card-content> <ion-card-title>{{ user.name}}</ion-card-title> <ion-card-subtitle>{{ user.email }}</ion-card-subtitle> </ion-card-content> </ion-card></ion-content>ion-card { margin-left: auto; margin-right: auto; max-width: 600px;}
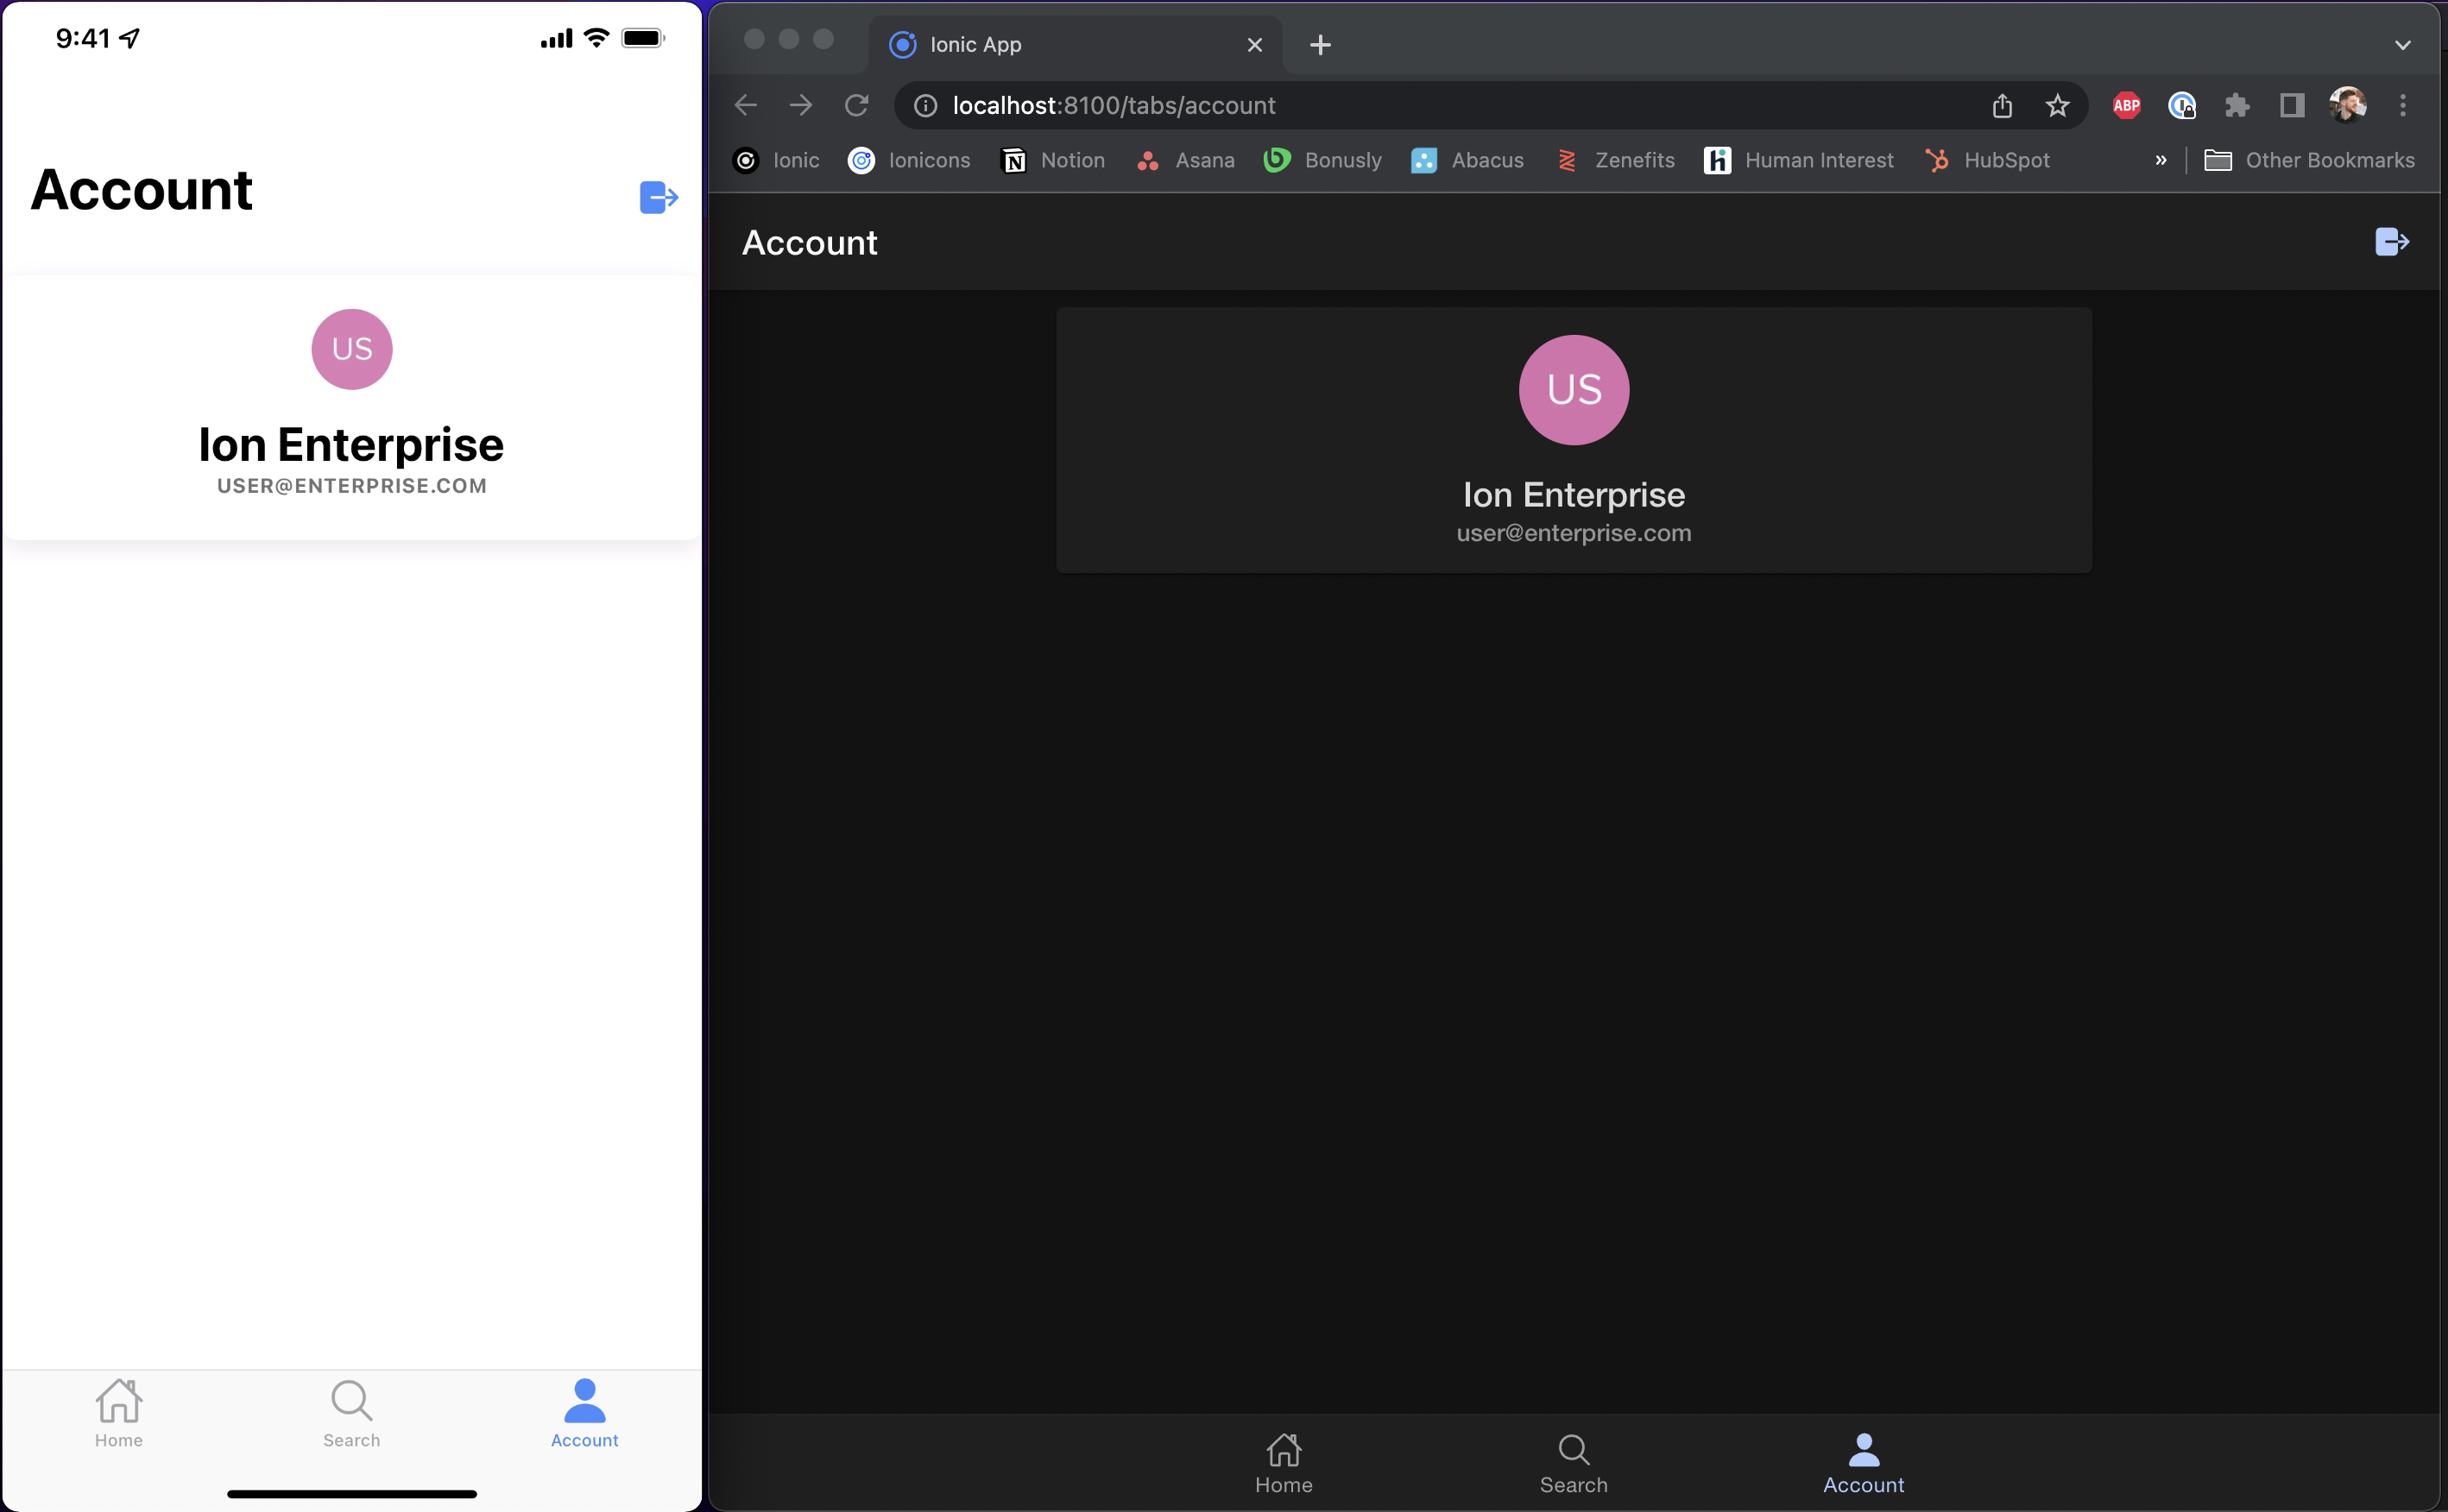
ion-avatar { margin: auto;}With the user object populated on initialization of the AccountPage, we will be able to see logged-in user's info as well as have a functional button to have them log out:

Next up#
Given the current implementation of the LoginPage and AccountPage within our main tabs, we can now look to create a guard around the main app. Let's make the first of the security improvements!