Native Builds
In this step, we'll create a debug Android build. This is the easiest option to get started with native builds, since unlike iOS, a signing certificate is not required.
Check out this branch from this tutorial's companion app to compare your starter project.
Build starter app
You must build your Ionic project at least once before adding any native platforms. To build the web assets of your starter app use the command below:
ionic build
This creates the www folder that Capacitor has been automatically configured to use as the webDir in capacitor.config.json. Learn more about building your Ionic app here.
Package for Native
To package your starter app for Android native using Capacitor, use the command to add the Android platform:
npm install @capacitor/android
npx cap add android
This creates an android/ directory in the root of the project.
Capacitor projects include the native platform as a source artifact. These are entirely separate native project artifacts that should be considered part of your Ionic app (i.e., check them into source control, edit them in their own IDEs, etc.).
Learn more about adding platforms here.
Building a Native Binary using Appflow
Make sure you commit your project with the latest changes to your git repository so that Appflow can access them.
You can build a variety of native build types on Appflow. Refer the docs to learn more.
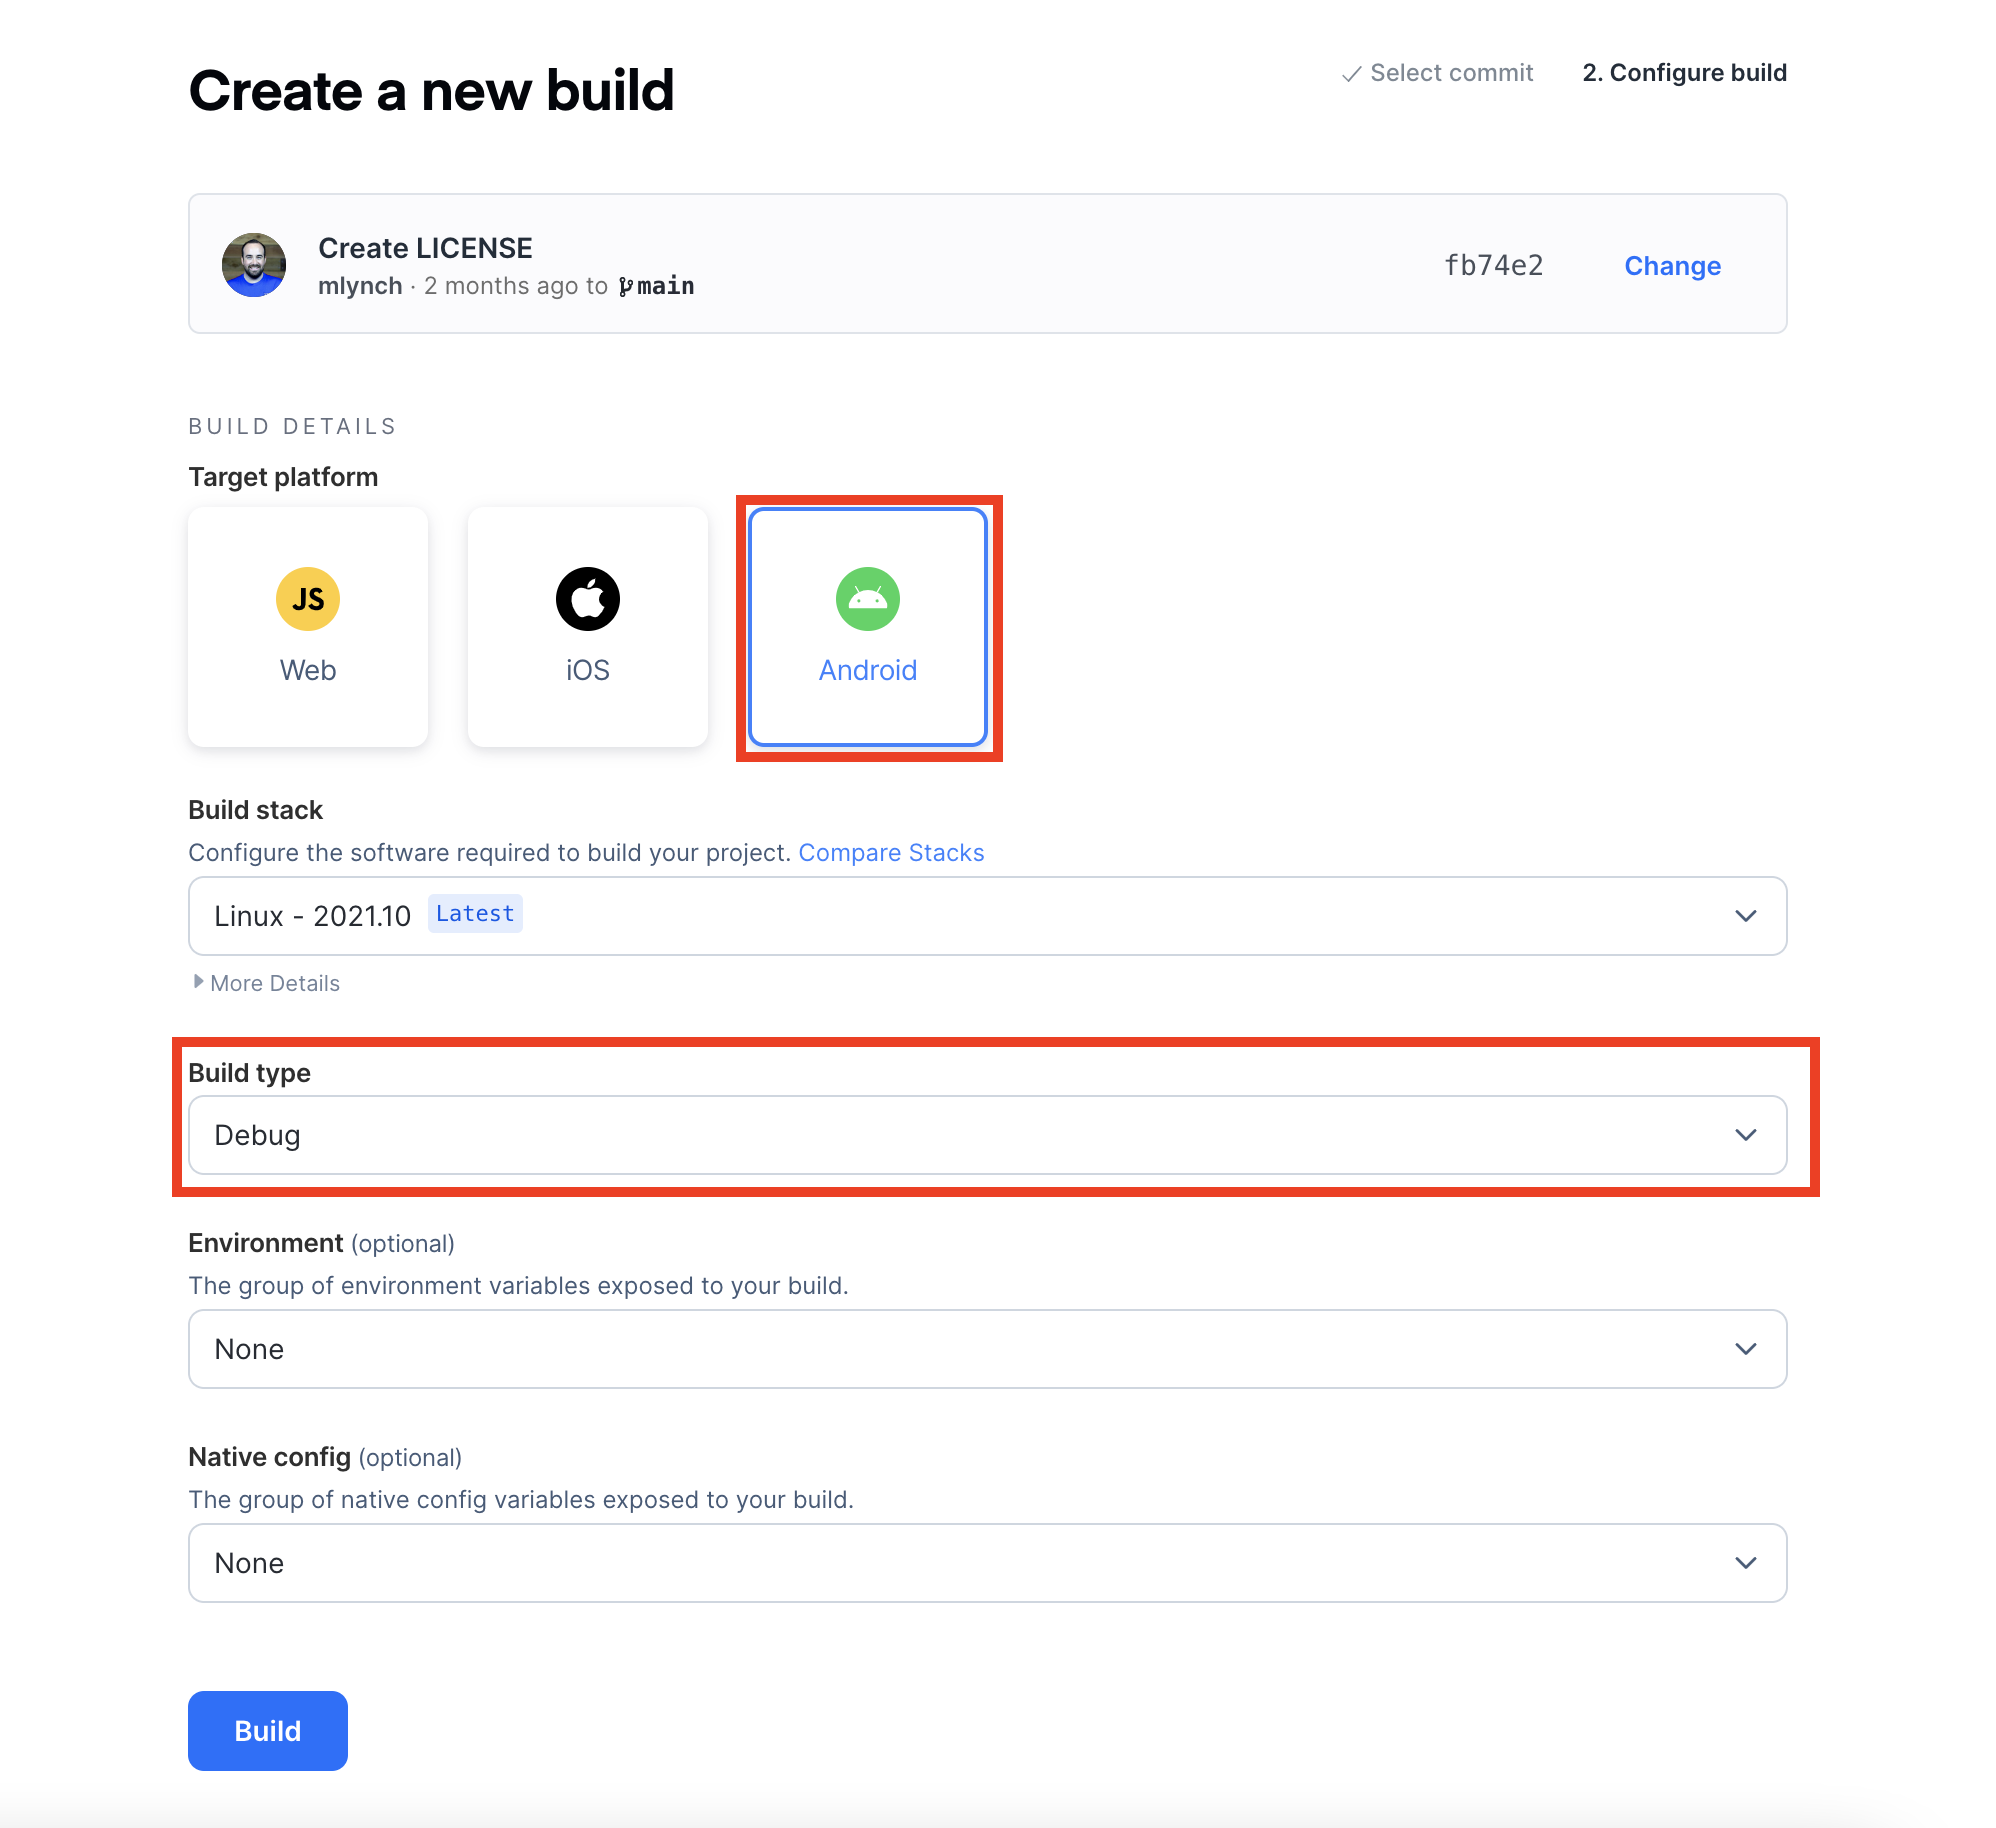
Trigger a web build from the most recent commit.
- Select Android as the target platform.
- Select Debug as the build type.
- Select the
latestbuild stack (learn more about build stacks here). - Click Build.
Once the build starts, you should be able to see the logs from the build instance.
Download the Starter App
After your build has completed, you can download the .apk or .aab file then load it onto your device/simulator of choice to see how it works.
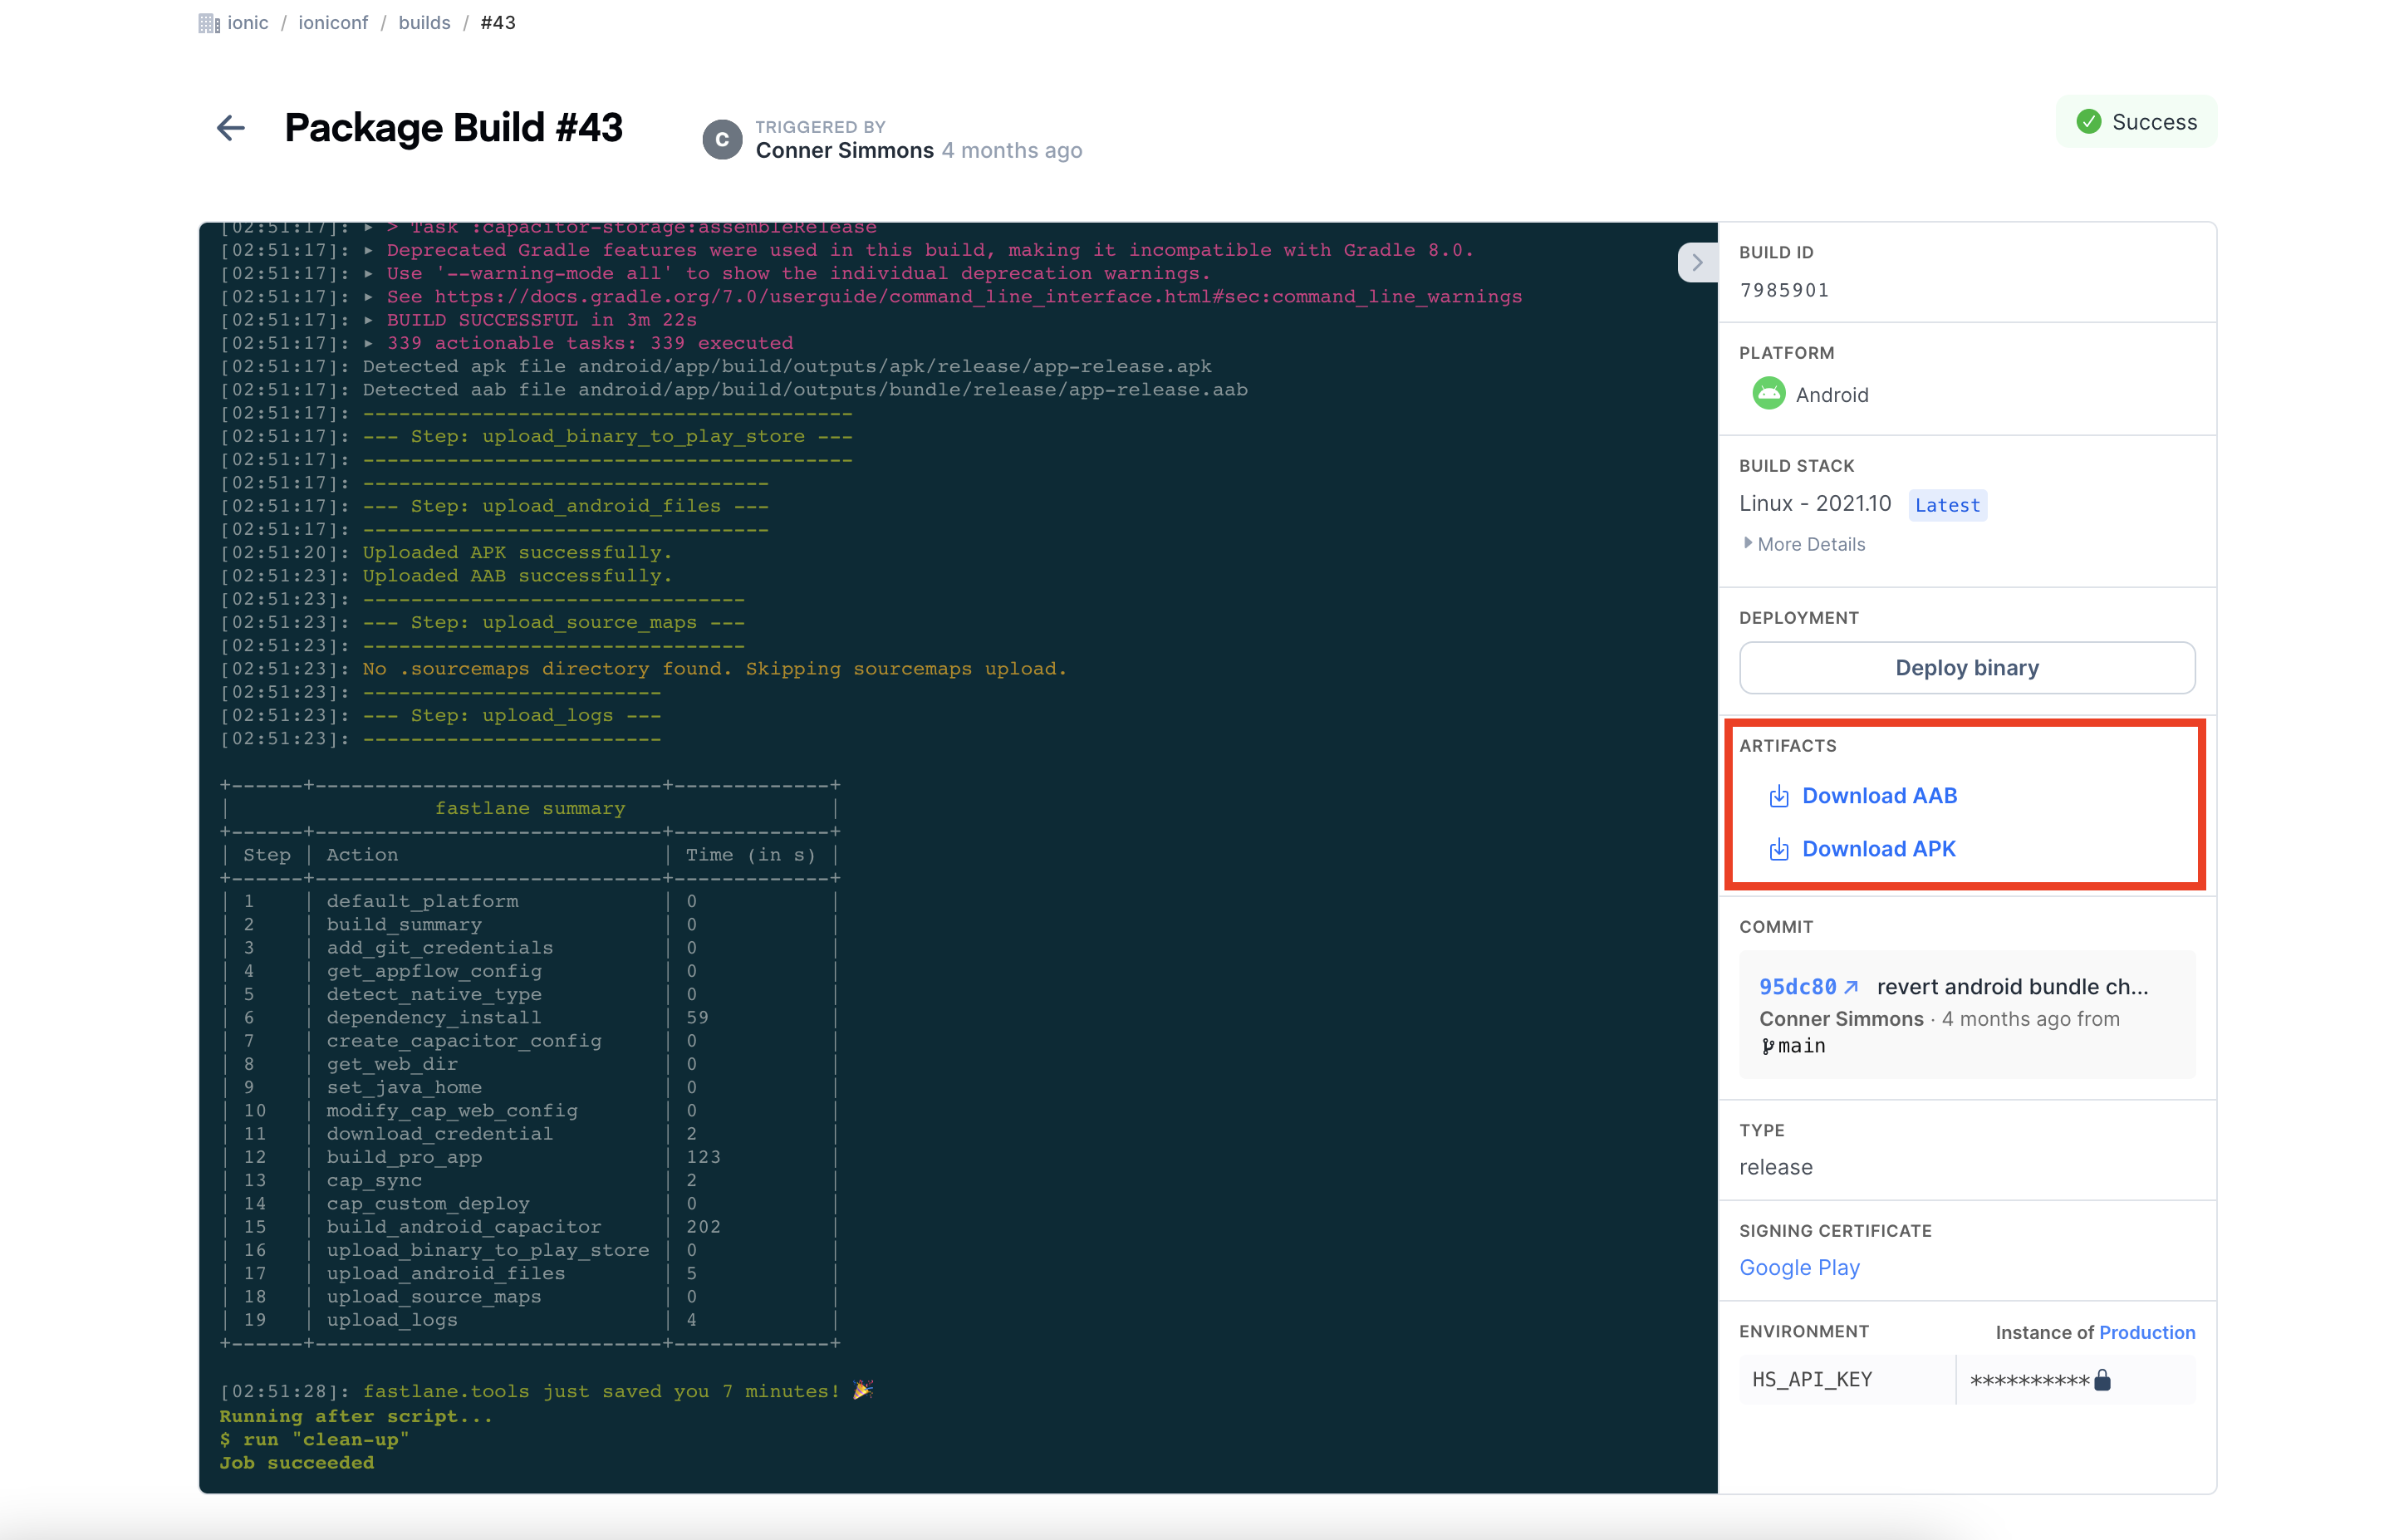
To download the build artifact, click on the above highlighted build artifact link and your download starts.
You can also install the .apk file on your simulator or device with development mode on.