Project Creation and Git
This tutorial uses Ionic Angular as the app framework/UI components and Capacitor as the native runtime. However, we will focus on Appflow's mobile CI/CD features rather than the development of the app itself, so you can follow along with any web framework (React, Vue, or Angular) or native runtime (Cordova or Capacitor).
In this first step, you'll install the tooling required to use Appflow, create an Ionic app, and integrate your project with an Appflow app.
Check out this branch from this tutorial's companion app to compare with your starter project. If you run into any issues or need help understanding any of these concepts, please contact Ionic Support.
Required Ionic Tooling
In order to use an Ionic app in Appflow, you'll need to install a few tools and create an Ionic app first.
System requirements:
- Node.js for interacting with the Ionic ecosystem. Download the LTS version here or install using nvm.
- Command-line interface/terminal (CLI):
- Windows users: For the best Ionic experience, we recommend the built-in command line (cmd) or the Powershell CLI, running in Administrator mode.
- Mac/Linux users, virtually any terminal will work.
Install Ionic CLI:
- Run the following command in your terminal to install the Ionic CLI (
ionic),native-run, which is used to run native binaries on devices and simulators/emulators, and@capacitor/assets, used to generate native app icons and splash screens:
npm install -g @ionic/cli native-run @capacitor/assets
The -g option means install globally. When packages are installed globally, EACCES permission errors can occur. Consider setting up npm to operate globally without elevated permissions. See Resolving Permission Errors for more information.
Create a new Ionic app
From the terminal, run the following command to create an Ionic Angular app named "starter_app" that uses the "blank" starter template:
ionic start starter_app blank --type=angular
When prompted, select the NgModules project type. Your project will automatically be integrated with Capacitor.
Alternatively, to create a new Ionic app that integrates with Cordova instead, use the commands below. More information on getting started with Cordova is here.
Ionic strongly recommends using Capacitor for the best Appflow experience. To learn more about these platforms, review the Capacitor vs Cordova article.
ionic start --cordova starter_app blank --type=angular
ionic integration add cordova
Create a Git repository
Next, head over to your git provider of choice and create a new repository (ex: starter_app) for this project.
Once you have your repository ready, it's time to push your local project to Git.
git add .   # stage all changes
git commit -m "initial commit"   # commit staged changes
git push origin main   # push changes from the main branch to the git host
Git Permissions
- To integrate Appflow with your git provider, you must log in to your git provider of choice as a user that meets the following requirements:
- Has full read, write, and admin privileges on any repositories you'd like to connect with Appflow.
- Has the ability to create a webhook in all repositories you'd like to connect with Appflow.
App creation and Git integration
Appflow works directly with git version control, using your codebase as the source of truth for Live Updates and native builds. In order for Appflow to access your code, you can choose one of these hosting services: GitHub, Bitbucket, Bitbucket Server, GitLab, GitLab Self-Managed or Azure DevOps.
Bitbucket Server, GitLab Self-Managed, and Azure DevOps integrations are only available on our Standard or Enterprise plans.
App creation
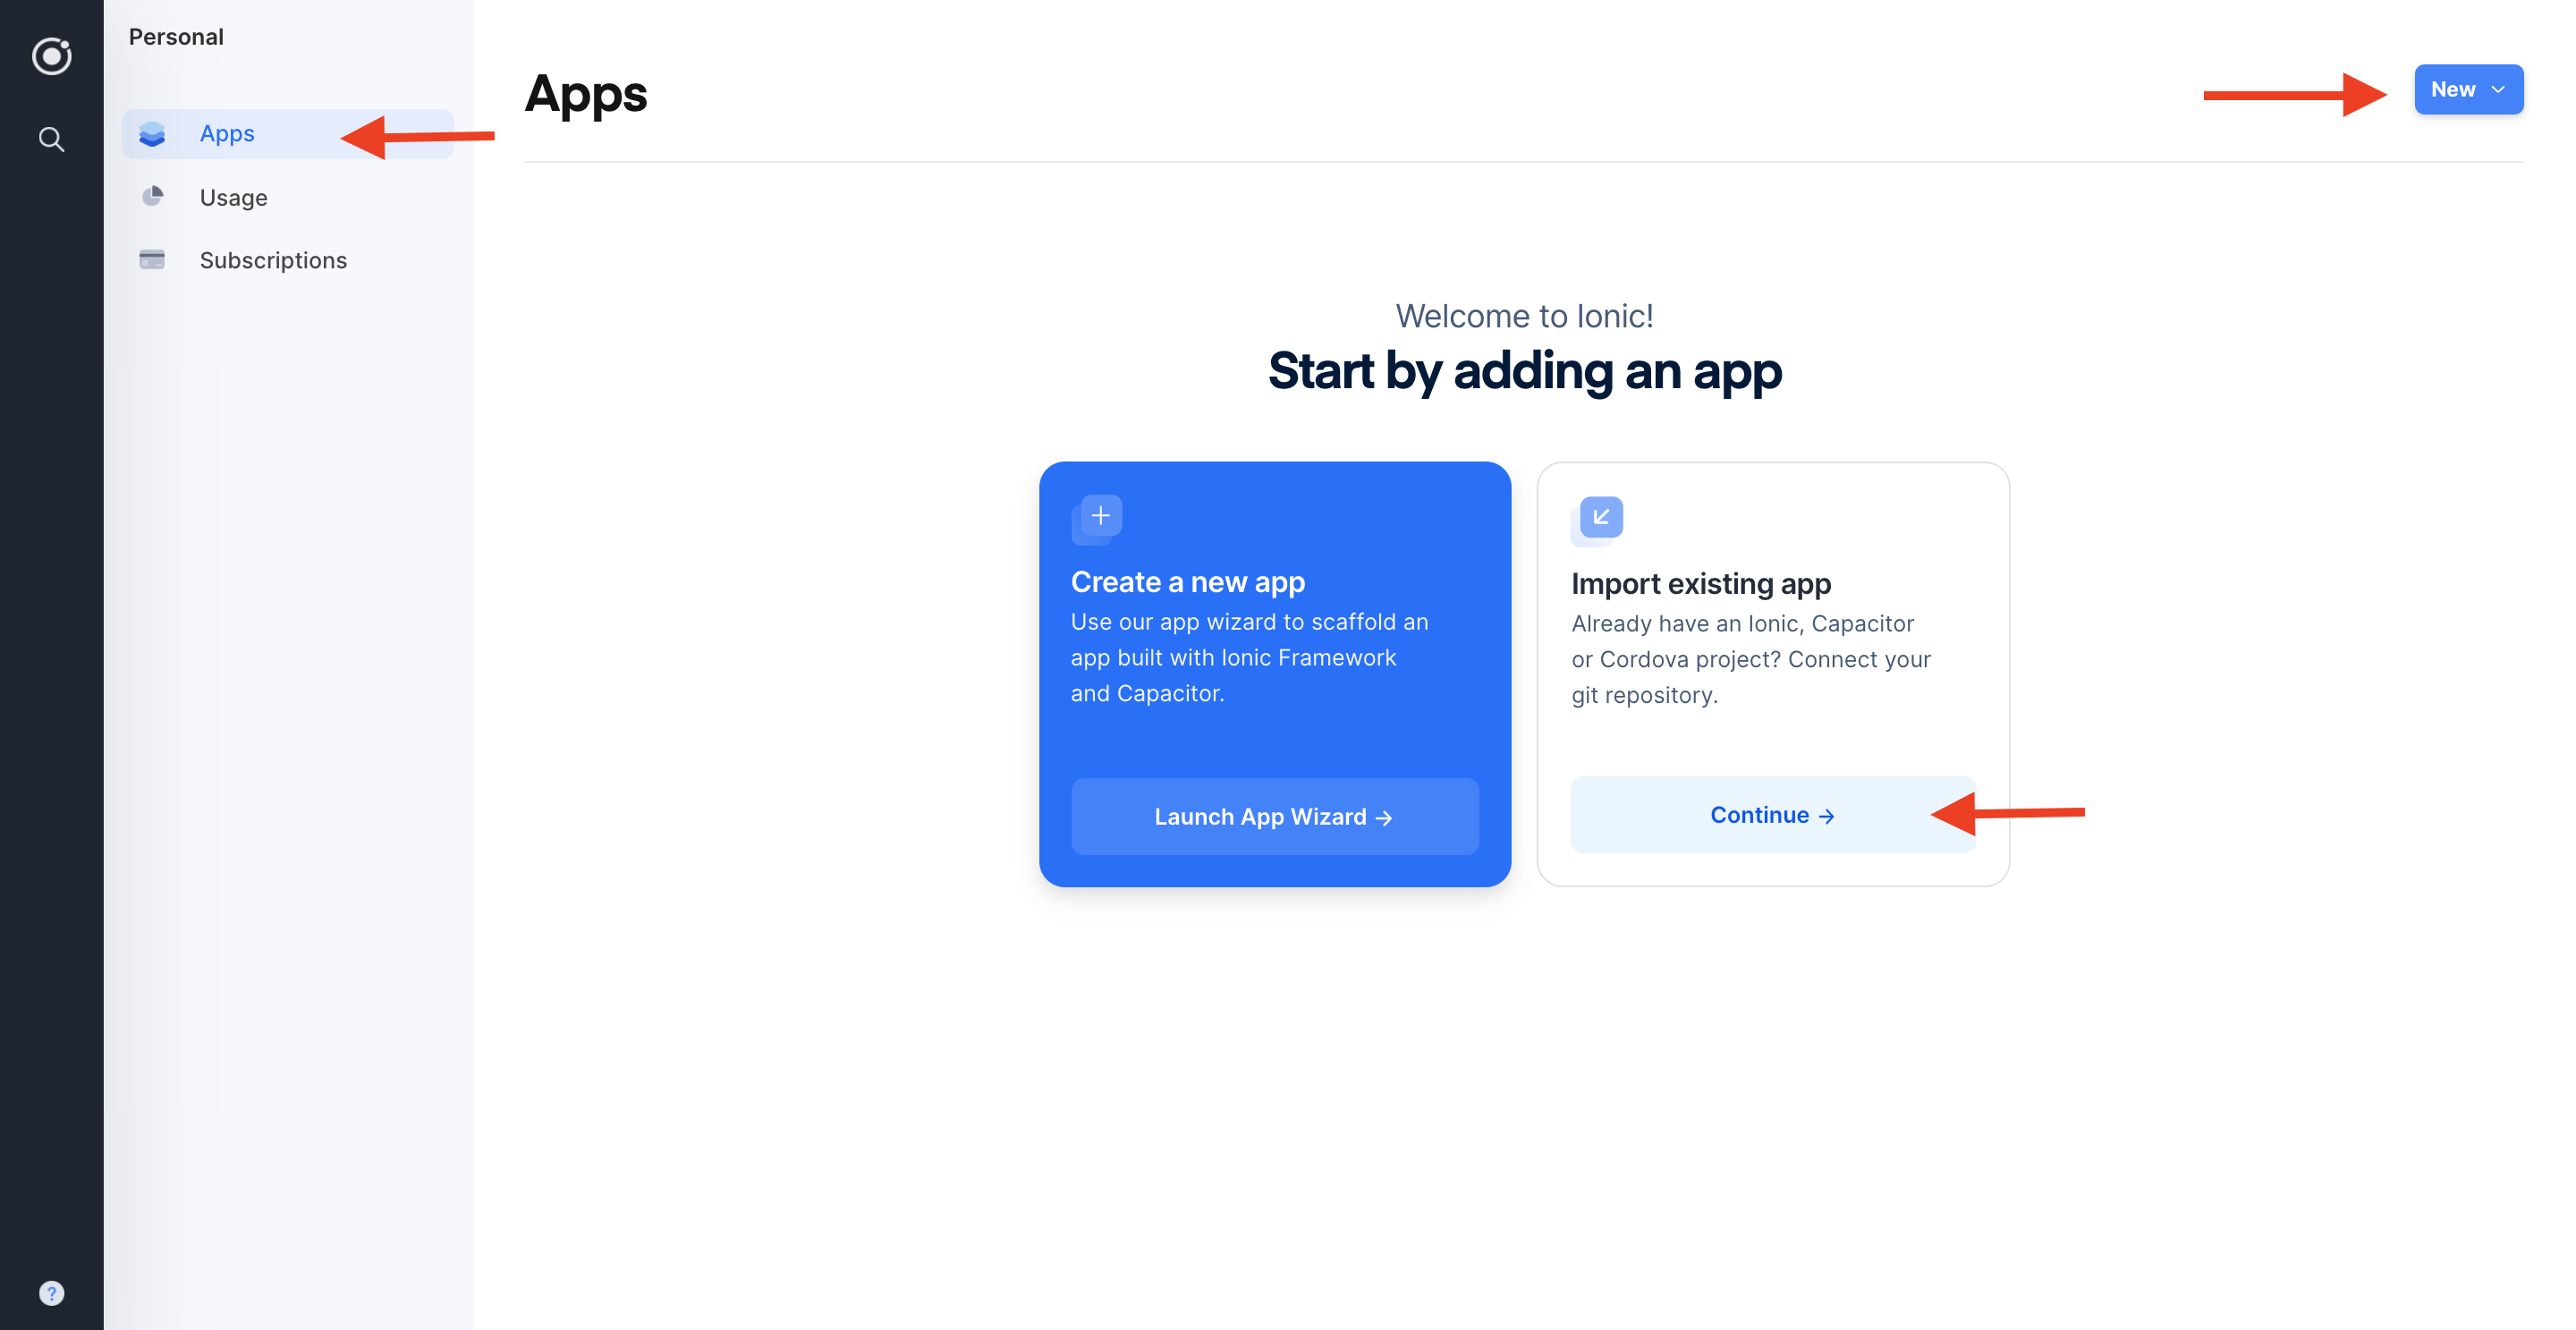
Log into the Appflow Dashboard using your credentials and you can see options to:
- Create a new app (using App Wizard)
- Import an existing app (from an existing Git repository)
For this tutorial, we will import our app that we already pushed to our Git.
Importing an existing app
Select the Import existing app option and continue.
Import your existing starter app into Appflow by giving it a name, mobile architecture, then choose your choice of Git provider.
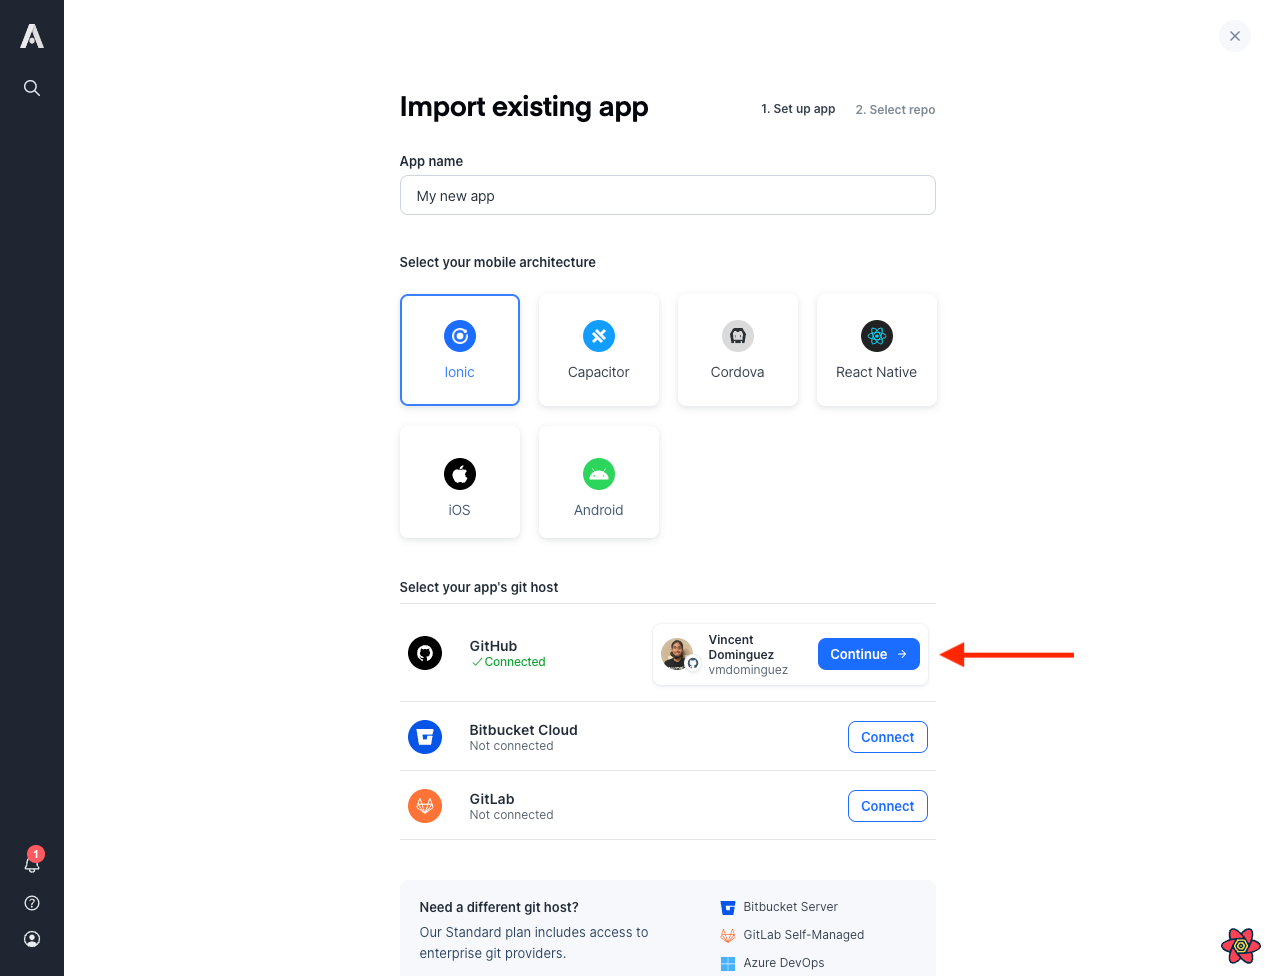
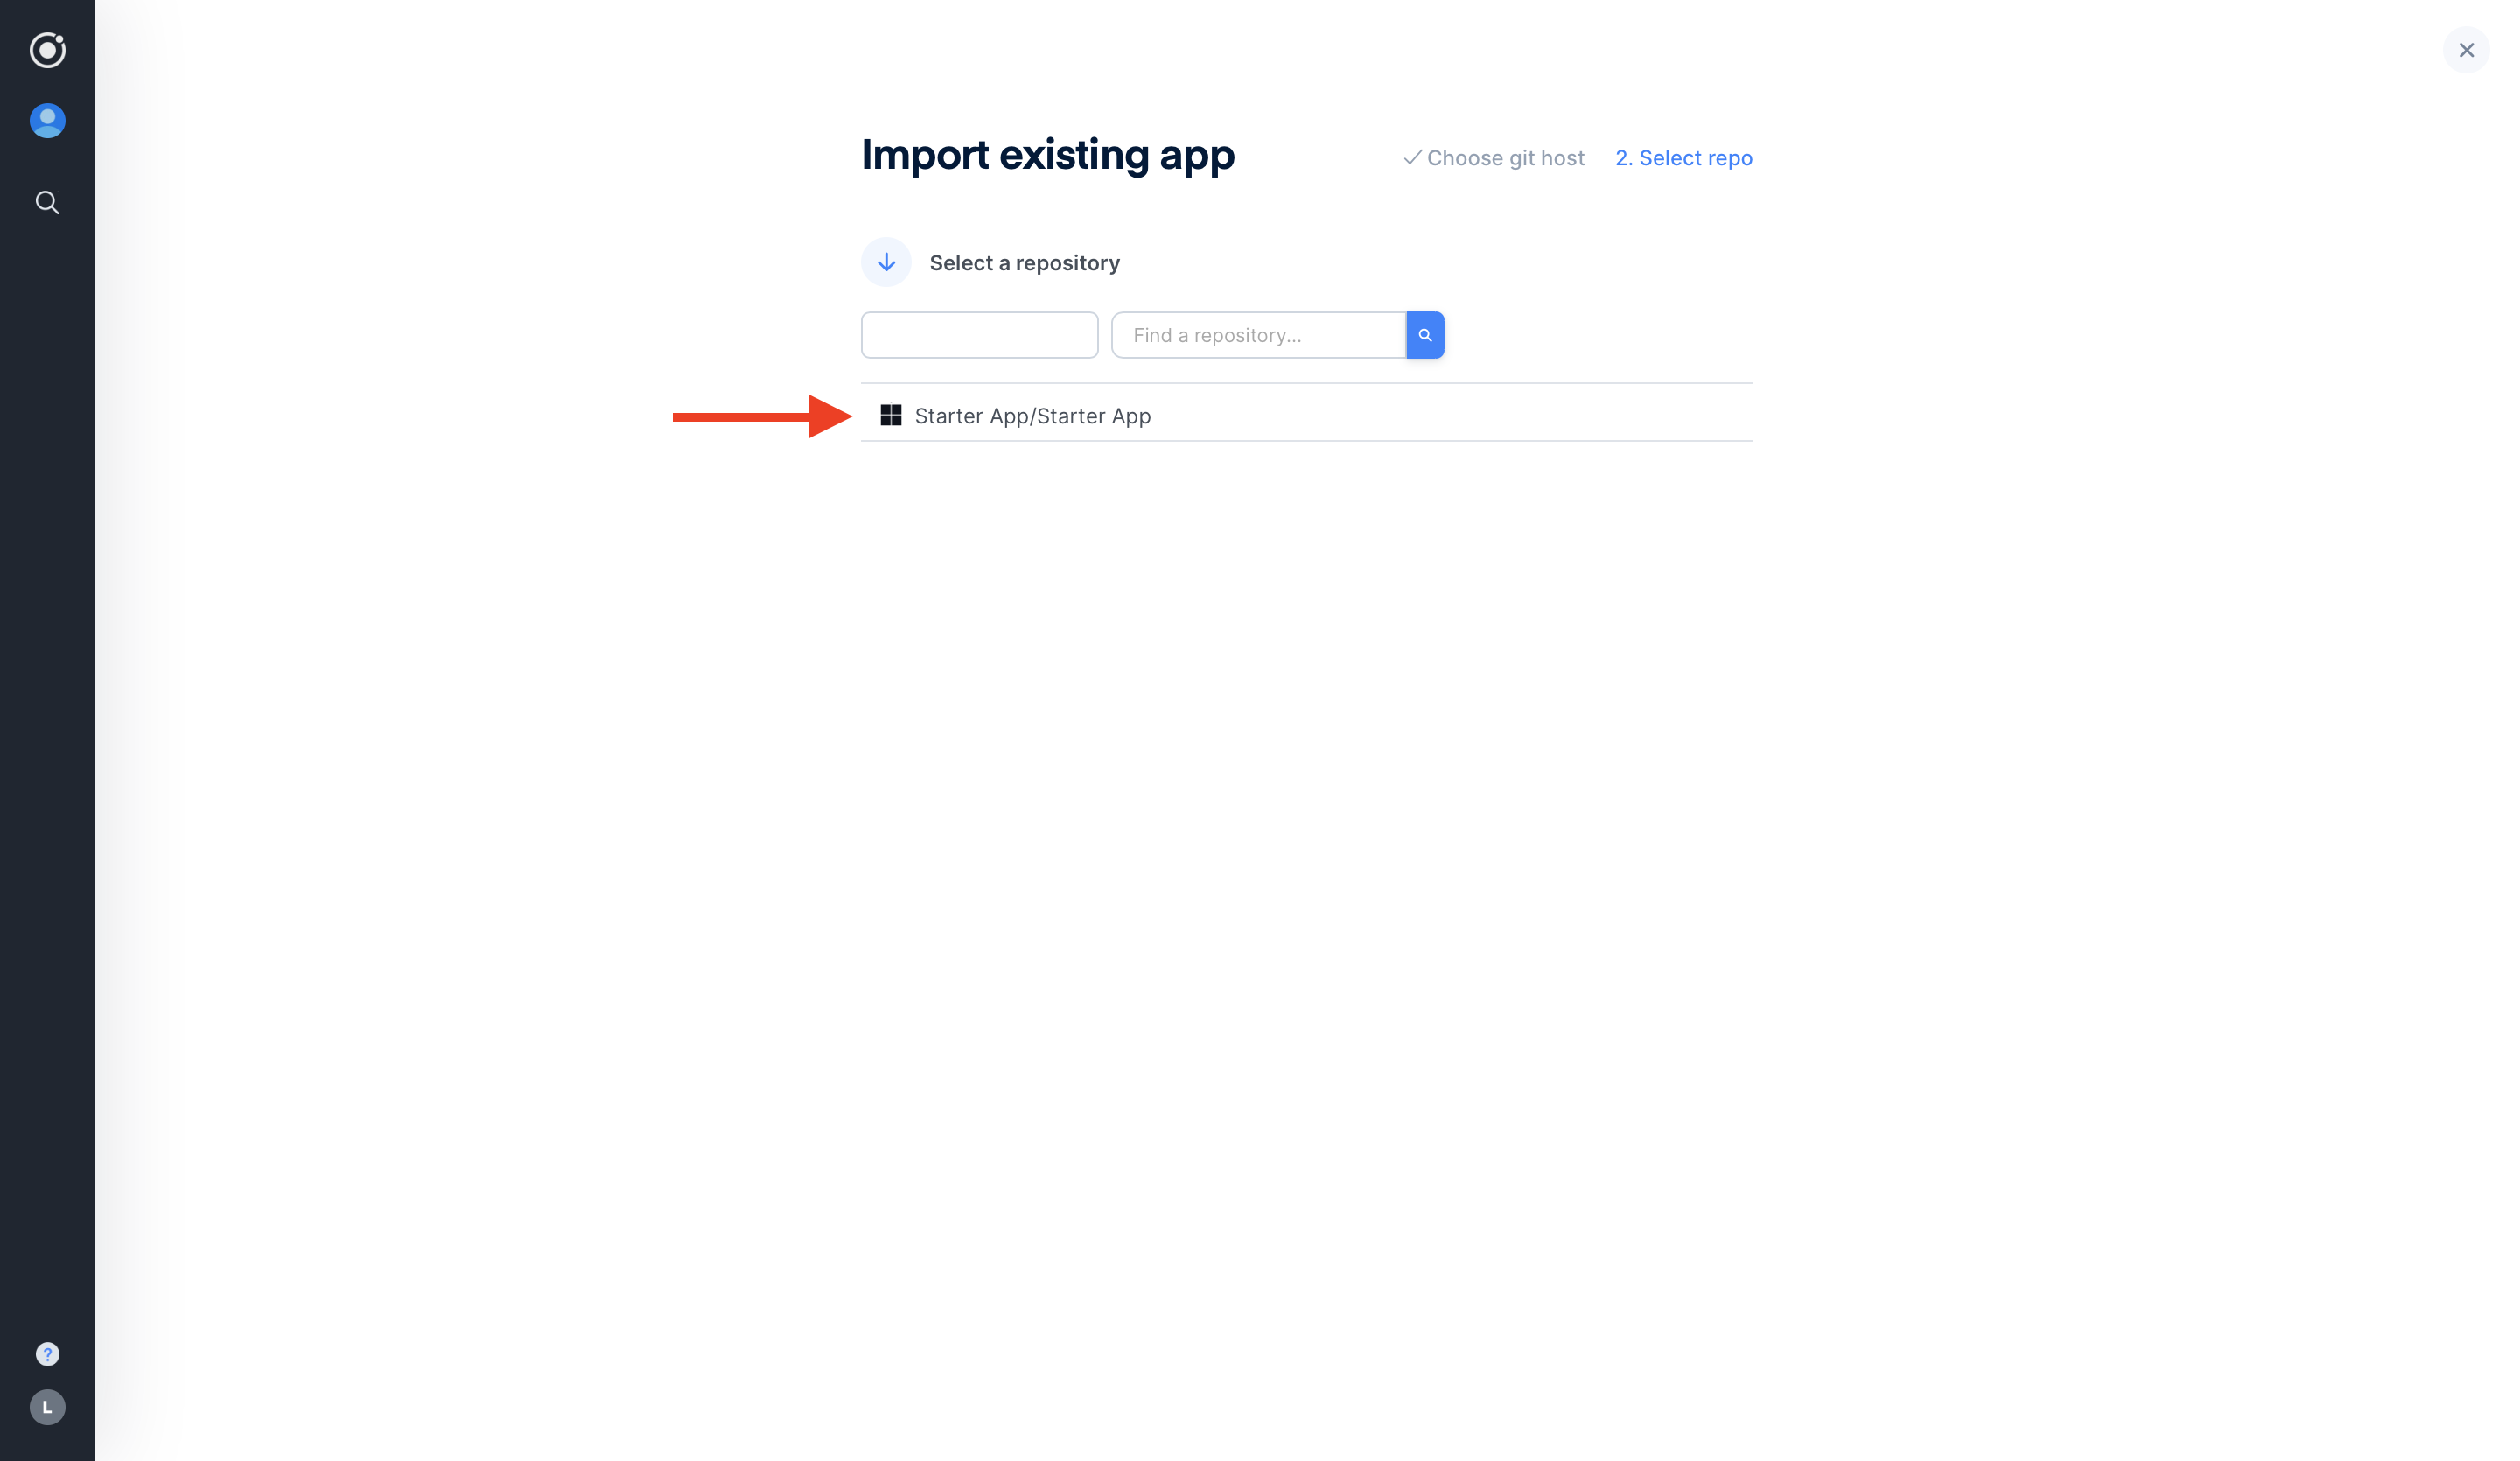
Once you successfully integrate your Git Provider with appflow, all the repositories available to the integrating users are listed.
Select the repository that you would like to use for this particular app in Appflow (ex:starter_app repository).
That's it! You're ready to start enabling some cool Appflow features.