Native Builds With Signing Certificates
Now that's we've learned how to build a native Android app on Appflow, let's do the same for iOS apps. Building for iOS involves a handful of extra steps, including generating App Store certificates and Provisioning Profiles.
Check out this branch from this tutorial's companion app to compare with your starter project.
Adding the iOS platform
Adding the iOS platform to your app is similar to Android. You can add the iOS platform using the following commands:
npm install @capacitor/ios
npx cap add ios
A native iOS project is created in the root of your project folder.
Generating App Store Certificate and Provisioning Profile
iOS builds require generating signing credentials and a provisioning profile. Code Signing with a development-type build allows your app to run on a device through Xcode. To create a signing certificate on Appflow, you'll need:
- iOS development provisioning profile
- iOS development signing certificate
You'll also need an Apple Developer account (Individual or Organization). See this article for details on the membership types.
Once you have an Apple developer account, follow the guide for generating iOS certificates.
Then, with a certificate and provisioning profile created, you can set up a new signing certificate in Appflow.
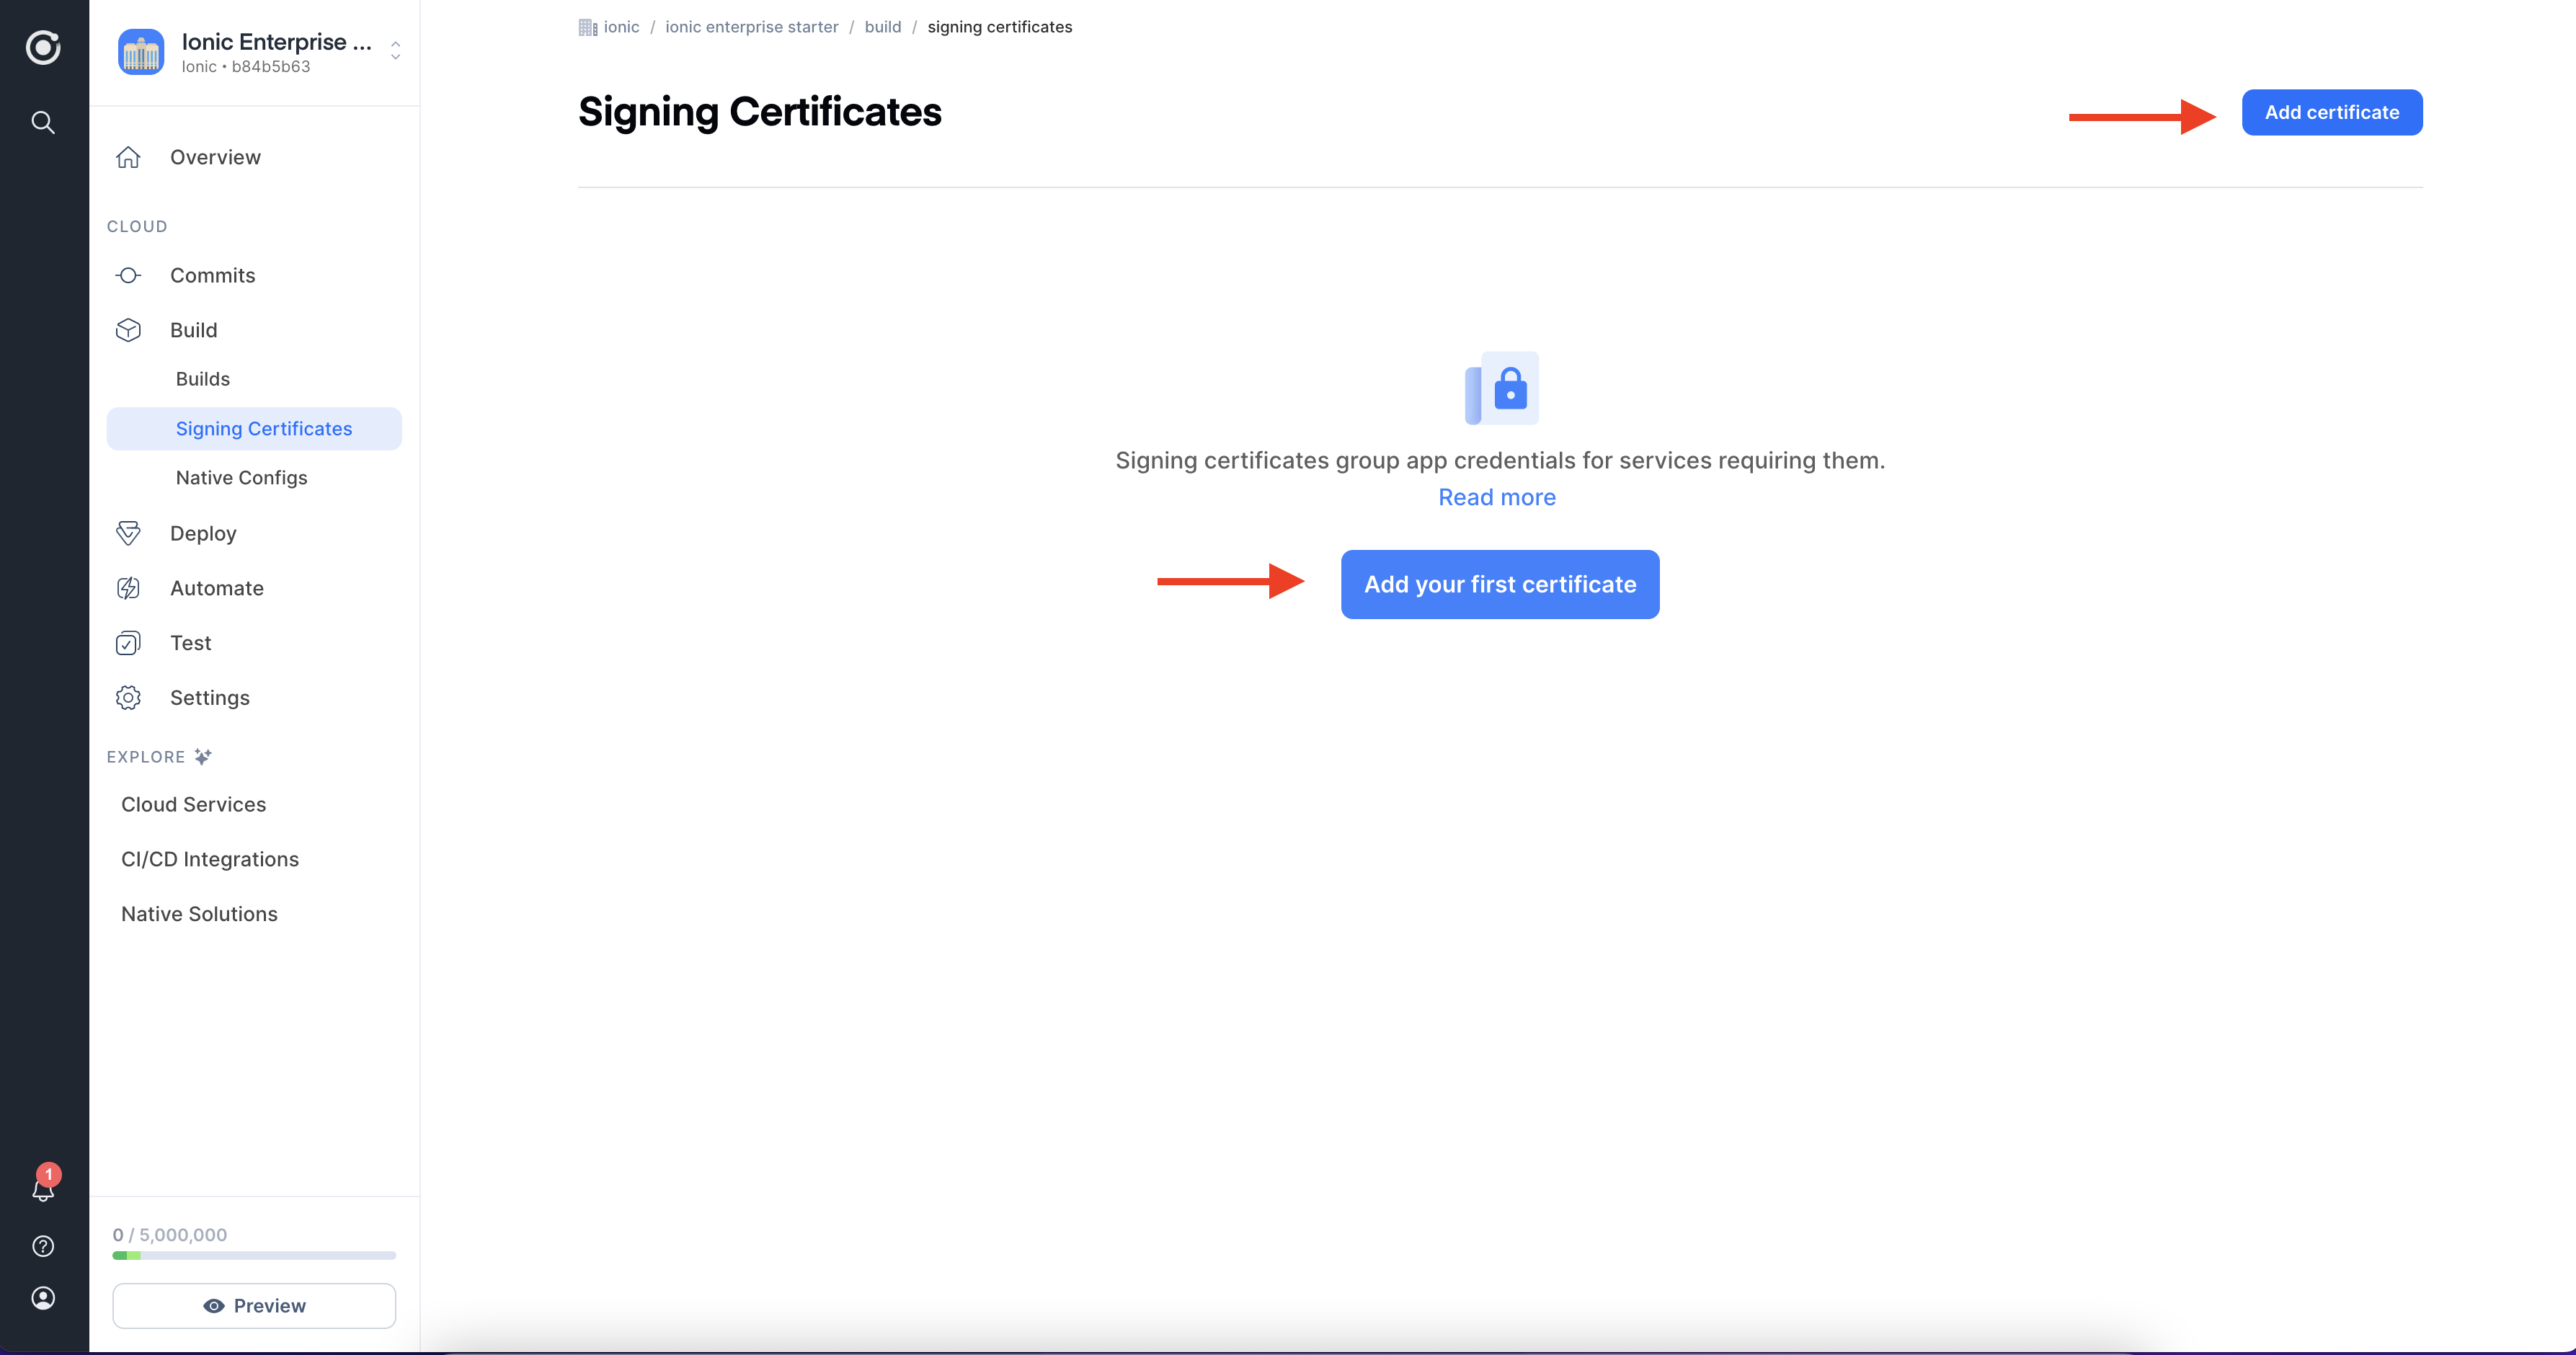
Creating a signing certificate in Appflow
Signing certificates securely store your credentials, so you can easily reference them when building your app in the cloud. After you have generated your signing certificate, you must upload it to Ionic Appflow.
To upload your security credentials:
-
Navigate to your App, then to the Build > Signing Certificates tab on the left-hand side.
-
Click the Add Profile button to create a new Profile.
- Enter a name for the signing certificate. (ex: ios_development) and use the generated
.p12file for the certificate, the.mobileprovisionfile for the Provisioning Profile, and the password used to generate the .p12 file for the password.
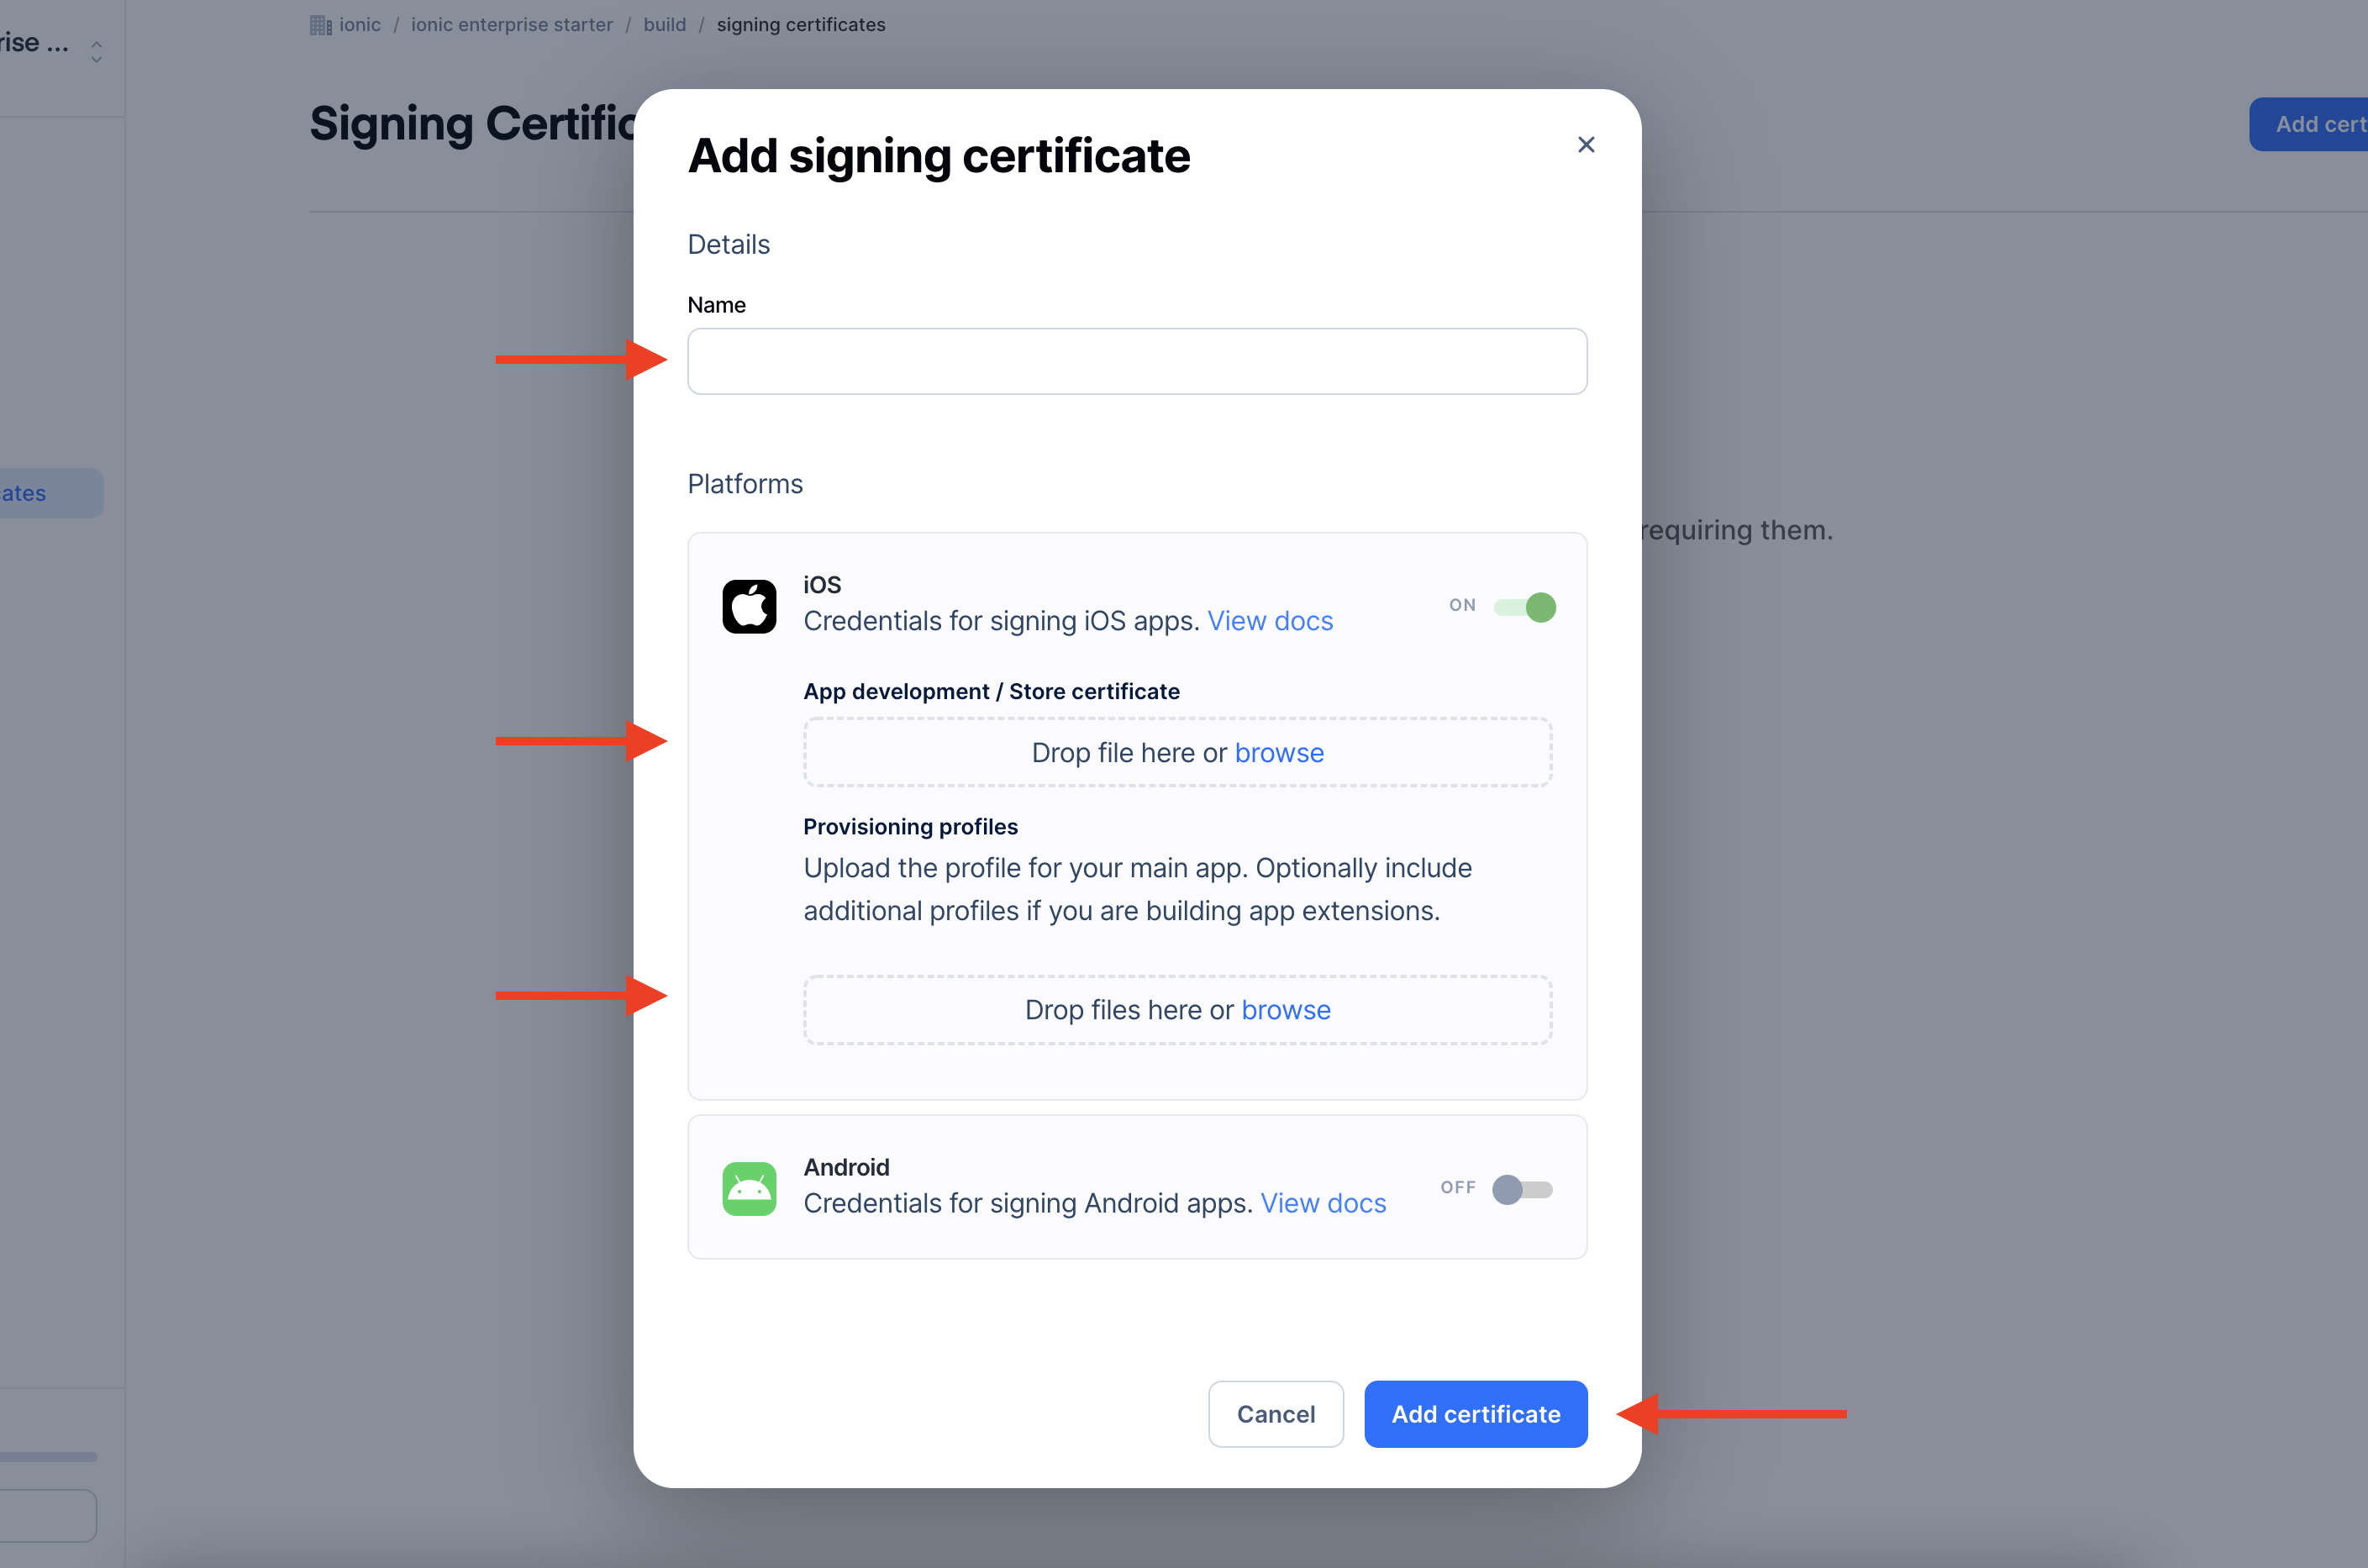
Both iOS and Android certifications can be used with one Profile, but for now let's focus on iOS credentials. You'll need to choose the certificate files you generated and upload them as well as put in any passwords needed to access the credentials.
Once that Profile has been created, you can click the Edit button to remove and/or upload your iOS and Android certs.
Make sure the bundle ID in your app and the Apple developer certificate are matching
iOS native Development builds in Appflow
You're now ready to build iOS apps on Appflow! Trigger a new iOS native build just like you did for Android earlier, including the signing certificate you just created.
- Select the commit.
- Select iOS as the target platform.
- Select the latest build stack.
- Select the Development build type.
- Select the signing certificate you created earlier (ex: ios_development).
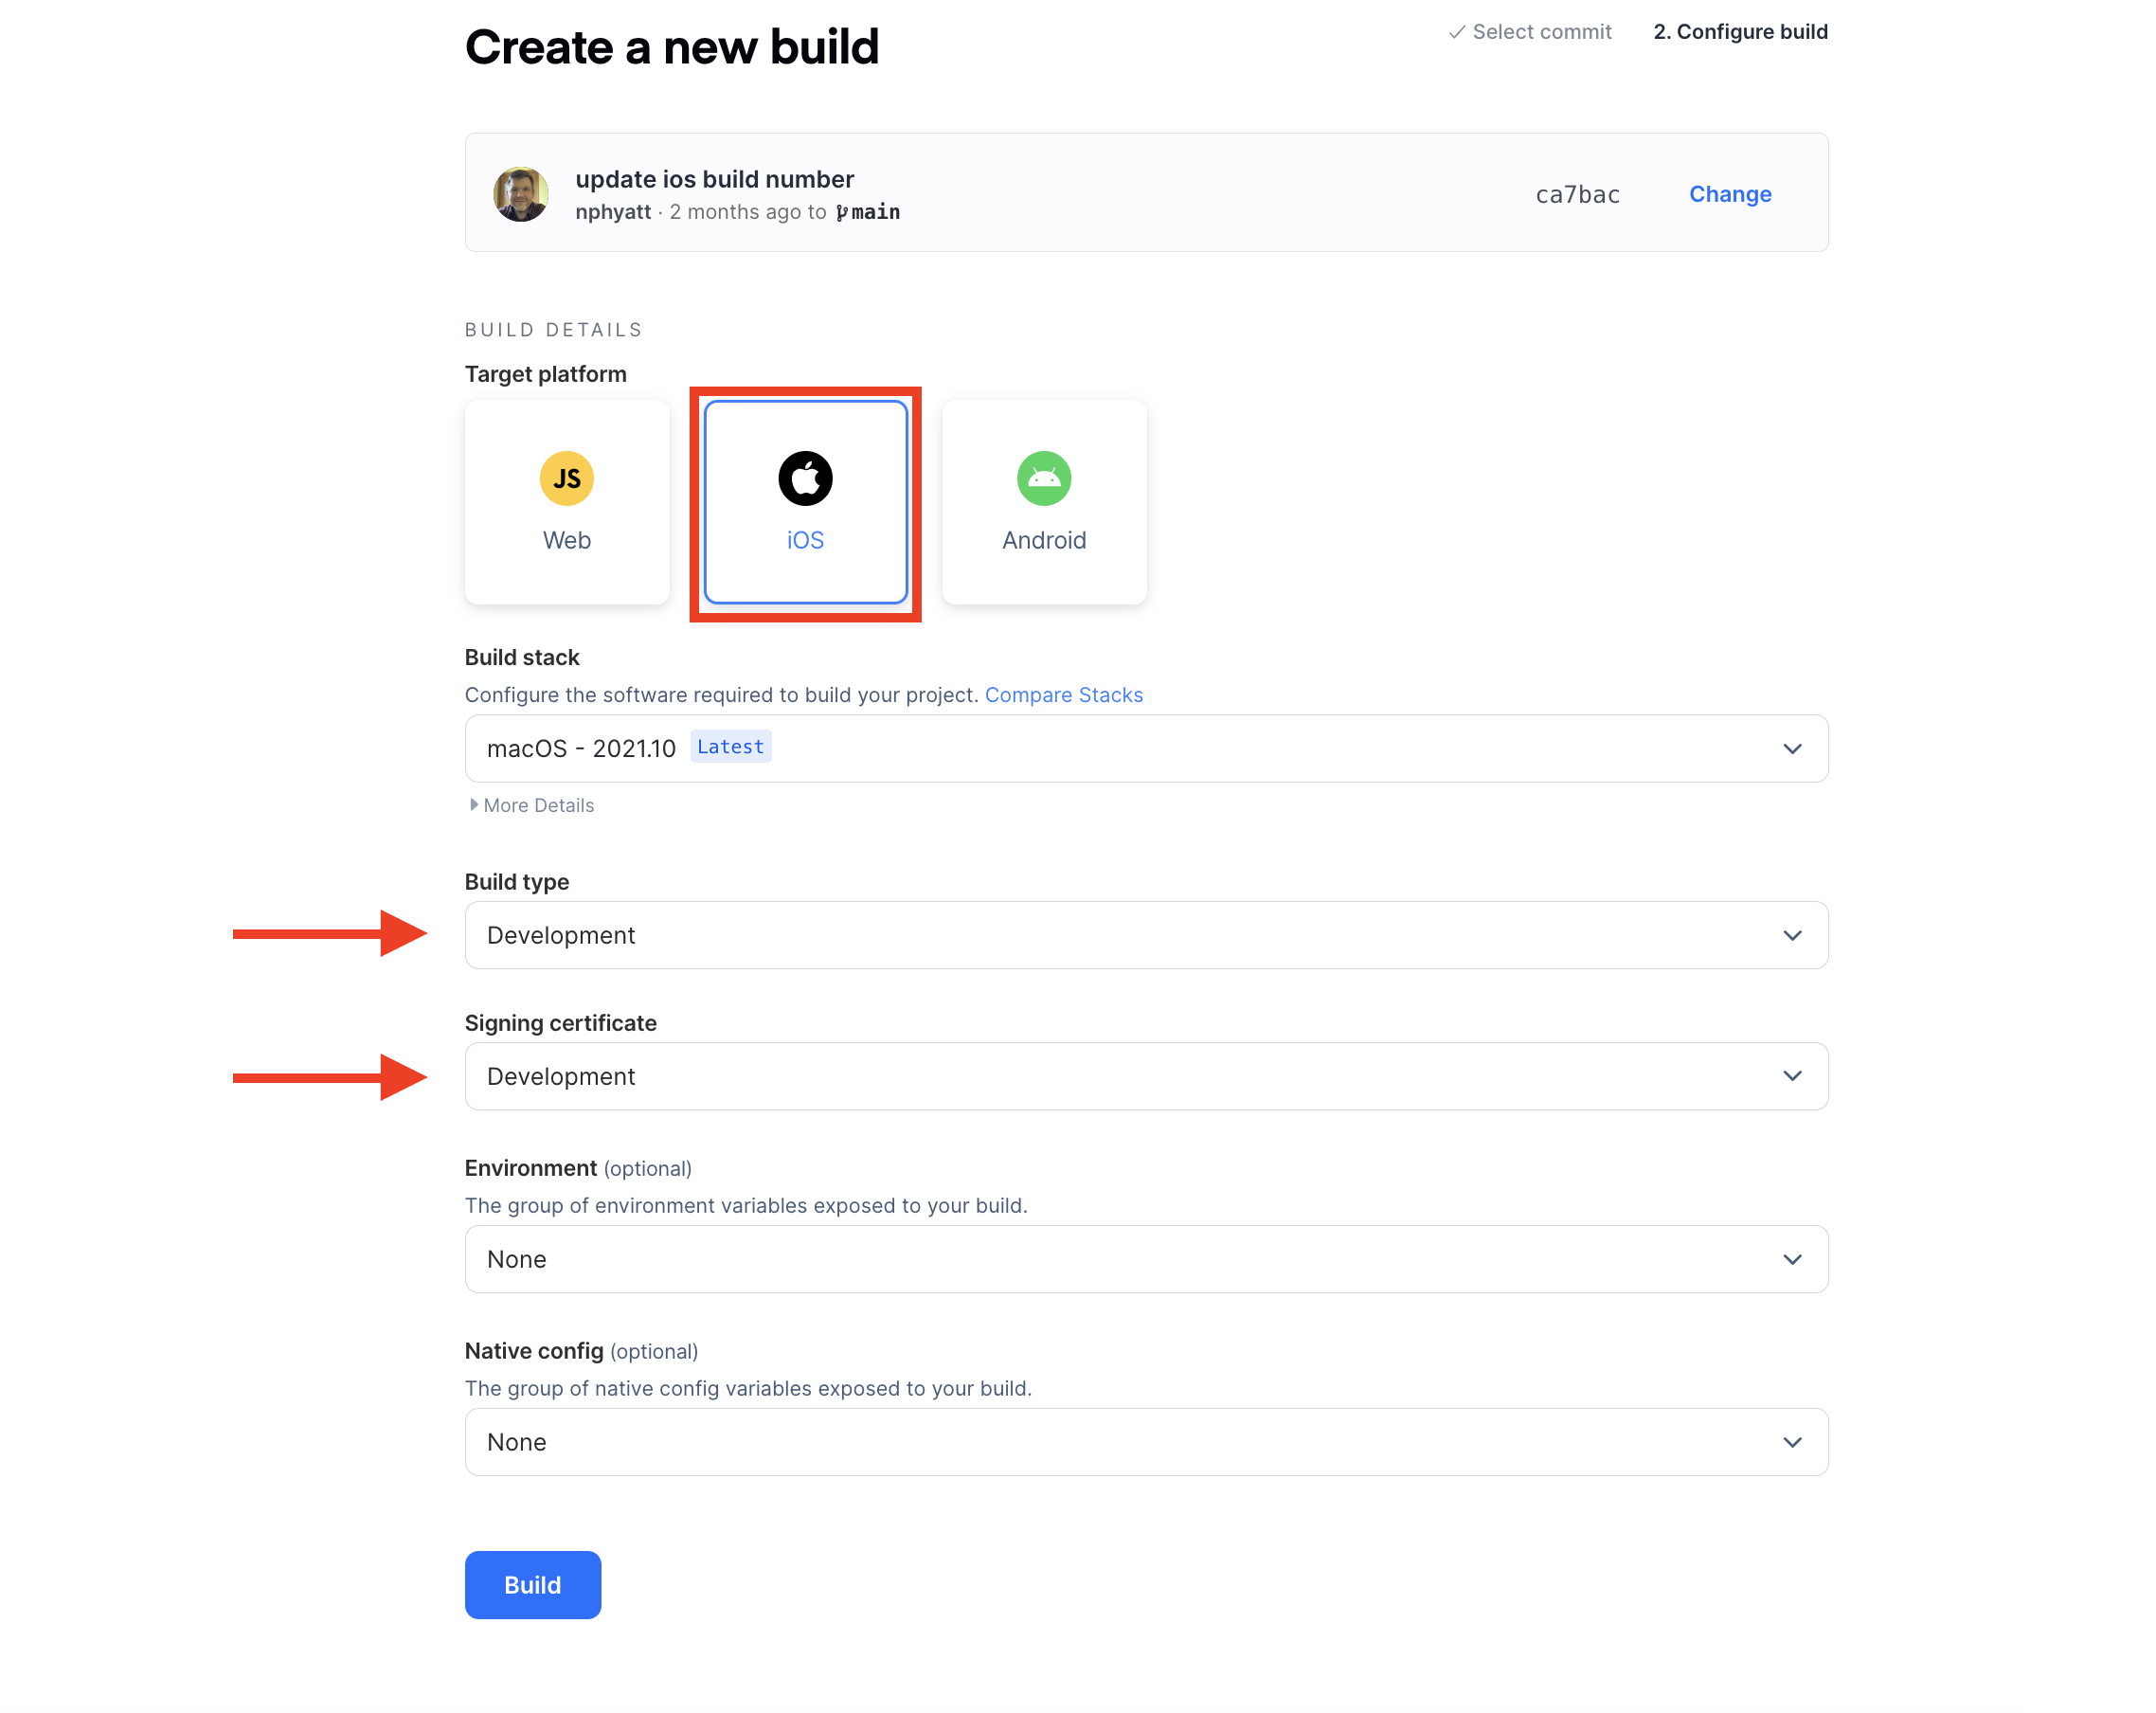
Once you click build, you should see the iOS build logs as its created.
Using other build types
While this tutorial focused on building Development iOS builds, the process is similar when creating App Store/Production iOS builds and Android Release builds. See our Deploy to App Stores documentation for Apple and Google Play along with the App Store Deployments step in our tutorial.