Deploying to the App Stores
Now that your app is ready, you need QA. Quality assurance involves testing and avoiding defects before release. In order to send an app out for user testing:
- For iOS, you can use TestFlight in App Store Connect.
- For Android, you can use testing tracks in the Google Play Console.
In this tutorial you will prepare a build for distribution, deploy to the destination, and invite testers for your app.
iOS and TestFlight
The Apple TestFlight service is used for sharing the early release of an app with users.
With TestFlight, we can take an early build of an app and share it with a select group of users, allowing them to provide feedback on their experience. Since the app is compiled ahead of time, developers can test the full spectrum of native APIs and server requests and verify.
Preparing a build for distribution
To use TestFlight you need an app build signed with a distribution signing certificate.
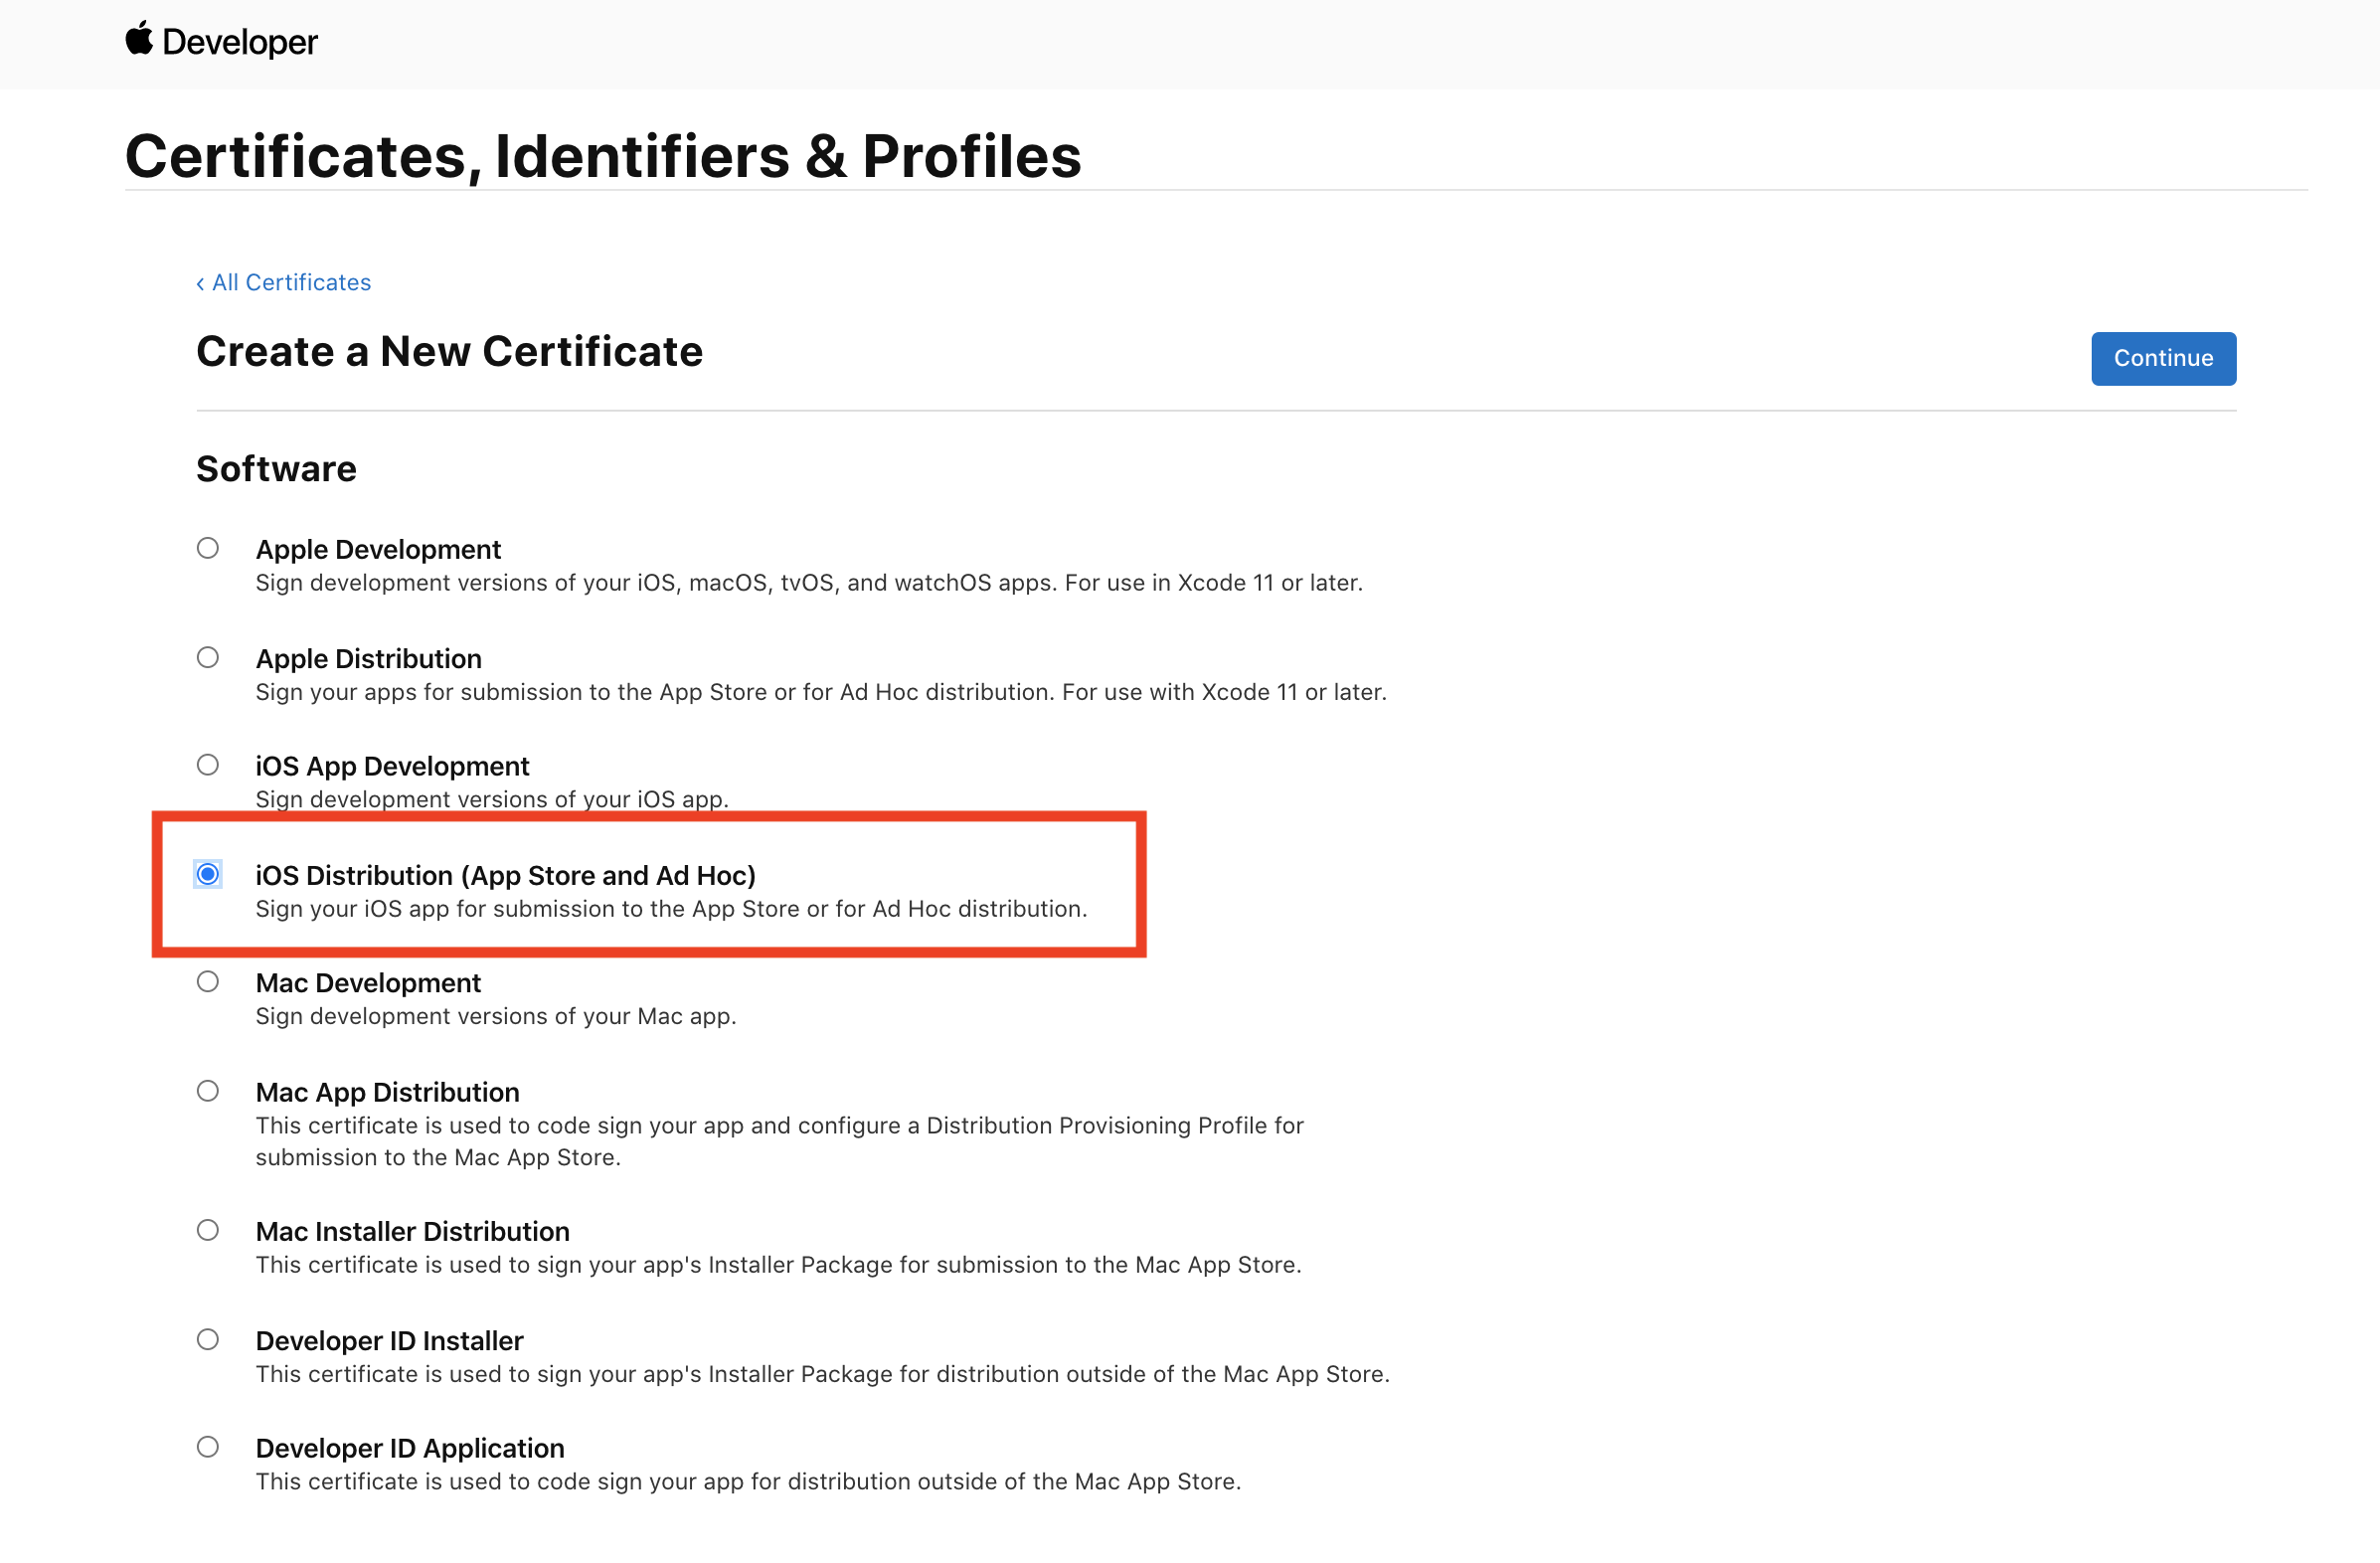
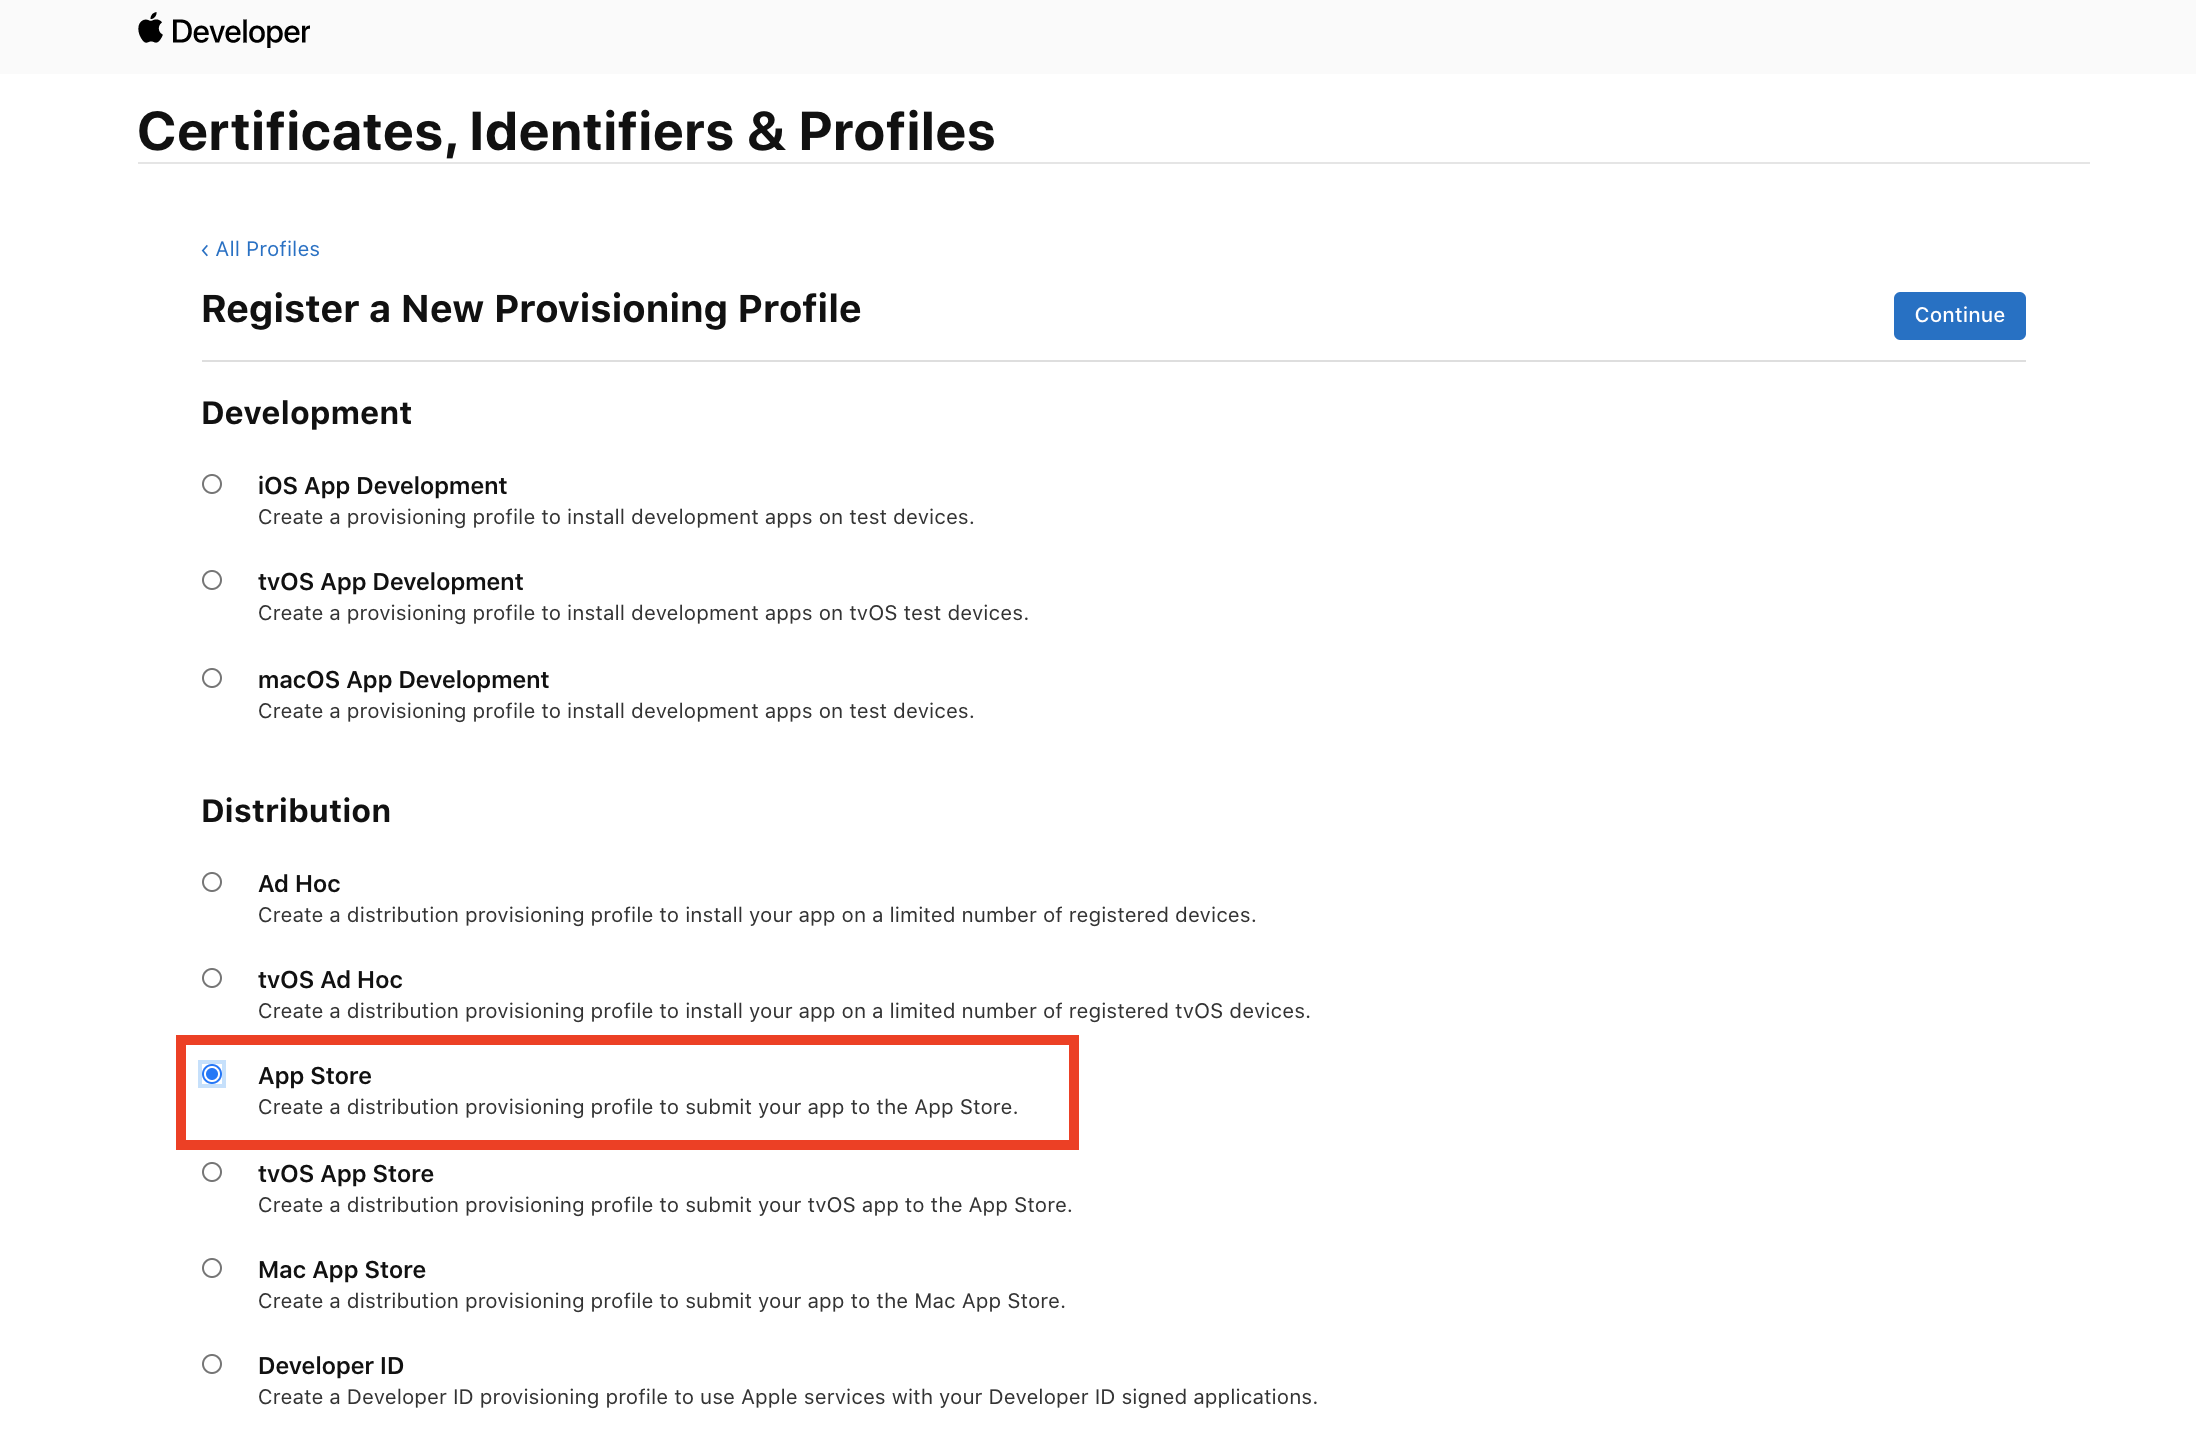
Creating a distribution certificate and corresponding provisioning profile is similar to creating a development certificate which we did in our previous chapter with few changes.
- Select iOS Distribution while creating the certificate this time.
- Select App Store under Distribution while creating the Provisioning Profile this time.
With this, you can now create a production signing certificate in Appflow Dashboard, similar to one we created in previous chapters, and select Signing Certificate Type as Production.
Deploy to the Apple App Store
To be able to deploy your App build directly to the App Store or TestFlight from Appflow, you need to add the Apple App Store as a Destination in the Appflow Dashboard.
For this, you need to create a new app in App Store Connect and then follow the guide to set up Deploy to App Store
Distribution build and deployment
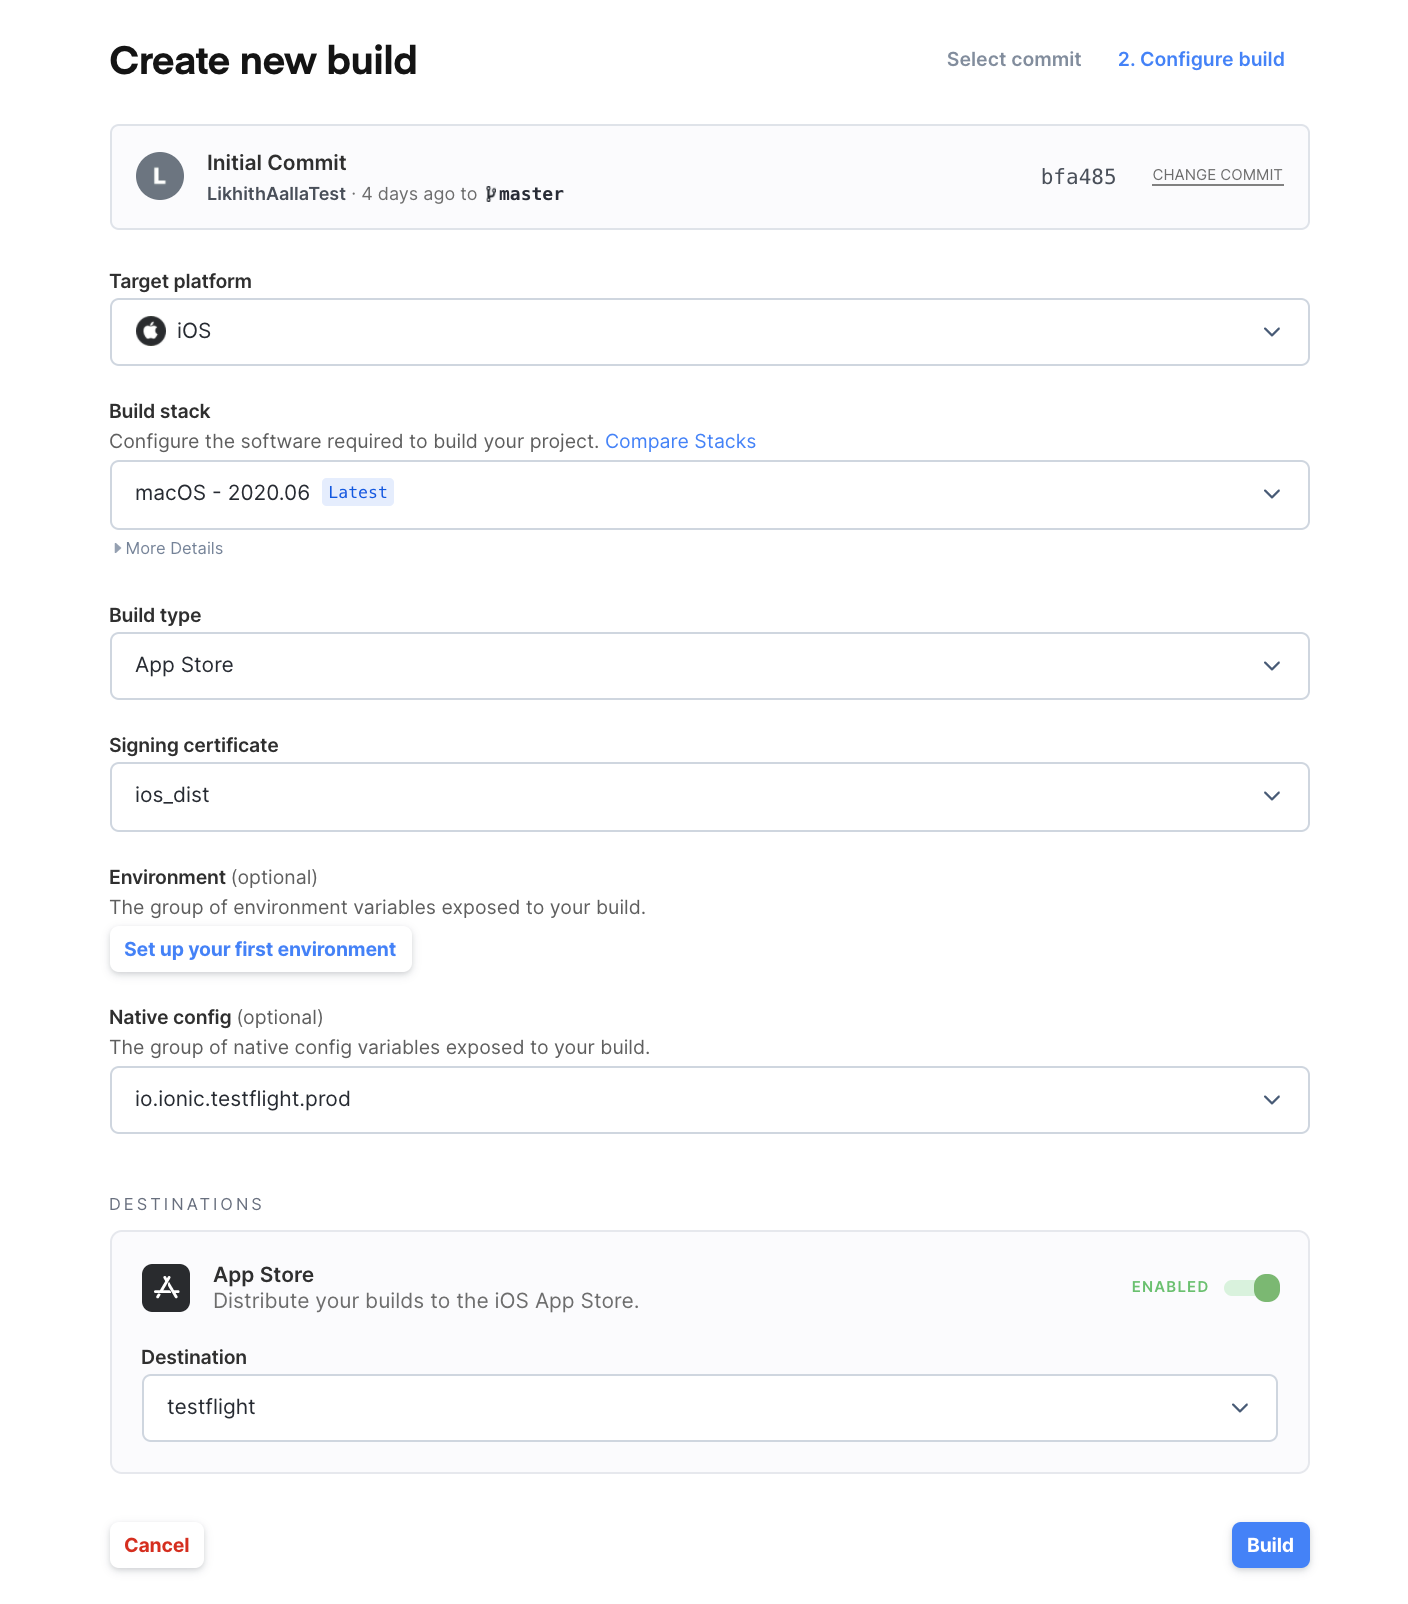
You are now ready to build a production iOS app on Appflow! Trigger a new iOS native build just like you did earlier and include the production signing certificate you just created.
- Select the commit.
- Select Target Platform as
iOS. - Select the Build Stack of Choice.
- Build Type App Store.
- Select the Signing Certificate you created earlier (ex: ios_distribution).
- Enable the toggle to App Store destination and Select the destination you created earlier.
-
Enabling App Store destination before build would automatically deploy to the destination after a successful build.
-
You can also manually deploy a build later using the deploy binary button from the builds tab.
You can see the deployment logs in the Deploy>deployments tab.

Inviting testers using TestFlight
Once the deployment is successful in the Appflow Dashboard, you can see the same build show up in your App Store Connect account select your app > TestFlight tab in the top navigation.
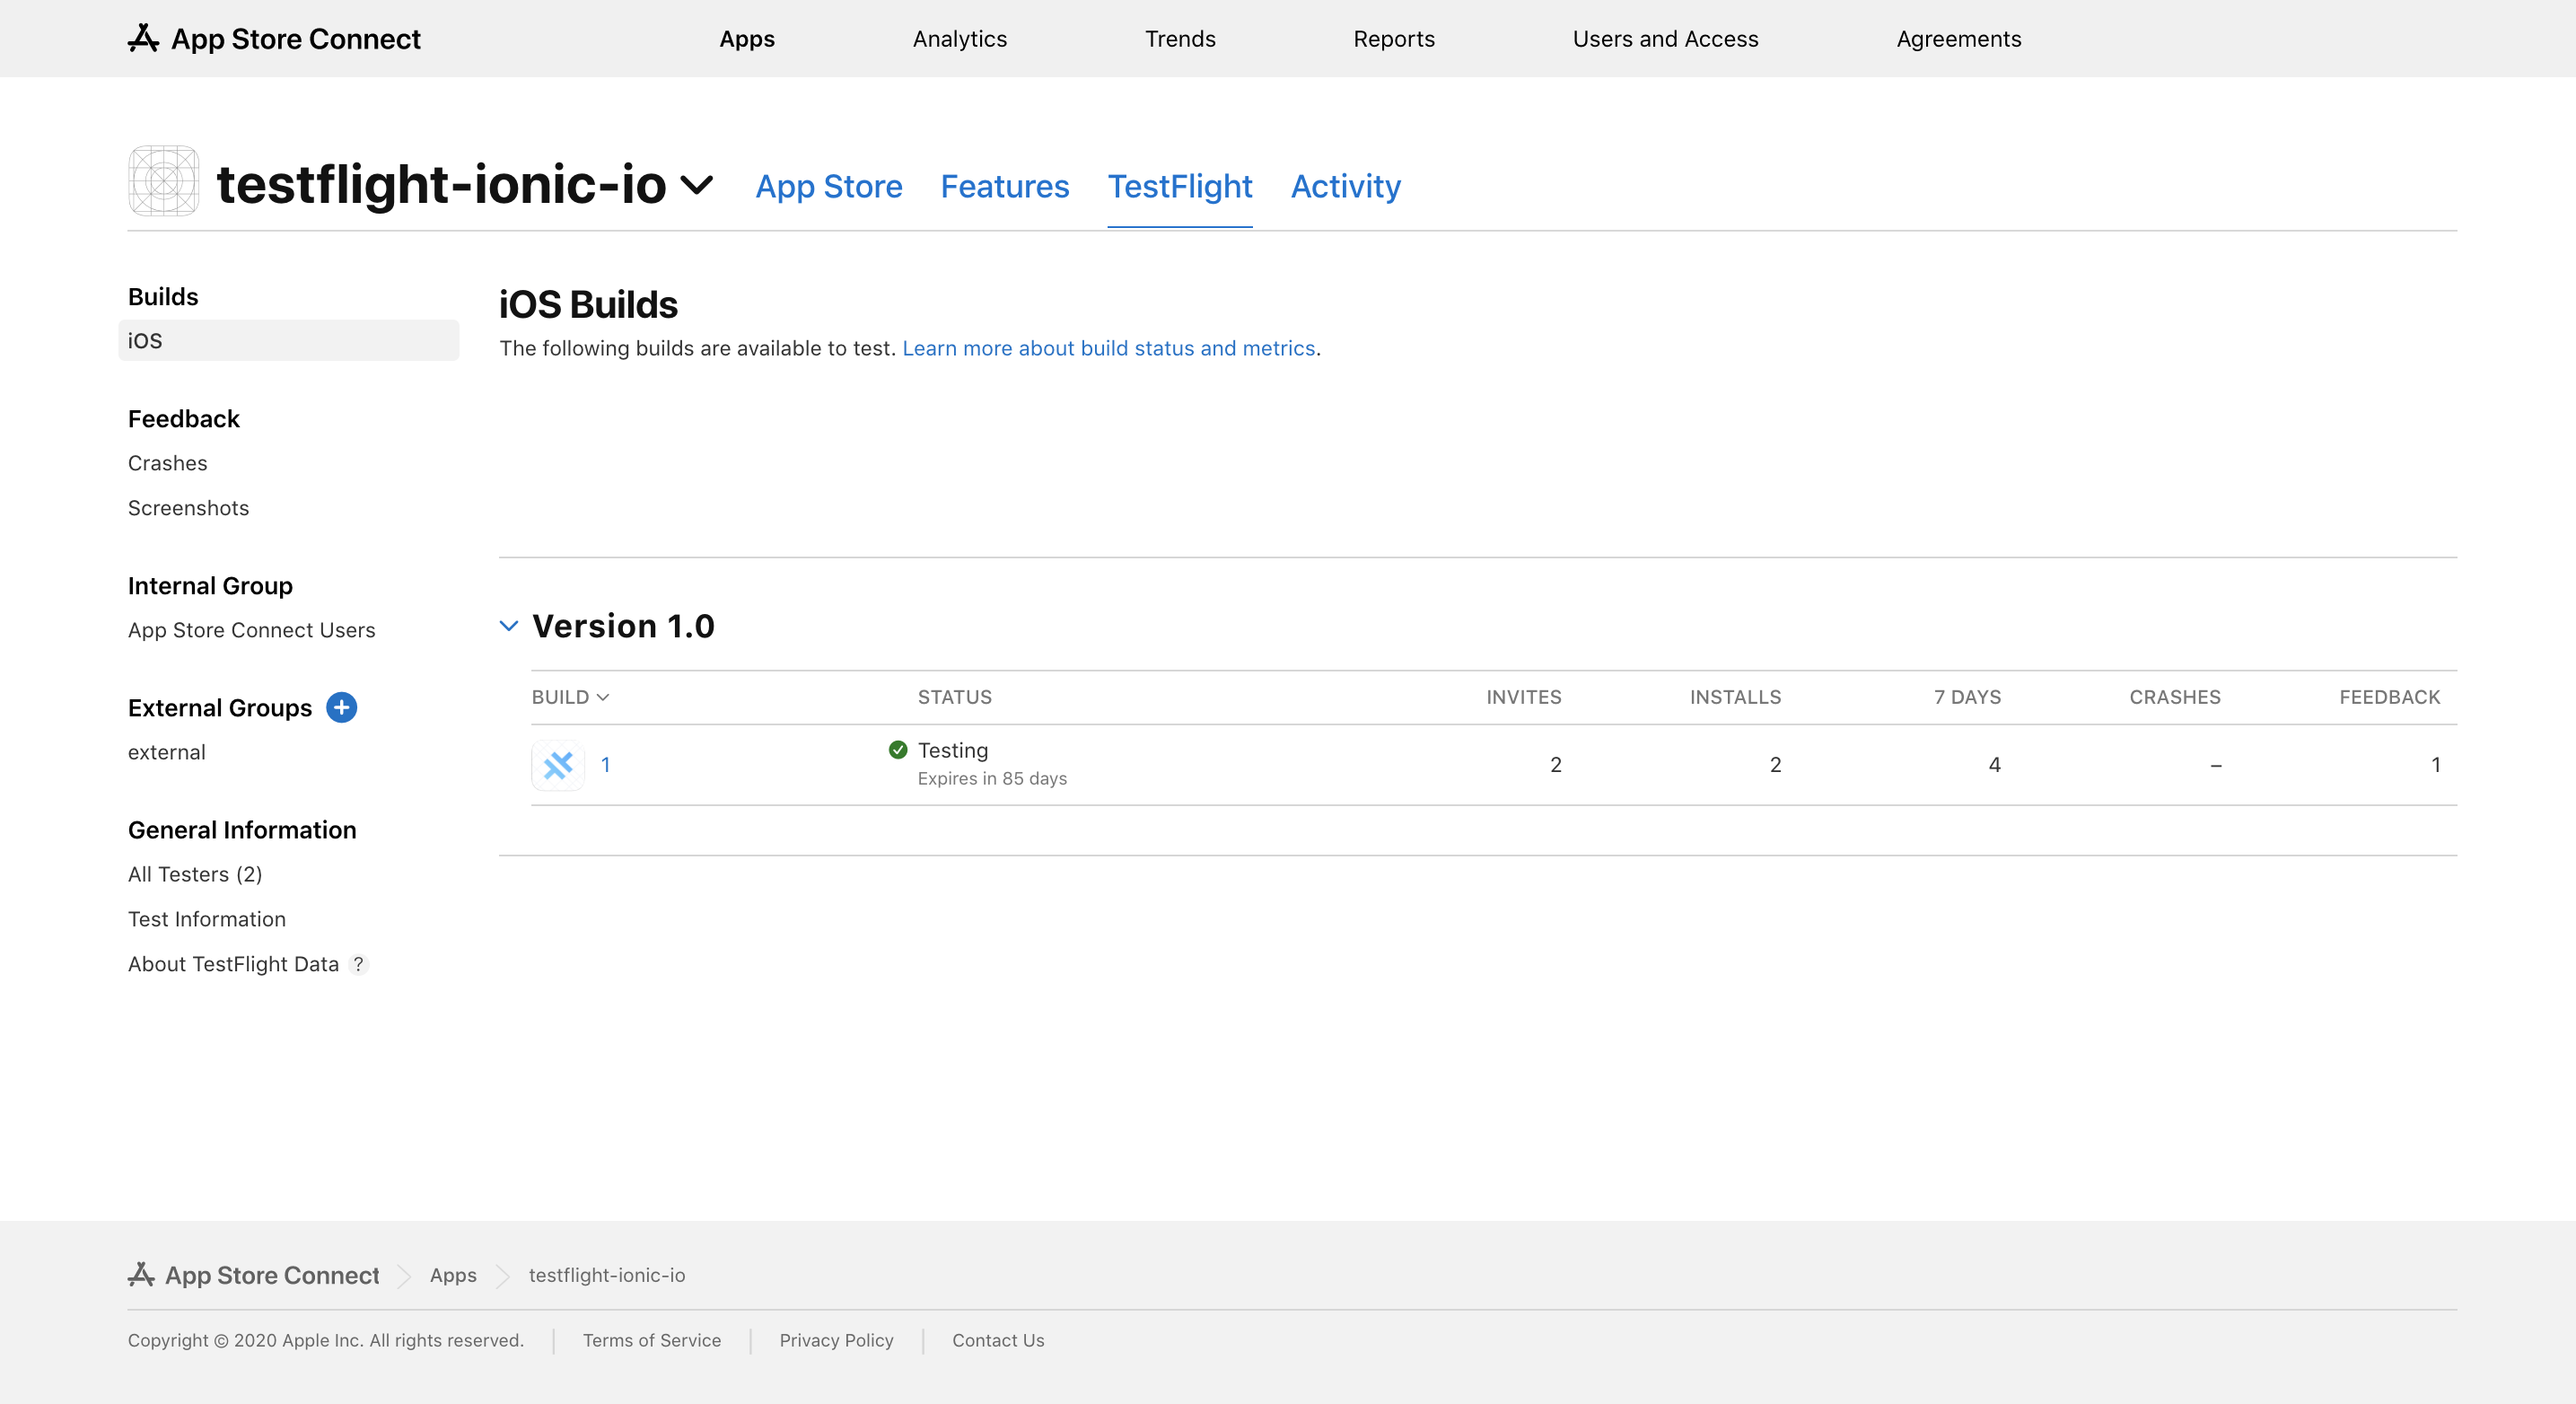
You can now invite internal testers from your Organization or add external testers using their email address.
Internal testers should be able to download your application via TestFlight. External users must wait until Apple approves the app for beta-testing. Refer Distribute an app using TestFlight for detailed steps.
Android and testing tracks
To test your Android app you can make use of testing tracks in the Google Play Store and enable internal user testing. The Google Play Console also provides best practices for testing your app.
Preparing a build for distribution
To use testing tracks you need a release build signed with Android security credentials. You can follow the Android Credentials guide to generate a Keystore that can be used to sign your binary.
With these credentials, you can now create a production signing certificate in Appflow Dashboard, similar to one we created in previous chapters.
Deploy to the Google Play Store
The Google Play destination allows you to upload your finished binaries to the Google Play Console for Android, this way you can deploy your build .aab file directly to the Google Play Store.
Note: The first upload for a new Android app must be uploaded from the Google Play Store website.
You can follow the guide to adding the Google Play Store as a destination and set one of the internal testing tracks as the destination.
Release build and deployment
You are now ready to build a production Android app on Appflow! Trigger a new Android native build just like you did earlier and include the production signing certificate you just created.
- Select the commit.
- Select Target Platform as
Android. - Select the latest build Stack.
- Build Type
Release. - Select the Signing certificate you created earlier (ex: android_release).
- Enable the Google Play Store destination and Select the destination you created earlier.
Enabling the Play Store destination before build would automatically deploy to the destination after a successful build. You can also manually deploy a build later using the deploy binary button from the builds tab.
You can see deployment logs in the Deploy > Deployments tab and select your latest Android deployment.
Inviting testers using testing tracks
Once the deployment is successful in the Appflow Dashboard, you can now see the same build show up in your Google Play Console account. For this example, we will look at the internal testing track select your app > Internal testing in the sidebar.
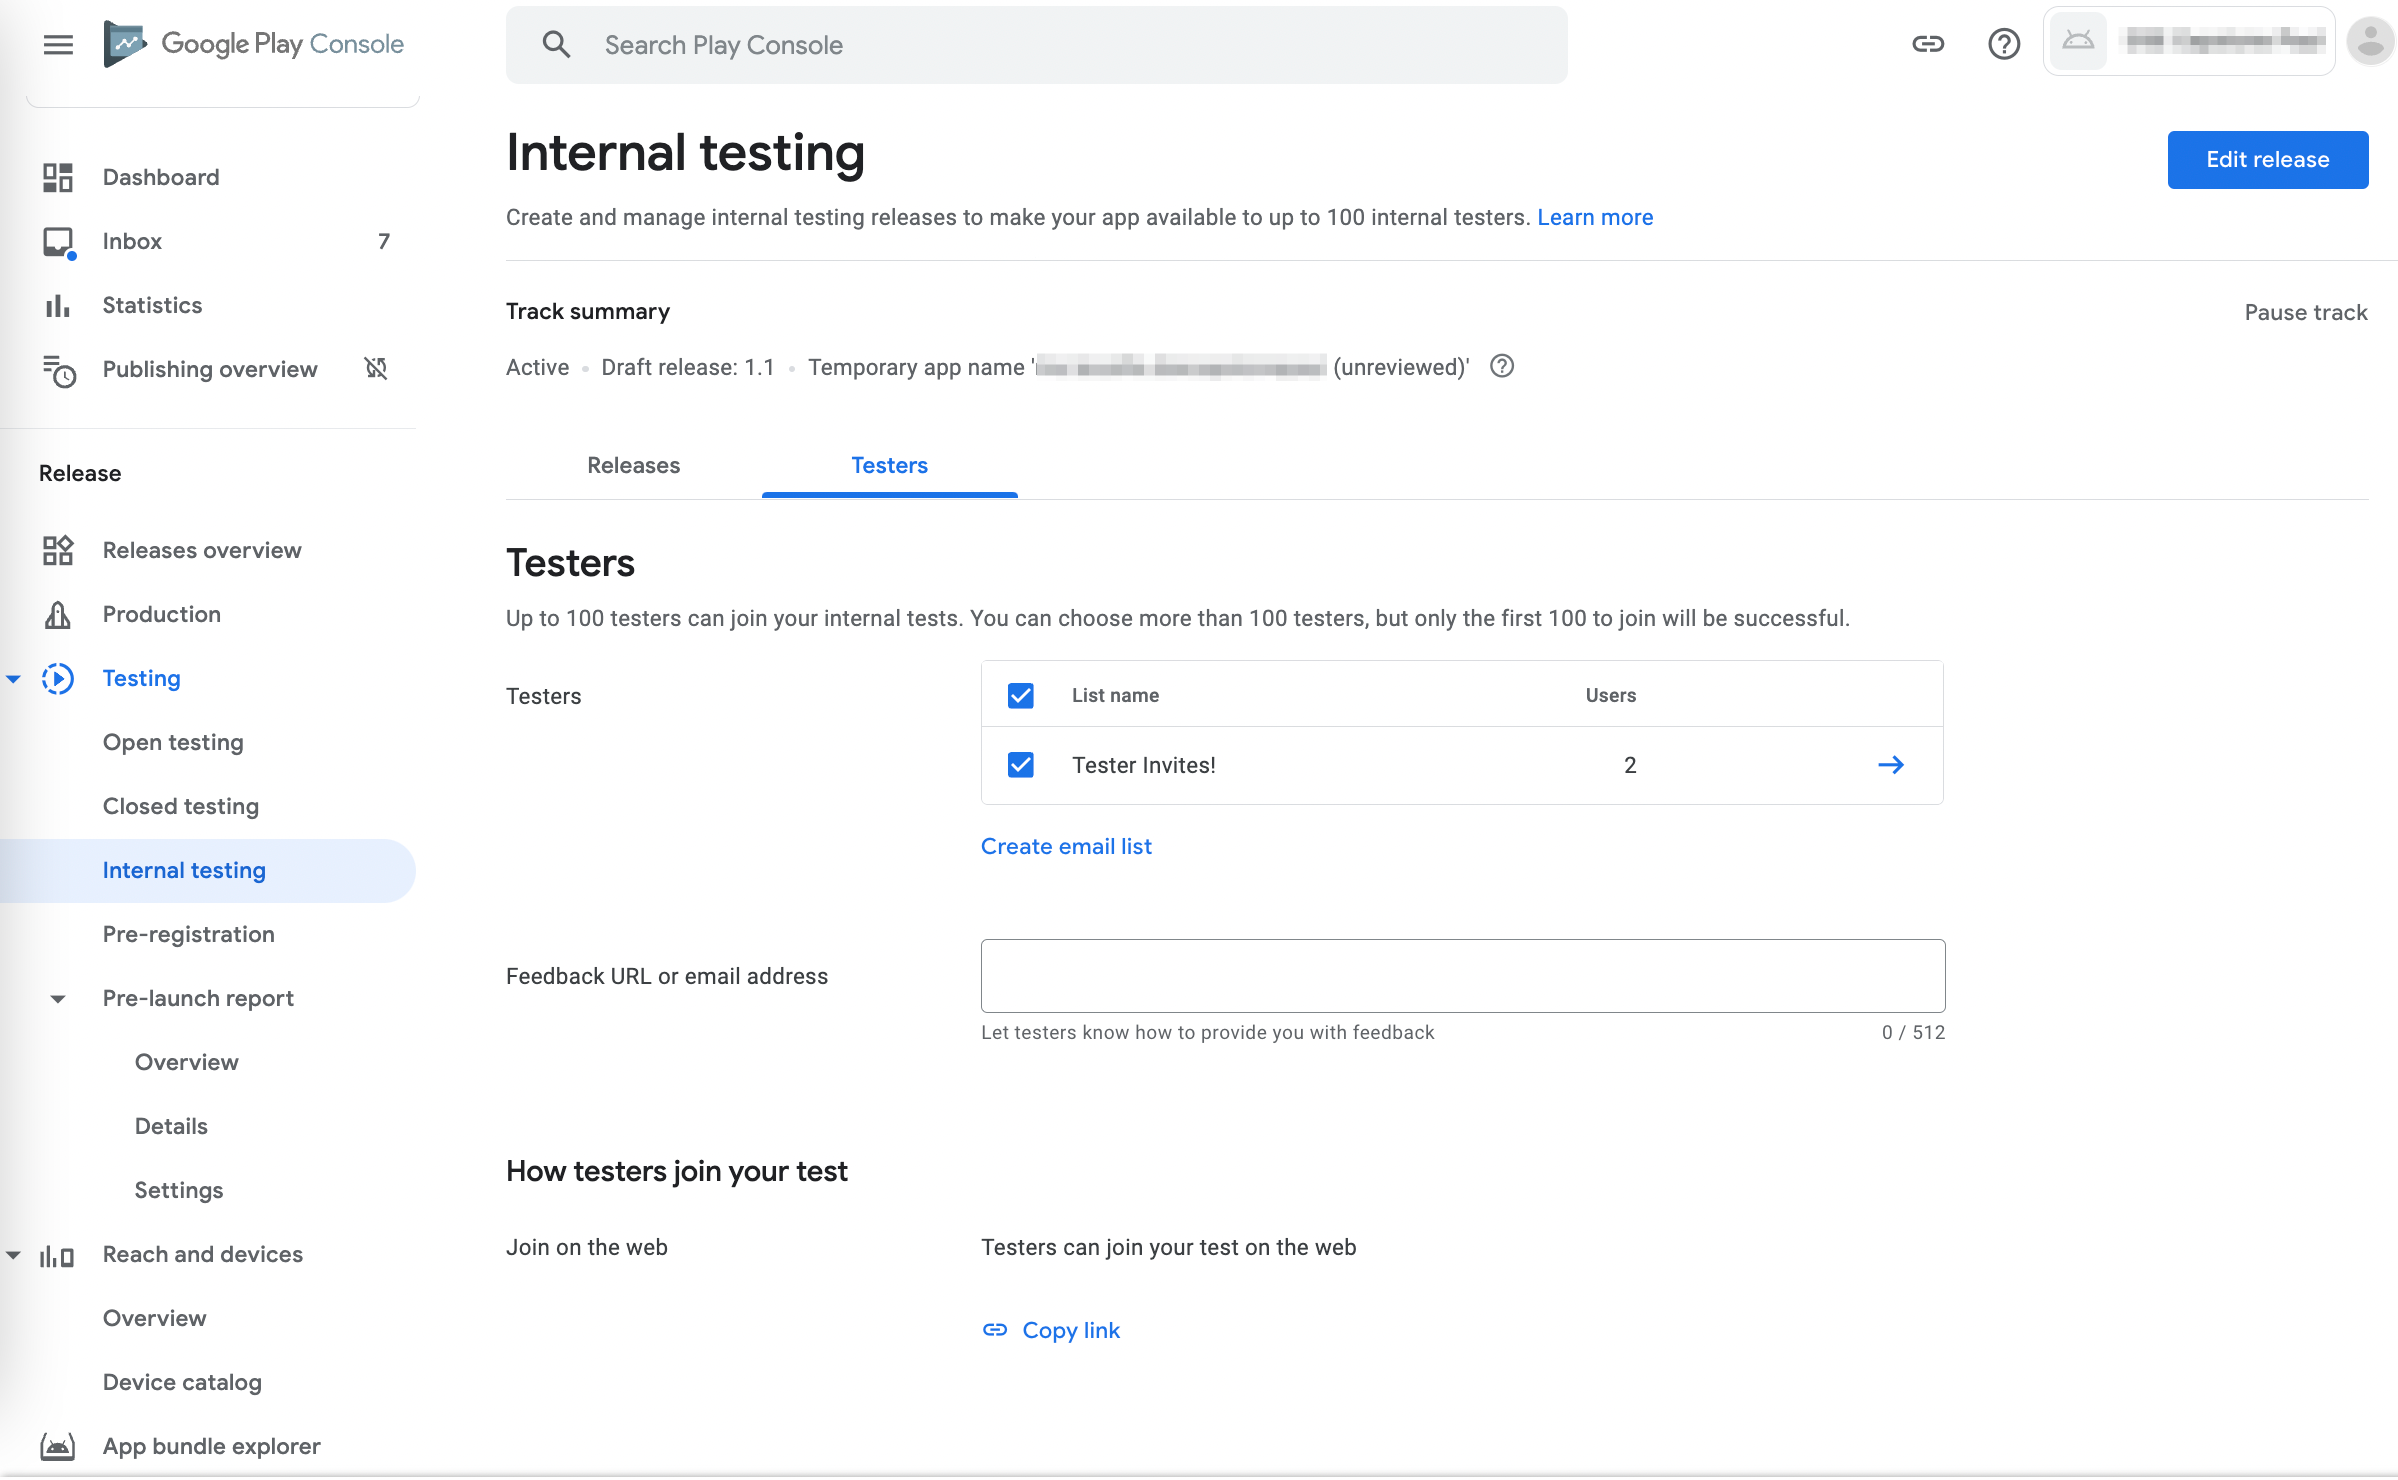
You can now invite internal testers from your Organization or add external testers using their email address. You can also use the provided link to allow testers can join your test on the web.
Additional notes
As an alternative, Android debug builds can be directly distributed and installed on a device if needed.
This can be done only on devices with debug mode enabled and can be crucial in the development cycle or for troubleshooting purposes.
However, there are some limitations when testing with an Android debug build with how SSL certificates and Proguard are disabled by default.
Live Updates and testing
When TestFlight or Android Testing track is used in combination with Appflow, Live updates can also be delivered to the testers throughout the testing cycle by deploying Live updates to the corresponding channels.
This can be crucial to evaluate the live updates and overall app experience.
The 3 key components in your testing cycle are:
- Creating an initial native build of the app which is directly deployed to the destination for iOS with TestFlight or Android with testing tracks.
- Deploying Live Updates to update the web components via Appflow as necessary.
- New build is only needed whenever a native component changes or the testing period has ended.
This now concludes the Testing & QA tutorial. You will have now prepared a build for distribution, deployed to the iOS App Store and/or Google Play Store, and have invited testers for your app.
Congrats on completing the Exploring Appflow tutorial! You can explore additional Appflow automation options here.