Live Updates
Appflow's Live Update feature lets you update the UI and business logic of your app in real-time. You can push HTML, CSS, and JS updates directly to your users without performing a new app store deployment, allowing you to instantly fix bugs and ship new features.
In this step, we'll install the Live Update SDK then build and deploy a web build to a mobile device.
Check out this branch from this tutorial's companion app to compare with your starter project.
Installing the appropriate SDK
We currently have a Cordova Live Update SDK and a Capacitor Live Update SDK available. We recommend using the Capacitor Live Update SDK for all new Capacitor projects, although the Cordova SDK can be used if desired. In this tutorial, we will be using the Capacitor Live Update SDK.
To install the Capacitor Live Update SDK, follow the instructions here. Alternatively, the Cordova Live Update SDK installation instructions can be found here.
Creating a new channel
Channels are used to manage which binary releases receive which live updates. At the minimum, it is recommended to have separate channels for each build environment (dev, prod, etc.), though we typically recommend creating separate channels for each new native release so that you can better control which updates are deployed to whom.
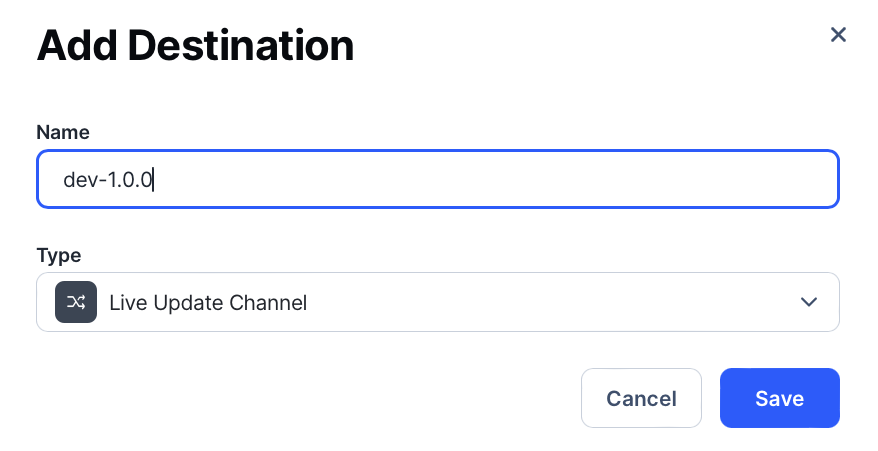
We can begin by creating a new dev-1.0.0 channel. Navigate to Deploy > Destinations and click New destination. Name the destination dev-1.0.0 and ensure that the type is set to Live Update Channel. Click Save.
Building for native with SDK installed
You can now configure the plugin to listen to the dev-1.0.0 channel. As this tutorial utilizes the Capacitor plugin, we will update the channel in our capacitor.config.ts.
const config: CapacitorConfig = {
  ...
  plugins: {
    LiveUpdates: {
      appId: 'abcd1234',
      channel: 'dev-1.0.0',
      autoUpdateMethod: 'background',
      maxVersions: 2,
    },
  },
  ...
};
Commit the changes to the capacitor.config.ts file and prepare a new Android debug build. If you have configured the Android debug automation in the previous section, you should be able to trigger a new build simply by pushing the commit to your main branch.
When the build is successful, download the .apk file and drag it into your emulator or install it on a device of your choice.
Trigger a web deploy build
Let's deploy a web build as a Live Update. To differentiate the live update from the previous version of the app currently running on your device, make a trivial change.
For example, open src/app/home/home.page.html in your editor:
  <div id="container">
    <strong>This is a live update deployed using Appflow!</strong>
    <p>Start with Ionic <a target="_blank" rel="noopener noreferrer" href="https://ionicframework.com/docs/components">UI Components</a></p>
  </div>
</ion-content>
Next, push your changes to your repository, then trigger a web build.
Assigning it to a channel
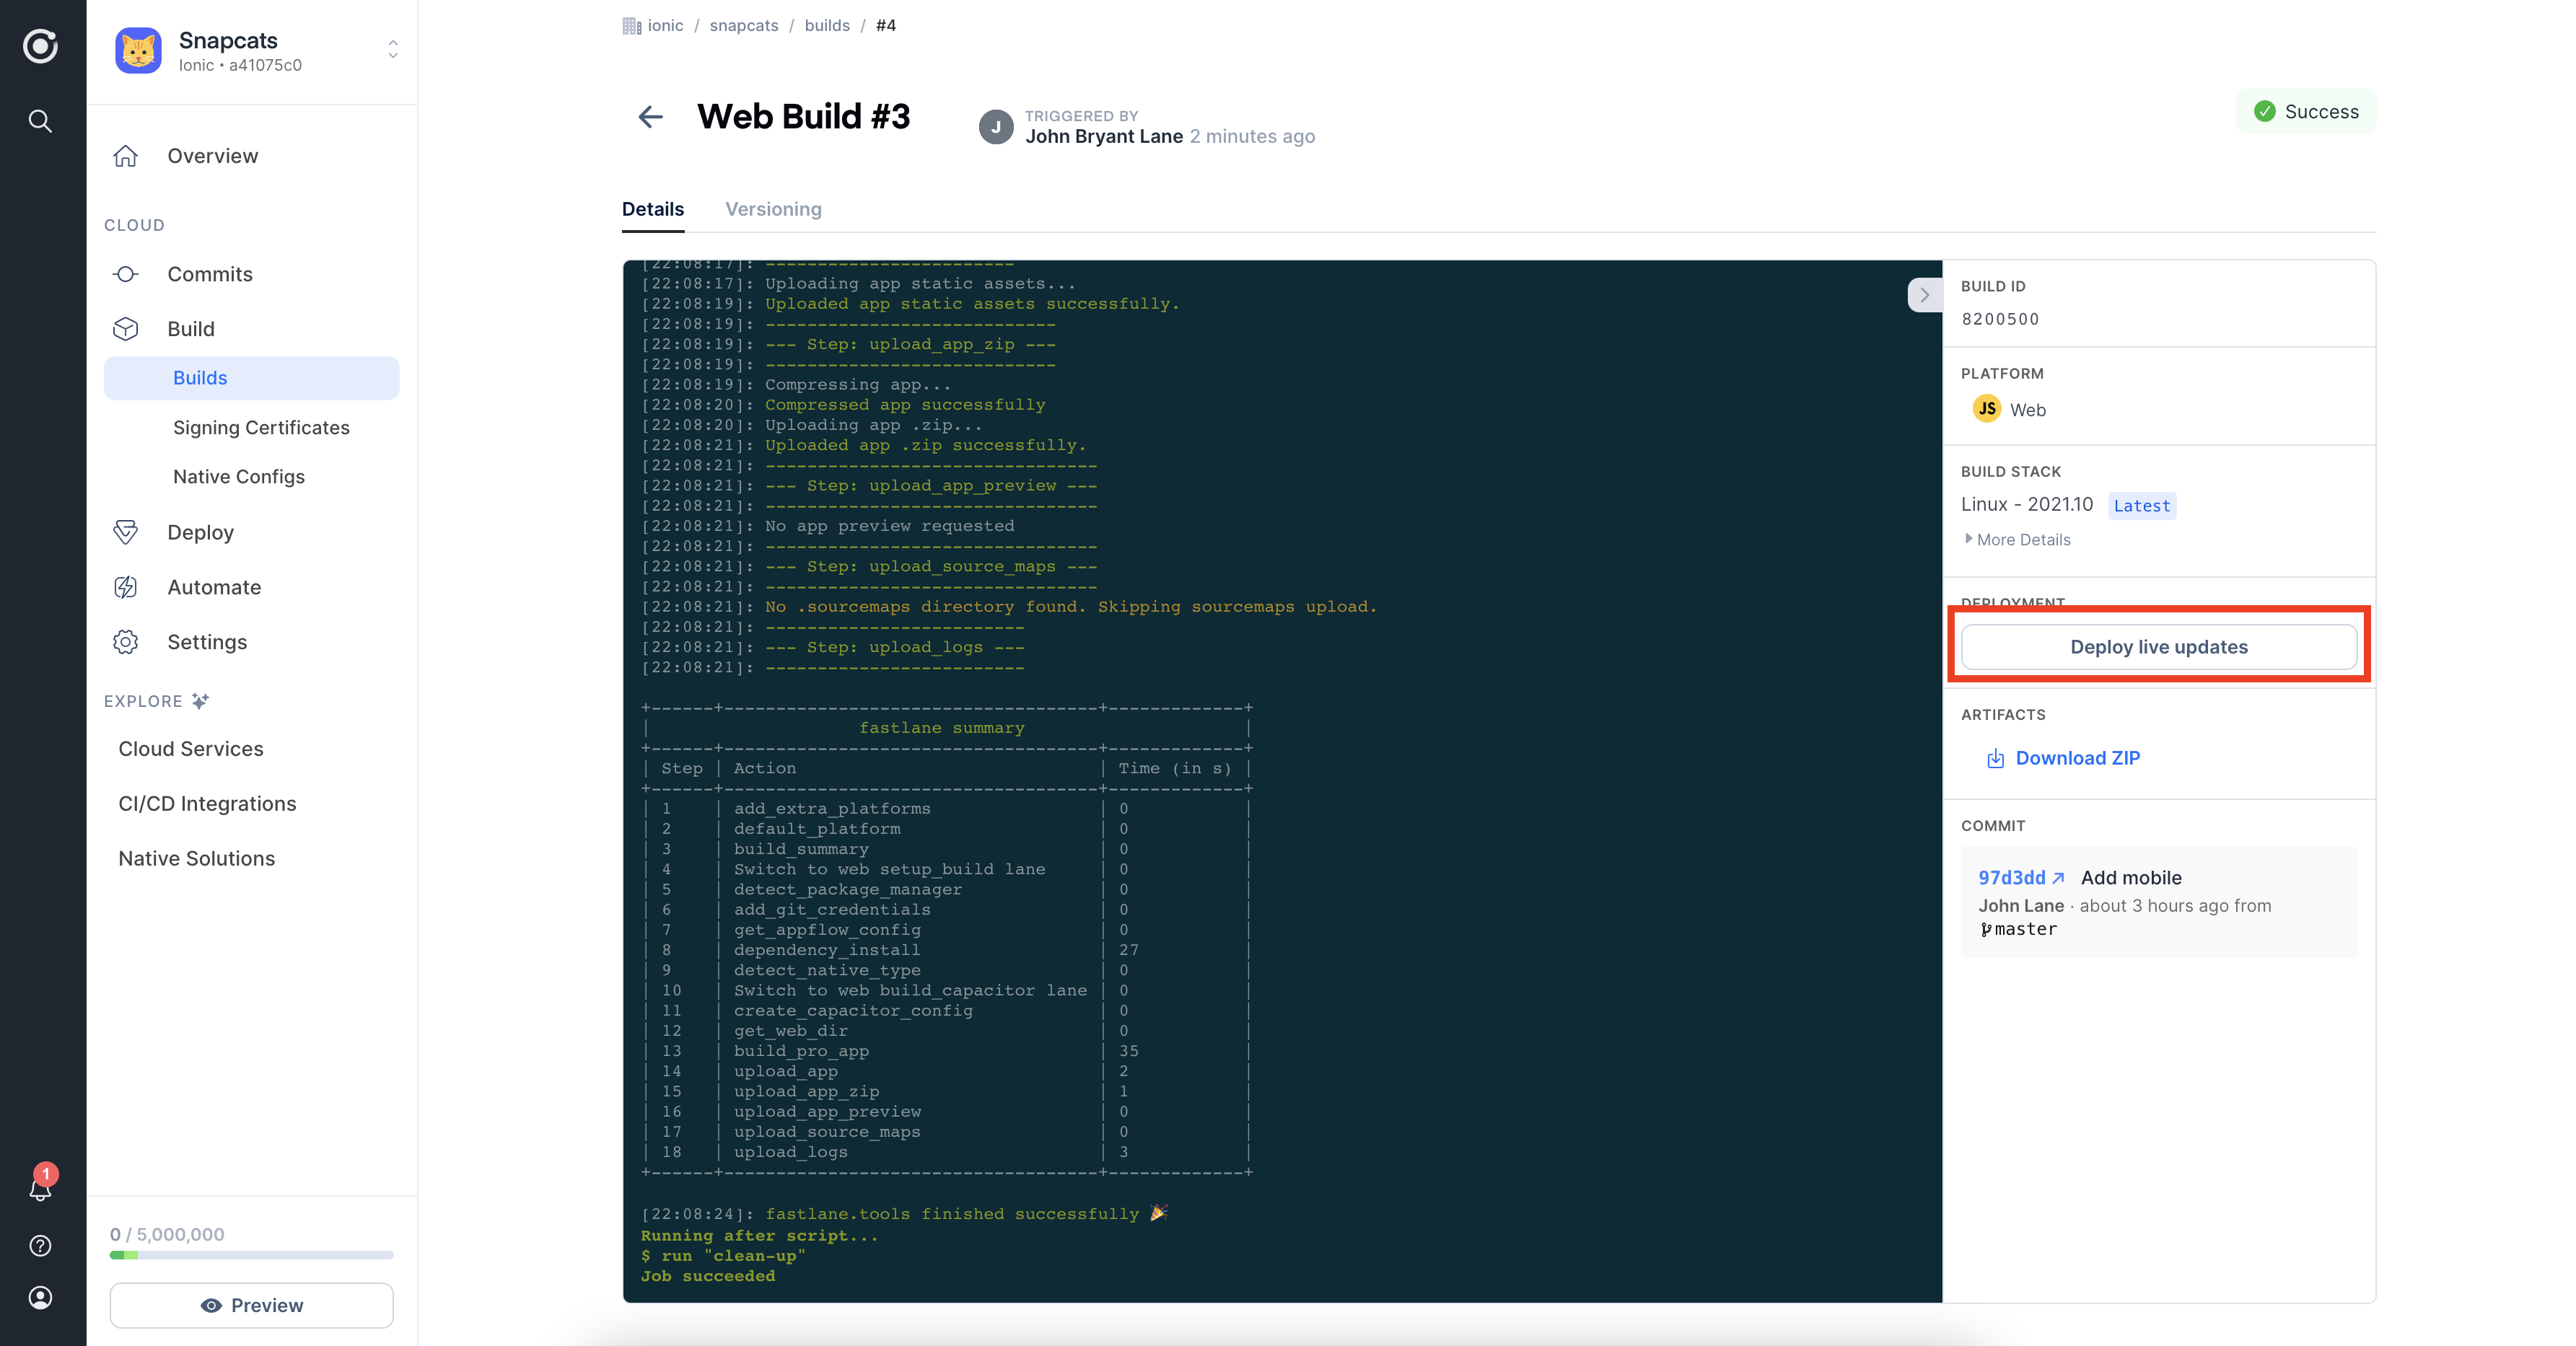
Once the web build is successful, assign it to the channel in Destinations that you chose earlier: production.
You can do that by selecting the deploy live updates option from the build log once it is successful.
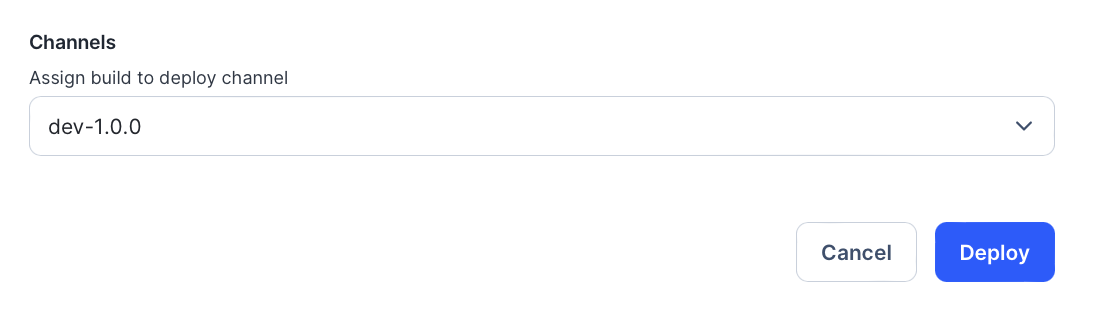
Select the production channel from the dropdown and click deploy.
You can see a list of all the deployments for each channel by navigating to Deploy > Destinations and selecting the channel.
Next, on the device or simulator upon which you installed the APK, you can see the Live Update applied to the app by placing the app into the background for 30 or more seconds and re-opening it.
The method by which the live update is applied can be configured as needed. The default behavior of the background method is to apply the update after the app has been in the background for 30+ seconds, but this amount of time can be adjusted or a different method can be applied altogther. Reference our Live Update Strategies documentation for more information.
Voila! 🎉 You have successfully deployed your first Live Update.