Migrating from App Center to Ionic Appflow
Migrating from Microsoft App Center to Ionic Appflow involves just a few simple steps. In this guide, we’ll walk through the complete migration process from start to finish, including integrating Live Updates (a CodePush alternative) and native iOS/Android builds.
Migration Summary
- Appflow is Ionic’s mobile DevOps service that helps development teams build, ship, and manage their iOS, Android and web apps. Featuring continuous native builds, live app deploys, and app store publishing.
- PhoneGap/Cordova apps written in jQuery Mobile, Framework 7, Sencha, KendoUI, or even your own custom solution can be migrated. An existing Ionic app is not required. To see which versions of the Cordova CLI and other tools are supported, view the Build Stacks page.
- Appflow offers equivalent services for App Center Build (build Android/iOS apps) and App Center Distribute (CodePush). For Test, Diagnostics, and Analytics services, please see Ionic's recommendations below.
- Ionic has Advisory services available if you need migration assistance.
Building your app in the cloud with Ionic Appflow requires a subscription.
About Ionic Appflow
Appflow, Ionic's Mobile DevOps Platform, handles the entire mobile app delivery process from building a native binary to publishing on the app stores and updating apps over time. Development teams can focus completely on the unique features of their app and outsource the complicated app delivery process to Appflow. As a mobile DevOps platform, Appflow powers mobile CI/CD at companies like Burger King, AAA, BCBS, and more.
Appflow fills in the gaps left by general purpose CI/CD systems, including:
- Set up consistent, repeatable mobile build environments so apps can be built on every commit, using predictable dev tools, a blank slate, and operating systems
- Build app binaries and artifacts for iOS, Android, and web
- Run tests and other scripts on every commit to ensure apps stay working
- Connect to existing GitHub, Gitlab, Bitbucket and other repos, to perform builds on every commit
- Release working updates to users in real-time (for web updates), or to the app stores (for binary updates)
- Manage different versions of apps between testers, stakeholders, and production users
Appflow Prerequisites
Like App Center, Appflow supports apps hosted in Git repositories on Azure DevOps, Bitbucket, GitHub, and GitLab.
Install Ionic CLI
If you do not have Node or npm installed on your computer, you will need to do this before proceeding. If you need to install Node, please select the current LTS version.
The Ionic CLI is required to integrate and manage Appflow's Live Updates feature.
npm install -g @ionic/cli
Create package.json and Ionic config files
Before you begin, we recommend making changes on a fresh Git branch.
Since Ionic Appflow was originally created to automate Ionic apps, it requires two files that your app may not have. First, create a package.json file. The easiest way to create it is to run:
$ npm init
Answer all the prompts, including package name, version, and description. The entry point: (index.js) can be set to anything since it won't be used.
{
  "name": "my-app",
  "version": "1.0.0",
  "description": "my cordova app",
  "main": "index.js",
  "scripts": {
    "test": "test"
  },
  "repository": {
    "type": "git",
    "url": "git+https://myorg@bitbucket.org/teamname/my-app.git"
  },
  "author": "My Name",
  "license": "ISC",
  "homepage": "https://myhomepage.com"
}
Next, create a new file at the root of the project - ionic.config.json. Copy in the following, changing only the name for your app:
{
  "name": "my-app",
  "type": "custom",
  "integrations": {
    "cordova": {}
  }
}
Finally, commit the new files to your project:
git add .
git commit -m "added package json and ionic config"
git push
Migrate the Code
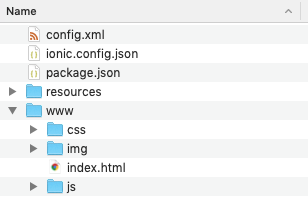
Now that we have the new required Appflow files in place, we can turn our attention to the actual app itself. Appflow expects the entire app to be inside a directory named www. Create that directory then move all app files into it, including HTML, CSS, JavaScript, images and any other related resources.
Here is what the app’s directory structure should look like:
Appflow Configuration
With your app ready for Appflow integration, it’s time to sign up, link your Git repository, then get building! Begin by signing up for an Appflow account.
Once you’re logged into Appflow, navigate to the Apps page then click the New button, followed by Import Existing App. Enter the App's name, then select your Git host. Link your GitHub or BitBucket account to Ionic Appflow by clicking the "Connect" button then authenticating using the standard OAuth login process.
After connecting your account, a list of your code repositories will appear. Choose the desired repo. Once it’s selected, your app’s Git repository is linked to Appflow. Any new code commits will automatically be detected and become visible in Appflow.
Link Appflow App
Next, we need to link Appflow to this local Cordova project. Run:
ionic link
Follow the prompts to sign into your Appflow account. Next, choose "Link an existing app on Ionic Appflow" then select your app from the list presented.
Install the Live Update SDK
From a command line, change directly into the root of your Cordova app then run:
ionic live-update add
The CLI will prompt you to fill in several values:
- Appflow App ID: If an ID number is listed in parentheses, then press Enter. Otherwise, the ID can be found within Appflow.
- Channel Name: A channel points to a specific Live Update build of your app that will be shared with any devices configured to listen to that channel for updates. Every app has two default channels: Production for App Store releases and Main for local development on your phone/device. For now, enter "Main."
- Update Method: The app will check for updates in the background. If an update is available it will be downloaded and installed while the user is using the older version. The next time they launch the app or the app has been in background for a specified duration, the new version will be loaded. Choose "auto" for now, which means the app will update immediately on startup.
The Live Update SDK will be downloaded and installed into your app project. You'll notice changes made to config.xml and package.json files. Commit them:
git add . # stage any changes
git commit -m "added live update sdk" #  commit staged changes
git push origin main # push the changes from the main or main branch to your git host
Once you've done a git push, you should see your commit available in the Commits tab of the Appflow Dashboard.
Deploying Live Updates (CodePush Alternative)
The Live Update feature works by using the installed Live Update SDK in your native application to listen to a particular Deploy Channel Destination. When a Web build is assigned to a Channel Destination, that update will be deployed to user devices running binaries that are configured to listen to the specified Channel Destination.
Trigger a Live Update Build
First, a web build must be created before it can be deployed. Either click the Start build icon from the Commits tab or click the New Build button in the top right from the Build > Builds tab.
On the next screen, Create New Build, select the Web target platform and the Latest build stack. Under Destinations, toggle Live Update then choose the "Main" channel.
Receive a Live Update on a Device
For your application to receive a live update from Deploy, you'll need to run the app on a device or an emulator. The easiest way to do this is simply to use the following command to launch your local app in an emulator or a device connected to your computer.
ionic cordova run [ios | android]
Since we selected the "auto" update method earlier, the application should update immediately on startup.
Congrats! 🎉 You have successfully deployed your first Live Update. This is just the start of what you can do with Live Updates. To learn more, view the complete Live Updates docs.
Live Updates and CodePush API
As we did above, Live Updates can be used without writing any code. Like App Center's CodePush, Appflow's Live Updates also offers an API that can be leveraged to support more advanced use cases. Here's a mapping between both APIs' functions. Appflow matches CodePush's functionality as well as offering additional features.
| CodePush | Live Updates |
|---|---|
| checkForUpdate | checkForUpdate |
| getCurrentPackage | getCurrentVersion |
| getPendingPackage | checkForUpdate + downloadUpdate |
| notifyApplicationReady | n/a (not needed) |
| restartApplication | reloadApp |
| sync | sync |
Bonus: Build Native Apps
With Appflow's Native Builds feature, you can create native iOS and Android app binaries in the cloud without platform dependencies or complicated build steps.
In Appflow, navigate to the Commits page. Like we did for the Live Update, click the New Build button then select a commit. Now we can choose which platform we want to build for: iOS, Android, Web. For simplicity's sake, select Android as the target platform - it doesn't require a security certificate to generate a native app file.
To learn more about generating a signing certificate, please see here.
Next, choose the "Debug" Build Type which is meant for local development and testing. With those choices selected, click the Build button.
This will spin up a virtual machine to perform the build on, which will take a few minutes to complete. As the various build steps are executed, a trailing log detailing each step is shown. The nice thing about seeing all these details of the process is when something goes amiss, you have far better insight into the issue. Once the process is done, you can download your native application and install it onto your mobile device.
That’s it! You’ve successfully created a native Android app binary using Ionic Appflow. To learn more about Native Builds, check out the docs.
Remove App Center Dependencies
Now that we've integrated Appflow's services, you should remove any references to App Center. Besides being a best practice to remove unused code/services, removing the SDK should reduce the size of your apps.
First, open a terminal then uninstall the App Center plugins:
cordova plugin remove cordova-plugin-appcenter-analytics cordova-plugin-appcenter-crashes cordova-plugin-code-push
Next, open config.xml and remove the following preference values. They will look similar to:
<preference name="APP_SECRET" value="0000-0000-0000-0000-000000000000" />
<preference name="CodePushDeploymentKey" value="YOUR-ANDROID-DEPLOYMENT-KEY" />
<preference name="CodePushPublicKey" value="YOUR-PUBLIC-KEY" />
If you were using App Center Analytics in your app, remove the following preferences elements: APPCENTER_ANALYTICS_ENABLE_IN_JS and APPCENTER_CRASHES_ALWAYS_SEND.
Remove the following <access /> elements:
<access origin="https://codepush.appcenter.ms" />
<access origin="https://codepush.blob.core.windows.net" />
<access origin="https://codepushupdates.azureedge.net" />
Remove the reference to CodePush in the CSP meta tag in the index.html file (https://codepush.appcenter.ms):
<meta
  http-equiv="Content-Security-Policy"
  content="default-src https://codepush.appcenter.ms 'self' data: gap: https://ssl.gstatic.com 'unsafe-eval' style-src 'self' 'unsafe-inline'; media-src *"
/>
Finally, within your app, remove any code references to App Center services, such as codePush.sync();.
Next Steps
You've migrated from App Center to Appflow, utilizing the Live Updates and Native Builds features before removing all App Center dependencies. This is just the beginning of what you can use Appflow for. Explore the rest of the service includes Automations (multiple environments and native configurations), App Store Publishing (build native apps in the cloud then deploy them directly to the app stores), and the Appflow CLI (use Appflow inside your CI/CD platform of choice (such as Azure DevOps, Gitlab, Jenkins, and more).
Migrate from Cordova to Capacitor
While this article highlighted the steps you need to take to migrate your Cordova/PhoneGap based application to use Appflow, there is an additional option worth considering: Capacitor.
Built by the Ionic team as a spiritual successor to Cordova, Capacitor allows development to move close to the native tooling and capabilities with the goal of providing an even better user experience and performance.
Fortunately, the migration process is easy and the majority of Cordova plugins are backward compatible with Capacitor. Start migrating here.
Have Questions? Stuck? Migration Assistance Available
If you have any questions or run into issues working with Ionic Appflow, visit the Ionic Forums. If you need migration assistance, Ionic has Advisory services available as well.