Deploying Live Updates
Now that we've installed the Live Updates SDK and understand how web builds and channels work, we'll walk through the process of deploying a live update to a device.
The Live Updates feature works by using the installed Live Updates SDK in your native application to listen to a particular Live Update channel destination.
When a Web build is assigned to a channel destination, that update will be deployed to user devices running binaries that are configured to listen to the specified channel.
The terms "Web build", "deploy build", "live deploy" and "live update" can be used interchangeably. They all refer to an update provided to your user's device by Appflow's Live Updates feature.
Triggering a Web Build
In order to deploy a live update, you will first need to create a Web build.
There are two ways to do this:
- Click the
Start buildbutton from theCommitstab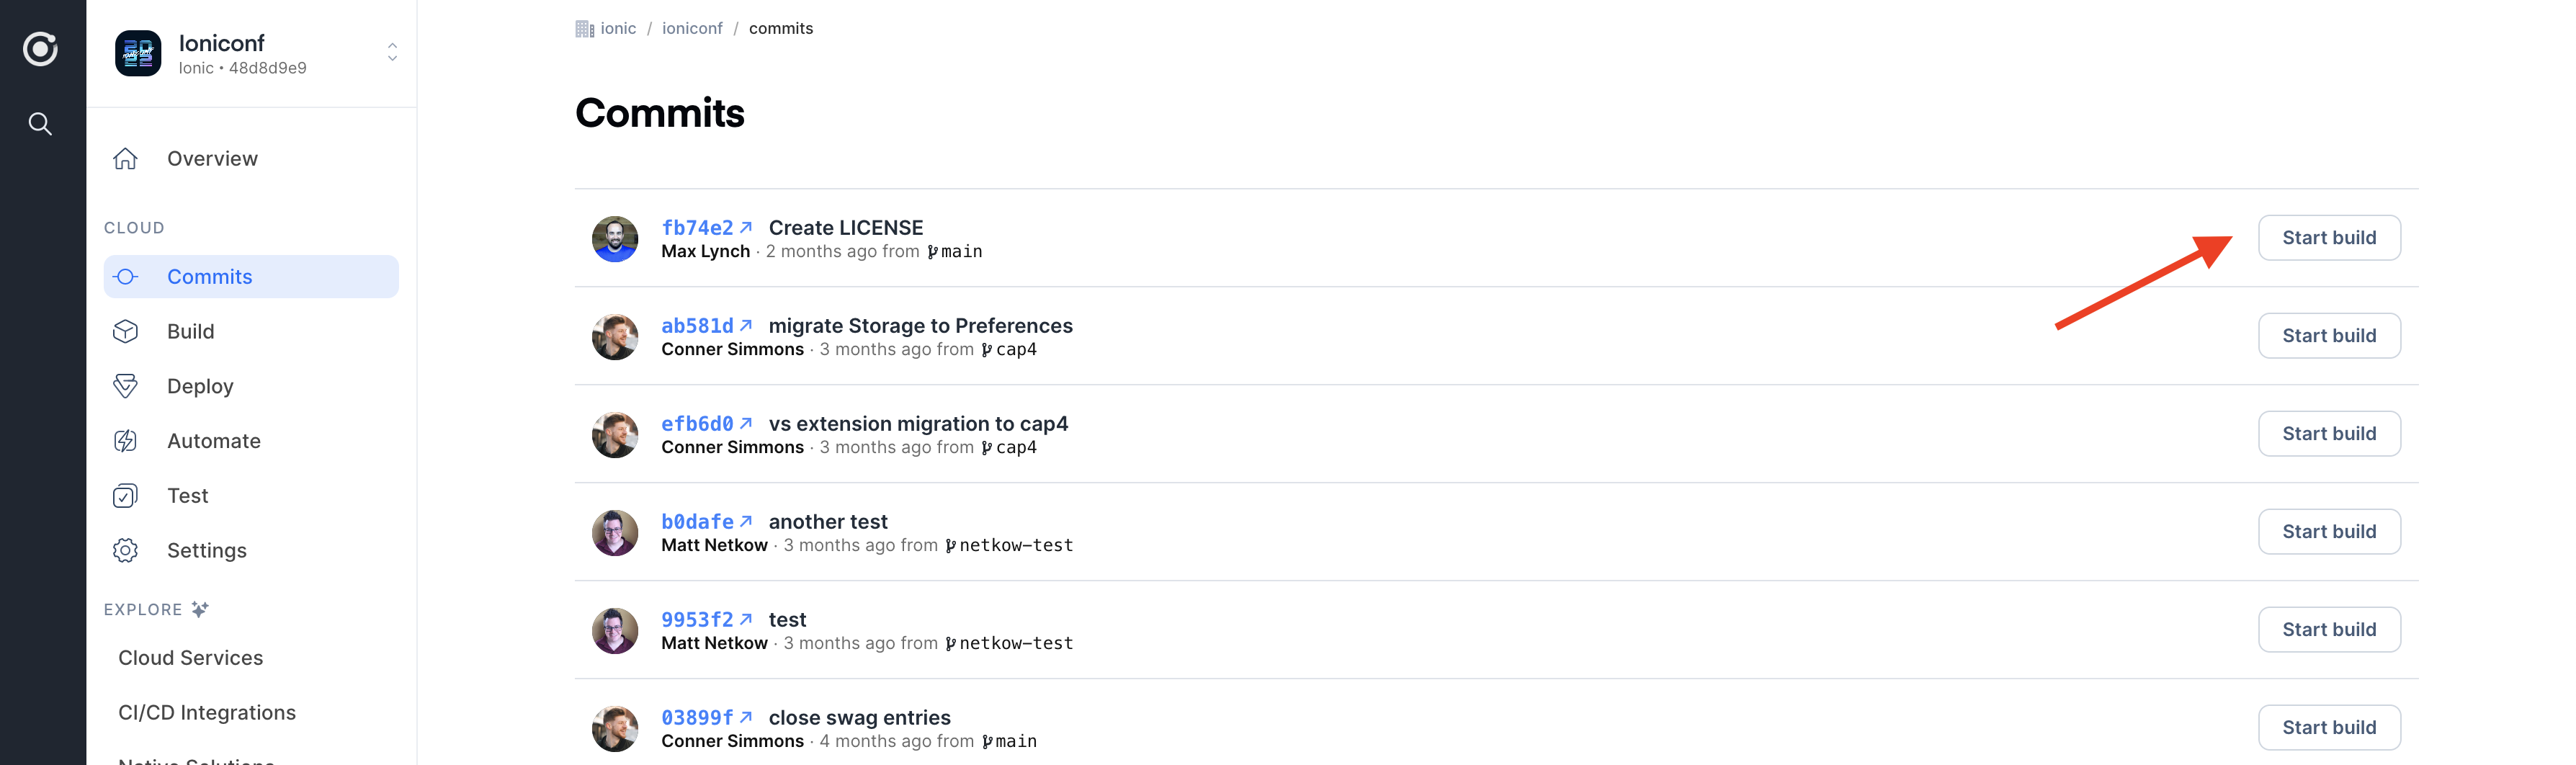
- Click the
New buildbutton in the top right from theBuild > Buildstab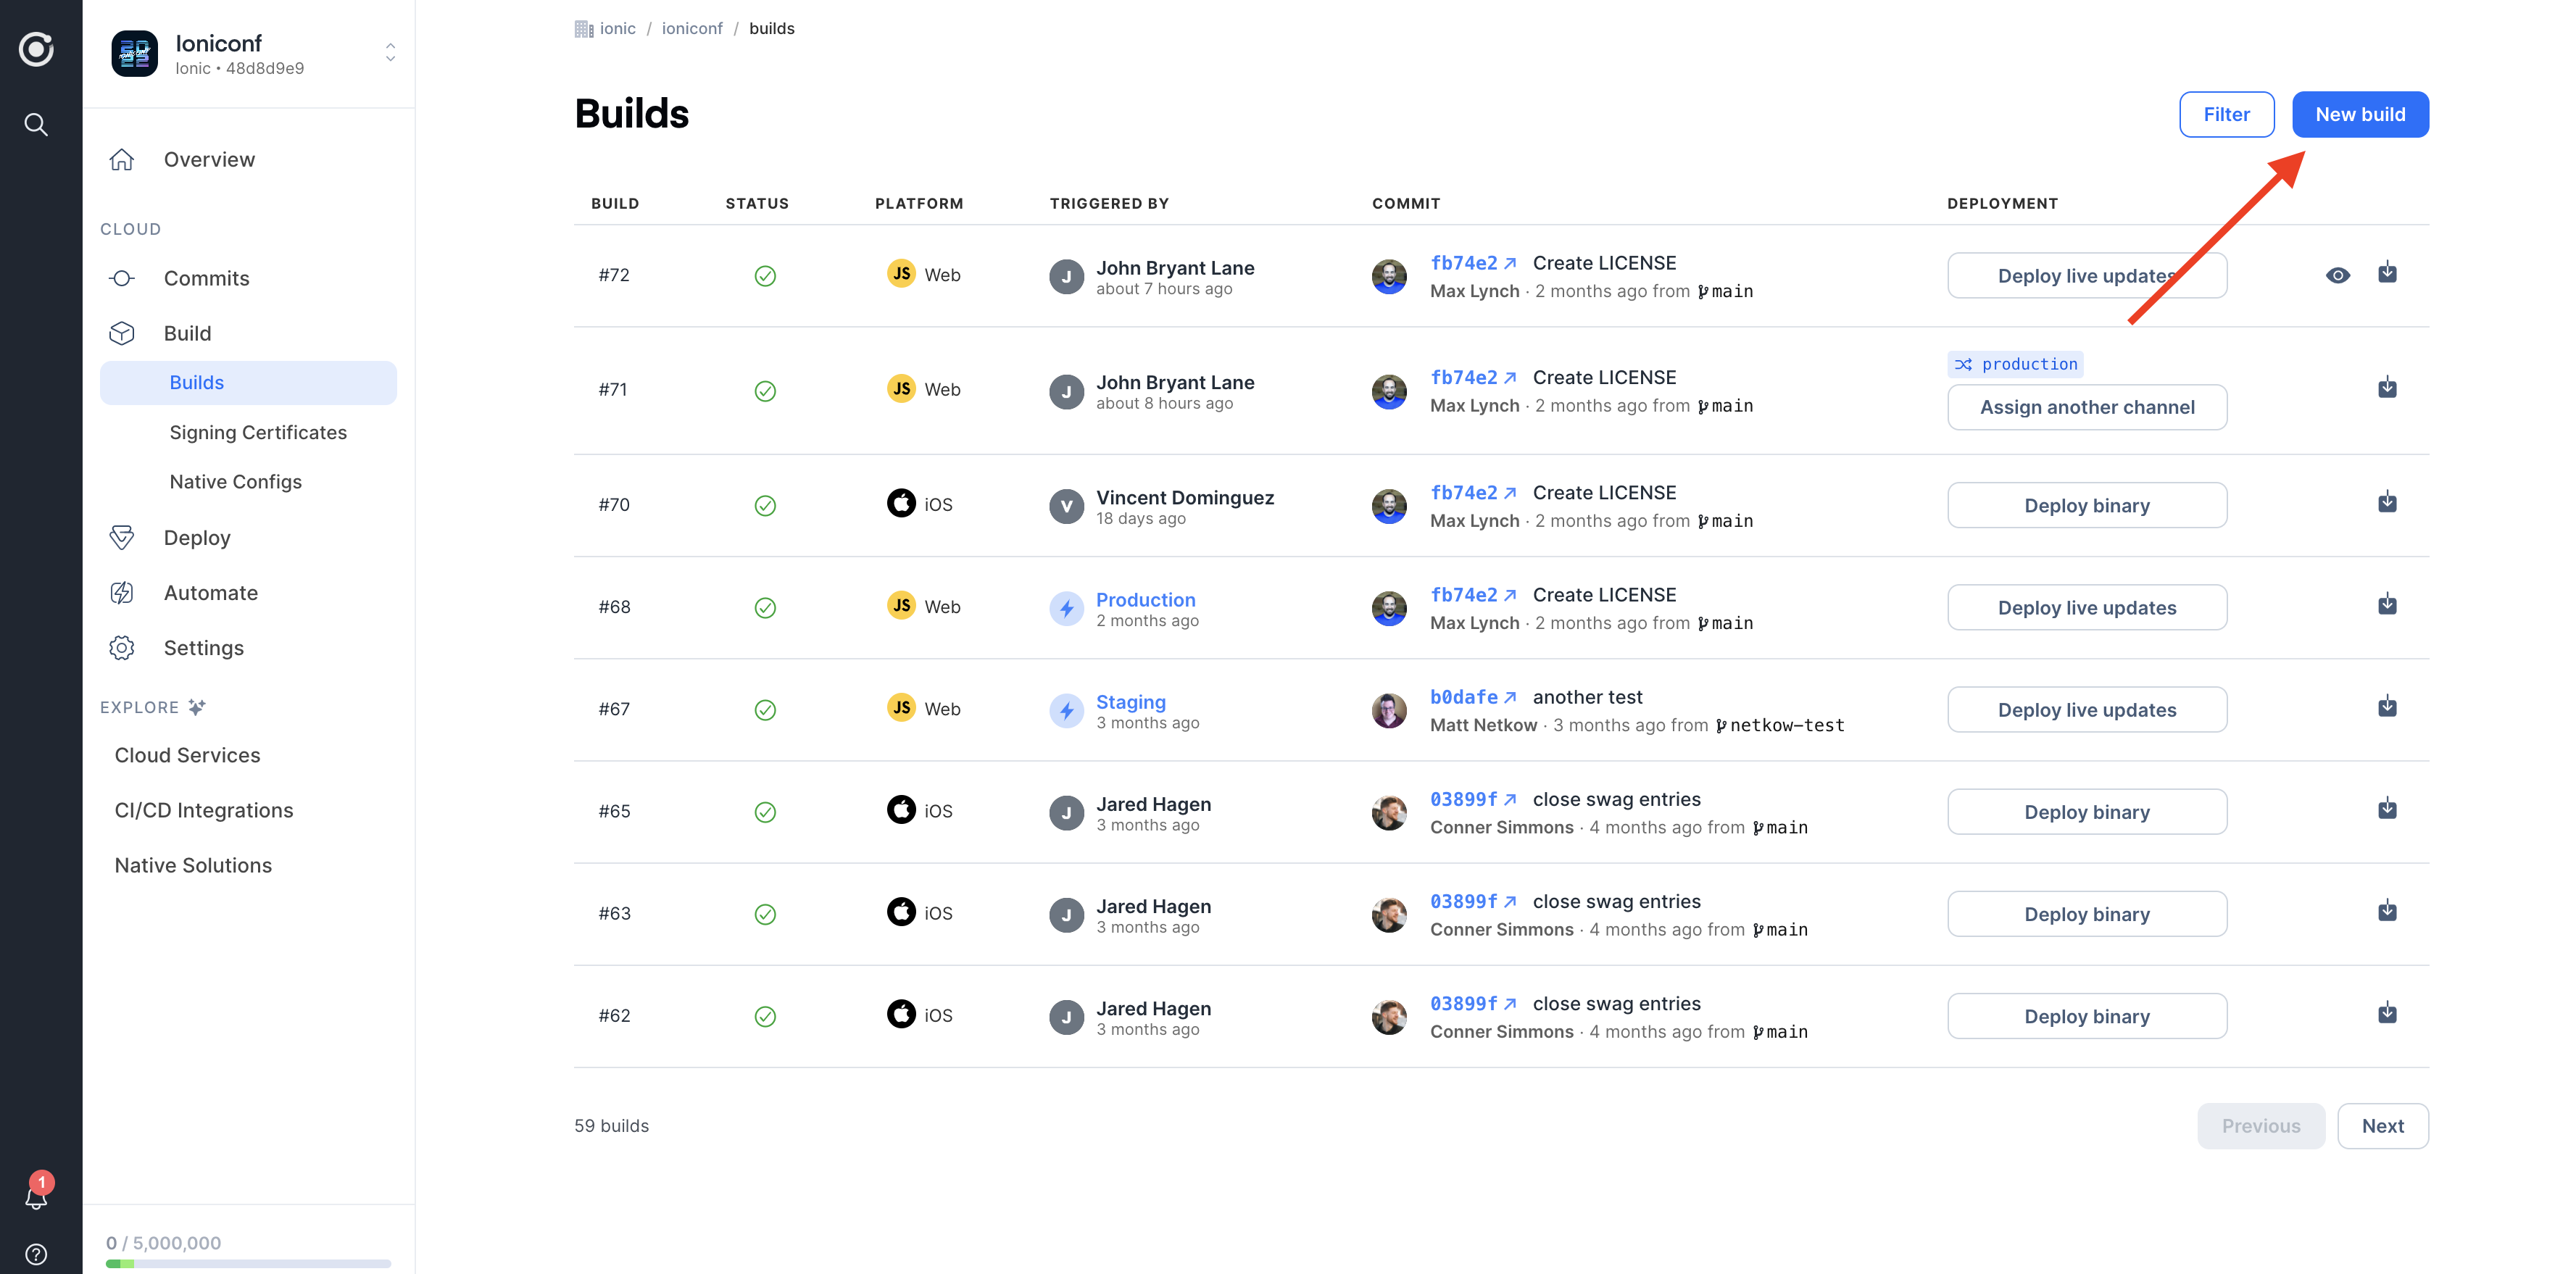
Choose the commit to deploy then select the Web target platform and the Latest build stack. If you have configured custom environments, you can select one from the provided dropdown list. Finally, you can also enable the Live Update and pick a channel to automatically assign the build to once it completes successfully. For the purposes here, we will leave both options blank.
Once the build begins you can watch its progress and review at the logs if you encounter errors.
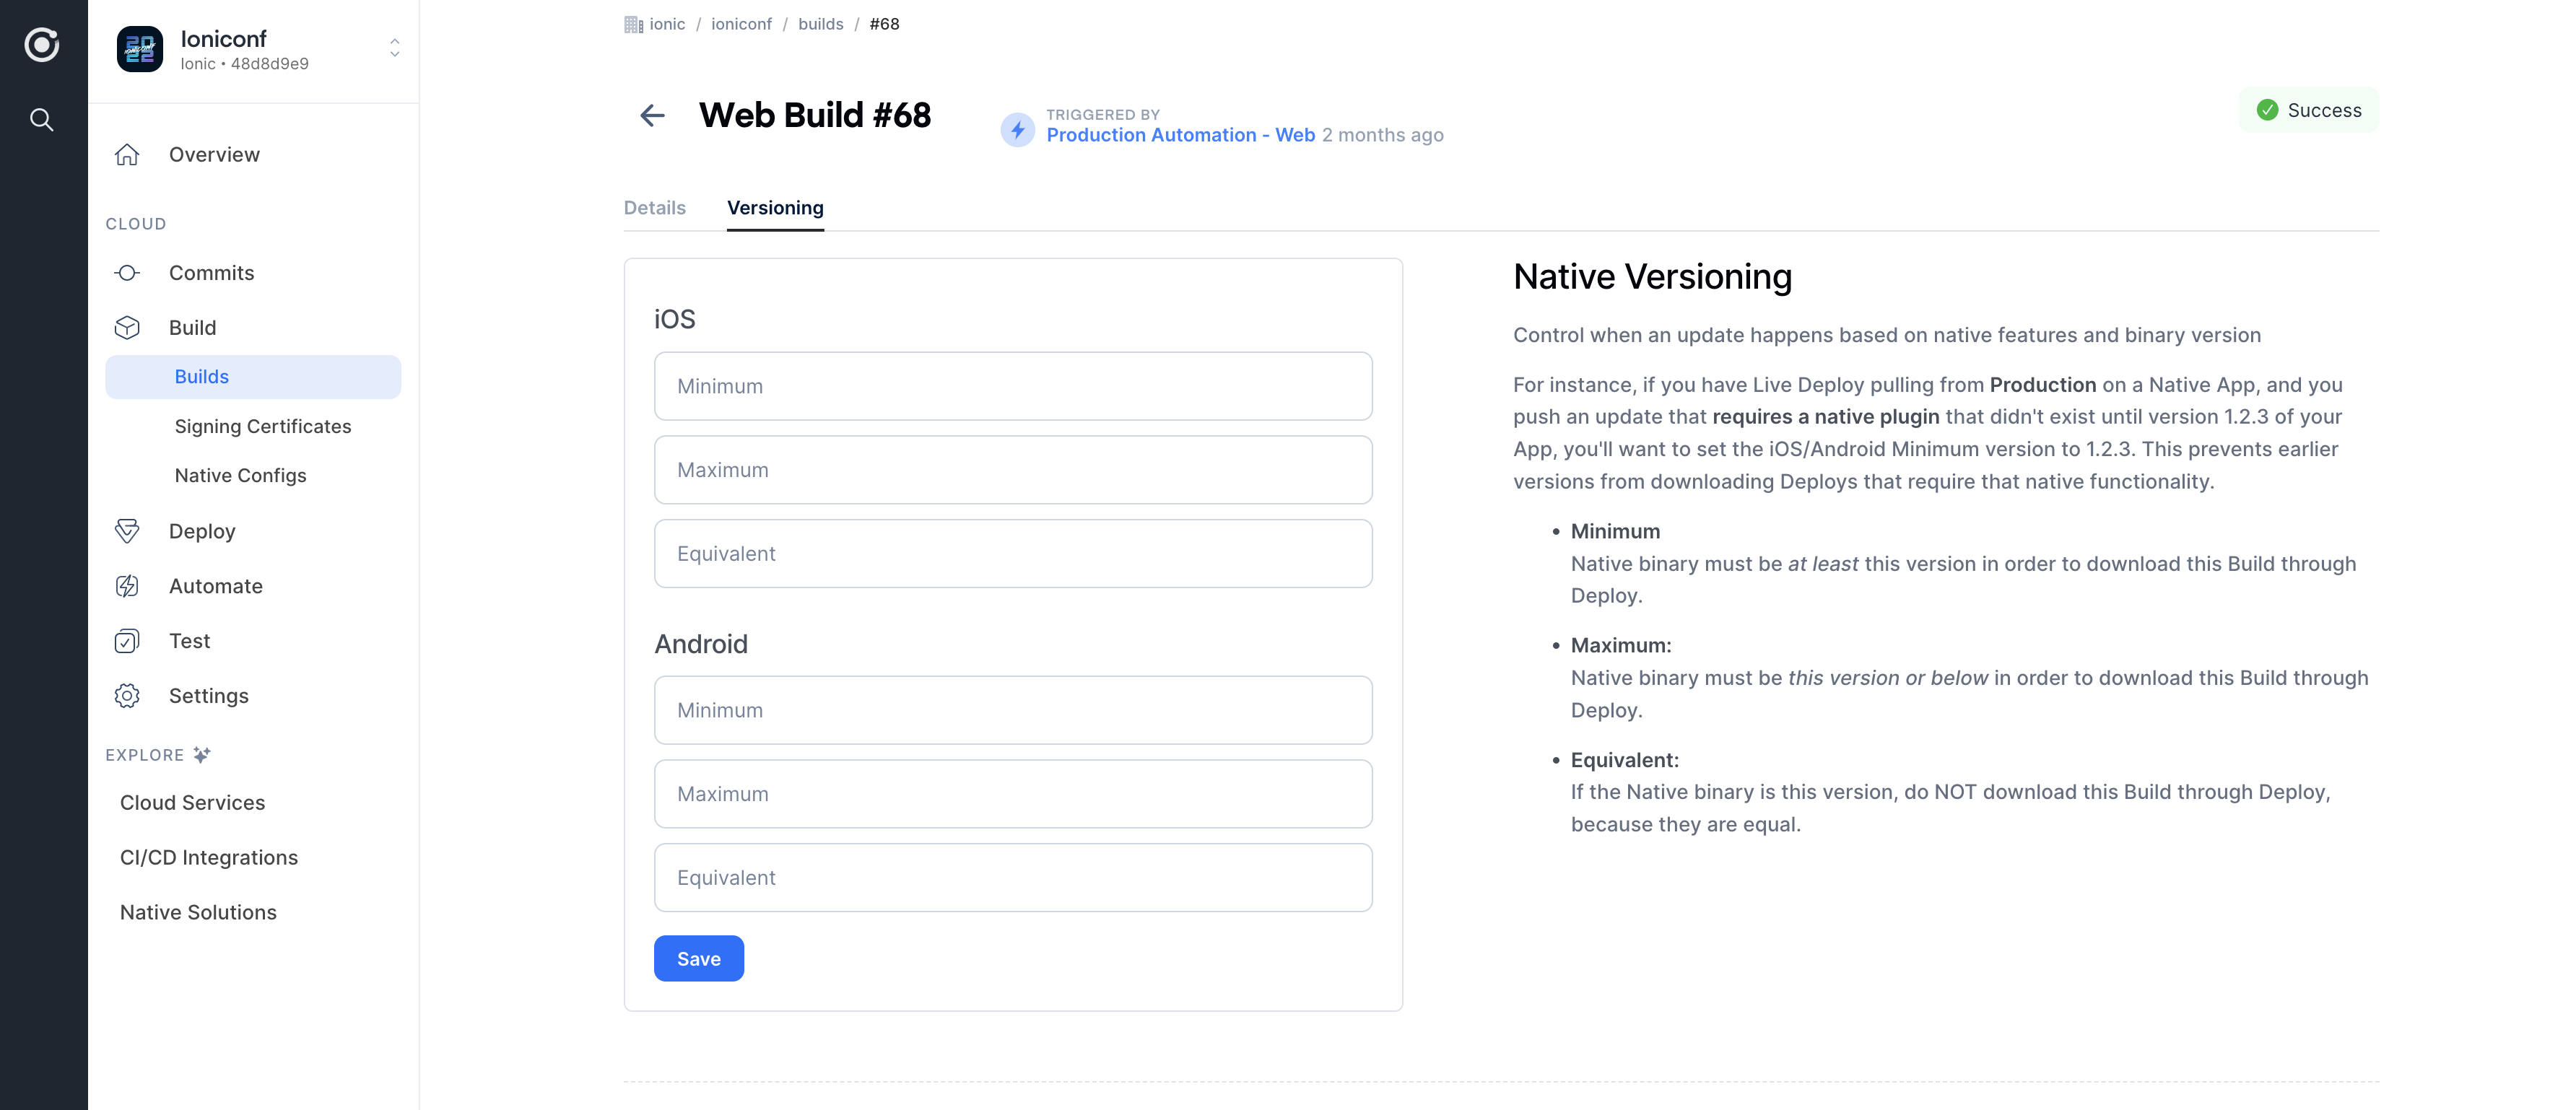
Web Build Versioning
Once the Web Build completes, it can be restricted to a specific native build number assigned in the Web Build details. A minimum and maximum equivalent build version number are specified, which designates whether the update is compatible. After doing this, new native builds that are distributed within an app store do not conflict with the current available update from Appflow.
For more details and a simple use case see this article.
Assign the Build to a Channel
If you have trouble getting a successful build in the previous step, you can find answers to common Deploy build errors in this section of our knowledge base.
Once you have created a Channel, go back to the Builds section of your app. On the right side of each Web Build, click the 3 dot ellipsis, then "Deploy Live Update" menu item.
Select the Live Update channel from the dropdown then click the Deploy button. The Live Update becomes active immediately. Once a Web Build is set as active for a Channel, any native binaries that have been configured to watch the channel will receive the new update the next time the app checks in.
Receiving a Live Update on a Device
For your application to receive a live update, you'll need to run the app on a device or an emulator.
For Capacitor projects, the easiest way to do this is to use the cap run command to launch your local app in an emulator or a device connected to your computer.
npx cap run [ios | android] [options]
You can also open Xcode and Android Studio to run the app, see logs, etc.
npx cap open [ios | android]
For Cordova projects, the equivalent command is ionic cordova run.
ionic cordova run [ios | android] [options]
If the app is configured correctly to listen on the channel that the live update was deployed to, the application should be ready to update. If you're using the background update method, just stay in the app for 30 seconds or so while the update is downloaded in the background. Then, close the application, reopen it again and you should see your update applied 🎉.
If the app is configured correctly to listen on the channel that the live update was deployed to, the application should update immediately on startup if you're using the auto update method.
Turning off Updates for Local Development
Your code will get overwritten if the local app codebase points to the same channel as a deployed Live Update build. To avoid this situation, you can turn off live updates for local development. Be sure to turn it back on before submitting to the app stores.
Capacitor SDK
Open the capacitor.config.ts file, and under the LiveUpdates section, set enabled to false:
const config: CapacitorConfig = {
  plugins: {
    LiveUpdates: {
      enabled: false,
    }
  }
};
Cordova SDK
If you have a Capacitor app, then in the capacitor.config.ts file, set the following then run npx cap sync:
"cordova": {
  "preferences": {
    "DisableDeploy": "true"
  }
}
Alternatively, you can change the Channel name to one currently not in use using ionic live-update configure --channel-name="NAME" (details here). This make changes to the native project files directly (on Android, android/app/src/main/res/xml/config.xml and on iOS, ios/App/App/config.xml).
If you have a Cordova app, then set the DisableDeploy preference to true in the config.xml file during local development. You can then set it back to false before building your binary for release by either manually setting it back or using the native config feature if you're building your binaries with the native builds feature.
Review Live Updates Strategies
Downloading and applying Live Updates automatically in the background is just one of several Live Updates strategies you can apply. Next, let's look at some advanced options.