Deploy a Live Update
Use Appflow's Live Updates feature to update the UI and business logic of your app remotely, in real-time. Push HTML, JS, and CSS updates directly to your users without going through the app store to instantly fix bugs and ship new features.
Here's a high-level overview of the Live Updates installation, configuration, and deployment process.
Install SDK
Have a Cordova app instead? View setup instructions here.
Within your Capacitor app project, install the Live Updates SDK:
npm install @capacitor/live-updates
With the Live Updates SDK installed, add a "LiveUpdates" configuration section under plugins in capacitor.config.ts (or capacitor.config.json) file:
import { CapacitorConfig } from '@capacitor/cli';

const config: CapacitorConfig = {
  plugins: {
    LiveUpdates: {
      appId: 'FILL-ME-IN',
      channel: 'Production',
      autoUpdateMethod: 'background',
      maxVersions: 2,
    },
  },
};
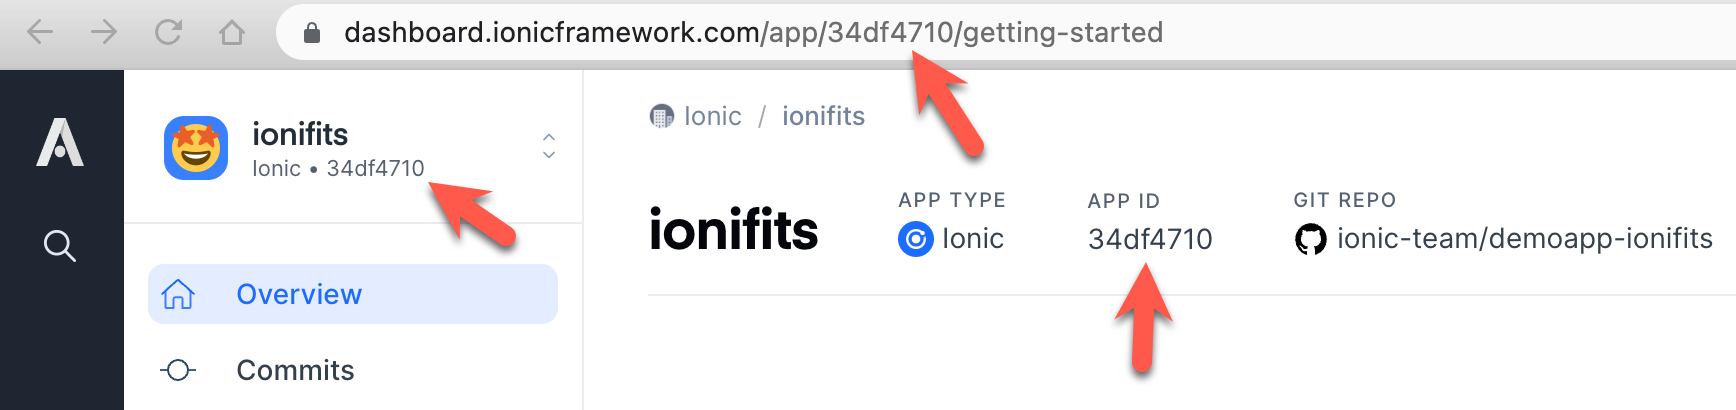
Find the App Id on the App Overview page:
Next, run Capacitor sync then commit the changes to your repository:
npx cap sync
Creating a Web Build
In order to deploy a live update, you first need to create a Web build in Appflow. The Live Updates feature works by using the installed Live Updates SDK in your native application to listen to a particular Live Update channel destination.
When a Web build is assigned to a channel destination, that update will be deployed to user devices running binaries that are configured to listen to the specified channel (specified above in the Capacitor config file).
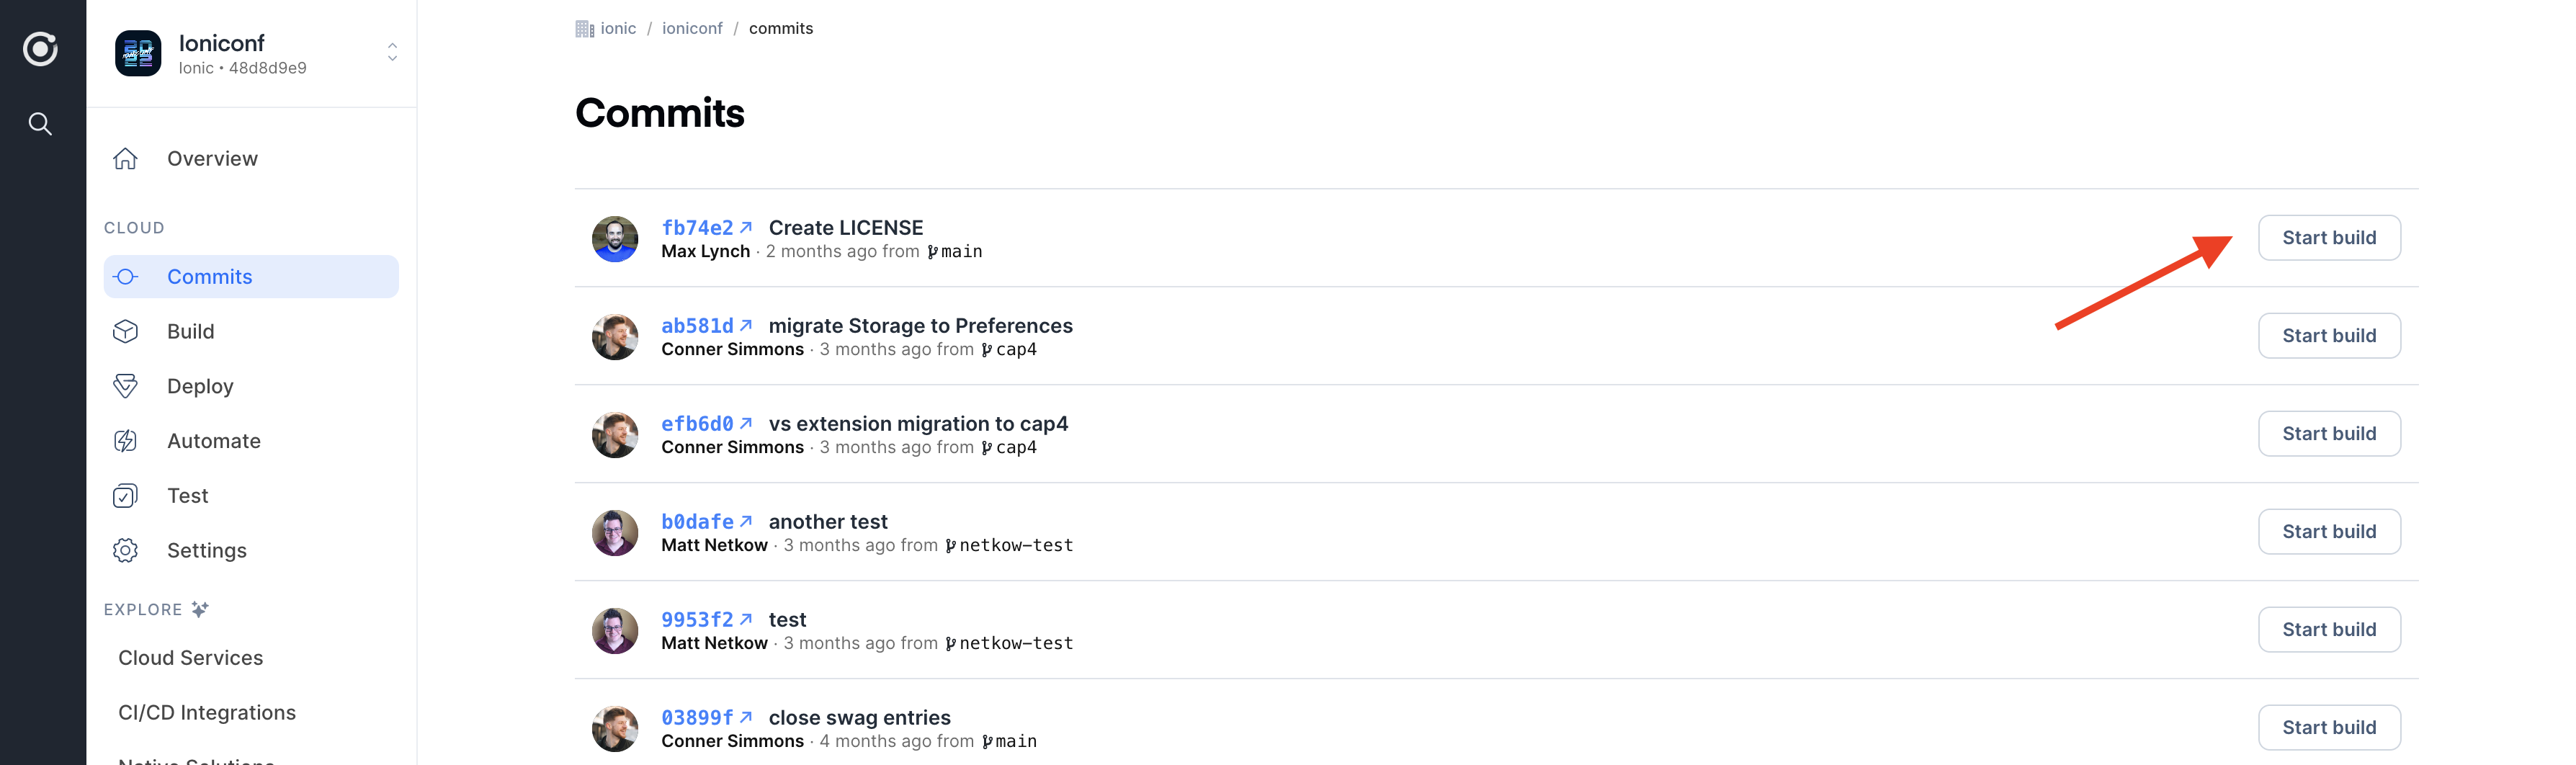
Navigate to the Commits tab and click on the Start build button.
Next, select the Web target platform and the Latest build stack. Toggle the Live Update Destination and select the production channel to automatically assign the build to the production channel once it completes successfully. Once the build begins you will be able to watch its progress and look at the logs if you encounter errors.
Receiving a Live Update on a Device
For your application to receive a live update, you'll need to run it on a device or an emulator.
For Capacitor apps, the easiest way to do this is to use the cap run command to launch your local app in an emulator or a device connected to your computer.
npx cap run [ios | android] [options]
Since we are using the background update method, just stay in the app for 30 seconds or so while the update is downloaded in the background. Then, close the application, reopen it again and you should see your update applied 🎉.
Next Steps
This guide only scratches the surface of what's possible with Live Updates. To learn more, review the rest of the Live Updates documentation.