Using Appflow CLI with Bitbucket Pipelines
Appflow CLI is available to our enterprise customers only
Introduction
You can utilize Live Updates, Native Builds, and App Store Publishing from the Appflow CLI inside a Bitbucket Pipeline.
This example will walk you through setting up a pipeline in Bitbucket Pipelines that takes you repo, performs an iOS Build for TestFlight, saves it to Bitbucket as an artifact, and then pushes it directly to TestFlight.
Requirements
For this example, we've already done the following in our Appflow dashboard:
- Set up a Personal Access Token
- Connected our Bitbucket Repo to an Appflow App
- Created a Signing Credential for iOS App Store (Production), and added to Appflow as "TestFlight"
- Added an App Store Destination as "TestFlight"
Creating a Pipeline
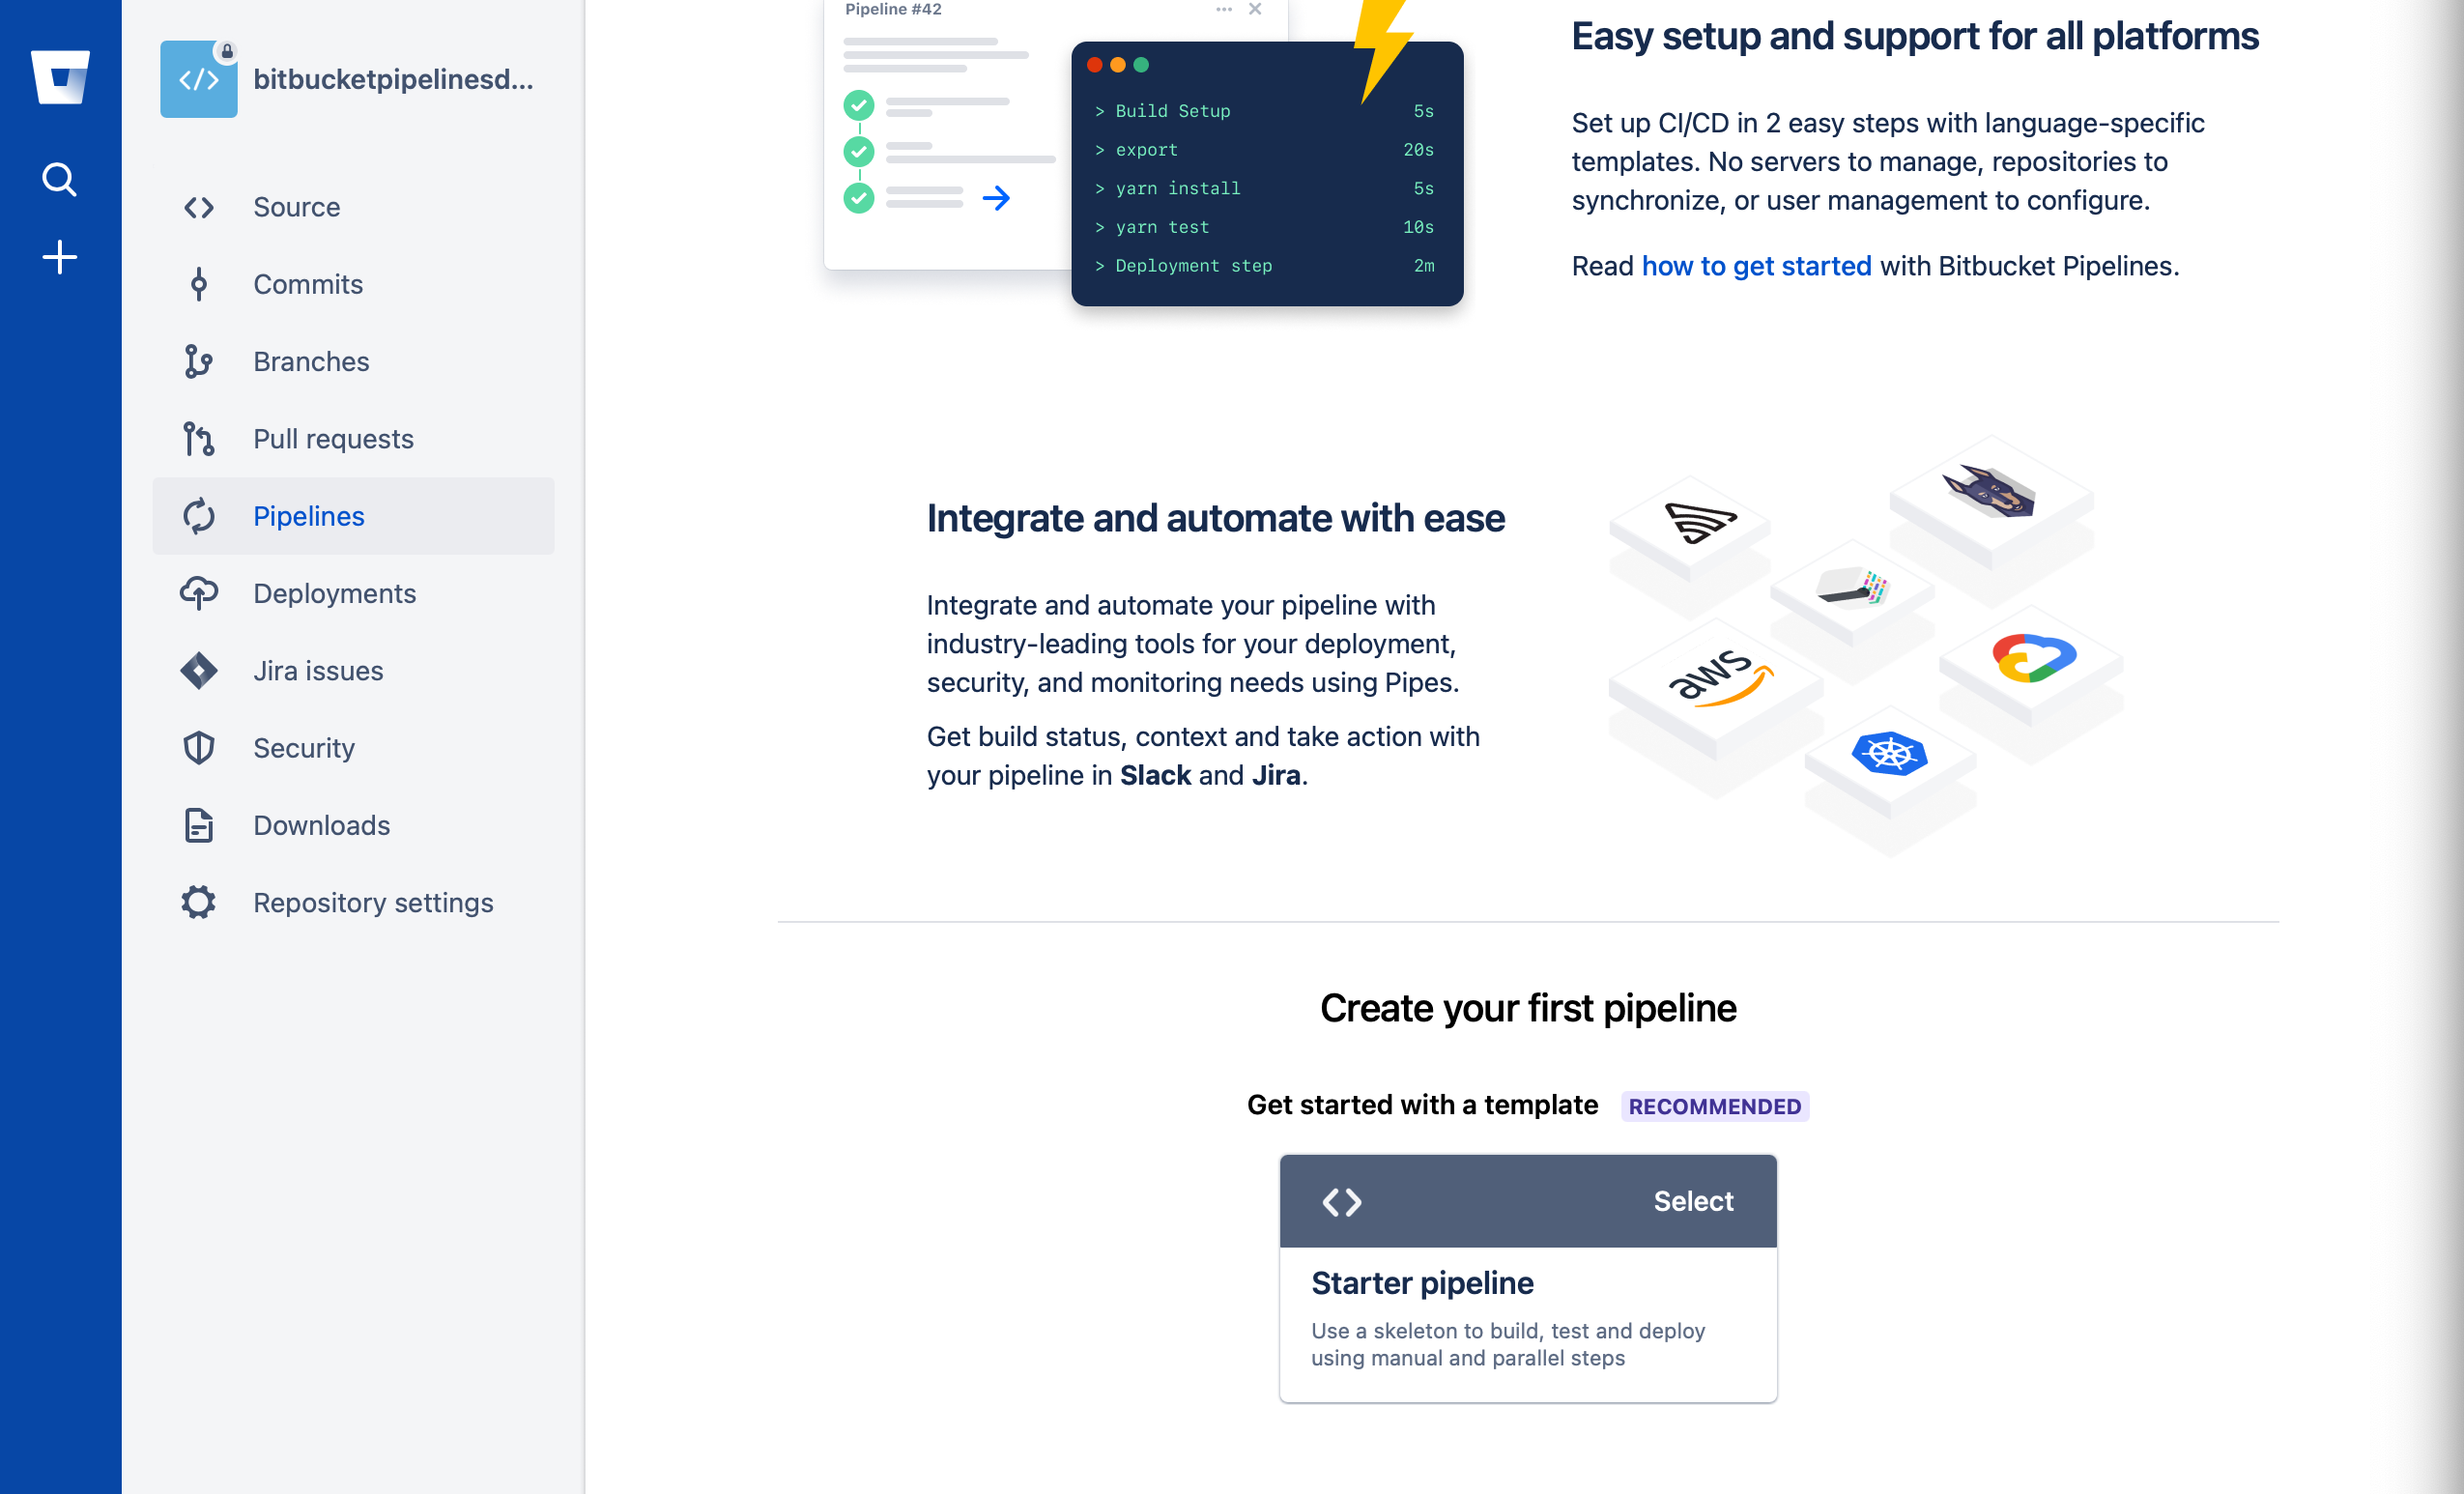
Navigate to the Pipelines section of your Bitbucket Repo and click "Create your first pipeline," then click on "Select" for Starter pipeline.
Writing our Pipeline
Once we've created our pipeline, we'll be dropped into the Pipeline editor, which looks like this:
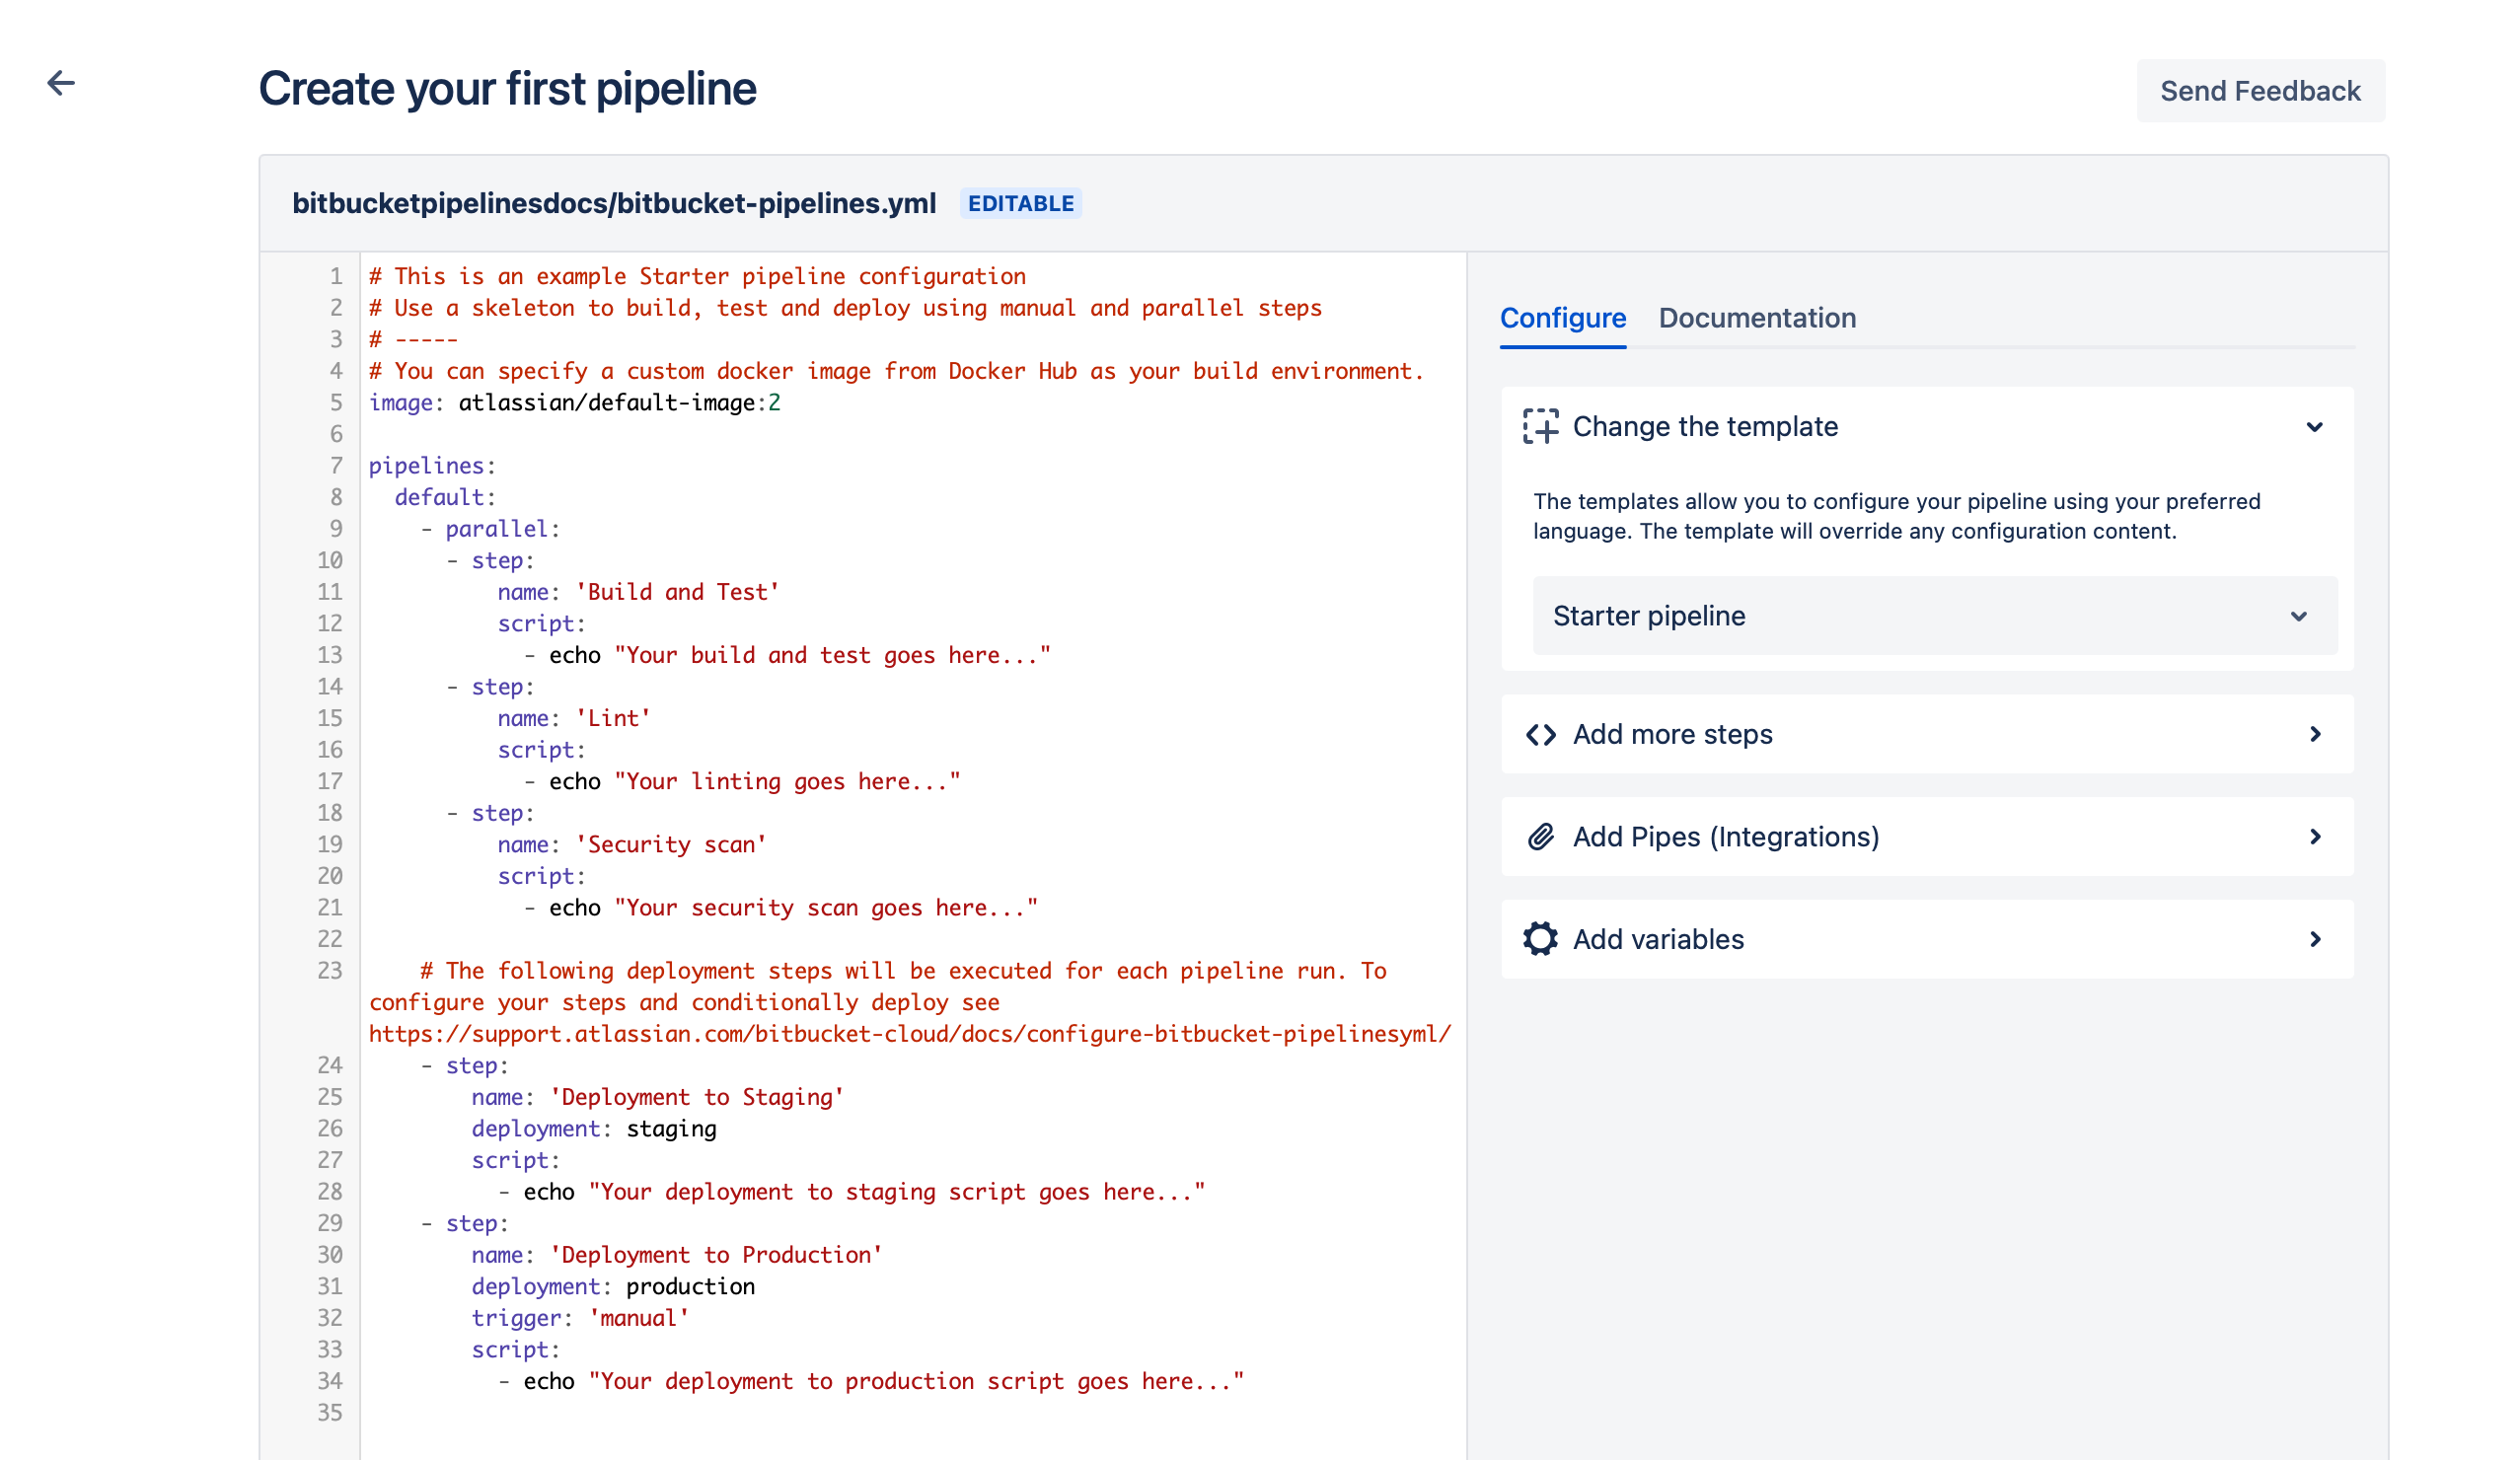
The first thing we'll want to do is add our Personal Access Token as a Variable. Click on "Add variables" on the right, and set up a new Variable with the name IONIC_TOKEN and the value of your PAT. Mark this variable as a Secured, then click Add.
Now that we have access to our IONIC_TOKEN we can write a pipeline. The steps for this example are going to be:
- Update the pipeline image
- Run an iOS build in Appflow
- Save artifacts for use between steps
- Deploy to TestFlight in Appflow
Be sure to replace AppIdEx123abc with your actual App ID from the Appflow Dashboard. You can find this by opening your app in Appflow and looking under its name in the top left.
Full yaml Script
# This is an example Starter pipeline configuration
# Use a skeleton to build, test and deploy using manual and parallel steps
# -----
# You can specify a custom docker image from Docker Hub as your build environment.
image: node:lts

pipelines:
  custom:
    appflowios:
      - step:
          name: 'Run an iOS Build in Appflow'
          script:
            - curl -fsSL https://ionic.io/get-appflow-cli | bash
            - appflow build ios app-store --app-id AppIdEx123abc --commit $BITBUCKET_COMMIT --signing-cert "TestFlight" --ipa-name "app.ipa" --json --token $IONIC_TOKEN | jq -r '.buildId' > iosbuildid.txt
          artifacts:
            - iosbuildid.txt
            - app.ipa
      - step:
          name: 'Deploy to TestFlight in Appflow'
          deployment: production
          script:
            - curl -fsSL https://ionic.io/get-appflow-cli | bash
            - appflow deploy ios --app-id AppIdEx123abc --build-id $(< ./iosbuildid.txt) --destination "TestFlight" --token $IONIC_TOKEN
Initial Setup
Let's walk through this pipeline step by step. First we updated the image to node:lts.
# This is an example Starter pipeline configuration
# Use a skeleton to build, test and deploy using manual and parallel steps
# -----
# You can specify a custom docker image from Docker Hub as your build environment.
image: node:lts
Then we changed the structure of the default configuration to be custom with appflowios as our job.
pipelines:
  custom:
    appflowios:
      - step:
      - step:
Perform an iOS Build
Since Bitbucket treats each step as standalone, we'll be installing the Appflow CLI during each step (should take < 1 second) with the following command: - curl -fsSL https://ionic.io/get-appflow-cli | bash.
After that we added a multiline Step that does a few different things. The primary part of this command is appflow build ios app-store --app-id AppIdEx123abc --commit $BITBUCKET_COMMIT --signing-cert "TestFlight" --ipa-name "app.ipa" --json --token $IONIC_TOKEN which actually performed the build.
We included | jq -r '.buildId' after that to parse the Build ID from Appflow out of the responses JSON, so that we can store it.
Because Bitbucket steps are standalone, we'll be saving our Build ID that is returned from jq as the contexts of a text artifact like so: > iosbuildid.txt and we'll reference this in our next deployment job. We'll also ensure we save both the build id file and the app.ipa that was generated as artifacts of this step.
The complete first step looks like this:
- step:
    name: 'Run an iOS Build in Appflow'
    script:
      - curl -fsSL https://ionic.io/get-appflow-cli | bash
      - appflow build ios app-store --app-id AppIdEx123abc --commit $BITBUCKET_COMMIT --signing-cert "TestFlight" --ipa-name "app.ipa" --json --token $IONIC_TOKEN | jq -r '.buildId' > iosbuildid.txt
    artifacts:
      - iosbuildid.txt
      - app.ipa
Deploy to TestFlight
Since Bitbucket treats each step as standalone, we'll be installing the Appflow CLI during each step (should take < 1 second) with the following command: - curl -fsSL https://ionic.io/get-appflow-cli | bash.
Then we'll utilize the file we saved earlier to reference the build id in our deploy command with $(< ./iosbuildid.txt).
The actual deployment command is rather simple, with the final step looking like this:
- step:
    name: 'Deploy to TestFlight in Appflow'
    deployment: production
    script:
      - curl -fsSL https://ionic.io/get-appflow-cli | bash
      - appflow deploy ios --app-id AppIdEx123abc --build-id $(< ./iosbuildid.txt) --destination "TestFlight" --token $IONIC_TOKEN
Save and Run
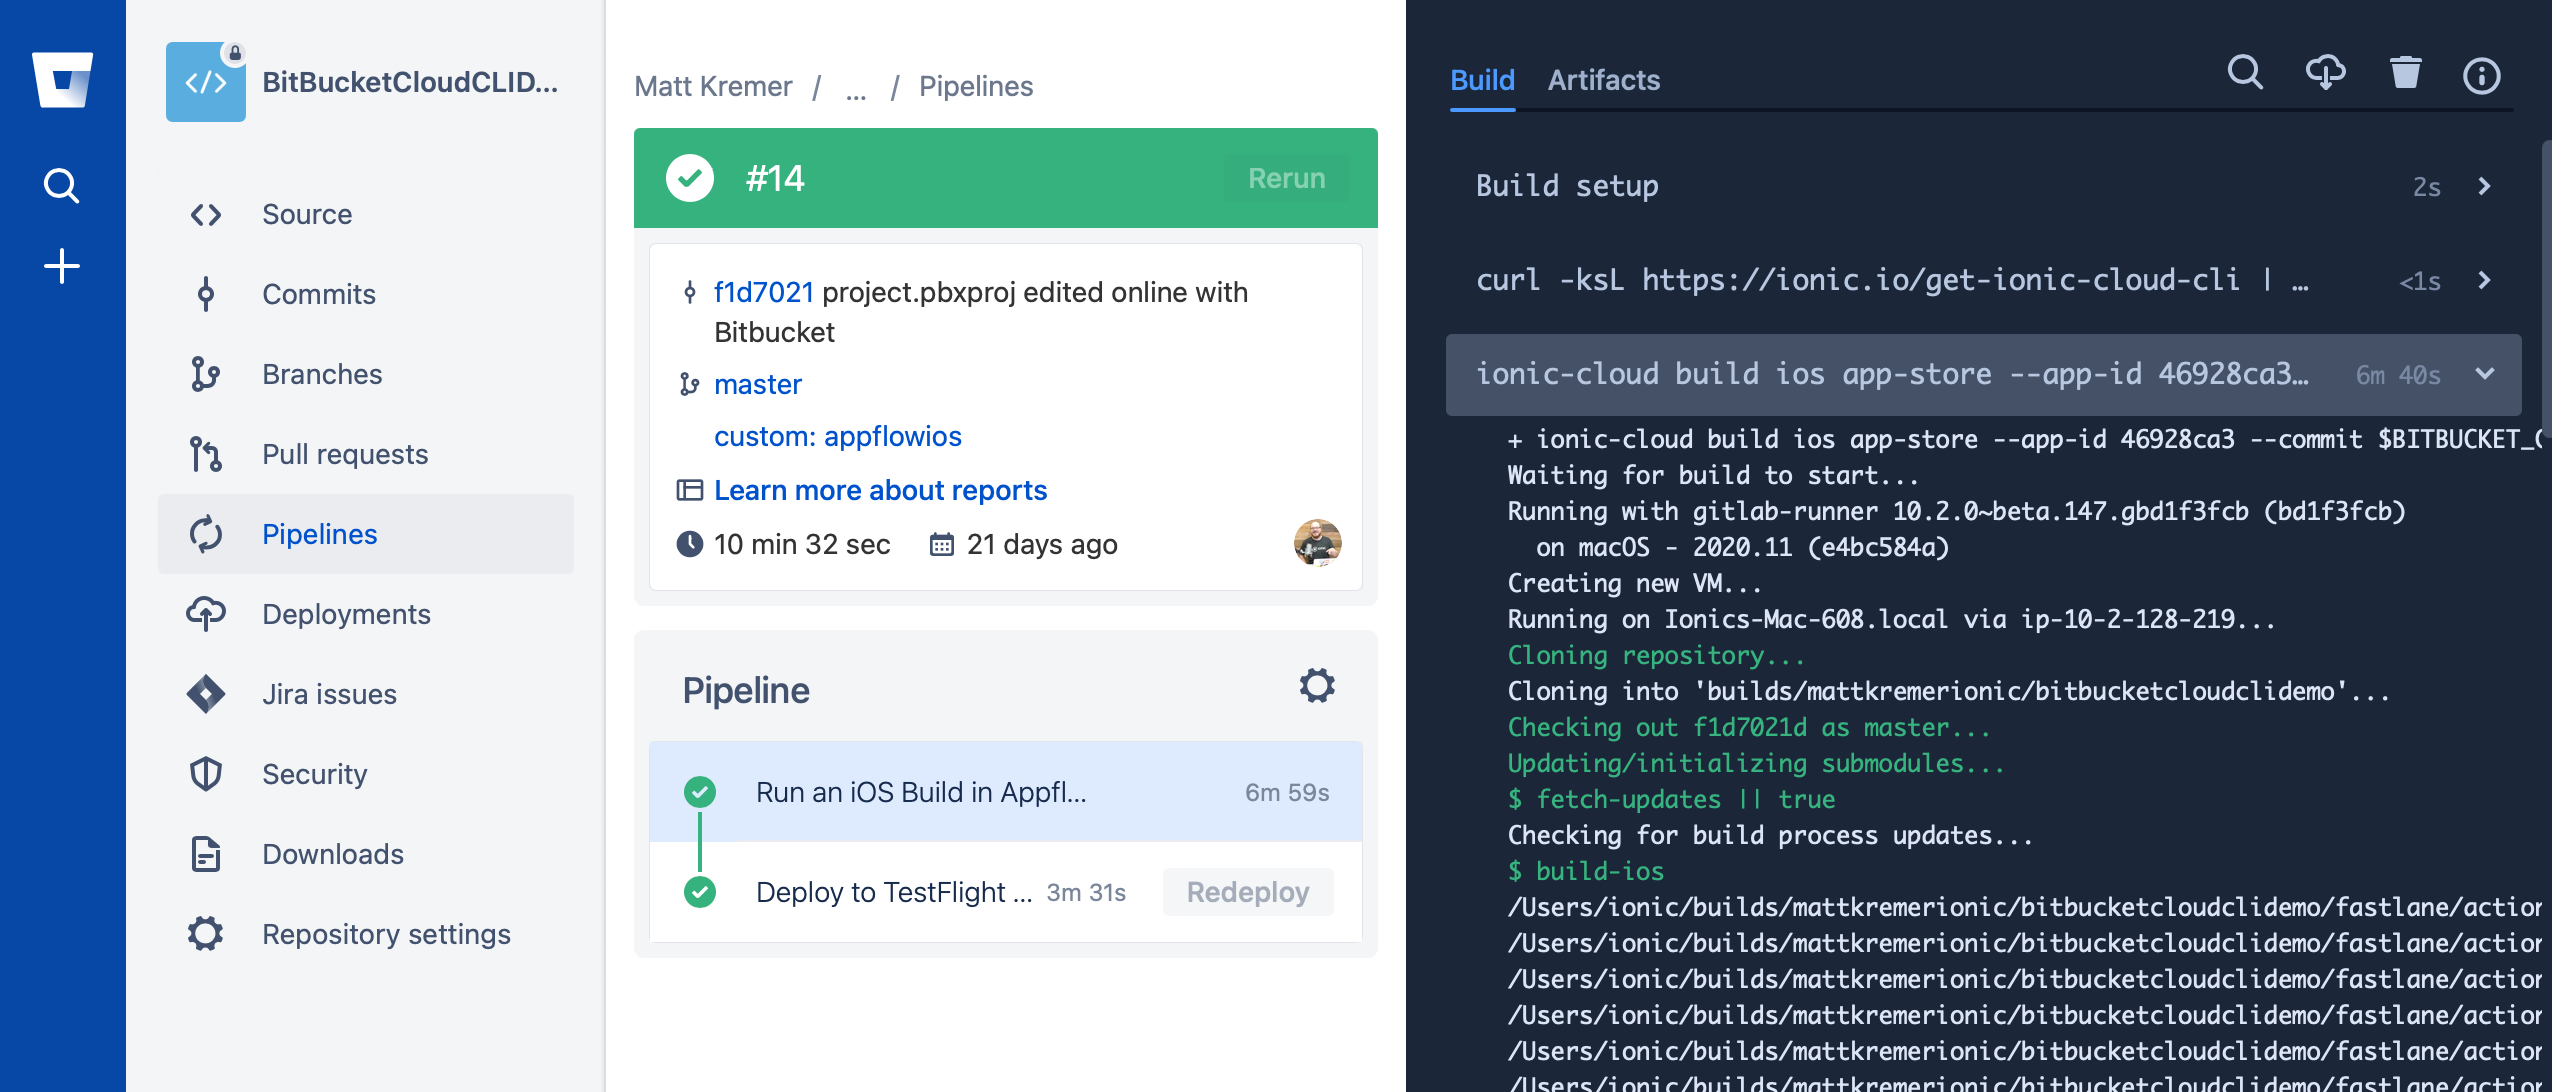
After you save your pipeline, you can go back to the pipelines tab and click "Run pipeline". Feel free to set up a Schedule to run the pipeline if you'd like to automate it. Once you run your pipeline, you should see all build output and errors ported directly back to your Bitbucket dashboard like so:
Next Steps
This example walked through setting up an iOS build automated through to Testflight, but you can also create Pipelines
for Android builds, or Live Updates. See the other Appflow CLI documentation or run appflow --help to learn more
about what functions are available in the Appflow CLI.