Using Appflow CLI with GitLab CI/CD Pipelines
Appflow CLI is available to our enterprise customers only
Introduction
You can utilize Live Updates, Native Builds, and App Store Publishing from the Appflow CLI inside a GitLab CI/CD Pipelines.
This example will walk you through setting up a pipeline in GitLab CI/CD Pipelines that takes your repo, performs an Android Build for Play Store, saves it to GitLab as an artifact, and then pushes it directly to the Play Store Console.
Requirements
For this example, we've already done the following in our Appflow dashboard:
- Set up a Personal Access Token
- Connected our GitLab Repo to an Appflow App
- Created a Signing Credential for Google Play Store (Production), and added to Appflow as "PlayStoreInternal"
- Added an Play Store Destination as "Play Store"
Setup Personal Access Token in GitLab
The Appflow CLI will need to authenticate using a Personal Access Token stored as an environment variable accessible within the GitLab Pipeline. To create this variable in a project:
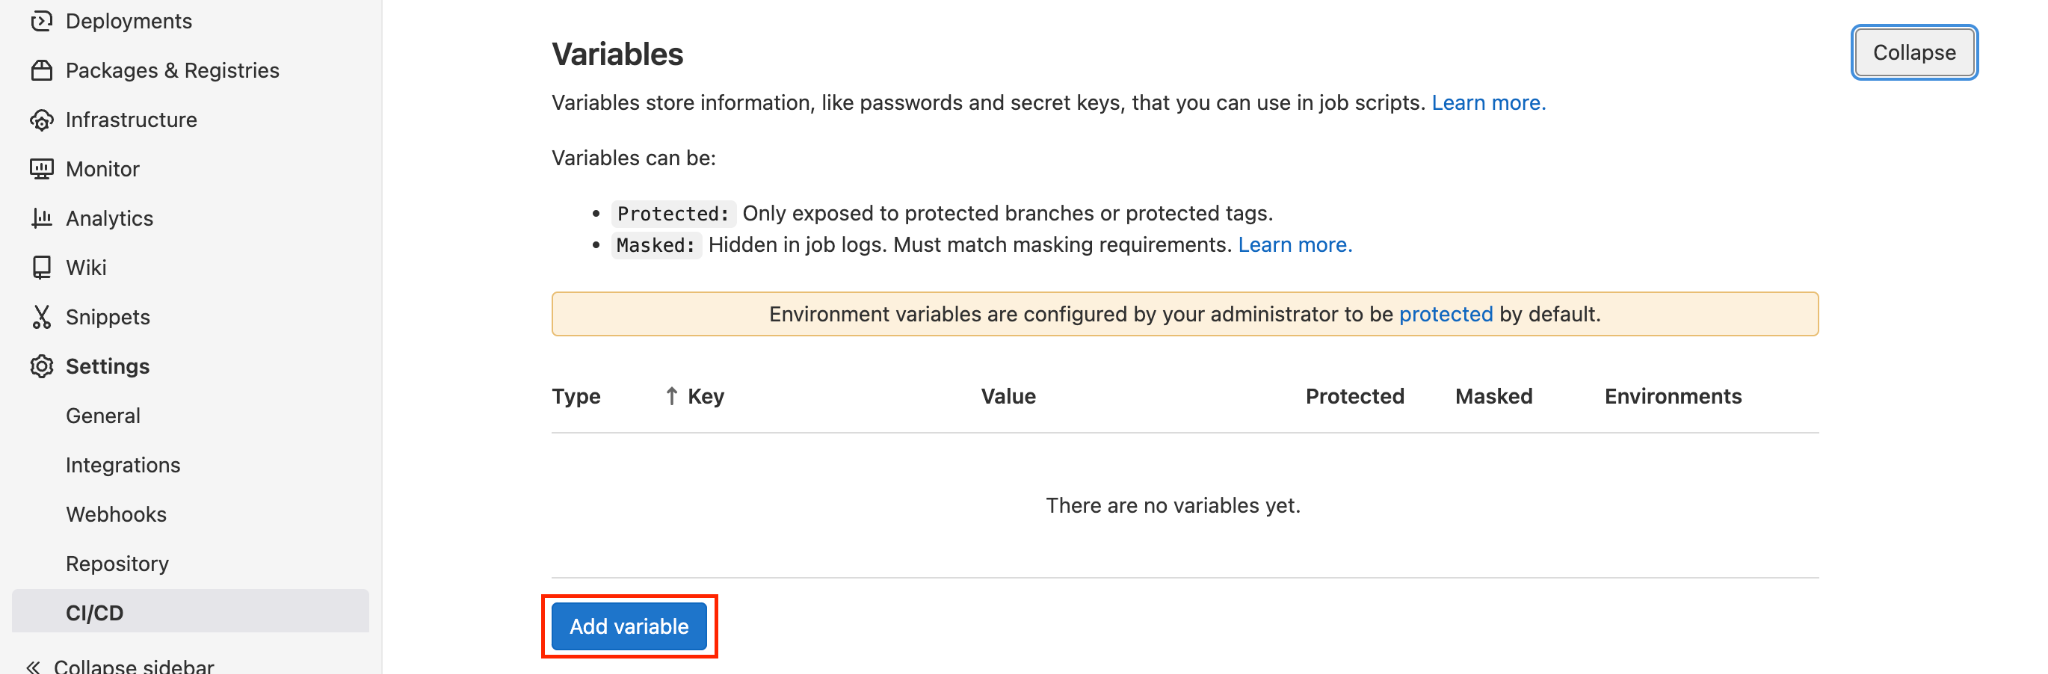
Navigate to Settings > CI/CD > Variables > “Add variable”
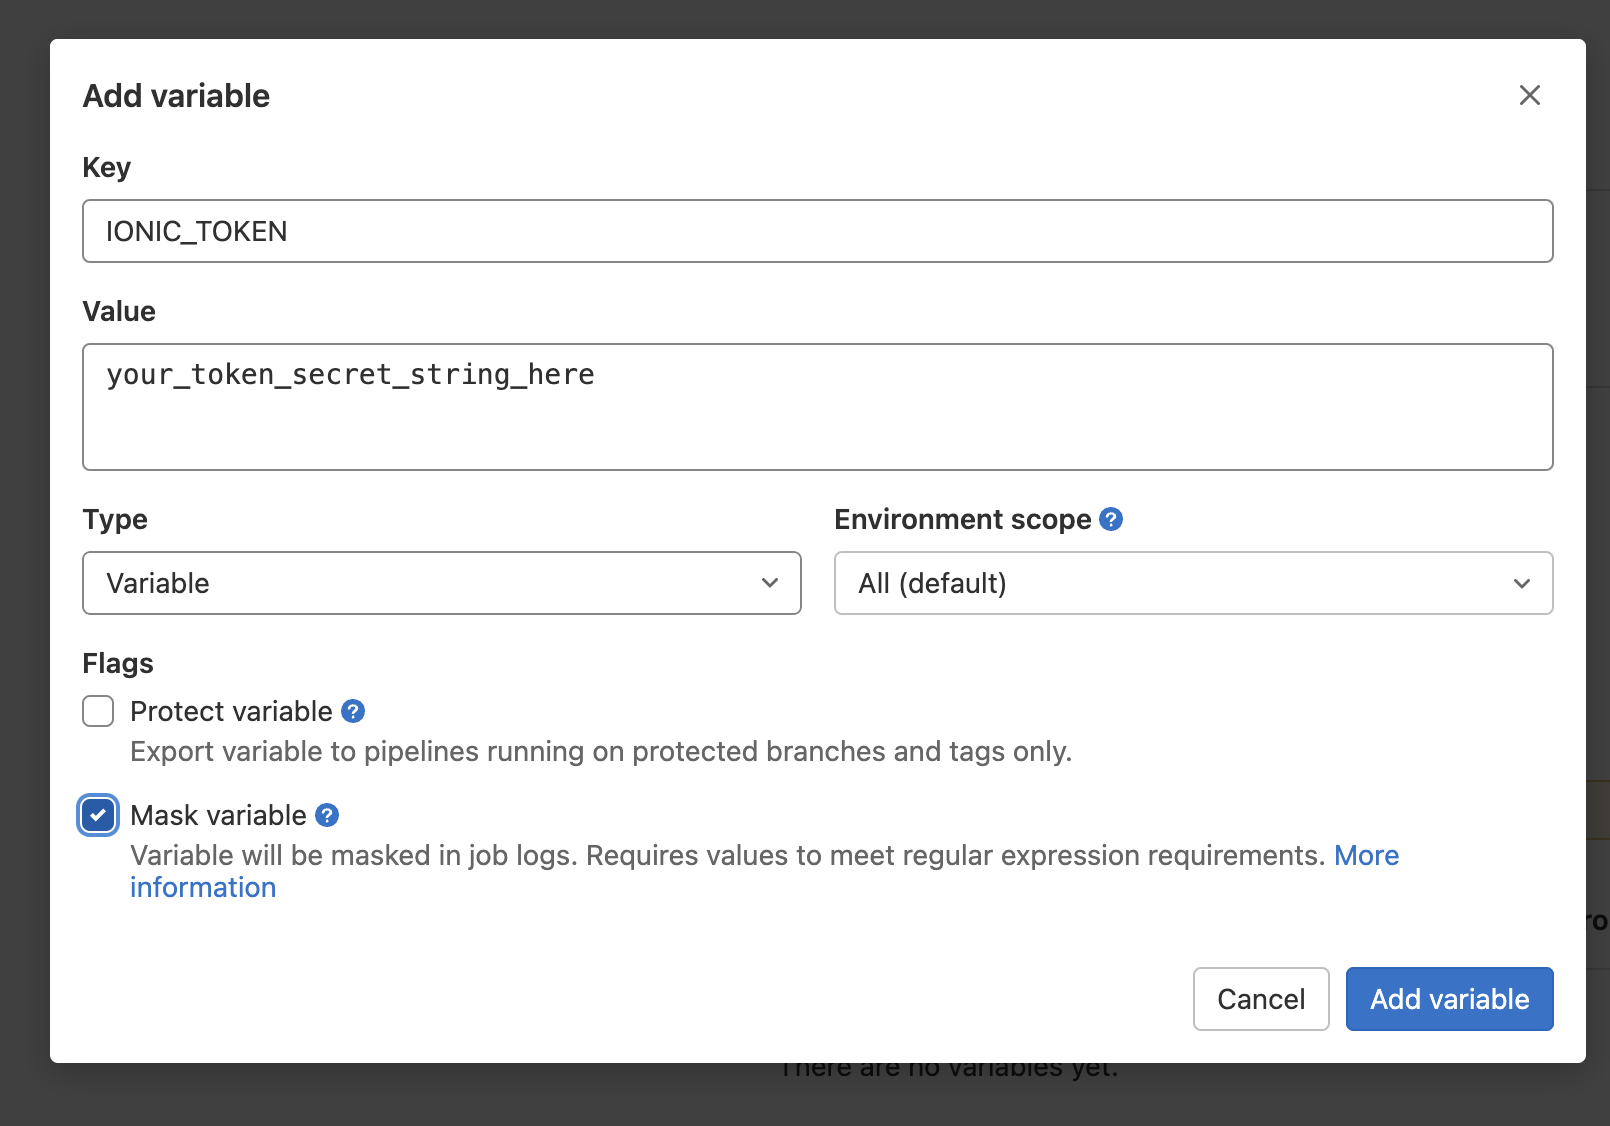
In the popup that appears, enter IONIC_TOKEN for the Key and enter the string obtained while setting up the ionic token in the Appflow dashboard for the Value. Although optional, we would also recommend setting the mask variable flag such that the token string does not appear within the pipeline logs.
Creating a Pipeline
Navigate to Settings > CI/CD > Runners and verify that the project has runners enabled.
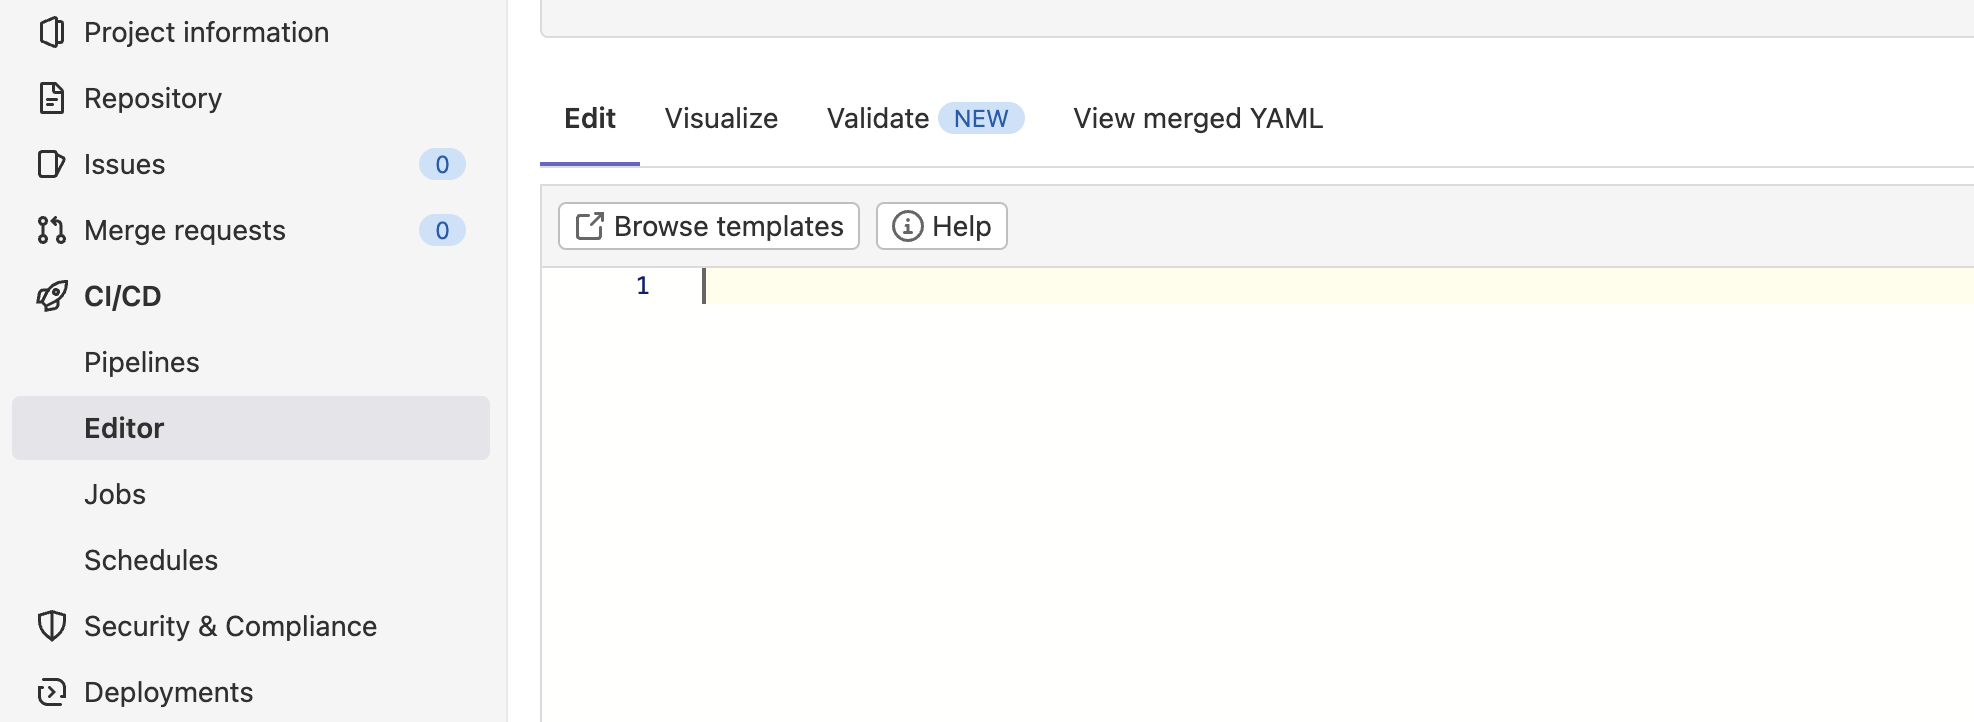
Then navigate to CI/CD > Editor > “Configure pipeline” to open the Pipeline Editor. Clear the contents of the editor to prepare the pipeline.
Writing the Pipeline
The yaml script below contains an example pipeline with the following steps:
- Assign the pipeline image
- Perform an android build in Appflow
- Save artifacts for use between steps
- Deploy to Google Play Console in Appflow
Be sure to replace AppIdEx123abc with your actual App ID from the Appflow Dashboard. You can find this by opening your app in Appflow and looking under its name in the top left corner of the dashboard.
Full yaml Script
# This is an example Starter pipeline configuration
# Start with a minimal pipeline that you can customize to build and deploy your code.
# Add steps that build, run tests, deploy, and more.
# You can specify a custom docker image as your build environment.

image: ubuntu:latest

variables:
  ANDROID_BUILD_ID: ''

stages:
  - build
  - deploy

build_Android:
  stage: build
  before_script:
    - apt-get update && apt-get -y install curl jq
    - curl -sL https://ionic.io/get-appflow-cli | bash
  script:
    - ANDROID_BUILD_ID=$(appflow build android release --app-id AppIdEx123abc --commit="$CI_COMMIT_SHA" --signing-cert PlayStoreInternal --aab-name "app.aab" --json --token="$IONIC_TOKEN" | jq -r ".buildId")
    - echo "$ANDROID_BUILD_ID" > androidbuildid.env
  artifacts:
    paths:
      - ./app.aab
      - ./androidbuildid.env

deploy_Android:
  stage: deploy
  before_script:
    - apt-get update && apt-get -y install curl
    - curl -sL https://ionic.io/get-appflow-cli | bash
  script:
    - ANDROID_BUILD_ID="$(cat androidbuildid.env)"
    - appflow deploy android --app-id=AppIdEx123abc --build-id="$ANDROID_BUILD_ID" --destination "Play Store" --token="$IONIC_TOKEN"
Initial Setup
Let's walk through this pipeline step by step. First we assign the image used in each job of this pipeline to ubuntu:latest.
# This is an example Starter pipeline configuration
# Start with a minimal pipeline that you can customize to build and deploy your code.
# Add steps that build, run tests, deploy, and more.
# You can specify a custom docker image as your build environment.

image: ubuntu:latest
We then define an environment variable called ANDROID_BUILD_ID and assign it with an empty string. This environment variable will be used later in the pipeline to help us keep track of the build id between jobs.
Then we define the order that stages in this pipeline will be executed. The jobs will be mapped to these stages to ensure that the Appflow build is ready before a deployment is executed.
stages:
  - build
  - deploy
Perform an Android Build
Since Gitlab Pipelines uses a unique image instance for each job in a pipeline, we'll need to install the Appflow CLI during each job (should take < 1 second). We also install the jq package to help us later with parsing the build output.
build_Android:
  stage: build
  before_script:
    - apt-get update && apt-get -y install curl jq
    - curl -sL https://ionic.io/get-appflow-cli | bash
After that, we added a multiline step that does a few different things. The primary part of this job is the appflow build android command which actually performs the build.
We included | jq -r '.buildId' after that to parse the Build ID from Appflow out of the response JSON. The build ID is then assigned to the ANDROID_BUILD_ID environment variable.
Because Gitlab jobs are standalone, we'll add our Build ID that is returned from the jq command to an empty environment file artifact called androidbuildid.env. This file will then be referenced in the deployment job. We'll also save both the build id file and the app.aab that was generated as artifacts of this step.
The complete first job looks like this:
build_Android:
  stage: build
  before_script:
    - apt-get update && apt-get -y install curl jq
    - curl -sL https://ionic.io/get-appflow-cli | bash
  script:
    - ANDROID_BUILD_ID=$(appflow build android release --app-id AppIdEx123abc --commit="$CI_COMMIT_SHA" --signing-cert PlayStoreInternal --aab-name "app.aab" --json --token="$IONIC_TOKEN" | jq -r ".buildId")
    - echo "$ANDROID_BUILD_ID" > androidbuildid.env
  artifacts:
    paths:
      - ./app.aab
      - ./androidbuildid.env
Deploy to Play Store
Since Gitlab Pipelines uses a unique image instance for each job in a pipeline, we'll need to install the Appflow CLI during each job (should take < 1 second).
Then we'll utilize the file we saved earlier to assign the build id value from the build job back into the ANDROID_BUILD_ID environment variable.
The actual deployment command is rather simple, with the final step looking like this:
deploy_Android:
  stage: deploy
  before_script:
    - apt-get update && apt-get -y install curl
    - curl -sL https://ionic.io/get-appflow-cli | bash
  script:
    - ANDROID_BUILD_ID="$(cat androidbuildid.env)"
    - appflow deploy android --app-id=AppIdEx123abc --build-id="$ANDROID_BUILD_ID" --destination "Play Store" --token="$IONIC_TOKEN"
Save and Run
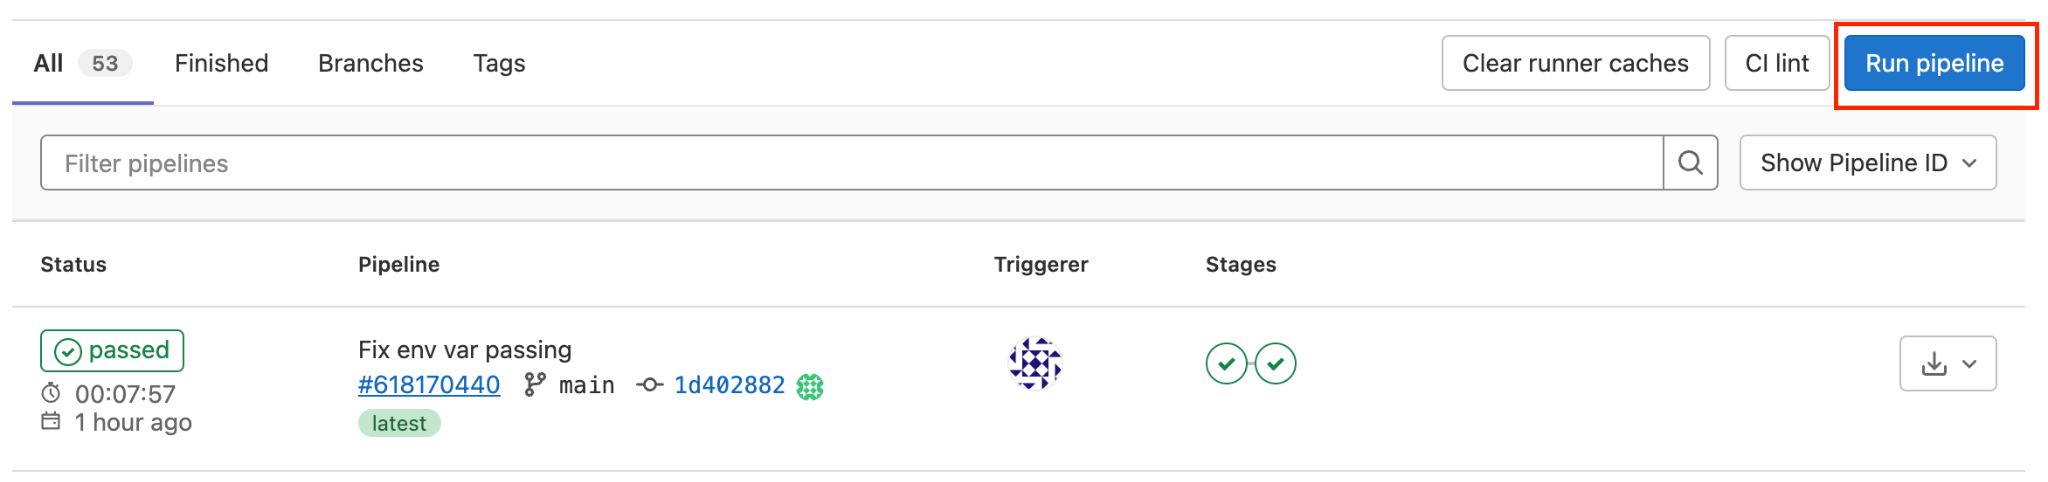
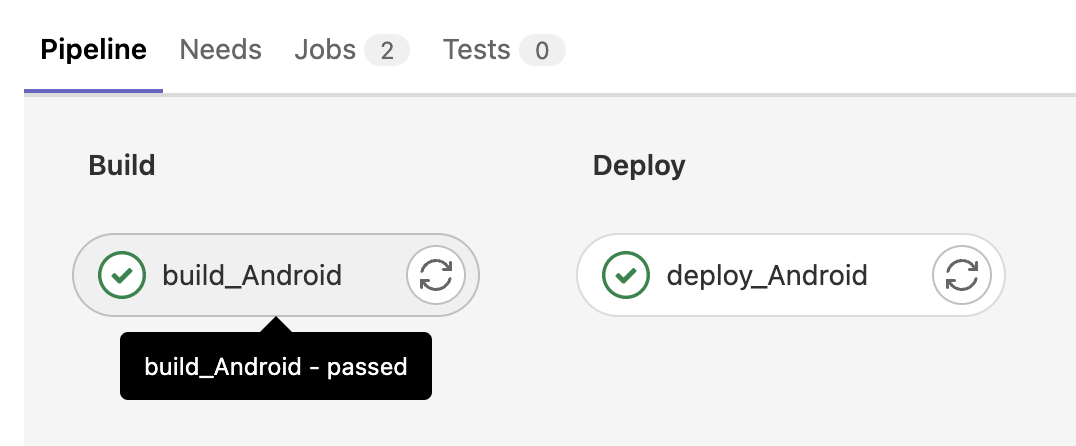
After committing the yaml script to the project repo, the pipeline will automatically run whenever a new commit is made to the repo. It is also possible to run the pipeline manually by navigating to the pipeline tab and clicking "Run pipeline".
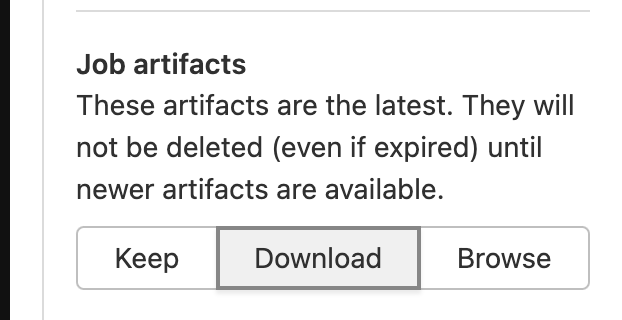
Once the pipeline has executed successfully, the .aab artifact will be uploaded to the Google Play console. The .aab artifact can also be downloaded from the pipeline by viewing the build_android job in the executed pipeline.
Next Steps
This example walked through setting up a GitLab pipeline to automatically create an android build and deploy an android
build to the Google Play Console. But it is also possible to create Pipelines for iOS builds, or Live Updates. See the
other Appflow CLI documentation or run appflow --help to learn more about what functions are available in the Appflow CLI.