Live Updates API
The live update API can be used to customize the live update process beyond the functionality of the auto and background live update methods. In this tutorial, we will create an app that demonstrates significant methods provided by the Live Update API.
This tutorial extends the topics discussed in the Live Update Tutorial. It is recommended to review that tutorial before proceeding.
Although the steps described in this tutorial are used to create an Android app, the live update API can also be used within iOS apps.
A sample app containing all of the examples in this tutorial can be found on Ionic’s GitHub page.
Preparing the App for Live Updates
Create the Android App
We will create a Capacitor based Android app using a blank Ionic starter template using the Angular framework. To do this, run the following command in a terminal window:
ionic start myApp blank --type=angular
This should create a new project called myApp within the current working directory. Navigate from the terminal into the project directory. Create a new repo in your preferred Appflow supported git provider (GitHub, GitLab, BitBucket, etc) and push the project to this new repo.
Then add Capacitor’s android package and the cordova-plugin-ionic live update plugin into the project:
npm i @capacitor/android@latest cordova-plugin-ionic@latest
Now create the web assets for this project.
npm run build
This will create a ./www directory within the project structure. The android component of this app can now be added by running Capacitor’s add command
npx cap add android
Associate this project with a new app in the Appflow dashboard by connecting a repo to a new Appflow app and then adding the corresponding app id to the ionic.config.json file
{
"name": "myApp",
"integrations": {
  "capacitor": {}
},
"type": "angular",
+ "id": "YOUR_APP_ID"
}
Then commit and push the project to confirm that Appflow is listening to commits on this repo.

Since an app id has been assigned to this project, the live update configurations can now be added to the app by running the following command:
ionic live-update add
This command will ask you to enter the app-id, channel name, and live update method.
- For the app-id, enter the value for the
idkey in theionic.config.jsonfile - For the channel name, enter
Production - For the live update method, select
auto
This will make the app listen for live updates on the default Production live update channel using the Appflow’s prebuilt auto live update method. We will later switch to using a custom live update method, but for the sake of this tutorial, we will verify that the live update plugin is working before using a custom live update method.
The android app is now ready to be built in Appflow. Commit and push the project so that the new commit appears in the Appflow dashboard. Then run an android debug build using the latest build stack.

After the android build has run successfully, download the .apk file for this build and transfer it into an android emulator or test device. Open the app to confirm that the base android app functions correctly.
Create a Live Update Deployment
After verifying that the android base app works, we can now verify that the live update plugin is also working. To do this, replace the ./src/app/home/home.page.html with the following:
<ion-header [translucent]="true">
 <ion-toolbar>
   <ion-title>
     Custom Live Update Demo 🚀
   </ion-title>
 </ion-toolbar>
</ion-header>
<ion-content [fullscreen]="true">
   <ion-accordion-group>
     <ion-accordion value="manual-update">
         <ion-item slot="header">
             <ion-label>Reload App with Manual Update</ion-label>
           </ion-item>
           <ion-item slot="content">
           </ion-item>
     </ion-accordion>
     <ion-accordion value="get-configuration">
       <ion-item slot="header">
         <ion-label>Get Configurations</ion-label>
       </ion-item>
       <ion-item slot="content">
       </ion-item>
     </ion-accordion>
     <ion-accordion value="get-current-version">
       <ion-item slot="header">
           <ion-label>Get Current Live Update Version</ion-label>
         </ion-item>
         <ion-item slot="content">
         </ion-item>
     </ion-accordion>
     <ion-accordion value="get-available-version">
         <ion-item slot="header">
             <ion-label>Get Count of Available Live Update Versions</ion-label>
           </ion-item>
           <ion-item slot="content">
           </ion-item>
       </ion-accordion>
       <ion-accordion value="configure">
         <ion-item slot="header">
             <ion-label>Configure App to Receive Live Updates</ion-label>
           </ion-item>
           <ion-item slot="content">
           </ion-item>
       </ion-accordion>
   </ion-accordion-group>
</ion-content>
Commit and push this change. Then go to the Appflow dashboard to run a web build and deploy the build to the Production live update channel.

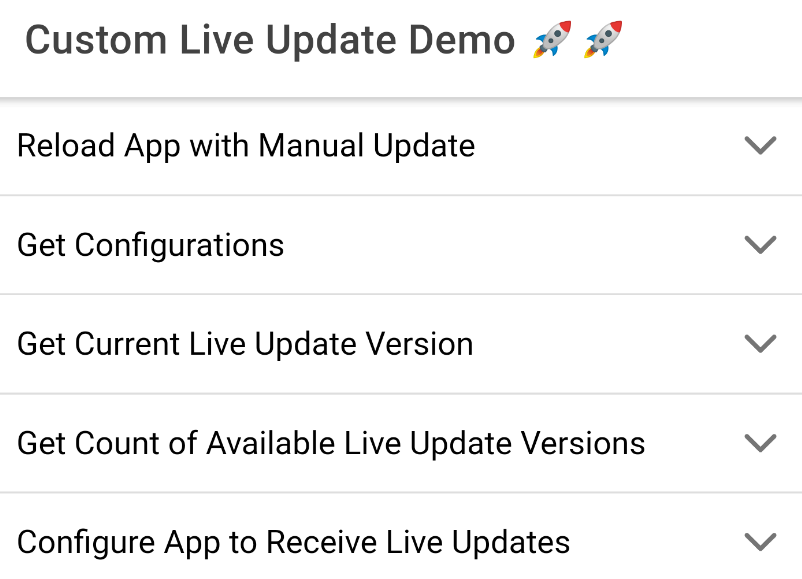
Close and reopen the app in the Android emulator to confirm that the live update was automatically applied. The app should now show a collection of ion-accordions.
Switch Live Update Methods
Now that the android base app and live update plugin are confirmed to work properly, we will create a new version of the android app that uses a custom live update method.
In the project directory, open the terminal and run the following ionic live-update command:
ionic live-update configure android
Like the ionic live-update add command, this command will ask you to enter the new app-id, channel name, and live update methods. Enter the same app-id and live update channel entered previously but select the none live update method instead of auto.

By setting the live update method to none, the live update API methods will need to be called manually within the web assets to construct a custom live update method.
Provide these web assets access to the Live Update API methods by importing the plugin’s Deploy class into ./src/app/app.module.ts
import { NgModule } from '@angular/core';
import { BrowserModule } from '@angular/platform-browser';
import { RouteReuseStrategy } from '@angular/router';

import { IonicModule, IonicRouteStrategy } from '@ionic/angular';

import { AppComponent } from './app.component';
import { AppRoutingModule } from './app-routing.module';
+ import { Deploy } from 'cordova-plugin-ionic/dist/ngx';
Then add Deploy as a provider in the @ngModule decorator
@NgModule({
 declarations: [AppComponent],
 entryComponents: [],
 imports: [BrowserModule, IonicModule.forRoot(), AppRoutingModule],
- providers: [{ provide: RouteReuseStrategy, useClass: IonicRouteStrategy }],
+ providers: [{ provide: RouteReuseStrategy, useClass: IonicRouteStrategy }, Deploy],
 bootstrap: [AppComponent],
})
Commit and push the changes to the remote repo. Then create a new android debug build in the Appflow dashboard.

Finally, replace the .apk file in the android emulator. The android app is now configured to use a custom live update method.
Populate the Live Update API Examples
Now that the android app has been reconfigured to use a custom live update process, we can now add methods from the Live Update API documentation to implement this custom live update process.
Preparing the Home Page to use Live Update API
Since the following examples use the live update API methods within the app’s home page, we will need to give the home page access to these methods. To do this, open ./src/app/home/home.page.ts and import the Deploy class.
import { Deploy } from 'cordova-plugin-ionic/dist/ngx';
Then add a Deploy object to the constructor.
constructor(private _deploy: Deploy) {}
So the home.page.ts file should now look like this:
import { Component } from '@angular/core';
import { Deploy } from 'cordova-plugin-ionic/dist/ngx';

@Component({
 selector: 'app-home',
 templateUrl: 'home.page.html',
 styleUrls: ['home.page.scss'],
})
export class HomePage {
 constructor(private _deploy: Deploy) {}

}
Commit and push these changes to the remote repo. Then create a new web build and deploy the web build to the “Production” live update channel.

Since the android app can’t automatically accept this new live update in its current state, we can run the sync() and reloadApp() methods from the console of the device inspector to manually update the app.
Open the app and then open the console of the device inspector of the app to execute the sync() method:
IonicCordova.deploy.sync();
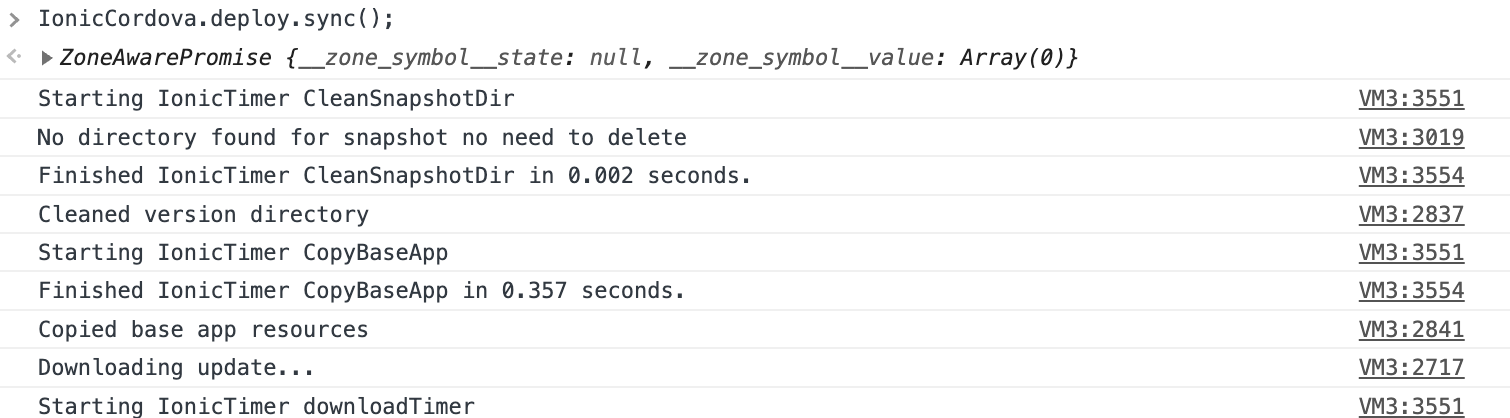
Running this method will check for and download the live update. Then prepares the live update so that it can be applied to the app when the app is reloaded. We can force the web app component for the Capacitor app to reload by executing the following command in the console of the device inspector:
IonicCordova.deploy.reloadApp();
This method should reload the app with the new live update and refresh the device inspector window.
These methods can be used in any of the following examples to apply the live update manually. However the following example will provide a means to apply a live update without opening the device inspector.
Example 1: Reload App with Manual Update
In this example, we will create a button that can be pressed to apply a live update.
To begin, open ./src/app/home/home.page.html, find the "manual-update" ion-accordion element, and replace it’s ion-item "content" element with the following:
<ion-item slot="content">
<ion-grid id='grid-manual-update'>
<ion-row>
<ion-col>
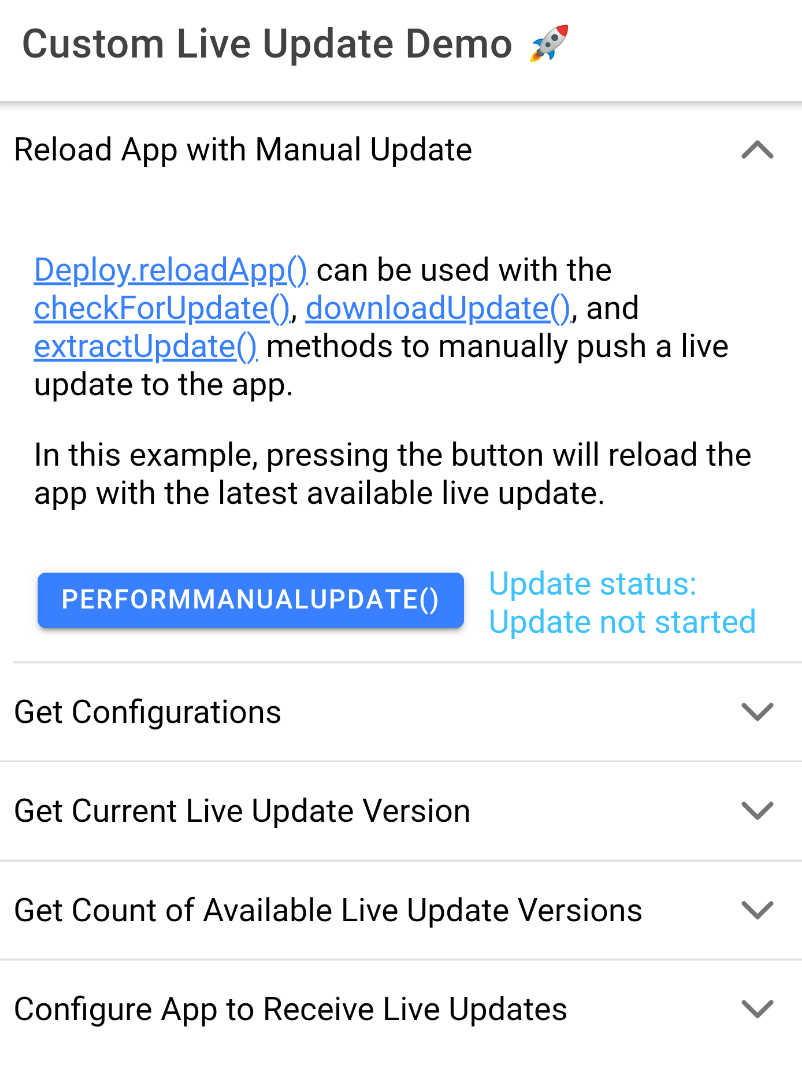
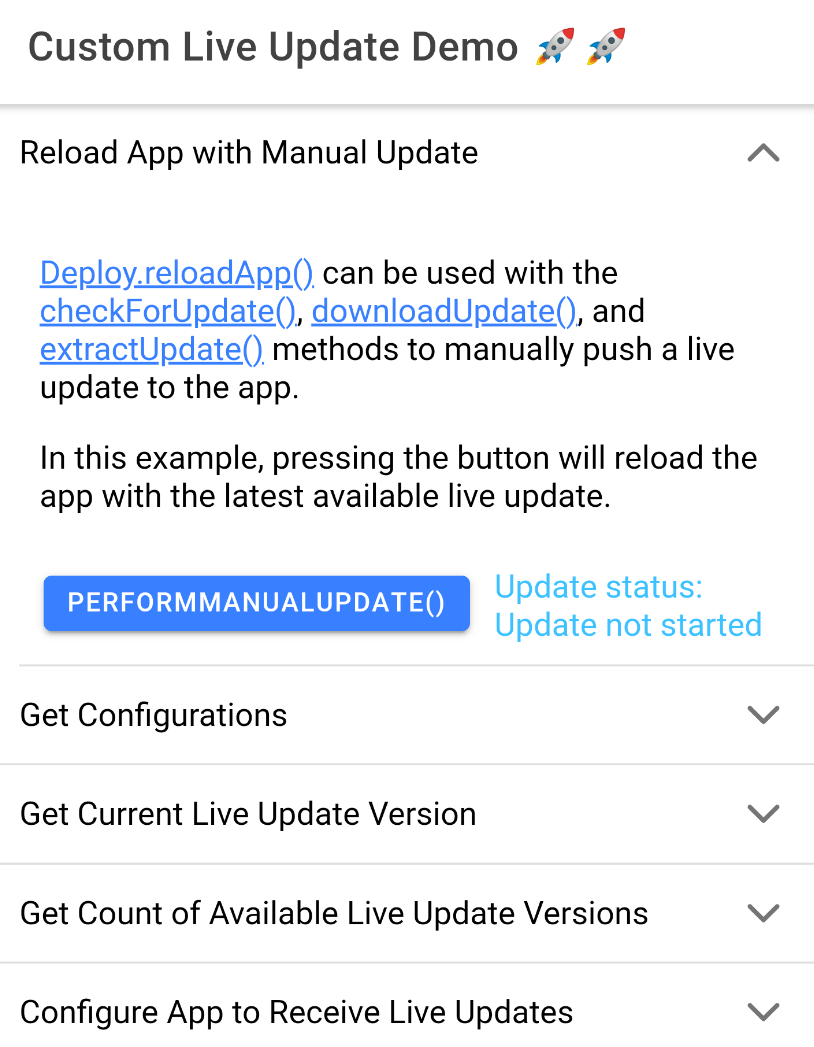
<p><a href='https://ionic.io/docs/appflow/deploy/api#reloadapp'>Deploy.reloadApp()</a> can be used with the <a href='https://ionic.io/docs/appflow/deploy/api#checkforupdate'>checkForUpdate()</a>, <a href='https://ionic.io/docs/appflow/deploy/api#downloadupdate'>downloadUpdate()</a>, and <a href='https://ionic.io/docs/appflow/deploy/api#downloadupdate'>extractUpdate()</a> methods to manually push a live update to the app.<p>
<p>In this example, pressing the button will reload the app with the latest available live update.</p>
</ion-col>
</ion-row>
<ion-row>
<ion-col>
<ion-button (click)='performManualUpdate()'>performManualUpdate()</ion-button>
</ion-col>
<ion-col>
<ion-text color='secondary'>Update status: {{updateStatus}}</ion-text>
</ion-col>
</ion-row>
</ion-grid>
</ion-item>
Then in home.page.ts, add an updateStatus string variable before the constructor of the HomePage class.
updateStatus: string = 'Update not started';
Then add the following method after the constructor:
async performManualUpdate() {
   this.updateStatus = 'Checking for Update';
   const update = await this._deploy.checkForUpdate()
   if (update.available){
     this.updateStatus = 'Update found. Downloading update';
     await this._deploy.downloadUpdate((progress) => {
       console.log(progress);
     })
     this.updateStatus = 'Update downloaded. Extracting update';
     await this._deploy.extractUpdate((progress) => {
       console.log(progress);
     })
     console.log('Reloading app');
     this.updateStatus = 'Update extracted. Reloading app';
     await this._deploy.reloadApp();
   } else {
     console.log('No update available');
     this.updateStatus = 'No update available';
   }
  }
Commit and push the changes to the remote repo. Then create a new web build and deploy the web build to the Production live update channel.

Since the android app can’t automatically accept this new live update in its current state, we will need to run the sync() and reloadApp() methods manually within the console of the device inspector. Please refer to the Preparing the Home Page to use Live Update API section for details on this process.
Once the live update has been applied, expanding the “Reload app with Manual Update” ion-accordion should show the changes added in this example.
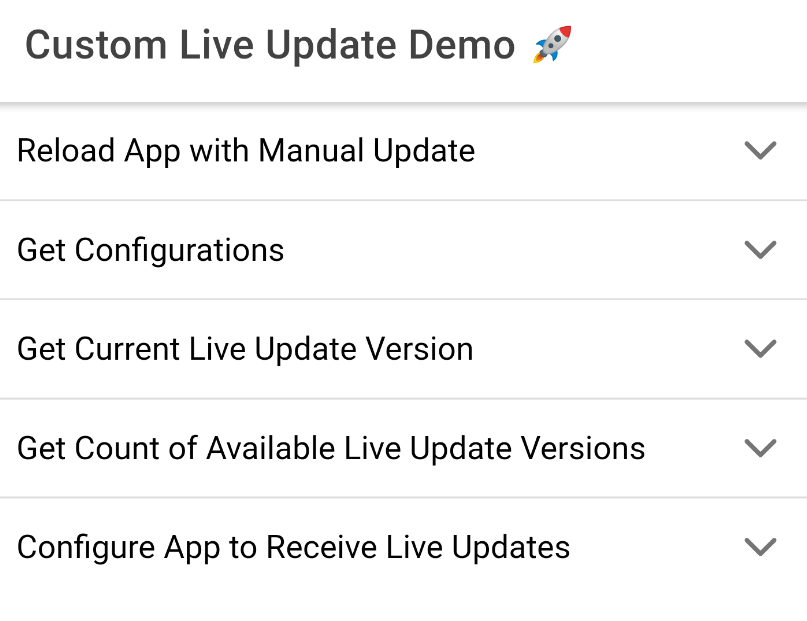
To test the live update button, add a second rocket to the title in the home page. Commit and push this change. Then create a new web build in Appflow and deploy it to the Production channel.

After the live update has been deployed, press the button in the app to confirm that the button can apply the live update.
As you may have noticed, the sync() method used in the console of the device inspector functions identically to the checkForUpdate(), downloadUpdate(), and extractUpdate() methods shown in this example. This is because the sync() method executes each of these methods internally. So it is possible to refactor the method shared in this example using the sync() method.
With the creation of this button, it is now possible to complete the remaining examples without the need to use the device inspector. However the device inspector can still be used as a tool to execute any of these methods for troubleshooting purposes.
Example 2: Get Configurations
In this example, the getConfiguration() method will be used to get the app's configurations for handling live updates. This example also demonstrates how to isolate specific configurations by extracting the app id.
To begin, open ./src/app/home/home.page.html, find the “get-configuration” ion-accordion element, and replace it’s ion-item content element with the following:
<ion-item slot="content">
    <ion-grid id='grid-get-configuration'>
        <ion-row>
            <ion-col>
                <p><a href='https://ionic.io/docs/appflow/deploy/api#getconfiguration'>Deploy.getConfiguration()</a> can be used to get the app's configurations for handling live updates. The information obtained from this method includes, the app id, channel name, and update method associated with the app.</p>
                <p>In this example, we demonstrate how this method can be used to obtain the app id.</p>
            </ion-col>
        </ion-row>
        <ion-row>
            <ion-col>
            <ion-button (click)='getUpdateConfig()'>getConfiguration()</ion-button>
            </ion-col>
            <ion-col>
            <ion-text color='secondary'>App id: {{appid}}</ion-text>
            </ion-col>
        </ion-row>
    </ion-grid>
</ion-item>
Then in home.page.ts, add an appid string variable before the constructor of the HomePage class.
appid: string = 'TBD';
Then add the following method after the constructor:
async getUpdateConfig() {
   const info = (await this._deploy.getConfiguration()).appId;
   this.appid = info;
 }
Commit and push the changes to the remote repo. Then create a new web build and deploy the web build to the Production live update channel.

If example 1 was completed, press the PERFORMMANUALUPDATE() button to apply the live update. Otherwise, refer to the Preparing the Home Page to use Live Update API section for instructions on how to apply the live update through the device inspector.
After applying the live update, opening the app and expanding the “Get Configurations” ion-accordion should now show the changes added in this example:
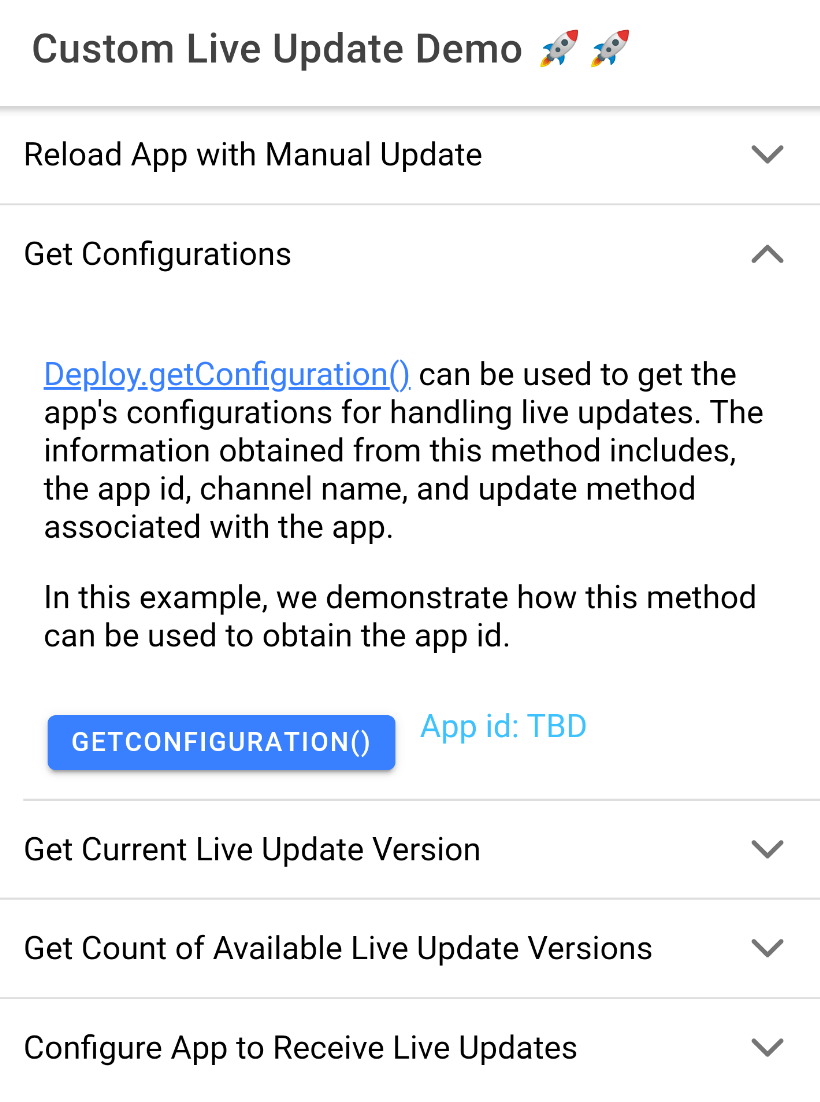
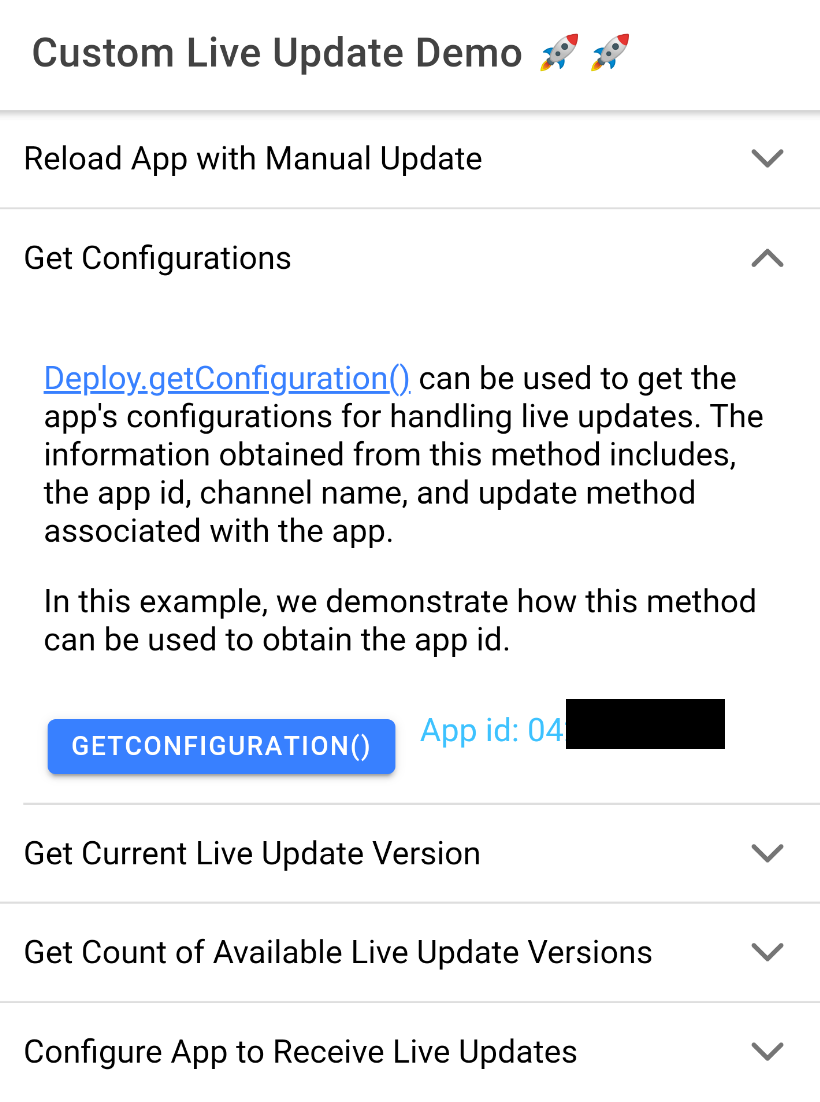
Pressing the GETCONFIGURATION() button will update the App id label from "TBD” to the app id associated with this app.
The value for other keys can also be isolated by using this method. For example, the below code shows a different version of this method that returns the binary version code of the app.
async getUpdateConfig() {
   const info = (await this._deploy.getConfiguration()).binaryVersionCode;
   this.binaryVersionCode = info;
 }
It is also possible to call this method within the console of the device inspector by executing the following method:
IonicCordova.deploy.getConfiguration()
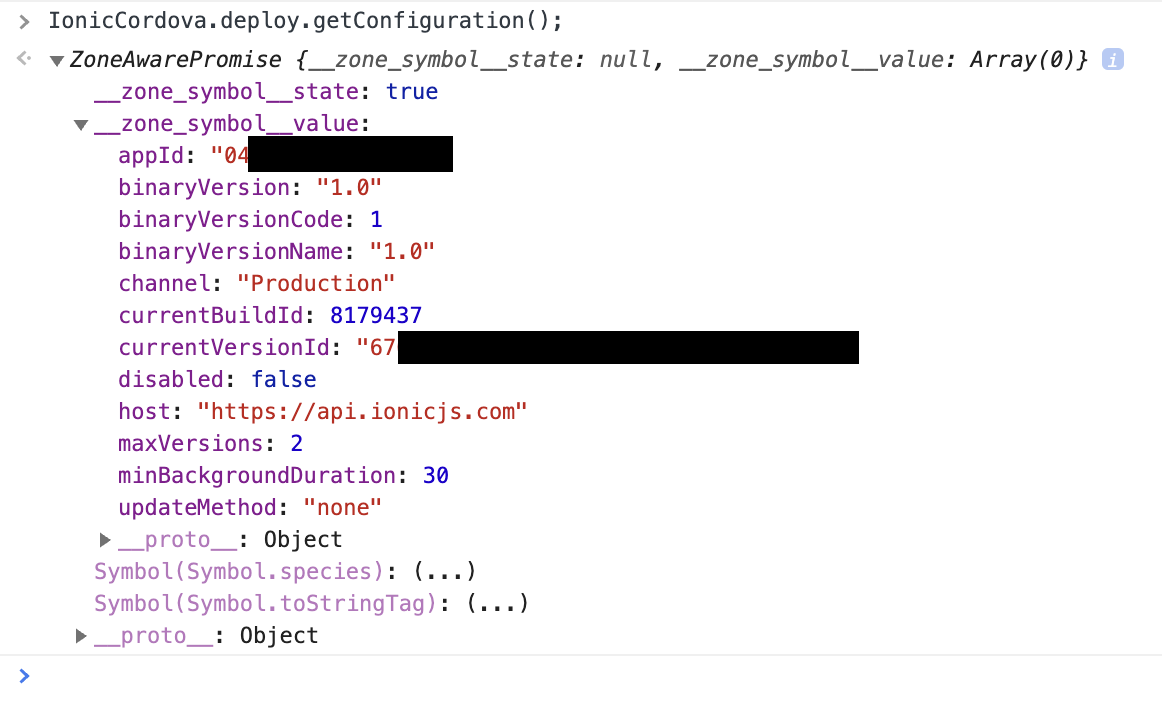
For additional details, please refer to the Live Update API Documentation for this method.
Example 3: Get Current Live Update Version
In this example, the getCurrentVersion() method will be used to get the live update currently loaded onto the app.
To begin, open ./src/app/home/home.page.html, find the “get-current-version” ion-accordion element, and replace it’s ion-item "content” element for with the following:
<ion-item slot="content">
<ion-grid id='grid-get-current-version'>
<ion-row>
<ion-col>
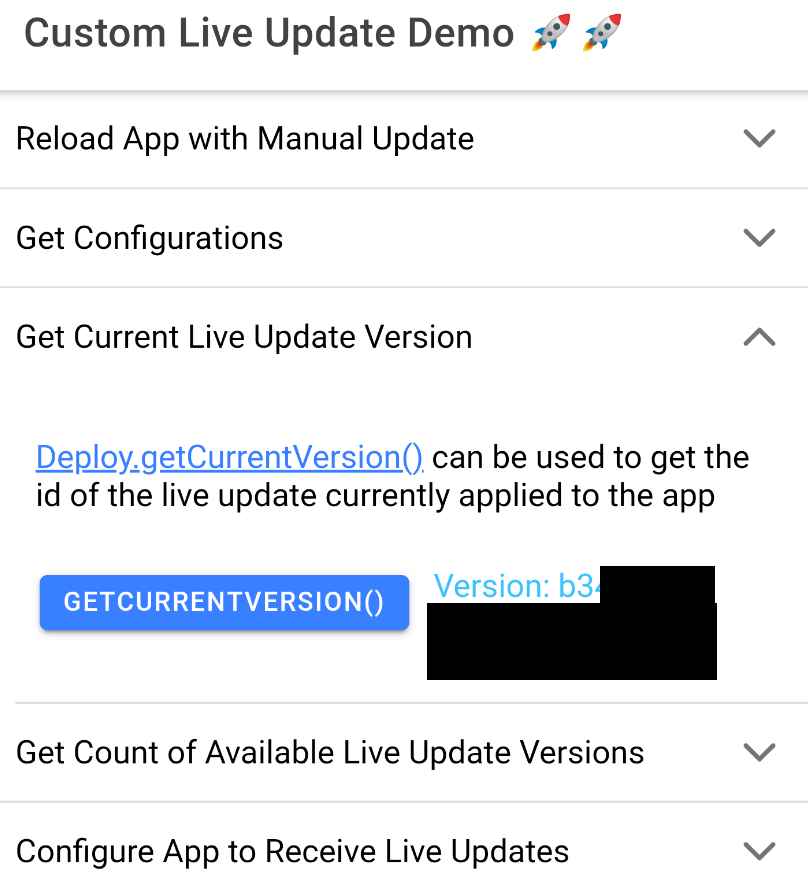
<p><a href='https://ionic.io/docs/appflow/deploy/api#getcurrentversion'>Deploy.getCurrentVersion()</a> can be used to get the id of the live update currently applied to the app</p>
</ion-col>
</ion-row>
<ion-row>
<ion-col>
<ion-button (click)='getCurrVersion()'>getCurrentVersion()</ion-button>
</ion-col>
<ion-col>
<ion-text color='secondary'>Version: {{versionCurrent}}</ion-text>
</ion-col>
</ion-row>
</ion-grid>
</ion-item>
Then in home.page.ts, add a versionCurrent string variable before the constructor of the HomePage class.
versionCurrent: string = 'TBD';
Then add the following method after the constructor:
async getCurrVersion() {
   let versionCurrent = (await this._deploy.getCurrentVersion());
   if (versionCurrent) {
     this.versionCurrent = versionCurrent.versionId;
   } else {
     this.versionCurrent = 'No version found';
   }
 }
Commit and push the changes to the remote repo. Then create a new web build and deploy the web build to the Production live update channel.

If example 1 was completed, press the PERFORMMANUALUPDATE() button to apply the live update. Otherwise, refer to the Preparing the Home Page to use Live Update API section for instructions on how to apply the live update through the device inspector.
After applying the live update, expanding the “Get Current Live Update Version” ion-accordion should now show the changes added in this example:

And then pressing the GETCURRENTVERSION() button will update the version label to show the version number of the live update.
As with the getConfiguration() method discussed in Example 2, it is also possible to get the value of other keys returned by this method. For example, this method can be modified to return the buildId associated with the live update:
async getCurrVersion() {
   let versionCurrent = (await this._deploy.getCurrentVersion());
   if (versionCurrent) {
     this.buildId = versionCurrent.buildId;
   } else {
     this.buildId = 'No buildId found';
   }
 }
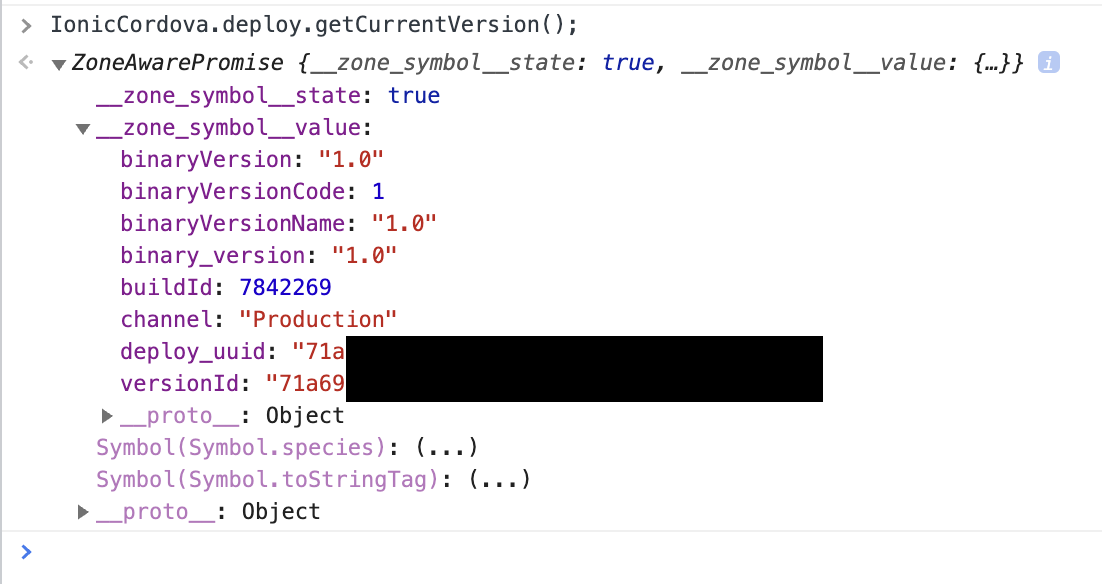
Additionally, the getCurrentVersion() method can be executed from the console of the device inspector.
IonicCordova.deploy.getCurrentVersion()
For additional details, please refer to the Live Update API Documentation for this method.
Example 4: Get Count of Available Live Update Versions
In this example, the getAvailableVersion() method will be used to get the count of Live Update versions stored in the app.
To begin, open ./src/app/home/home.page.html, find the “get-available-version” ion-accordion element, and replace it’s ion-item “content” element for with the following:
<ion-item slot="content">
    <ion-grid id='grid-get-available-version'>
        <ion-row>
            <ion-col>
                <p><a href='https://ionic.io/docs/appflow/deploy/api#getavailableversions'>Deploy.getAvailableVersions()</a> can be used to get the number of live updates available for the current natvie version of this app</p>
            </ion-col>
        </ion-row>
        <ion-row>
            <ion-col>
            <ion-button (click)='onCheckVersions()'>getAvailableVersions()</ion-button>
            </ion-col>
            <ion-col>
            <ion-text color='secondary'>Number of Versions: {{versionsAvailable}}</ion-text>
            </ion-col>
        </ion-row>
    </ion-grid>
</ion-item>
Then in home.page.ts, add a versionsAvailable string variable before the constructor of the HomePage class.
versionsAvailable: string = 'Unknown';
Then add the following method after the constructor:
 async onCheckVersions() {
   const versions = await this._deploy.getAvailableVersions();
   if (versions.length > 0) {
     this.versionsAvailable = versions.length.toString();
   } else {
     this.versionsAvailable = "None";
   }
 }
Commit and push the changes to the remote repo. Then create a new web build and deploy the web build to the Production live update channel.

If example 1 was completed, press the PERFORMMANUALUPDATE() button to apply the live update. Otherwise, refer to the Preparing the Home Page to use Live Update API section for instructions on how to apply the live update through the device inspector.
After applying the live update, expanding the “Get Count of Available Live Update Versions” ion-accordion element should now show the changes added in this example:
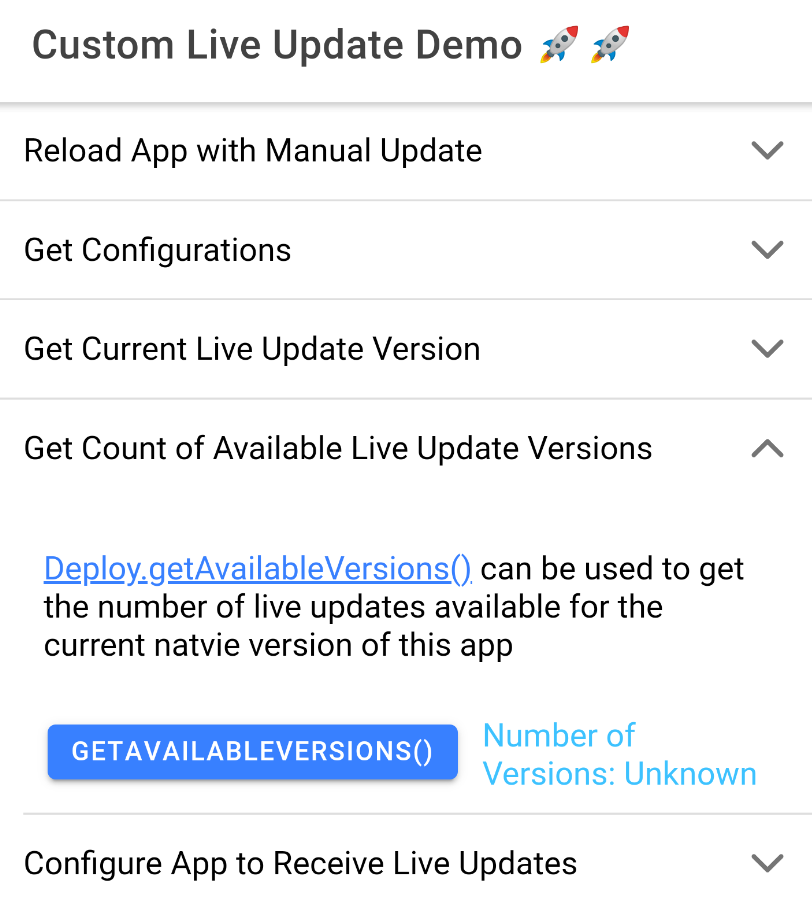
And then pressing the GETAVAILABLEVERSIONS()button will show the number of live updates instances stored in the app.

As with the getCurrentVersion() method discussed in Example 3, it is also possible to execute this method from the console of the device inspector which will show additional information associated with each live update version stored within the app
IonicCordova.deploy.getAvailableVersions()
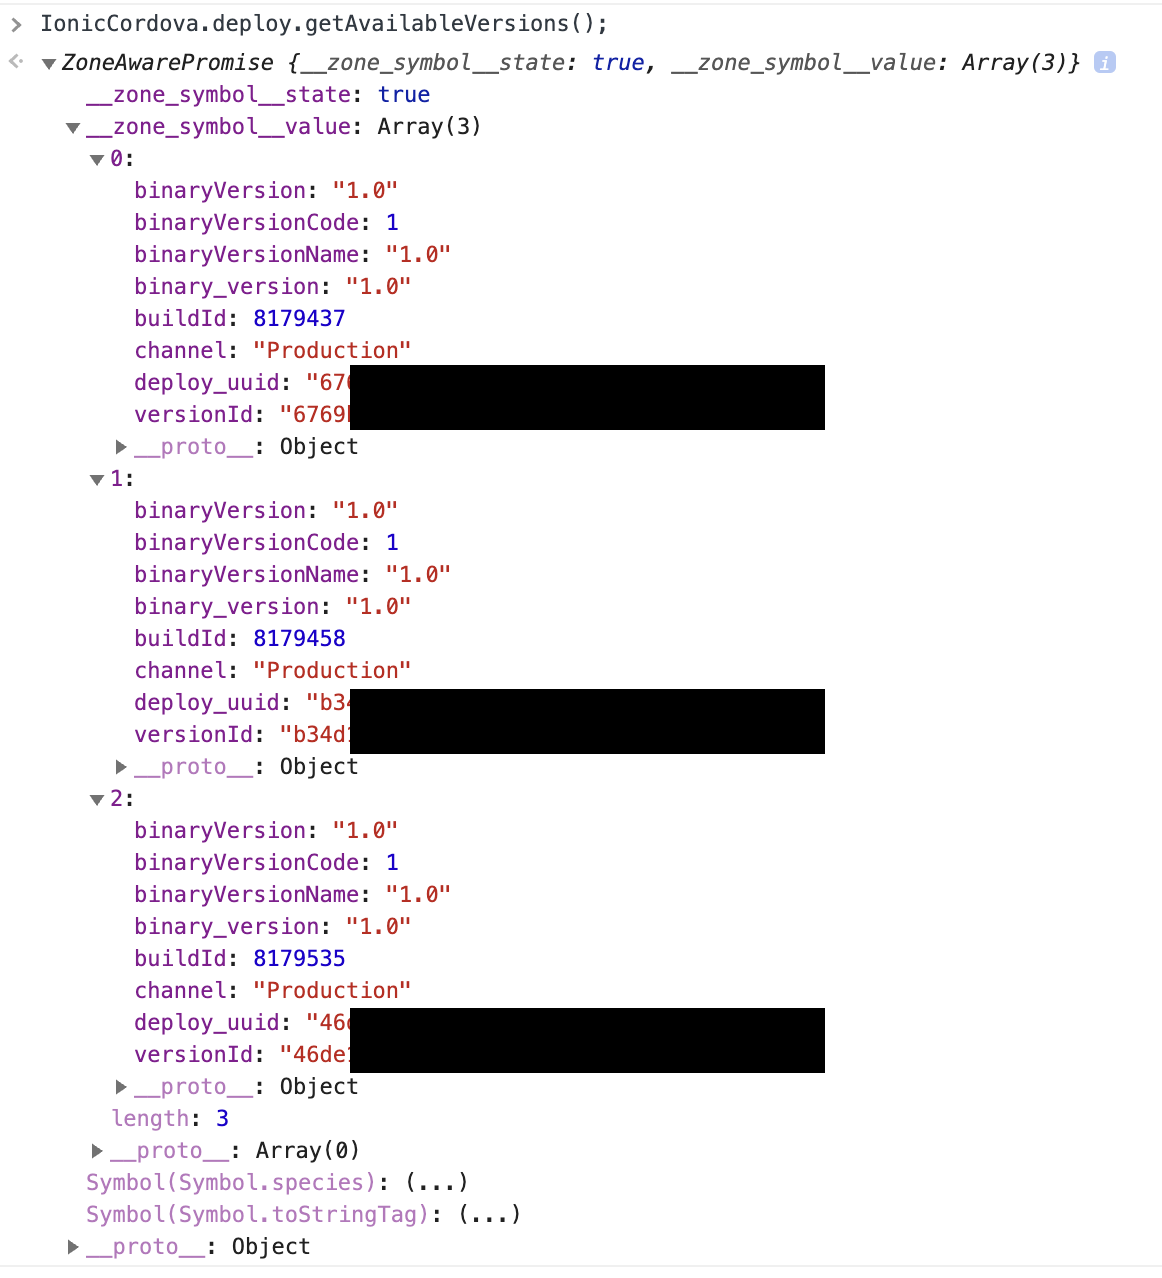
The output shown above corresponds to the last three live update versions applied to the app. The number of live update versions that can be stored in the app corresponds to the value set in the max-store preference during live update configuration. The keys for these live update versions can be called to modify individual live update instances. For example, this method can be modified to delete the earliest live update version stored in the app:
async onCheckVersions() {
   const versions = await this._deploy.getAvailableVersions();
   if (versions.length) {
          this._deploy.deleteVersionById(versions[0].versionId);
   } else {
          console.log("No live update versions to delete");
   }
 }
For additional details, please refer to the Live Update API Documentation for this method.
Example 5: Configure App to Receive Live Updates
Although we have already applied live update configurations to the Capacitor app, it is also possible to reconfigure the app, at runtime, using the Live Update API. This example will show how to do this using the configure() method.
To begin, open ./src/app/home/home.page.html, find the “configure” ion-accordion element, and replace it’s ion-item content element with the following:
<ion-item slot="content">
<ion-grid id='grid-configure'>
<ion-row>
<ion-col>
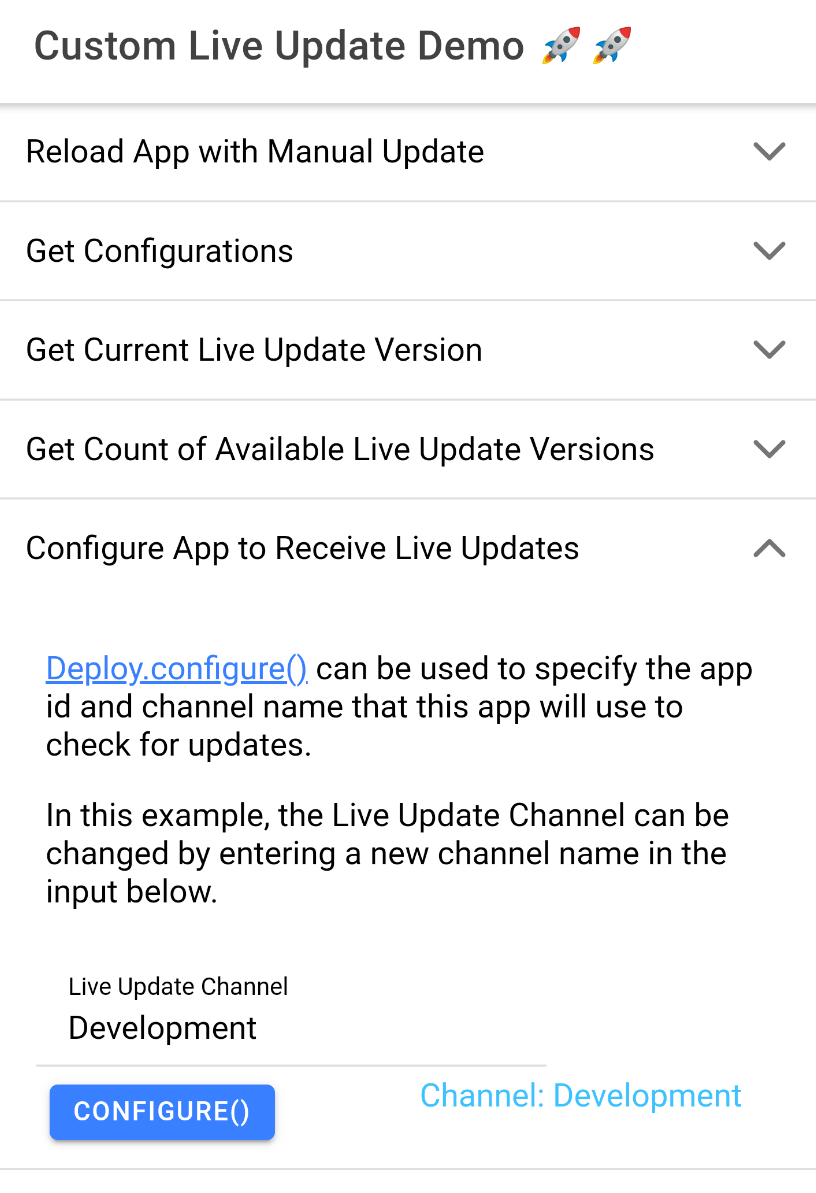
<p><a href='https://ionic.io/docs/appflow/deploy/api#configure'>Deploy.configure()</a> can be used to specify the app id and channel name that this app will use to check for updates.<p>
<p>In this example, the Live Update Channel can be changed by entering a new channel name in the input below.</p>
</ion-col>
</ion-row>
<ion-row>
<ion-item>
<ion-label position="stacked">Live Update Channel</ion-label>
<ion-input type="text" [(ngModel)]="newChannel" text-right id="inputNewChannel" placeholder="Production" ></ion-input>
</ion-item>
</ion-row>
<ion-row>
<ion-col>
<ion-button (click)='configureDeploy()'>configure()</ion-button>
</ion-col>
<ion-col>
<ion-text color='secondary'>Channel: {{channelCurrent}}</ion-text>
</ion-col>
</ion-row>
</ion-grid>
</ion-item>
Then in home.page.ts, add a newChannel and channelCurrent string variable before the constructor of the HomePage class.
newChannel: string = 'Production';
channelCurrent: string = 'Production';
Then add the following method after the constructor:
async configureDeploy() {
   let appid = (await this._deploy.getConfiguration()).appId;
   const config = {
     'appId': appid,
     'channel': this.newChannel
   }
   await this._deploy.configure(config);
   this.channelCurrent = (await this._deploy.getConfiguration()).channel;
 }
Commit and push the changes to the remote repo. Then create a new web build and deploy the web build to the Production live update channel.

If example 1 was completed, press the PERFORMMANUALUPDATE() button to apply the live update. Otherwise, refer to the Preparing the Home Page to use Live Update API section for instructions on how to apply the live update through the device inspector.
After applying the live update, expanding the “Configure App to Receive Live Updates” ion-accordion should now show the changes added in this example:
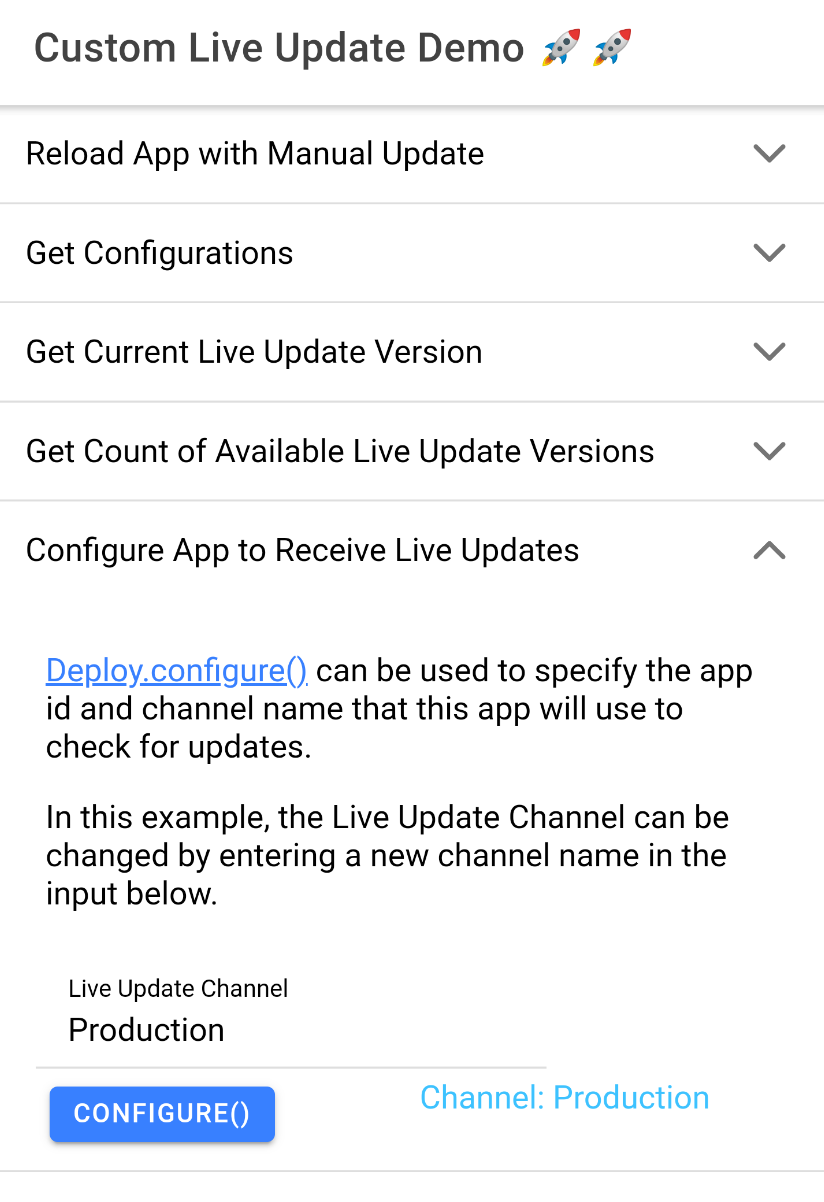
Typing a new channel name in the “Live Update Channel” textbox and pressing the CONFIGURE() button will change the channel that the app listens on to the channel specified in this textbox.
This method uses the getConfiguration() method discussed in example 2 to obtain the appId associated with this app, adds it to a config object that includes the new channel name that is entered in the textbox, reconfigures the live update settings for this app, and then provides the channel name returned by the getConfiguration() method after the app has been reconfigured.
Although the configure() method provides the ability to dynamically change the live update methods, it is important to understand that these changes will persist even across binary updates and app closure. This can introduce additional complexity to the deployment of a live update.
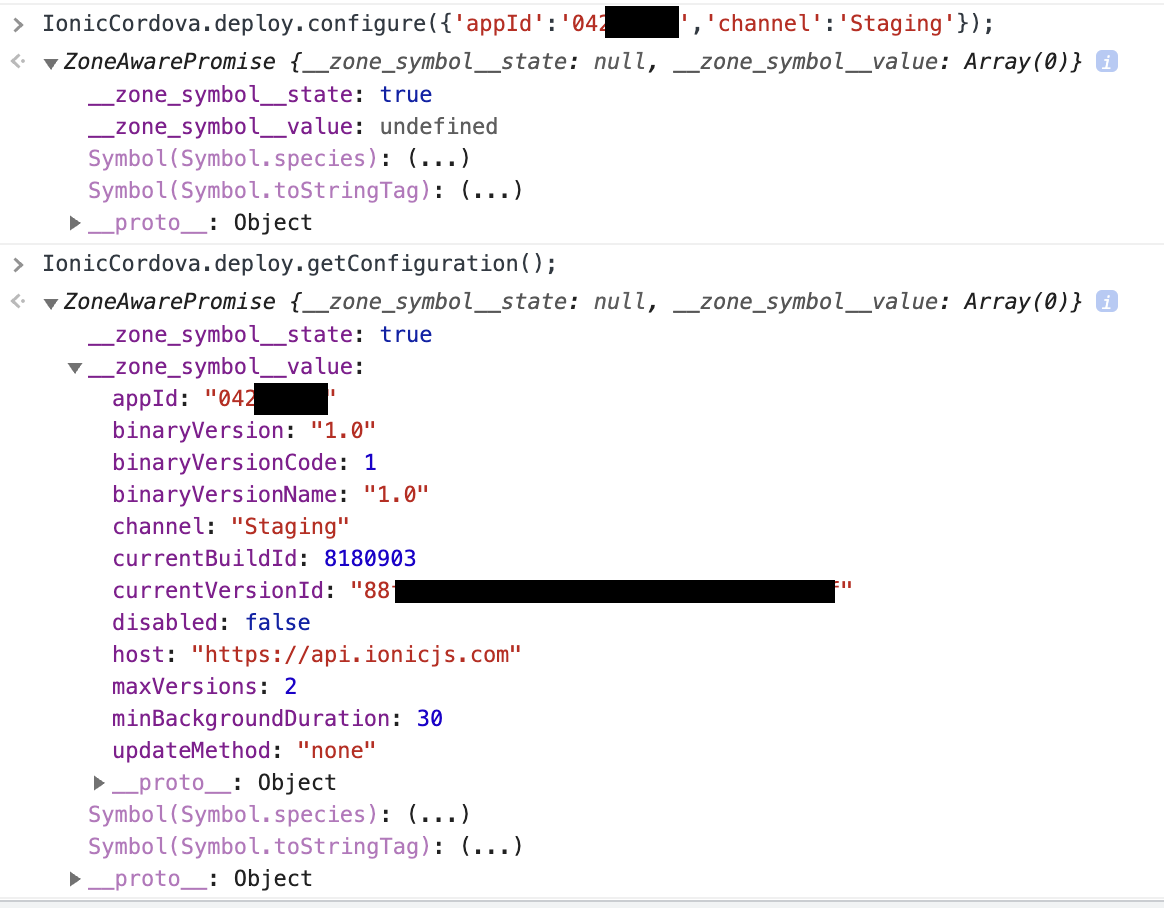
It is also possible to call this method within the console of the device inspector by executing the following method:
IonicCordova.deploy.configure({‘appId’:’<YOURAPPID>’,’channel’:’<NEWCHANNEL>’})
For additional details, please refer to the Live Update API Documentation for this method.
Conclusion
These examples demonstrate some of the methods provided with the Live Update API to create a custom live update process. Additional methods can be found within the Live Update API documentation. A sample app containing all of these examples can be found on Ionic’s GitHub page.