Building Modern Angular Apps with Ionic and Standalone Components

This is a guest post from Simon Grimm, Ionic Developer Expert and educator at the Ionic Academy, an online school with 70+ video courses focused entirely on building awesome mobile apps with Ionic and Capacitor!
With Angular v17, the Angular team introduced many groundbreaking changes to how you can write powerful and performant Angular apps. All these changes are available in Ionic as well, and in this tutorial, we’ll take a look at how you can use them to build modern Angular apps with Ionic.
By the end of this tutorial, you will know how to:
- Use the new Angular Control Flow
- Work with Signals
- Use Deferred Blocks
- Import Ionic Standalone Components
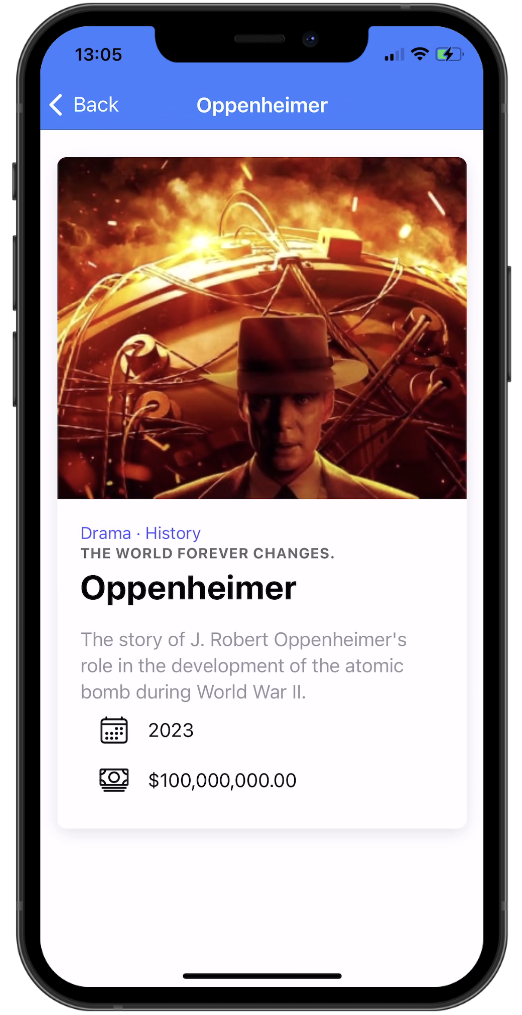
We will build a simple movie app that shows a list of trending movies and allows us to view the details of each movie, as below.
You can also find the full source code on GitHub. Now roll up your sleeves, and let’s get started!
Setting up the Project with Angular 17
To get started, bring up a terminal, create a new Ionic app, and navigate into the project folder. We will use the blank template and the --type angular flag to create an Angular app – make sure you pick Standalone Components when asked about how you want to build your app!
ionic start modernApp blank --type angular

cd ./modernApp

ionic g service services/movie

ionic g page details
Additionally we generate a service to fetch the movie data and a details page to show the details of a movie. To correctly make HTTP calls, we can now add the provideHttpClient to the src/main.ts as we don’t have a main module anymore:
import { enableProdMode, importProvidersFrom } from '@angular/core';
import { bootstrapApplication } from '@angular/platform-browser';
import { RouteReuseStrategy, provideRouter, withComponentInputBinding } from '@angular/router';
import { IonicRouteStrategy, provideIonicAngular } from '@ionic/angular/standalone';

import { routes } from './app/app.routes';
import { AppComponent } from './app/app.component';
import { environment } from './environments/environment';
import { provideHttpClient } from '@angular/common/http';

if (environment.production) {
  enableProdMode();
}

bootstrapApplication(AppComponent, {
  providers: [
    { provide: RouteReuseStrategy, useClass: IonicRouteStrategy },
    provideIonicAngular(),
    provideRouter(routes, withComponentInputBinding()),
    provideHttpClient(),
  ],
});
In addition to provideHttpClient, we also added withComponentInputBinding to the provideRouter call to enable the automatic binding of route parameters to components. We’ll come back to this once we build the details page.
Angular ESBuild
To make use of all of the powerful new features of Angular 17, we can now enable ESBuild, which makes building our app much faster.
To do so, we need to change the @angular-devkit/build-angular:browser package to @angular-devkit/build-angular:application, end then rename the main property to browser inside the angular.json:
"architect": {
        "build": {
          "builder": "@angular-devkit/build-angular:application",
          "options": {
            "browser": "src/main.ts",
            "polyfills": ["src/polyfills.ts"],
Additionally, polyfills is now an array, and you need to remove buildOptimizer & vendorChunk from the configurations block. With all of that in place, you are now on the fastest possible Angular build!
Adding the Movie Database API
To follow along with this tutorial, you also need to get an API key for the The Movie Database API.
Simply create an account and request one for free, then open the src/environments/environment.ts file and add your API key:
export const environment = {
  production: false,
  apiKey: 'YOURKEY',
};
If you create a production build later, also update the src/environments/environment.prod.ts file with that key.
Creating a Service
To use Typescript in the best possible way, I like to generate Typescript interfaces based on JSON responses from APIs using this VSC Extension.
In our case, this results in some interfaces we can rename and put into a new src/app/services/interfaces.ts file:
export interface ApiResult {
  page: number;
  results: any[];
  total_pages: number;
  total_results: number;
}

export interface MovieResult {
  adult: boolean;
  backdrop_path: string;
  belongs_to_collection?: any;
  budget: number;
  genres: Genre[];
  homepage: string;
  id: number;
  imdb_id: string;
  original_language: string;
  original_title: string;
  overview: string;
  popularity: number;
  poster_path: string;
  production_companies: Productioncompany[];
  production_countries: Productioncountry[];
  release_date: string;
  revenue: number;
  runtime: number;
  spoken_languages: Spokenlanguage[];
  status: string;
  tagline: string;
  title: string;
  video: boolean;
  vote_average: number;
  vote_count: number;
}

interface Spokenlanguage {
  english_name: string;
  iso_639_1: string;
  name: string;
}

interface Productioncountry {
  iso_3166_1: string;
  name: string;
}

interface Productioncompany {
  id: number;
  logo_path?: string;
  name: string;
  origin_country: string;
}

interface Genre {
  id: number;
  name: string;
}
Now we can create a new service to fetch the movie data from the API. Services haven’t changed much, but they don’t have to: React developers would love to have a singleton service construct to inject anywhere!
Services structure our Angular app, split up view and business logic and make it easy to share data between components. Enough of the praise, let’s implement our service to make two API calls inside the src/app/services/movie.service.ts:
import { HttpClient } from '@angular/common/http';
import { Injectable } from '@angular/core';
import { delay } from 'rxjs/operators';
import { Observable } from 'rxjs/internal/Observable';
import { ApiResult, MovieResult } from './interfaces';
import { environment } from 'src/environments/environment';

const BASE_URL = 'https://api.themoviedb.org/3';
const API_KEY = environment.apiKey;

@Injectable({
  providedIn: 'root',
})
export class MovieService {
  private http = inject(HttpClient);

  constructor() {}

  getTopRatedMovies(page = 1): Observable<ApiResult> {
    return this.http
      .get<ApiResult>(`${BASE_URL}/movie/popular?page=${page}&api_key=${API_KEY}`)
      .pipe(
        delay(2000) // Simulate slow network
      );
  }

  getMovieDetails(id: string): Observable<MovieResult> {
    return this.http.get<MovieResult>(`${BASE_URL}/movie/${id}?api_key=${API_KEY}`);
  }
}
As we use the latest and greatest, we now also moved the dependency injection to the class level by using inject directly.
Using the new Angular Control Flow
We can now start building our app by adding a new page to show the list of trending movies, based on the data we get from our MovieService. Additionally, we will now add imports for all Ionic components that we will later use in our view.
Why? Because we can, thanks to Ionic 7.5!
Instead of importing all Ionic components, we can now pick the ones we actually need from the @ionic/angular/standalone package and include them in our Angular standalone components. While this does add a few lines to our imports, it also makes it easier to see which components we actually use in our view. Additionally, this makes loading pages faster and reduces the final bundle size of our app.
We now need one function to load the trending movies, and another one to load more movies when we scroll to the bottom of the list which triggers the infinite scroll event.
Go ahead by changing the src/app/home/home.page.ts to:
import { Component, OnInit, inject } from '@angular/core';
import {
  IonHeader,
  IonToolbar,
  IonTitle,
  IonContent,
  InfiniteScrollCustomEvent,
  IonBadge,
  IonLabel,
  IonAvatar,
  IonItem,
  IonList,
  IonLoading,
  IonInfiniteScroll,
  IonInfiniteScrollContent,
  IonSkeletonText,
  IonAlert,
} from '@ionic/angular/standalone';
import { MovieService } from '../services/movie.service';
import { DatePipe } from '@angular/common';
import { RouterModule } from '@angular/router';
import { catchError, finalize } from 'rxjs';

@Component({
  selector: 'app-home',
  templateUrl: 'home.page.html',
  styleUrls: ['home.page.scss'],
  standalone: true,
  imports: [
    IonHeader,
    IonToolbar,
    IonTitle,
    IonContent,
    IonLabel,
    IonBadge,
    IonAvatar,
    IonItem,
    IonList,
    IonLoading,
    IonInfiniteScroll,
    IonInfiniteScrollContent,
    IonSkeletonText,
    IonAlert,
    DatePipe,
    RouterModule,
  ],
})
export class HomePage implements OnInit {
  private movieService = inject(MovieService);

  private currentPage = 1;
  public movies: any[] = [];
  public imageBaseUrl = 'https://image.tmdb.org/t/p';
  public isLoading = true;
  public error = null;
  public dummyArray = new Array(5);

  // Load the first page of movies during component initialization
  ngOnInit() {
    this.loadMovies();
  }

  async loadMovies(event?: InfiniteScrollCustomEvent) {
    this.error = null;

    // Only show loading indicator on initial load
    if (!event) {
      this.isLoading = true;
    }

    // Get the next page of movies from the MovieService
    this.movieService
      .getTopRatedMovies(this.currentPage)
      .pipe(
        finalize(() => {
          this.isLoading = false;
        }),
        catchError((err: any) => {
          this.error = err.error.status_message;
          return [];
        })
      )
      .subscribe({
        next: (res) => {
          // Append the results to our movies array
          this.movies.push(...res.results);

          // Resolve the infinite scroll promise to tell Ionic that we are done
          event?.target.complete();

          // Disable the infinite scroll when we reach the end of the list
          if (event) {
            event.target.disabled = res.total_pages === this.currentPage;
          }
        },
      });
  }

  // This method is called by the infinite scroll event handler
  loadMore(event: InfiniteScrollCustomEvent) {
    this.currentPage++;
    this.loadMovies(event);
  }
}
Nothing too crazy going on here, so let’s move to the view now. The new Angular Control Flow is a powerful feature that allows us to write cleaner and more readable code.
It’s based on the @if and @for directives, which are similar to the *ngIf and *ngFor directives, but with some important differences.
The @if directive is used to conditionally render a block of code, and it can be used just as you would expect – but inside the HTML:
@if (condition) { ... }

@else if { ... }

@else { ... }
The second new directive is @for, which is used to iterate over an array and render a block of code for each item in the array:
@for (item of items; track item.id) { ... }The track keyword is used to tell Angular how to track the items in the array, and it’s required when using @for.
Let’s build a view around our isLoading state and the value from our API call:
- If we are loading, we show a list of six Ionic skeleton items
- If we have an error, we show an Ionic inline alert with the error message
- When we have an array, we show a list of movies
- When the array is empty and we finished loading, we show a message that no movies were found.
Bring up the src/app/home/home.page.html now and change it to:
<ion-header>
  <ion-toolbar color="primary">
    <ion-title>Trending Movies</ion-title>
  </ion-toolbar>
</ion-header>

<ion-content>
  @if (isLoading) {
  <ion-list class="ion-padding-top">
    @for (i of dummyArray; track i) {
    <ion-item lines="none" class="ion-padding-bottom">
      <ion-avatar slot="start">
        <ion-skeleton-text></ion-skeleton-text>
      </ion-avatar>
      <ion-skeleton-text animated style="height: 40px" />
    </ion-item>
    }
  </ion-list>
  } @else if (error) {
  <ion-alert
    header="Error"
    [message]="error"
    isOpen="true"
    [buttons]="['Ok']"
  />
  }

  <ion-list class="ion-padding-top">
    @for (item of movies; track item.id) {
    <ion-item button [routerLink]="['/details', item.id]">
      <ion-avatar slot="start">
        <img [src]="imageBaseUrl + '/w92' + item.poster_path" />
      </ion-avatar>

      <ion-label class="ion-text-wrap">
        <h3>{{ item.title }}</h3>
        <p>{{ item.release_date | date:'y' }}</p>
      </ion-label>

      <ion-badge slot="end"> {{ item.vote_average }} </ion-badge>
    </ion-item>
    }
    @empty {
      @if (!isLoading) {
      <ion-item lines="none">
        <ion-label class="ion-text-center">No movies found</ion-label>
      </ion-item>
      }
    }
  </ion-list>

  <ion-infinite-scroll (ionInfinite)="loadMore($event)">
    <ion-infinite-scroll-content
      loadingSpinner="bubbles"
      loadingText="Loading more data..."
    />
  </ion-infinite-scroll>
</ion-content>
If you added your API key correctly, you should now see a list of trending movies.
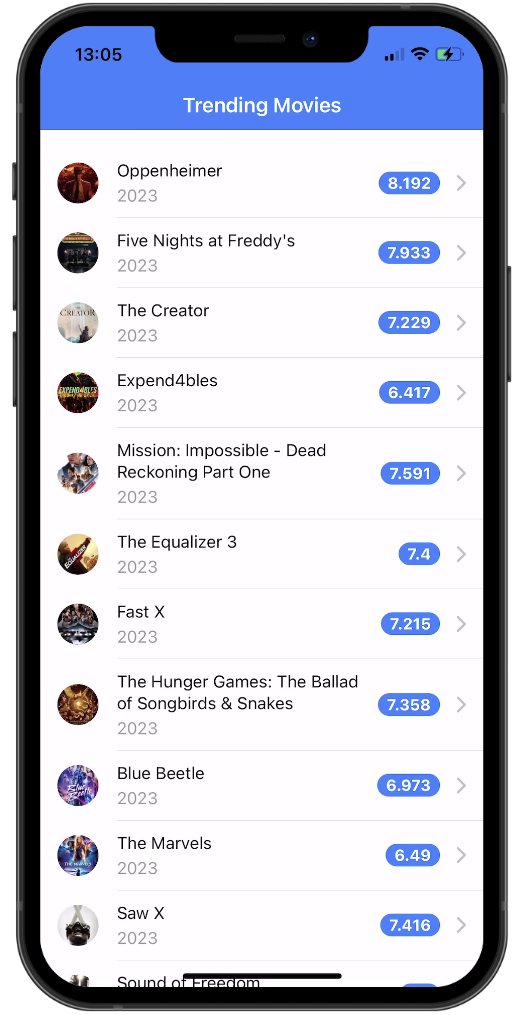
Congratulations on using the new Angular Control Flow with Ionic! You are now officially among the cool kids. Clicking on one of the movies should take us to the details page, so let’s work on that now.
Working with Signals
In the beginning, the CLI automatically changed our routing, but we need to include the :id parameter manually now.
Open up the src/app/app.routes.ts file and change it to:
import { Routes } from '@angular/router';

export const routes: Routes = [
  {
    path: 'home',
    loadComponent: () => import('./home/home.page').then((m) => m.HomePage),
  },
  {
    path: '',
    redirectTo: 'home-defer',
    pathMatch: 'full',
  },
  {
    path: 'details/:id', // <-- Add the :id parameter
    loadComponent: () =>
      import('./details/details.page').then((m) => m.DetailsPage),
  },
  {
    path: 'home-defer',
    loadComponent: () =>
      import('./home-defer/home-defer.page').then((m) => m.HomeDeferPage),
  },
];
Now the buttons in our list work, and we are able to retrieve the id parameter from the URL on the details page. Remember how we added the withComponentInputBinding to the provideRouter call in the src/main.ts? This is where it comes into play!
We can now use the @Input decorator to bind the id parameter to a variable in our details page, and the set function will be called whenever the value changes.
This makes it really easy for us to immediately load the movie details when the id changes!
On top of that we will also use the new signal function to create a Signal that we can use in our view to show the movie details.
Not really required here, but I wanted to show you how to use Signals! The usage is really easy:
- Create a new Signal with
signal<T>(initialValue) - Set the value with
set(newValue) - Get the value by calling the
signal()
Open the src/app/details/details.page.ts now and change it to:
import {
  Component,
  Input,
  WritableSignal,
  inject,
  signal,
} from '@angular/core';
import { MovieService } from '../services/movie.service';
import { MovieResult } from '../services/interfaces';
import {
  IonBackButton,
  IonButtons,
  IonCard,
  IonCardContent,
  IonCardHeader,
  IonCardSubtitle,
  IonCardTitle,
  IonContent,
  IonHeader,
  IonIcon,
  IonItem,
  IonLabel,
  IonText,
  IonTitle,
  IonToolbar,
} from '@ionic/angular/standalone';
import { CurrencyPipe, DatePipe } from '@angular/common';
import { addIcons } from 'ionicons';
import { cashOutline, calendarOutline } from 'ionicons/icons';

@Component({
  selector: 'app-details',
  templateUrl: './details.page.html',
  styleUrls: ['./details.page.scss'],
  standalone: true,
  imports: [
    IonHeader,
    IonToolbar,
    IonTitle,
    IonContent,
    IonIcon,
    IonCard,
    IonCardHeader,
    IonCardTitle,
    IonCardSubtitle,
    IonCardContent,
    IonText,
    IonLabel,
    IonButtons,
    IonBackButton,
    IonItem,
    CurrencyPipe,
    DatePipe,
  ],
})
export class DetailsPage {
  private movieService = inject(MovieService);
  public movie: WritableSignal<MovieResult | null> = signal<MovieResult | null>(
    null,
  );
  public imageBaseUrl = 'https://image.tmdb.org/t/p';

  // Load the movie details when the id changes through the URL :id parameter
  @Input()
  set id(movieId: string) {
    // This is just to show Signal usage
    // You could also just assign the value to a variable directly
    this.movieService.getMovieDetails(movieId).subscribe((movie) => {
      this.movie.set(movie);
    });
  }

  constructor() {
    // Load the the required ionicons
    addIcons({
      cashOutline,
      calendarOutline,
    });
  }
}
Almost forgot another change of Ionic standalone components: We can manually add the icons we need to the addIcons function, which will then be included in the final bundle.
Now we can use the movie signal in our view to show the movie details.
We will also use the new control flow again and cast the movie signal to a variable with as movie to make it easier to work with.
Open up the src/app/details/details.page.html file and change it to:
<ion-header>
  <ion-toolbar color="primary">
    <ion-buttons slot="start">
      <ion-back-button defaultHref="/"></ion-back-button>
    </ion-buttons>
    <ion-title>{{ movie()?.title }}</ion-title>
  </ion-toolbar>
</ion-header>

<ion-content>
  @if (movie(); as movie) {
  <ion-card>
    <div
      [style.height.px]="300"
      [style.background-image]="'url(' + imageBaseUrl + '/w400' + movie?.poster_path + ')'"></div>

    <ion-card-header>
      <ion-card-title> {{ movie?.title }} </ion-card-title>
      <ion-card-subtitle> {{ movie.tagline }} </ion-card-subtitle>
      <ion-text color="tertiary">
        @for (g of movie.genres; track g.id; let isLast = $last;) {
        <span> {{ g.name }} {{ !isLast ? '·' : '' }}</span>
        }
      </ion-text>
    </ion-card-header>
    <ion-card-content>
      <ion-label color="medium">{{ movie.overview }}</ion-label>

      <ion-item lines="none">
        <ion-icon name="calendar-outline" slot="start"></ion-icon>
        <ion-label>{{ movie.release_date | date: 'y'}}</ion-label>
      </ion-item>

      <ion-item lines="none">
        <ion-icon name="cash-outline" slot="start"></ion-icon>
        <ion-label>{{ movie.budget| currency: 'USD' }}</ion-label>
      </ion-item>
    </ion-card-content>
  </ion-card>
  }
</ion-content>
Hidden inside is also another iteration over the genres of the movie. As you can see, stuff like isLast is still available just like before!
That means, everything you learned about Angular in the past is still valuable and can be used with the new Angular 17 features.
Working with Deferred Blocks
The last thing we want to do is to add a new page that uses a deferred block – one of the coolest additions of Angular 17!
A deferred block is a block of code that is only rendered when a condition is met.
That means, we can use it to show a loading indicator or skeleton while we are loading data, and then show the actual data when it’s available.
Ok, that’s nothing new. We could do that before, right?
Well, the great thing is that now the deferred template is not loaded until required!
This means, the items will not appear in the DOM before, which can massively improve performance.
There’s even a block @loading which describes the transition from empty state to the actual data, which makes it great for SSR. Let’s build a new page that uses a deferred block to show a list of trending movies, based on the code from our previous page.
Bring up the src/app/home-defer/home-defer.page.html file and change it to:
<ion-header>
  <ion-toolbar color="primary">
    <ion-title>Trending Movies</ion-title>
  </ion-toolbar>
</ion-header>

<ion-content>
  @defer (when !isLoading) {
  <ion-list>
    @for (item of movies; track item.id) {
    <ion-item button [routerLink]="['/details', item.id]">
      <ion-avatar slot="start">
        <img [src]="imageBaseUrl + '/w92' + item.poster_path" alt="poster" />
      </ion-avatar>

      <ion-label class="ion-text-wrap">
        <h3>{{ item.title }}</h3>
        <p>{{ item.release_date | date:'y' }}</p>
      </ion-label>

      <ion-badge slot="end"> {{ item.vote_average }} </ion-badge>
    </ion-item>
    }
    @empty {
      @if (!isLoading) {
      <ion-item lines="none">
        <ion-label class="ion-text-center">No movies found</ion-label>
      </ion-item>
      }
    }
  </ion-list>

  <ion-infinite-scroll (ionInfinite)="loadMore($event)">
    <ion-infinite-scroll-content
      loadingSpinner="bubbles"
      loadingText="Loading more data..."
    />
  </ion-infinite-scroll>
  }
  @placeholder {
    <ion-list class="ion-padding-top">
      @for (i of dummyArray; track i) {
      <ion-item lines="none" class="ion-padding-bottom">
        <ion-avatar slot="start">
          <ion-skeleton-text></ion-skeleton-text>
        </ion-avatar>
        <ion-skeleton-text animated style="height: 40px" />
      </ion-item>
    }
  </ion-list>
  }
  @error {
    <ion-alert
      header="Error"
      [message]="error"
      isOpen="true"
      [buttons]="['Ok']"
    />
  }
  @loading(minimum 2s) {
    Transition to list....
  }
</ion-content>
It’s mostly the same, but we now use the @defer directive to only render the list and infinite scroll when we are not loading anymore.
Additionally, we use the @placeholder directive to show the skeleton items while we are loading.
The @error directive is used to show the error message, and the @loading directive is used to show a transition message while we go from placeholder to deferred block.
Things like this make Angular 17 a great choice for building modern apps, and Ionic remains the most popular UI framework to build mobile apps with Angular and Capacitor!
Conclusion
In this tutorial, we learned how to use the new Angular Control Flow, Signals, and Deferred Blocks to build a modern Angular app with Ionic.We also learned how to use the new Ionic standalone components to only include the components we actually use in our app.
Ionic is ready for the latest updates of Angular 17, and if you want to get the most performance out of your app, you should definitely give it a try and upgrade your apps to the latest version!
If you want to learn more about Ionic, make sure to check out the Ionic Academy, an online school with 70+ video courses focused entirely on building awesome mobile apps with Ionic and Capacitor.