How to use Facebook Sign-In with Ionic and Firebase

Facebook has become one of the most used methods to get users to sign-in to your application, in today’s post we’ll set up the Facebook native plugin through Ionic Native.
That way we can use the Facebook app to sign-in our users, instead of having them log in through a browser.
To make things easier, we’re going to break down the process into three different parts:
- Step #1: We’ll log into our Facebook developer account, create a new app and get the credentials.
- Step #2: We’ll go into our Firebase console and enable Facebook Sign-In with the credentials from the first step.
- Step #3: We’ll write the code to authorize the user through Facebook and then authenticate that user into our Firebase app.
By the way, at the end of this post, I’m going to link a Starter Template that already has Google & Facebook authentication ready to go, all you’d need to do is add your credentials and run npm install.
With that in mind, let’s start!
Step #1: Facebook Developer Console
The first thing we need to do is to create a new application in Facebook’s developer dashboard, and this app is the one that Facebook will use to ask our users for their permission when we try to log them into our Ionic application.
For that you’ll need to go to https://developers.facebook.com/apps and create a new app.
Once you click on the button, you’ll get a short form pop up, add the name you want for your app and the contact email that will be public to users.
Once we finish creating our app, it will take you to the app’s dashboard, where you can see the app’s ID, take note of that ID, we’ll need it when it’s time to install the Facebook plugin.
Install the Cordova Plugin
Now that you created your app on Facebook, we need to install the Cordova plugin in our Ionic app so we can have our app calling the Facebook Sign-In widget.
For that, open your terminal and type (All in the same line):
$ ionic plugin add cordova-plugin-facebook4 --variable APP_ID="123456789" --variable APP_NAME="myApplication"
You’ll need to replace the values or APP_ID and APP_NAME for your real credentials. You can find both of those inside your Facebook Developers Dashboard.
It’s a bit of a pain to work with Cordova plugins, luckily the great Ionic Team created Ionic Native, which is a wrapper for the Cordova plugins so we can use them in a more “Angular/Ionic” way.
So the next thing we need to do is install the facebook package from Ionic Native, open your terminal again and type:
$ npm install --save @ionic-native/facebook
After we finish installing it, we need to tell our app to use it, that means, we need to import it in our app.module.ts file
import { SplashScreen } from '@ionic-native/splash-screen';
import { StatusBar } from '@ionic-native/status-bar'
import { Facebook } from '@ionic-native/facebook'

@NgModule({
  ...,
  providers: [ SplashScreen, StatusBar, Facebook ]
})
export class AppModule {}
Add your Platforms to Facebook
Once everything is set up in our development environment, we need to let Facebook know which platforms we’ll be using (if it’s just web, iOS, or Android).
In our case, we want to add two platforms, iOS and Android.
To add the platforms, go ahead and inside your Facebook dashboard click on settings, then, right below the app’s information you’ll see a button that says Add Platform, click it.
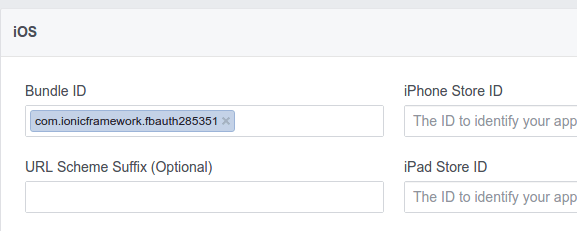
Once you click the button, you’ll see several options for the platforms you’re creating, let’s start with iOS, you’ll see a form asking you for some information, right now we just need the Bundle ID.
If you don’t know where to get the Bundle ID, it’s the same as the package name when you create an Ionic app, it’s inside your config.xml file:
<widget id="co.ionic.facebook435" version="0.0.1" xmlns="http://www.w3.org/ns/widgets" xmlns:cdv="http://cordova.apache.org/ns/1.0">
Please, I beg you, change co.ionic.facebook435 (or what you got there) for something that’s more “on brand” with your app or your business.
NOTE: Not kidding, go to Google Play and do a search for “ionicframework” you’ll see a couple of hundred apps that didn’t change the default package name 😛
Once you add the Bundle ID, just follow the process to create the app and then do the same for Android, the difference is that instead of Bundle ID, Android calls it “Google Play Package Name.”
Step #2: Enable Facebook Sign-In in Firebase.
Now that everything is set up on Facebook’s side, we need to go into our Firebase console and enable Facebook authentication for our app.
To enable Facebook, you’ll need to go to your Firebase Console and locate the app you’re using.
Once you’re inside the app’s dashboard, you’re going to go into Authentication > Sign-In Method > Facebook and are going to click the Enable toggle.
Once you do, it’s going to ask you for some information, specifically your Facebook app ID and secret key, you’ll find both of those inside your Facebook console, under your app’s settings.
Step #3: Authenticate Users.
It is entirely up to you in which step of your app’s process you want to authenticate your users, so I’m going to give you the code so you can just copy it into whichever Page you’re using.
The first thing we need to do is to get the authorization from Facebook, to do that, we need to import Facebook plugin from Ionic Native and ask our user to log in.
import { Facebook } from '@ionic-native/facebook'

constructor(public facebook: Facebook){}

facebookLogin(): Promise<any> {
  return this.facebook.login(['email']);
}
That function right there takes care of opening the Facebook native widget and ask our user to authorize our application to use their data for login purposes.
Now we need to handle the response. The function response will provide us with a Facebook access token we can then pass to Firebase.
import firebase from 'firebase';
import { Facebook } from '@ionic-native/facebook'

constructor(public facebook: Facebook){}

facebookLogin(): Promise<any> {
  return this.facebook.login(['email'])
    .then( response => {
      const facebookCredential = firebase.auth.FacebookAuthProvider
        .credential(response.authResponse.accessToken);

      firebase.auth().signInWithCredential(facebookCredential)
        .then( success => {
          console.log("Firebase success: " + JSON.stringify(success));
        });

    }).catch((error) => { console.log(error) });
}
Let’s break down the code above.
const facebookCredential = firebase.auth.FacebookAuthProvider
  .credential(response.authResponse.accessToken);
First, we’re using the line above to create a credential object we can pass to Firebase, then we need to pass that credential object to Firebase:
facebookLogin(): Promise<any> {
  return this.facebook.login(['email'])
    .then( response => {
      const facebookCredential = firebase.auth.FacebookAuthProvider
        .credential(response.authResponse.accessToken);

      firebase.auth().signInWithCredential(facebookCredential)
        .then( success => {
          console.log("Firebase success: " + JSON.stringify(success));
        });

    }).catch((error) => { console.log(error) });
}
This bit of code firebase.auth().signInWithCredential(facebookCredential) makes sure your user creates a new account in your Firebase app and then authenticates the user into the Ionic app, storing some authentication information (like tokens, email, provider info, etc.) in local storage.
Next Steps
By now you have a fully working sign-in process with Facebook using Firebase, I know it’s a lot of configuration, but it’s because we want our users to have an amazing experience using our apps.
Now I want you to download a Starter Template I built it has both Facebook and Google Sign-In working out of the box, all you need to do is add your credentials from Facebook and Google 🙂 (If the link doesn’t show the price as $0 just use the discount code IonicBlog to manually set it as $0)


