Ionic Native: Accessing iOS Photos and Android Gallery, Part 2
In Part 1 of this series, we took at a look at how to use Ionic Native’s Camera Plugin to access the native photo app (Photos on iOS and Gallery on Android) in an Ionic app. Hopefully that inspired you to go forth into the world and create something awesome, but if you did, you may have noticed a slight catch. The Camera plugin only lets us select one photo, and as we all know as savvy internet consumers, more pictures are more better. Making a user choose only one of their photos not only isn’t going to cut it for a lot of apps, it’s downright immoral!
So let’s fix the error of our ways, shall we? Time to take a look at the Image Picker plugin, which does a few things:
- Invokes the native photo app on the user’s device
- Allows the user to select multiple photos
- Returns an array of file URIs of the selected photos to our app
The plugin also allows us to set some options, such as the maximum number of images the user is allowed to select. More on these shortly.
To see how it works, let’s build another super fun sample app!
Getting Set Up
To follow along, you can download the starter project I put together, then run npm install in the project directory to get all the delicious dependencies.
The starter project contains two components:
HomePage: The starting page where we’ll call the Image Picker plugin.GalleryPage: Where the app will navigate to displays the users selected photos.
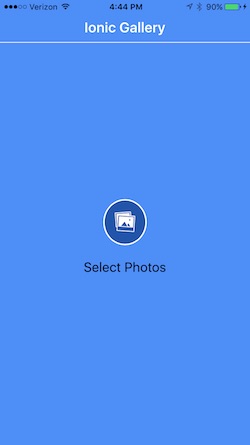
If you run ionic serve at this point, the app will launch in the browser and display the HomePage component. It’s a simple page with a button that looks like this:

To get started, we need to add the Image Picker to our project:
ionic plugin add cordova-plugin-image-picker
Then import the plugin into our app/pages/home/home.ts file so we can use it. We’ll also import our GalleryPage component so that we can navigate to it later:
import { ImagePicker } from 'ionic-native';
import { GalleryPage } from '../gallery/gallery';
That’s it for set-up. Onward to the land of many photos and honey!
Using the Image Picker Plugin
The great thing about Cordova and Ionic Native is how easy they make it to access native device functionality. Seriously, look how easy it is to add the Image Picker to home.ts:
private openGallery (): void {
  let options = {
    maximumImagesCount: 8,
    width: 500,
    height: 500,
    quality: 75
  }

  ImagePicker.getPictures(options).then(
    file_uris => this._navCtrl.push(GalleryPage, {images: file_uris}),
    err => console.log('uh oh')
  );
}
A function declared in twelve lines of code is all it takes. I’ll give you a second to catch your breath…OK, let’s look at how it’s done, starting with the options.
maximumImagesCount: The max number of images the user can select. Defaults to 15.width/height: The max width/height to constrain the returned images to. This is cool, since we can ask the plugin to return the images at whatever size we need. Note this will constrain the length of the longest side. The aspect ratio is maintained.quality: The quality relative to the original image. Most users take really high-res photos, but our app doesn’t necessarily need to be passing around and manipulating a bunch of 10000000 MB files (minor exaggeration). This lets us have some control over that.
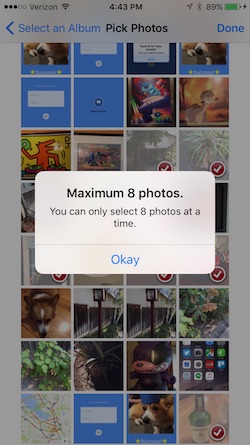
The maximumImagesCount option is especially worth noting here, because not only does it let us control the number of photos the user is allowed to select, it automatically pops an alert when they try to go over their limit:


Pretty helpful, right?
Once we set our options (all of which are optional), we pass them to ImagePicker.getPictures(), which will switch to the native photo app. Once the user selects their photos, the plugin will store copies of the selected images in a temp directory on the device, then return a promise. When the promise resolves, passes the app an array of file URIs for the selected images.
ImagePicker.getPictures(options).then(
  file_uris => this._navCtrl.push(GalleryPage, {images: file_uris}),
  err => console.log('uh oh')
);
In this app, we’re telling Ionic to navigate to the GalleryPage by pushing it on to the NavController stack once the promise resolves. We’re also passing the array of file URIs as a NavParam to the GalleryPage, so the files can be displayed.
And now for the final step. Update the <ion-icon> in app/pages/home/home.html to call the openGallery() function when it’s tapped:
<ion-icon name="images" on-tap="openGallery()"></ion-icon>
Let’s See Those Photos Already
Everything we need is in place. Now just deploy the app to a device with ionic run or using the handy Ionic View.
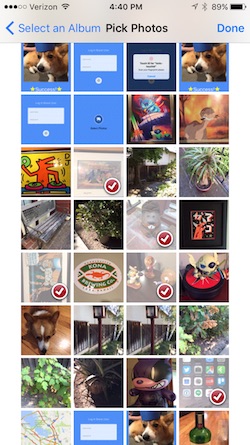
Once the app is running, tap the ‘Select Images’ button to invoke the Image Picker plugin and select your photos:


Then view them as a glorious gallery of delight (OK, it’s not quite that impressive):


Curious how the app made that nice gallery layout for the images? Check out the GalleryPage component in app/pages/gallery if you’re feeling adventurous, or stay tuned to the Ionic blog for a follow-up post on using Ionic’s grid component for layout.


