One MEAN Ionic 2 Todo App on Heroku, Part 1
Given the choice between a short or tall stack of pancakes, which would you get? The correct answer is always more pancakes. In this post, we’re giving you more pancakes! So grab the syrup, and let’s make a full-stack of MEAN. This is the first post in a three-part series! Here’s part 2 and part 3 for reference.
Before we really dig in, a little bit about the MEAN stack:
For those who aren’t familiar, the MEAN stack is similar in concept to the popular LAMP (Linux, Apache, MySQL, PHP) stack, and is one of the most popular application development stacks for JavaScript developers. MEAN stands for MongoDB, Express, AngularJS, and Node.js, which are the four technologies that make up the stack. Here’s a quick breakdown of the part each of these plays:
- MongoDB: NoSQL database/persistence
- Express: HTTP request router/API framework
- AngularJS: Application/MVC framework
- Node.js: Server-side execution environment
MEAN has been a popular default dev stack for web apps in particular for quite some time now, primarily because it gives developers the ability to work with JavaScript and JSON across their entire application stack, from the server all the way to the UI. This is pretty cool for a lot of reasons, though one of the largest is that it removes a lot of complexity from an already complex system. Not only can we write all of our code in a single language (JS), since every level of the stack speaks the same language we also get to use a single data format to exchange data (JSON), as well as common idioms and object types. This continuity between layers can reduce errors and make coordinating development across the stack much easier.
Ok, enough of that. On to our app!
Project Setup, Git, Heroku and the Node.js Backend
We’ll be creating is a simple Ionic 2 app that uses Typescript and a RESTful api. We’ll also build a Node.js backend, using Express for our API and MongoDB for data storage. When we’re all done, we’ll use Git to push the app to Heroku, where it will be hosted.
The code for the app is available on GitHub, and, for the impatient, able to be deployed live to your Heroku account by using the button below:
Project Setup
We’ll be writing the app’s frontend in TypeScript (TS), so you should probably download a TS compiler for your editor–it’ll make your life much easier.
To start, create a blank Ionic 2 app using the Ionic CLI’s start command. Feel free to name your app whatever you want. I’ve called mine todo-ionic2-heroku:
$ > ionic start todo-ionic2-heroku blank --v2
This will create a new project directory in place, with the same name as your project. The folder structure should look roughly like this:

Let’s check it out. cd into your newly created directory and serve it up!
$ > cd todo-ionic2-heroku
$ /todo-ionic2-heroku > ionic serve
The serve command runs a variety of gulp tasks to build your app, then opens it in your browser (I’m using the device mode built into Chrome’s DevTools to see how the app looks on mobile):

Flipping amazing, right? Okay, maybe not yet, but it’s a good start.
The Node.js Backend
If this is your first time using Heroku with a Node.js app, check out the Getting Started with Node.js on Heroku tutorial in Heroku’s Dev Center.
If you’re awesome and want to keep going, make sure you have the following installed:
Heroku toolbelt–Heroku’s CLI tool for creating and managing Heroku apps
Node.js
Git Init & Heroku Create
Let’s initialize a Git repository for our app:
$ /todo-ionic2-heroku > git init
Then set up the app with Heroku (Note: you must be logged in to your Heroku account from the command line):
$ /todo-ionic2-heroku > heroku create
This command just created a Git remote named heroku, where we’ll push our code. It also generated a random name for our app: evening-everglades-42641, in my case.
Set up MongoDB
Now that we have a blank Ionic app, and we’re linked up to Heroku, let’s provision a MongoDB instance. We could set up a local instance of MongoDB, but because we’re working with Heroku, we’ll use MongoLab’s mLab addon. This database-as-a-service through Heroku makes it very simple to provision a MongoDB database. Also, it’s free for little projects like this!

Note: if you don’t want to use MongoLab, there are other data store options for Heroku.
Use the Heroku CLI to provision your database:
$ /todo-ionic2-heroku > heroku addons:create mongolab
This little command provisioned a sandbox database for us that’s connected to the Heroku app created in the last step. It also created a config variable in your Heroku environment: MONGODB_URI. We’ll use that to connect to our database in the next step.
Create an Express App Connected to MongoDB
When we first created the Ionic project, much of the plumbing for a Node app came along with it. Excellent!
The only setup left is to download the node_modules for our server and --save them to our existing package.json file.
$ /todo-ionic2-heroku > npm install express mongodb cors body-parser --save
In order to interact with the mLab database we provisioned, we’ll use the mongodb node module, which is officially supported by Node.js.
(Note: For projects with more complex data models, you may want to check out Mongoose, which provides “elegant mongodb object modeling for node.js”.)
In the main folder of your project, create a file called server.js, and put the following code in it:
//server.js (todo-ionic2-heroku/server.js)
var express = require('express');
var bodyParser = require('body-parser');
var cors = require('cors');
var app = express();

var mongodb = require('mongodb'),
mongoClient = mongodb.MongoClient,
ObjectID = mongodb.ObjectID, // Used in API endpoints
db; // We'll initialize connection below

app.use(bodyParser.json());
app.set('port', process.env.PORT || 8080);
app.use(cors()); // CORS (Cross-Origin Resource Sharing) headers to support Cross-site HTTP requests
app.use(express.static("www")); // Our Ionic app build is in the www folder (kept up-to-date by the Ionic CLI using 'ionic serve')

var MONGODB_URI = process.env.MONGODB_URI;

// Initialize database connection and then start the server.
mongoClient.connect(MONGODB_URI, function (err, database) {
if (err) {
process.exit(1);
}

db = database; // Our database object from mLab

console.log("Database connection ready");

// Initialize the app.
app.listen(app.get('port'), function () {
console.log("You're a wizard, Harry. I'm a what? Yes, a wizard, on port", app.get('port'));
});
});

// Todo API Routes Will Go Below
Get the MONGODB_URI for Local Development Fallback
As we develop our app, we’ll want to be able to run it locally. For this, we have the code on line 17 in server.js:
var MONGODB_URI = process.env.MONGODB_URI;
process.env.MONGODB_URI tells our server where our database is when the app is running on Heroku, but if you try starting your server locally with node server.js, you’ll get an error like this:
TypeError: Parameter 'url' must be a string, not undefined
To fix this, we need to grab the database URI from Heroku with the heroku config command:
$ /todo-ionic2-heroku > heroku config | grep MONGODB_URI
From the output, copy the part starting with mongodb://heroku and continues on with a string of gobbledegook. It should look something like this:
mongodb://heroku_g24xsxd8:ur8k708rh1qqga17luq6saqtat@ds045622.mlab.com:45122/heroku_g24xsxd8
Then update line 17 of server.js:
var MONGODB_URI = process.env.MONGODB_URI || 'your_mongodb_uri_goes_in_these_quotes';
Note: Try not to share your DB URI anywhere public as it would grant full access to your database to anyone who knows how to use it.
At this point, you should be able to start the server and open up your app at http://localhost:8080/.
$ /todo-ionic2-heroku > node server.js
Database connection ready
You're a wizard, Harry. I'm a what? Yes, a wizard, on port 8080
Note: Going forward, it’s useful to have three tabs open in your terminal: one running your backend Express server, one running ionic serve to rebuild the frontend when Ionic detects changes, and one for running additional commands.
Set up Your RESTful API Endpoints
Now that our server is up and running, let’s go ahead and create the endpoints for a simple RESTful API that we’ll use to data for the front-end of our app. We’ll create two endpoints that support the following CRUD (Create, Read, Update, Delete) operations:

Finally, just for reference, the database schema for our todos is very simple:
{
"_id": ,
"description": ,
"isComplete":
}
Add API Endpoints to Server.js
To create our endpoints, let’s add the following to server.js:
//server.js
...
/*
* Endpoint --> "/api/todos"
*/

// GET: retrieve all todos
app.get("/api/todos", function(req, res) {
db.collection("todos").find({}).toArray(function(err, docs) {
if (err) {
handleError(res, err.message, "Failed to get todos");
} else {
res.status(200).json(docs);
}
});
});

// POST: create a new todo
app.post("/api/todos", function(req, res) {
var newTodo = {
description: req.body.description,
isComplete: false
}

db.collection("todos").insertOne(newTodo, function(err, doc) {
if (err) {
handleError(res, err.message, "Failed to add todo");
} else {
res.status(201).json(doc.ops[0]);
}
});
});

/*
* Endpoint "/api/todos/:id"
*/

// GET: retrieve a todo by id -- Note, not used on front-end
app.get("/api/todos/:id", function(req, res) {
db.collection("todos").findOne({ _id: new ObjectID(req.params.id) }, function(err, doc) {
if (err) {
handleError(res, err.message, "Failed to get todo by _id");
} else {
res.status(200).json(doc);
}
});
});

// PUT: update a todo by id
app.put("/api/todos/:id", function(req, res) {
var updateTodo = req.body;
delete updateTodo._id;

db.collection("todos").updateOne({_id: new ObjectID(req.params.id)}, updateTodo, function(err, doc) {
if (err) {
handleError(res, err.message, "Failed to update todo");
} else {
res.status(204).end();
}
});
});

// DELETE: delete a todo by id
app.delete("/api/todos/:id", function(req, res) {
db.collection("todos").deleteOne({_id: new ObjectID(req.params.id)}, function(err, result) {
if (err) {
handleError(res, err.message, "Failed to delete todo");
} else {
res.status(204).end();
}
});
});

// Error handler for the api
function handleError(res, reason, message, code) {
console.log("API Error: " + reason);
res.status(code || 500).json({"Error": message});
}
Push to Heroku and Test out Your API
Before we move onto our Ionic app, let’s push everything to Heroku as it currently stands and test out our API with a curl command.
Update .gitignore
By default, Ionic puts www/build in our .gitignore file, as we normally wouldn’t want to track it, but we need it to support Heroku deployment, so we’ll remove it. After removing it, .gitignore should look something like this:
#.gitignore
node_modules/
platforms/
plugins/
.DS_Store
Commit Changes and Push to Heroku
Next up, commit all of your our changes to the git repository and push it to Heroku:
$ /todo-ionic2-heroku > git add -A
$ /todo-ionic2-heroku > git commit -m "First commit"
$ /todo-ionic2-heroku > git push heroku master
Heroku will confirm your app has been deployed, but to open your app, you need at least one instance of it running. To activate your app run the following:
$/todo-ionic2-heroku > heroku ps:scale web=1
Then open your app:
$/todo-ionic2-heroku > heroku open
This opens your simple, blank Ionic app at your-app-name.heroku-app.com.
Next, let’s test the API by adding a new Todo by running the following curl command:
<br />$/todo-ionic2-heroku > curl -H "Content-Type: application/json" -d '{"description":"Order a tall stack of pancakes, just because."}' https://your-app-name.herokuapp.com/api/todos
You can check out your newly added todo under the todos collection in your mLab management portal. Open it up by running:
$/todo-ionic2-heroku > heroku addons:open mongolab
Some Closing Thoughts
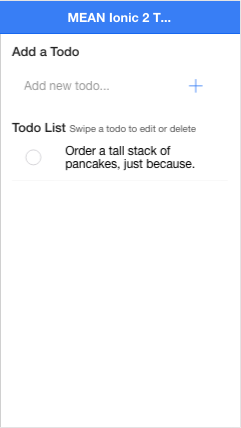
And with that, the backend is all ready to go. The next step will be to build out the frontend of our app. In the next post, we’ll write some Angular 2 code to retrieve the todos we just added to the database and display them in an Ionic 2 app.


