10 Minutes with Ionic 2: Hello World

Getting up and running with your first Ionic 2 app using the Ionic CLI is super simple for anyone with web development experience. As this post will show, you can get started very quickly and have a “Hello World” app within ten minutes.
Using just a couple commands on the CLI, you can have a starting template and be well on your way to having your app on Shark Tank.
Installing Ionic
The first thing you’ll want to do, if you haven’t already, is to install the Ionic 2 CLI, using the installation guide. After installing node, you’ll use NPM to install ionic@beta.
npm install -g ionic@beta
Creating your First App
Using the CLI, wherever we want to create our app, we will run the ionic start command to create an app called helloWorld, using the blank template.
ionic start helloWorld blank --v2 --ts
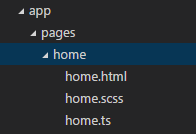
This will create a bunch of plumbing for you, including your first @Page of your app, inside app/pages/home, which will include the following files:
- home.html: The template for your page
- home.ts: The TypeScript for your page, where the
@Pagecomponent is defined - home.scss: a file to put any custom SASS styles for this page
Modifying a Page
Let’s modify the template (home.html) to just say “Hello World” in the navbar, and in the content, we will have the text say “Hello Andrew,” where “Andrew” will be a variable passed from our @Page component. By default, we’ve been given something like this:
<ion-navbar *navbar>
  <ion-title>
    Home
  </ion-title>
</ion-navbar>

<ion-content class="home">
  <ion-card>
    <ion-card-header>
      Card Header
    </ion-card-header>
    <ion-card-content>
      Hello World
    </ion-card-content>
  </ion-card>
</ion-content>
First, we’ll modify our ion-title to contain “Hello World”.
  <ion-title>
    Hello World
  </ion-title>
Next, let’s modify our ion-content to contain our hello text and bind a name variable that we will pass from our @Page.
<ion-content class="home">
  <ion-card>
    <ion-card-content>
      Hello {{name}}
    </ion-card-content>
  </ion-card>
</ion-content>
Finally, we’ll modify our @Page (home.ts) to assign a value to name. By default, we’ve been given something like this:
import {Page} from 'ionic-angular';


@Page({
  templateUrl: 'build/pages/home/home.html'
})
export class HomePage {}
Let’s add a constructor and assign a value to this.name which will be bound to our template.
import {Page} from 'ionic-angular';


@Page({
  templateUrl: 'build/pages/home/home.html'
})
export class HomePage {
  public name;

  constructor(){
    this.name = "Andrew";
  }
}
Serve
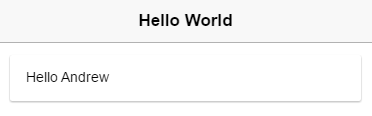
Next, in the CLI, we’ll run ionic serve to view our app in the browser:
ionic serveYou should end up with something similar to the following in your browser:
Conclusion
In under ten minutes, you can be up and running with Ionic version 2, using the CLI. In that short amount of time, we have the basic building blocks of your next big app!