Build Secure Offline Apps with Ionic & Couchbase Lite

Couchbase Lite is a full-featured NoSQL database that runs locally on mobile devices. The Offline Storage plugin, built and maintained by Ionic as part of Ionic Native, makes it easy to take advantage of the Couchbase Lite database to create your application using an offline-first architecture. This allows you to offer your users a fast and seamless experience regardless of their connectivity at the time.
New! View a live demo of Offline Storage here. Complete documentation available here.
In this article, I will demonstrate how to create an application supporting the full set of Create, Read, Update, and Delete (CRUD) operations. For simplicity, I will focus on the use of the database itself and will not get into more advanced topics such as data synchronization with a cloud-based API.
Demo Application
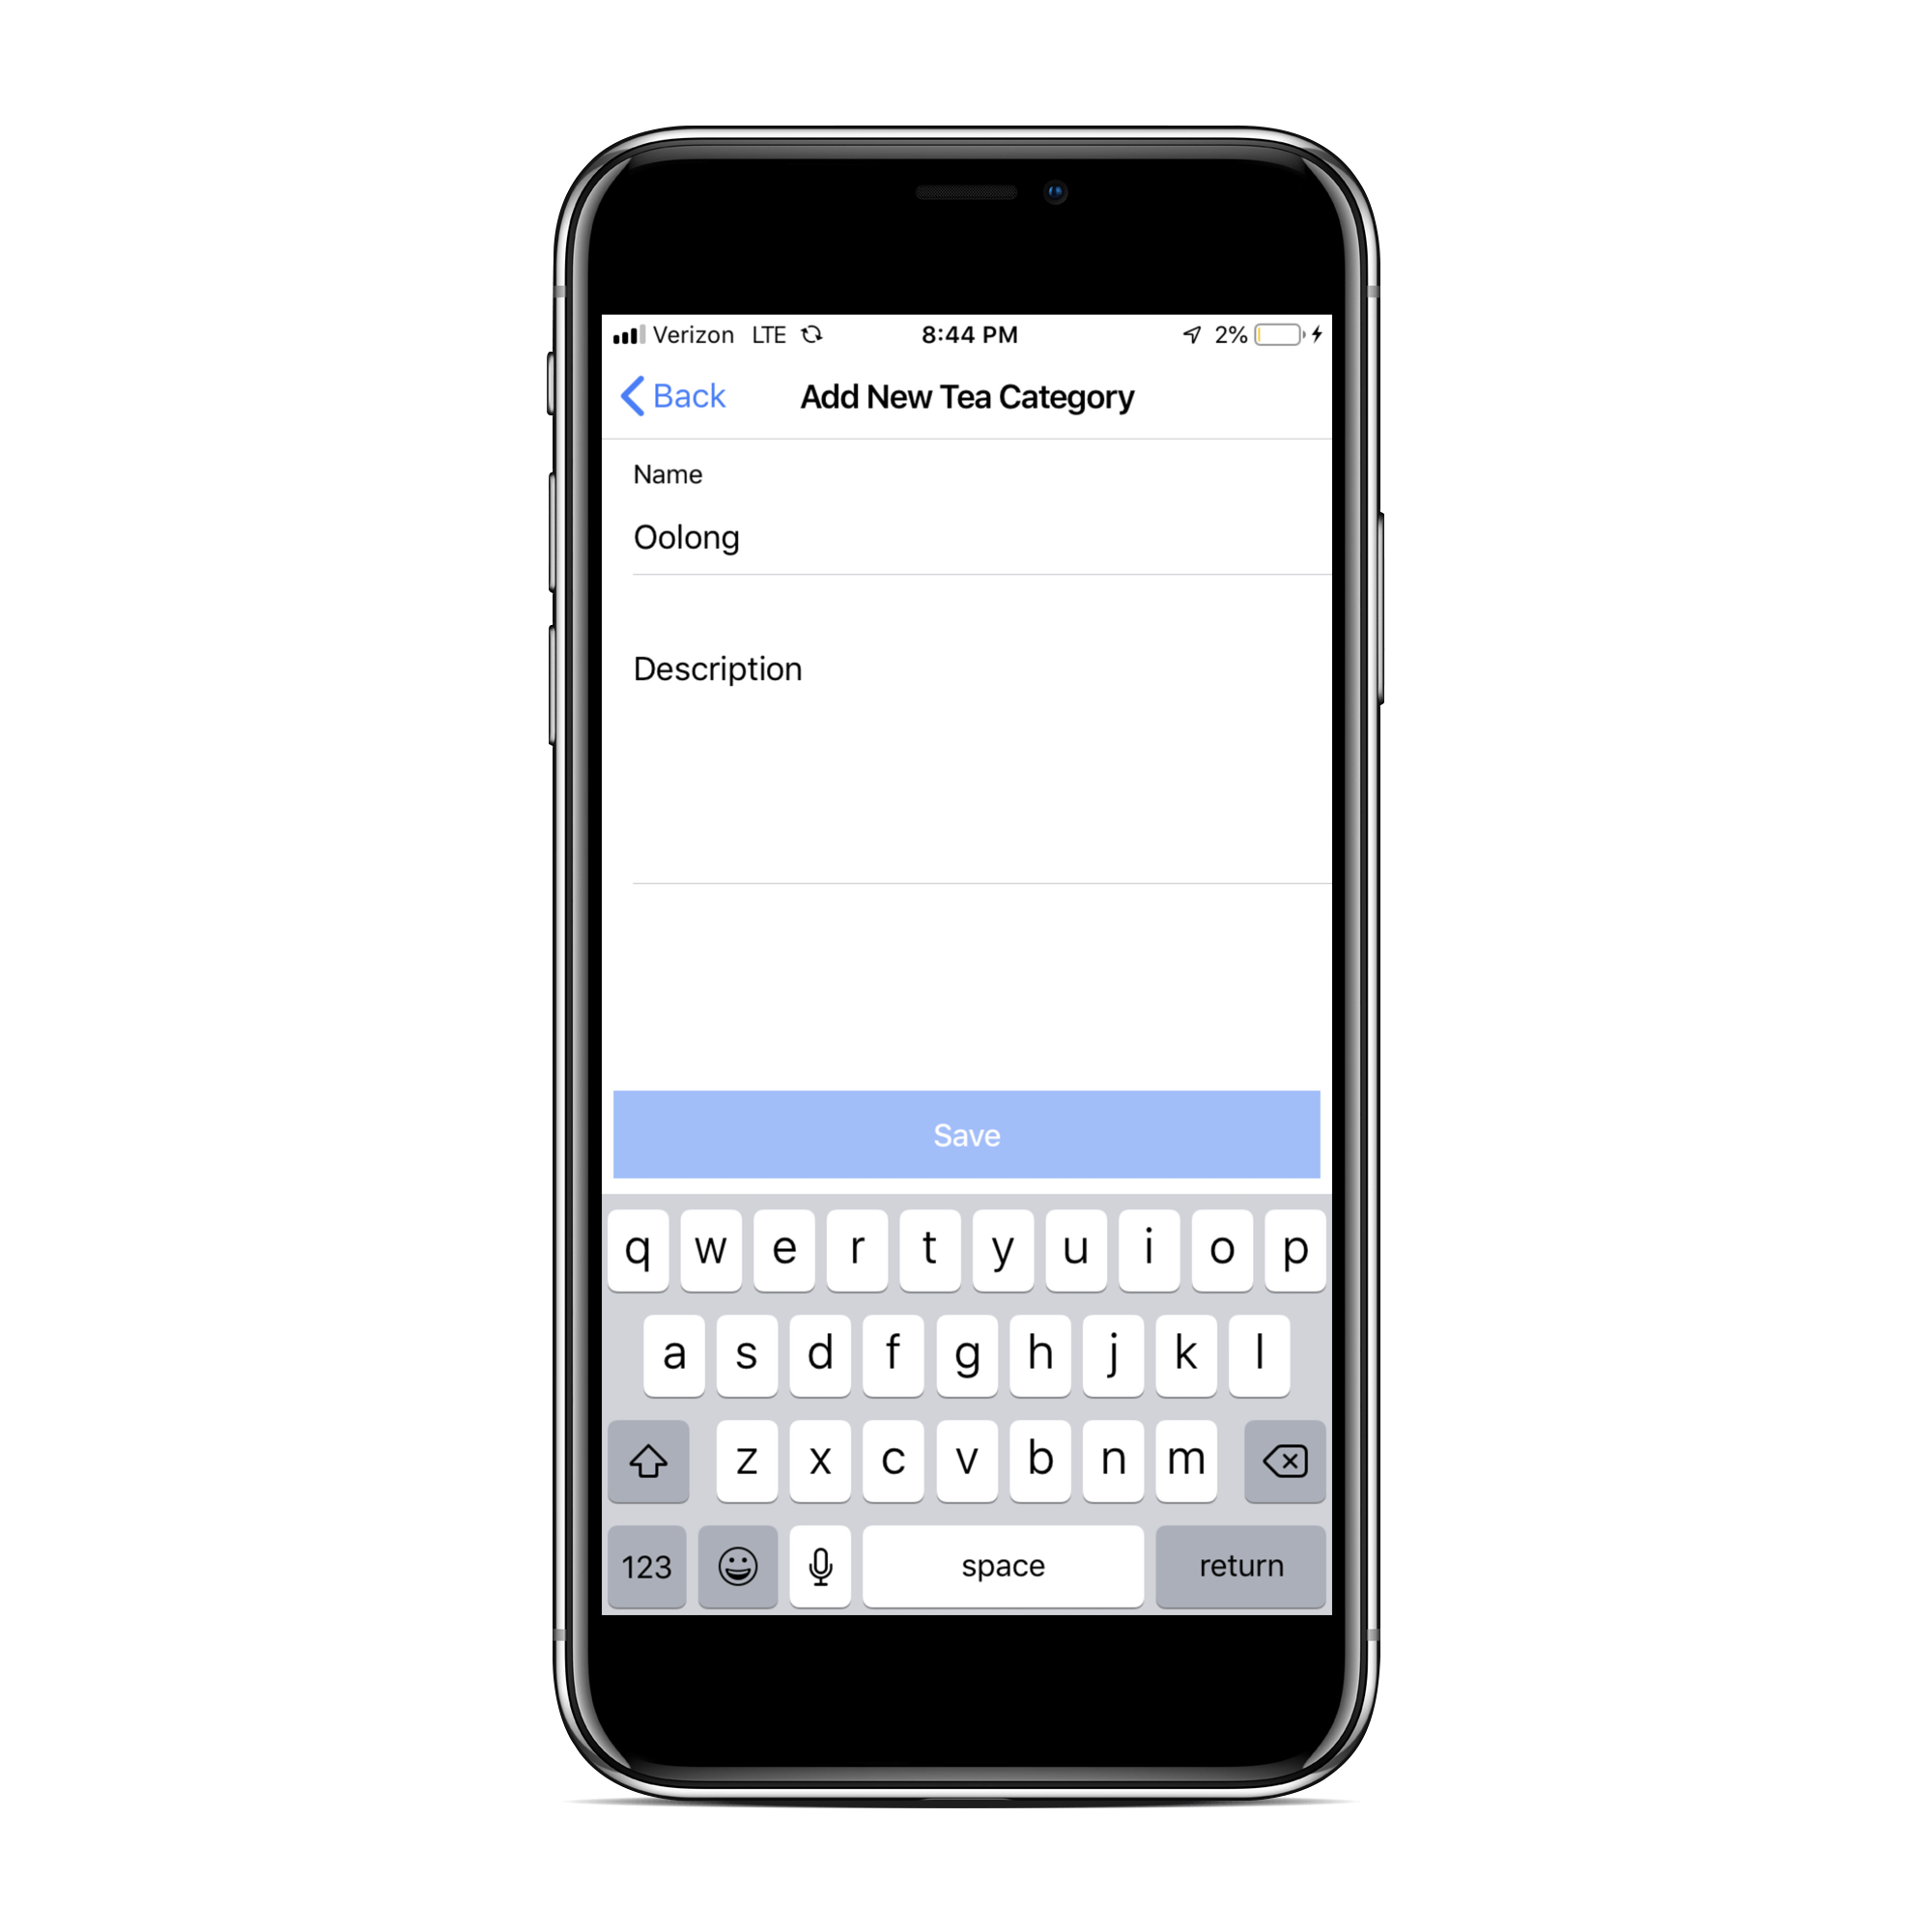
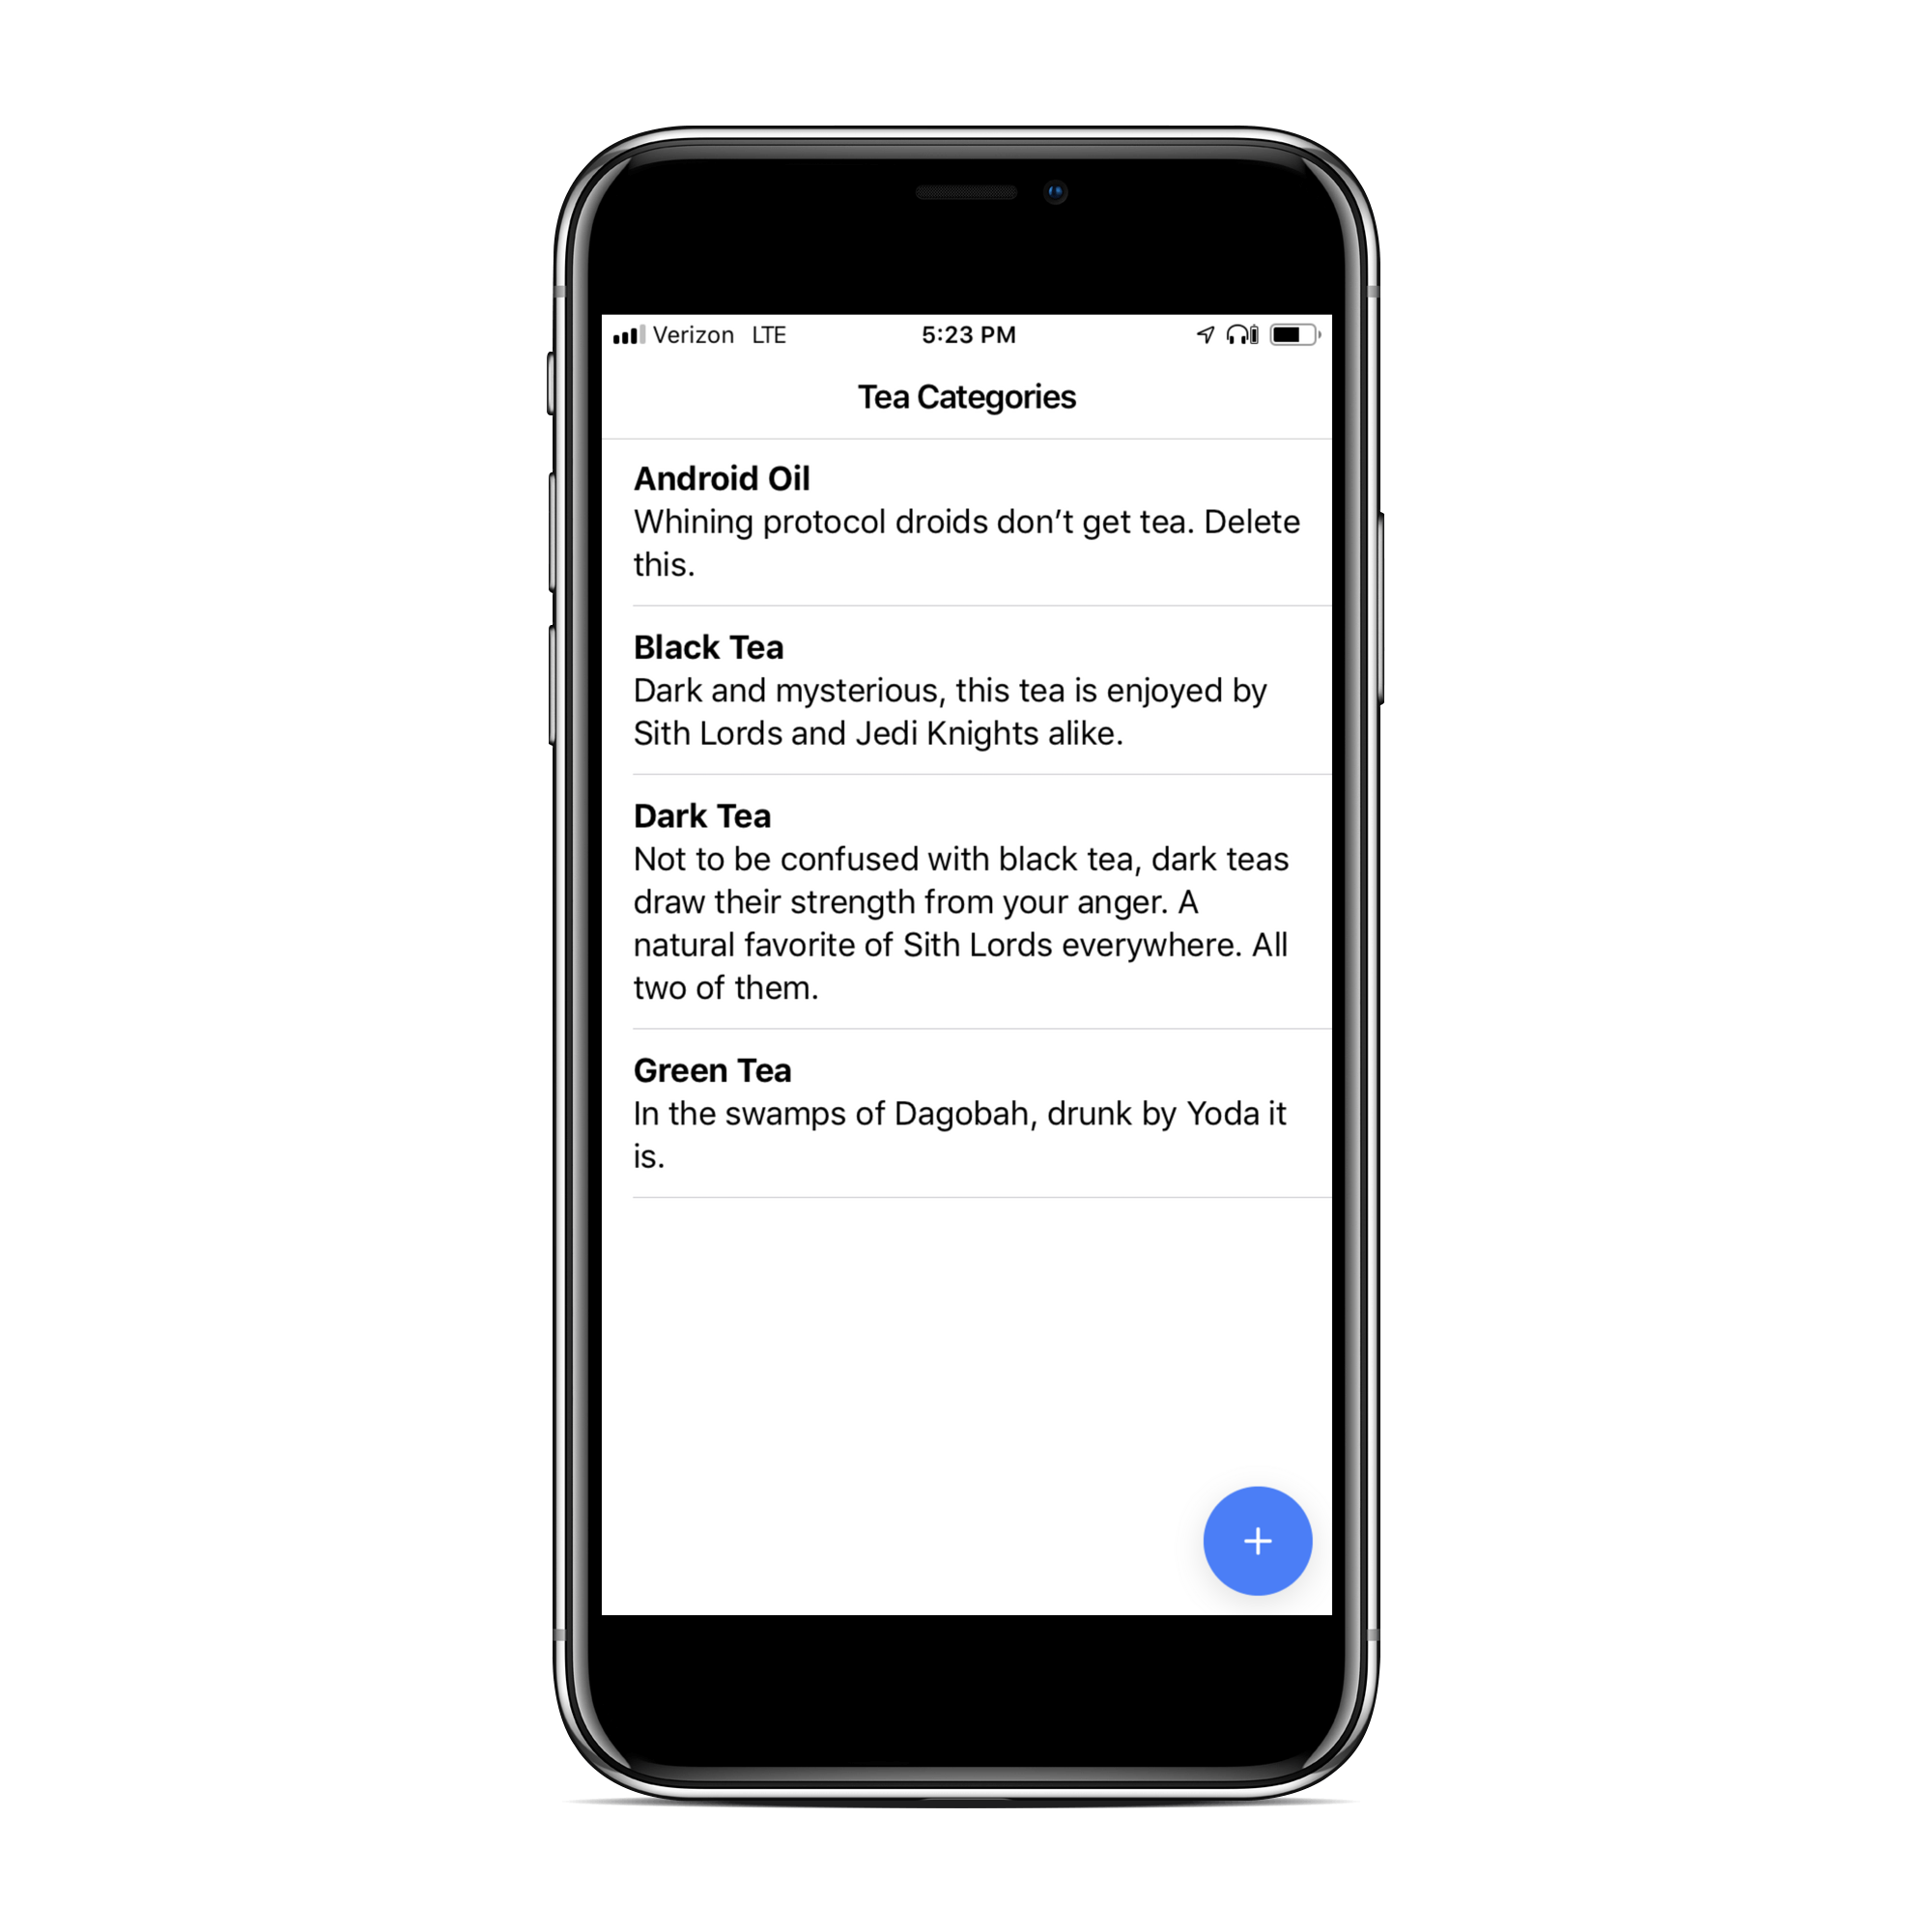
To demonstrate the power of the Offline Storage solution, I will use an application that displays different categories of tea. It allows the user to add new categories of tea, edit existing categories, and delete categories they no longer care about.
The complete source code for this application is available here.
Install Ionic Native
In order to use Ionic Native plugins, make sure you’re using the Ionic Enterprise Cordova CLI:
npm uninstall -g cordova
npm install -g @ionic-enterprise/cordova
Once you’ve installed the Ionic Enterprise Cordova CLI, you can register a native key, then install the Offline Storage plugin:
ionic enterprise register
ionic cordova plugin add @ionic-enterprise/offline-storage
NOTE: Ionic Native includes a reliable set of Native APIs & functionality that you can use in your Ionic app, quality controlled and maintained by the Ionic Team. Sign up here.
Initialize a Database
Create a Service
The first thing we will do is create a service, allowing us to abstract the data storage logic away from the rest of the pages and components in our application. Over time, this becomes easier to make changes to how data is stored without affecting the whole code base.
We will just be storing tea categories with this application so we will create a single service called TeaCategoriesService which will handle all of the CRUD operations. For now, it will only use a Couchbase Lite database for storage and retrieval, but could easily be updated to include cloud-based storage in the future. Within an Ionic application, run the generate service command:
ionic g service services/tea-categories/tea-categories
> ng generate service services/tea-categories/tea-categories
CREATE src/app/services/tea-categories/tea-categories.service.spec.ts (369 bytes)
CREATE src/app/services/tea-categories/tea-categories.service.ts (142 bytes)
[OK] Generated service!
Open the Database
The next step involves opening and initializing the database within TeaCategoriesService. The initializeDatabase() method below shows the basic steps required to open a database. The readyPromise is stored for use in other methods to ensure that the database has been initialized properly before we perform other operations.
import { Injectable } from '@angular/core';

import { Database, DatabaseConfiguration, IonicCBL, CordovaEngine } from 'ionic-enterprise-couchbase-lite';

@Injectable({
  providedIn: 'root'
})
export class TeaCategoriesService {
  private readyPromise: Promise<void>;
  private database: Database;

  constructor() {
    this.readyPromise = this.initializeDatabase();
  }

  private async initializeDatabase(): Promise<void> {
    return new Promise((resolve) => {
      IonicCBL.onReady(async () => {
        const config = new DatabaseConfiguration();
        config.setEncryptionKey('8e31f8f6-60bd-482a-9c70-69855dd02c38');
        this.database = new Database('teacategories', config);
        this.database.setEngine(new CordovaEngine({
          allResultsChunkSize: 9999
        }));
        await this.database.open();
        console.log(“DB Name: “ + this.database.getName());
        console.log(“DB Path: “ + await this.database.getPath());
        resolve();
      });
    });
  }
}
Notice that no specific mobile platform has been mentioned in the code above. The plugin abstracts away those details from the Ionic web developer, providing a true cross-platform solution. To demonstrate this, build and run the application on a mobile device or in an emulator. Upon examination of the console log, you will see the iOS and Android-specific file paths to the newly created database:
On iOS:
DB Name: teacategories
DB Path: /var/mobile/Containers/Data/Application/EC31A8DD-863B-4894-BC64-B89A370377F9/
Library/Application Support/CouchbaseLite/teacategories.cblite2/
On Android:
DB Name: teacategories
DB Path: /data/user/0/io.ionic.cs_demo_couchbase_lite/files/teacategories.cblite2/
Storing Data
TeaCategory Model
A generic data model – TeaCategory – is used to communicate between the TeaCategoriesService and its consumers. This allows us to decouple the data from the actual storage mechanism, making the application more maintainable as we add features in the future.
export interface TeaCategory {
  id?: string;
  name: string;
  description: string;
}
The “id” property is optional since newly created objects will not have any ID until they are added to the database.
Back to the TeaCategoriesService
When adding a new document to the database, we create a MutableDocument object. As the name implies, this is a document object that can be changed. After the object is created, set the properties we are concerned with and save the document:
  private async add(category: TeaCategory): Promise<void> {
    await this.readyPromise;
    const doc = new MutableDocument()
      .setString('name', category.name)
      .setString('description', category.description);
    return this.database.save(doc);
  }
Notice that the id property is not set – it will be automatically assigned by the database.
TeaCategoryEditorPage
The TeaCategoryEditorPage needs to pass the appropriate data to the service, await the completion of the save, and then navigate back to the HomePage:
  async save() {
    await this.teaCategories.save({
      name: this.name,
      description: this.description
    });

    this.navController.back();
  }
Querying Documents
Now that we are able to create documents, we need to be able to display them on the app’s HomePage. In order to retrieve all of the documents from the database, we can build a query that returns the data we need, execute the query, and then unpack the data into the generic TeaCategory model that we use to pass data back and forth.
TeaCategoryService: GetAll()
The bulk of the work is performed by the service, which returns a promise that resolves to an array of tea categories. This allows us to hide the details of the storage mechanism from the consumers of the service.
  async getAll(): Promise<Array<TeaCategory>> {
    await this.readyPromise;
    const query = QueryBuilder.select(
      SelectResult.property('name'),
      SelectResult.property('description'),
      SelectResult.expression(Meta.id)
    ).from(DataSource.database(this.database))
     .orderBy(Ordering.property('name'));

    const ret = await query.execute();
    const res = await ret.allResults();

    return res.map(t => ({
      id: t._id,
      name: t.name,
      description: t.description
    }));
  }
TeaCategoryEditorPage: Retrieve Results
The TeaCategoryEditorPage page just needs to await the results of the query.
  async ngOnInit() {
    this.categories = await this.teaCategories.getAll();
  }
Updating Tea Category Documents
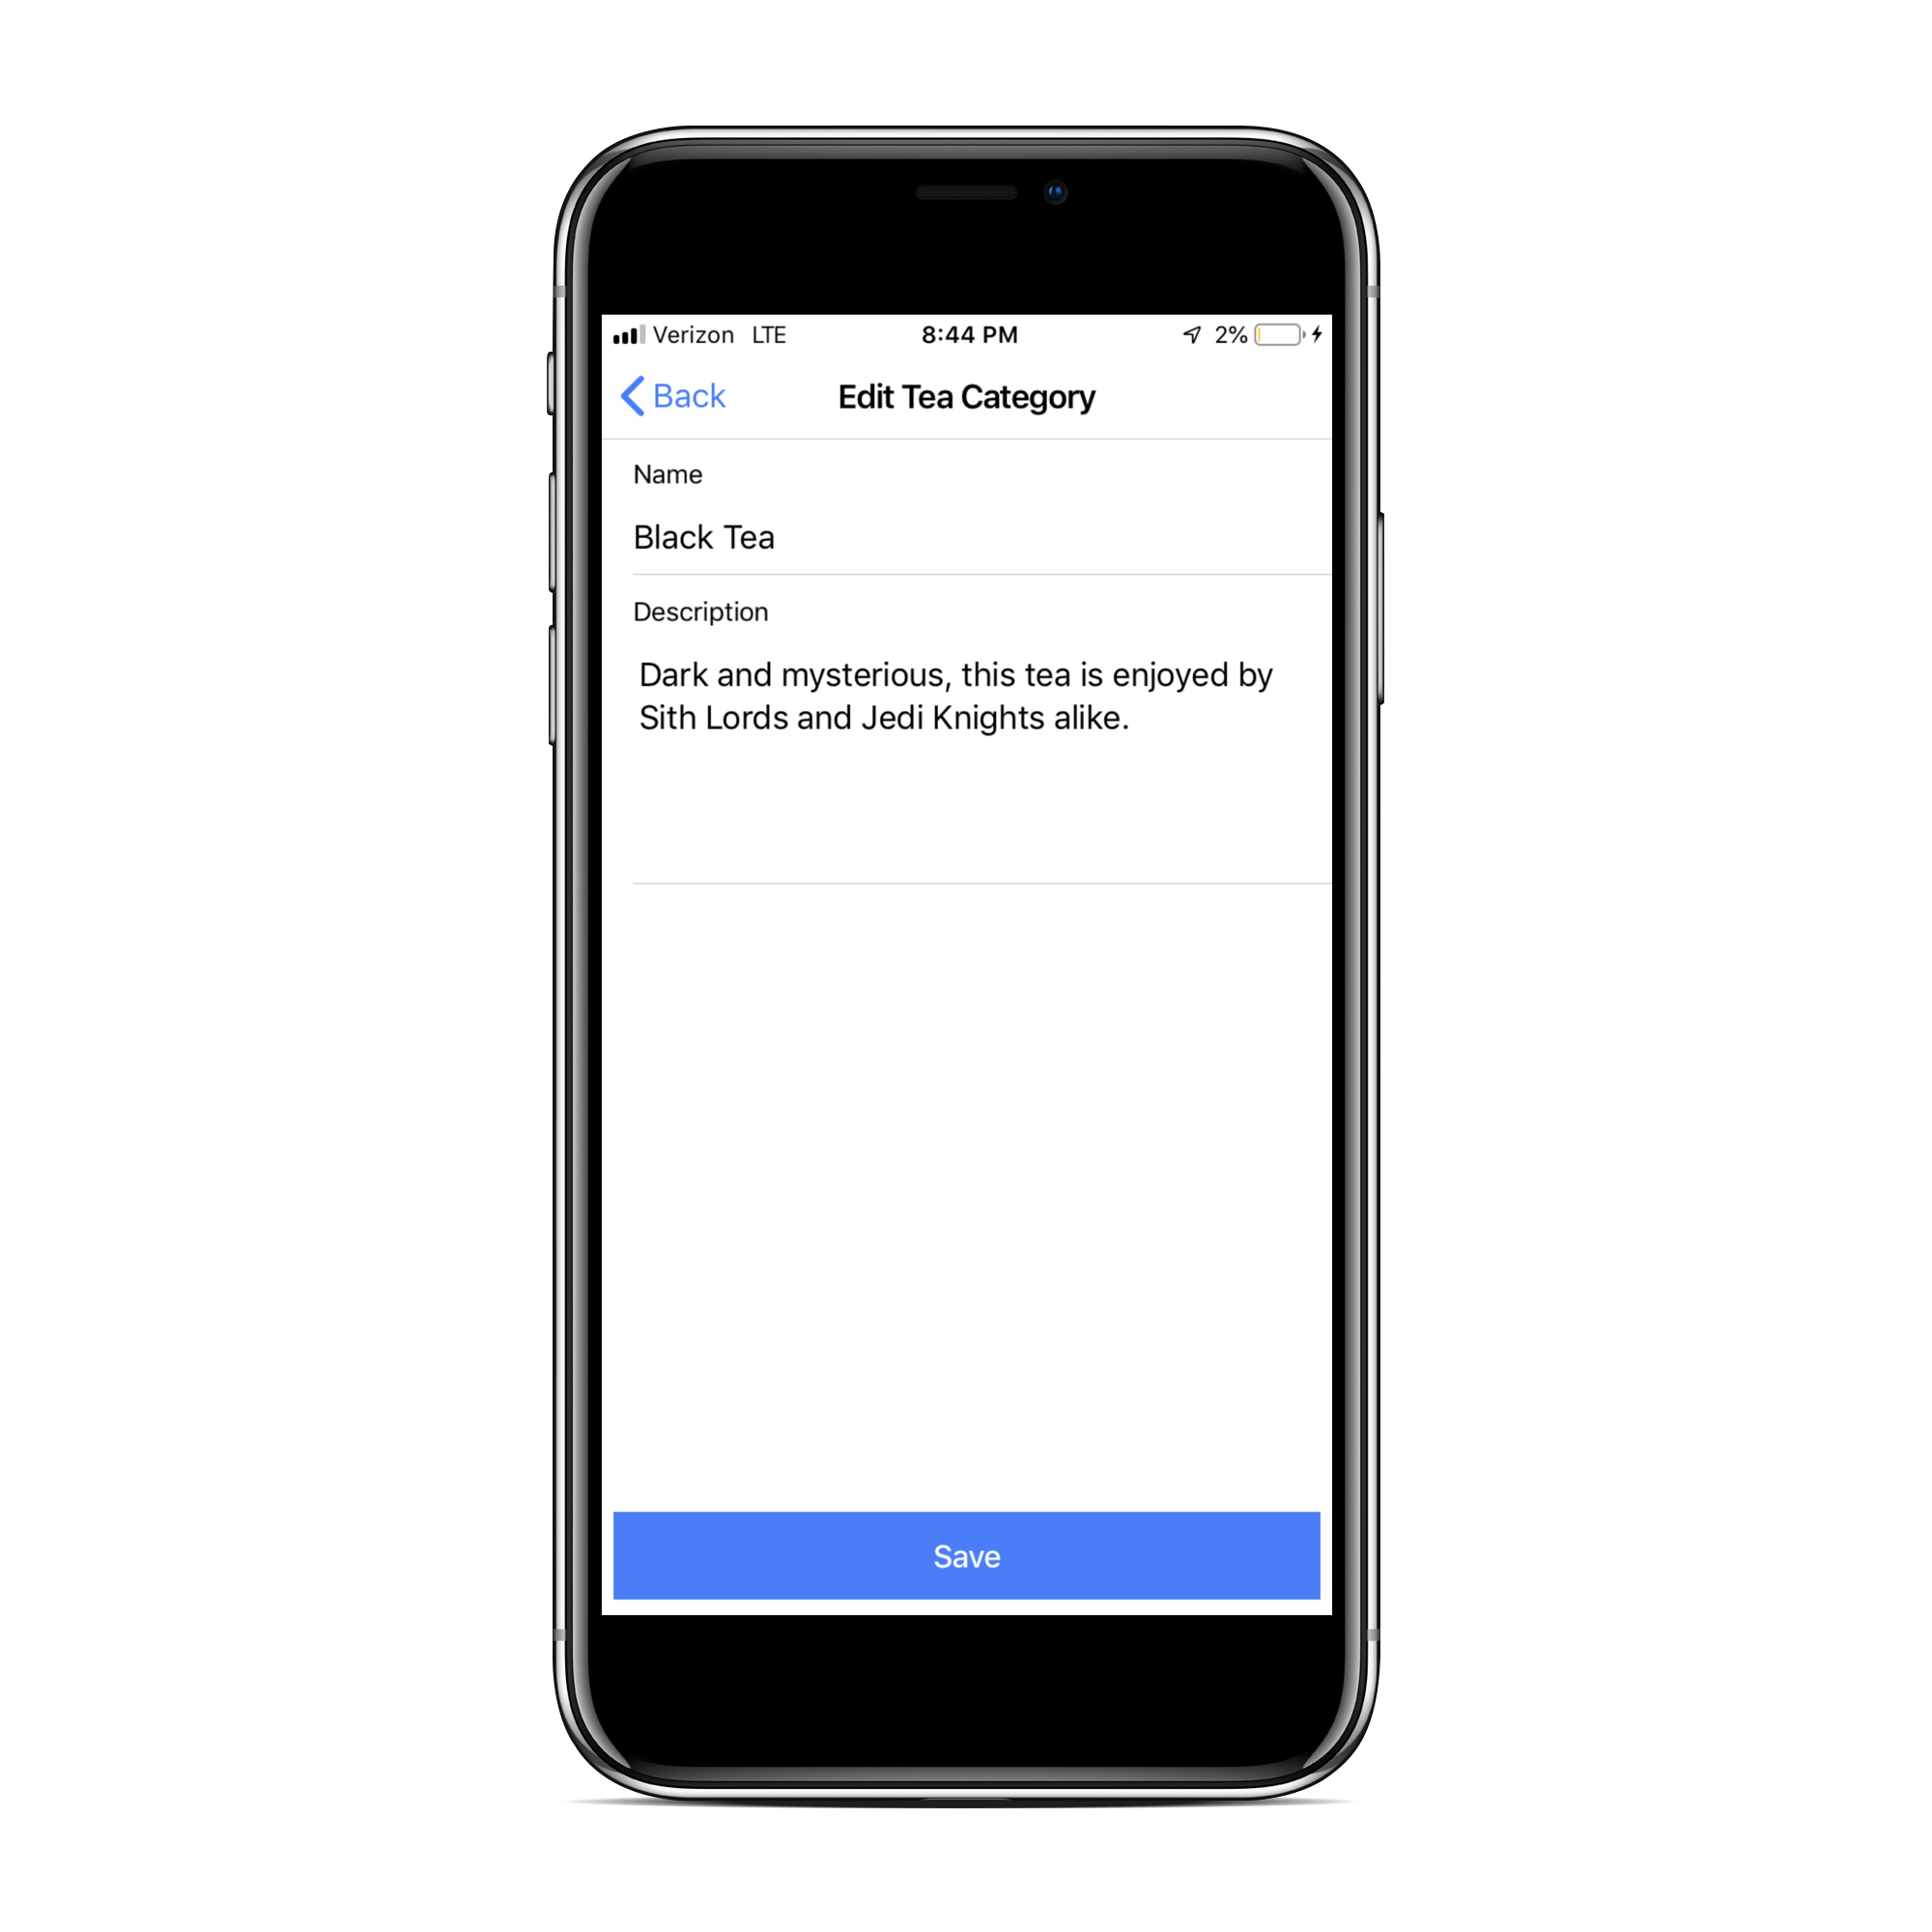
In order to update the tea category documents, the TeaCategoryEditorPage needs to obtain the document to edit then needs to save the changes back to the database.
TeaCategoryService: Get Document
The get routine retrieves the document based on id and unpacks the document into the model we are using to represent the data.
  async get(id: string): Promise<TeaCategory> {
    await this.readyPromise;
    const d = await this.database.getDocument(id);
    const dict = d.toDictionary();

    return {
      id: d.getId(),
      name: dict.name,
      description: dict.description
    };
  }
We do not want developers that are using the TeaCategoryService to worry about whether they are performing an insert or an update. They can just pass along a TeaCategory object that needs to be saved and the service can figure out if the operation is an “add” or an “update” based on whether or not the object has an ID.
 async save(category: TeaCategory): Promise<void> {
    return category.id ? this.update(category) : this.add(category);
  }

  private async add(category: TeaCategory): Promise<void> {
    await this.readyPromise;
    const doc = new MutableDocument()
      .setString('name', category.name)
      .setString('description', category.description);

    return this.database.save(doc);
  }

  private async update(category: TeaCategory): Promise<void> {
    await this.readyPromise;
    const d = await this.database.getDocument(category.id);
    const md = new MutableDocument(d.getId(), d.getSequence(), d.getData());
    md.setString('name', category.name);
    md.setString('description', category.description);

    return this.database.teaCatgories.save(md);
  }
TeaCategoryEditorPage: Making Changes
Next, the TeaCategoryEditorPage can easily handle both adding new tea categories and making changes to existing tea categories:
  async ngOnInit() {
    const id = this.route.snapshot.paramMap.get('id');
    if (id) {
      this.title = 'Edit Tea Category';
      const category = await this.teaCategories.get(id);
      this.id = category.id;
      this.name = category.name;
      this.description = category.description;
    } else {
      this.title = 'Add New Tea Category';
    }
  }

  async save() {
    await this.teaCategories.save({
      id: this.id,
      name: this.name,
      description: this.description
    });

    this.navController.back();
  }
Responding to Changes
Our users can now add, update, and view tea categories, but the HomePage does not show the changes right away. Instead, it only shows the changes after the user closes the application and starts it up again.
Furthermore, if the application had a process that would get new tea categories from a cloud-based service then update the database accordingly, we would not see those changes either.
So, we need a way for the application to respond to changes in the database.
TeaCategoryService: Respond to Data Changes
The database allows us to add change listeners in order to respond to changes to tea category data. We will again use our TeaCategoryService to create an abstraction layer between the database and the rest of our code.
  onChange(cb: () => void) {
    this.readyPromise
      .then(() => this.database.addChangeListener(cb));
  }
HomePage: Detecting Database Changes
In the HomePage, we still need to fetch the tea categories on entry, but we will also fetch the tea categories each time that a change to the database is detected.
Move ngOnInit() logic to a private method
  private async fetchCategories(): Promise<void> {
    this.categories = await this.teaCategories.getAll();
  }
In ngOnInit(), call the method and then set it up to be called with each database change:
  ngOnInit() {
    this.fetchCategories();
    this.teaCategories.onChange(() => this.fetchCategories());
  }
Deleting a Document
The final CRUD operation is the deletion of documents.
TeaCategoryService: Delete
In order to delete a document, we first get the document using the ID and then tell the database to delete the document.
  async delete(id: string): Promise<void>{
    await this.readyPromise;
    const d = await this.database.getDocument(id);

    return this.database.deleteDocument(d);
  }
HomePage: Delete UI
The HomePage page’s responsibility here is to confirm that the user does intend to delete the category. If so, it hands the ID off to the service to do the actual work.
  async removeTeaCategory(id: string): Promise<void> {
    const alert = await this.alertController.create({
      header: 'Confirm Delete',
      message: 'Are you sure you want to permanently remove this category?',
      buttons: [
        { text: 'Yes', handler: () => this.teaCategories.delete(id) },
        { text: 'No', role: 'cancel' }
      ]
    });
    alert.present();
  }
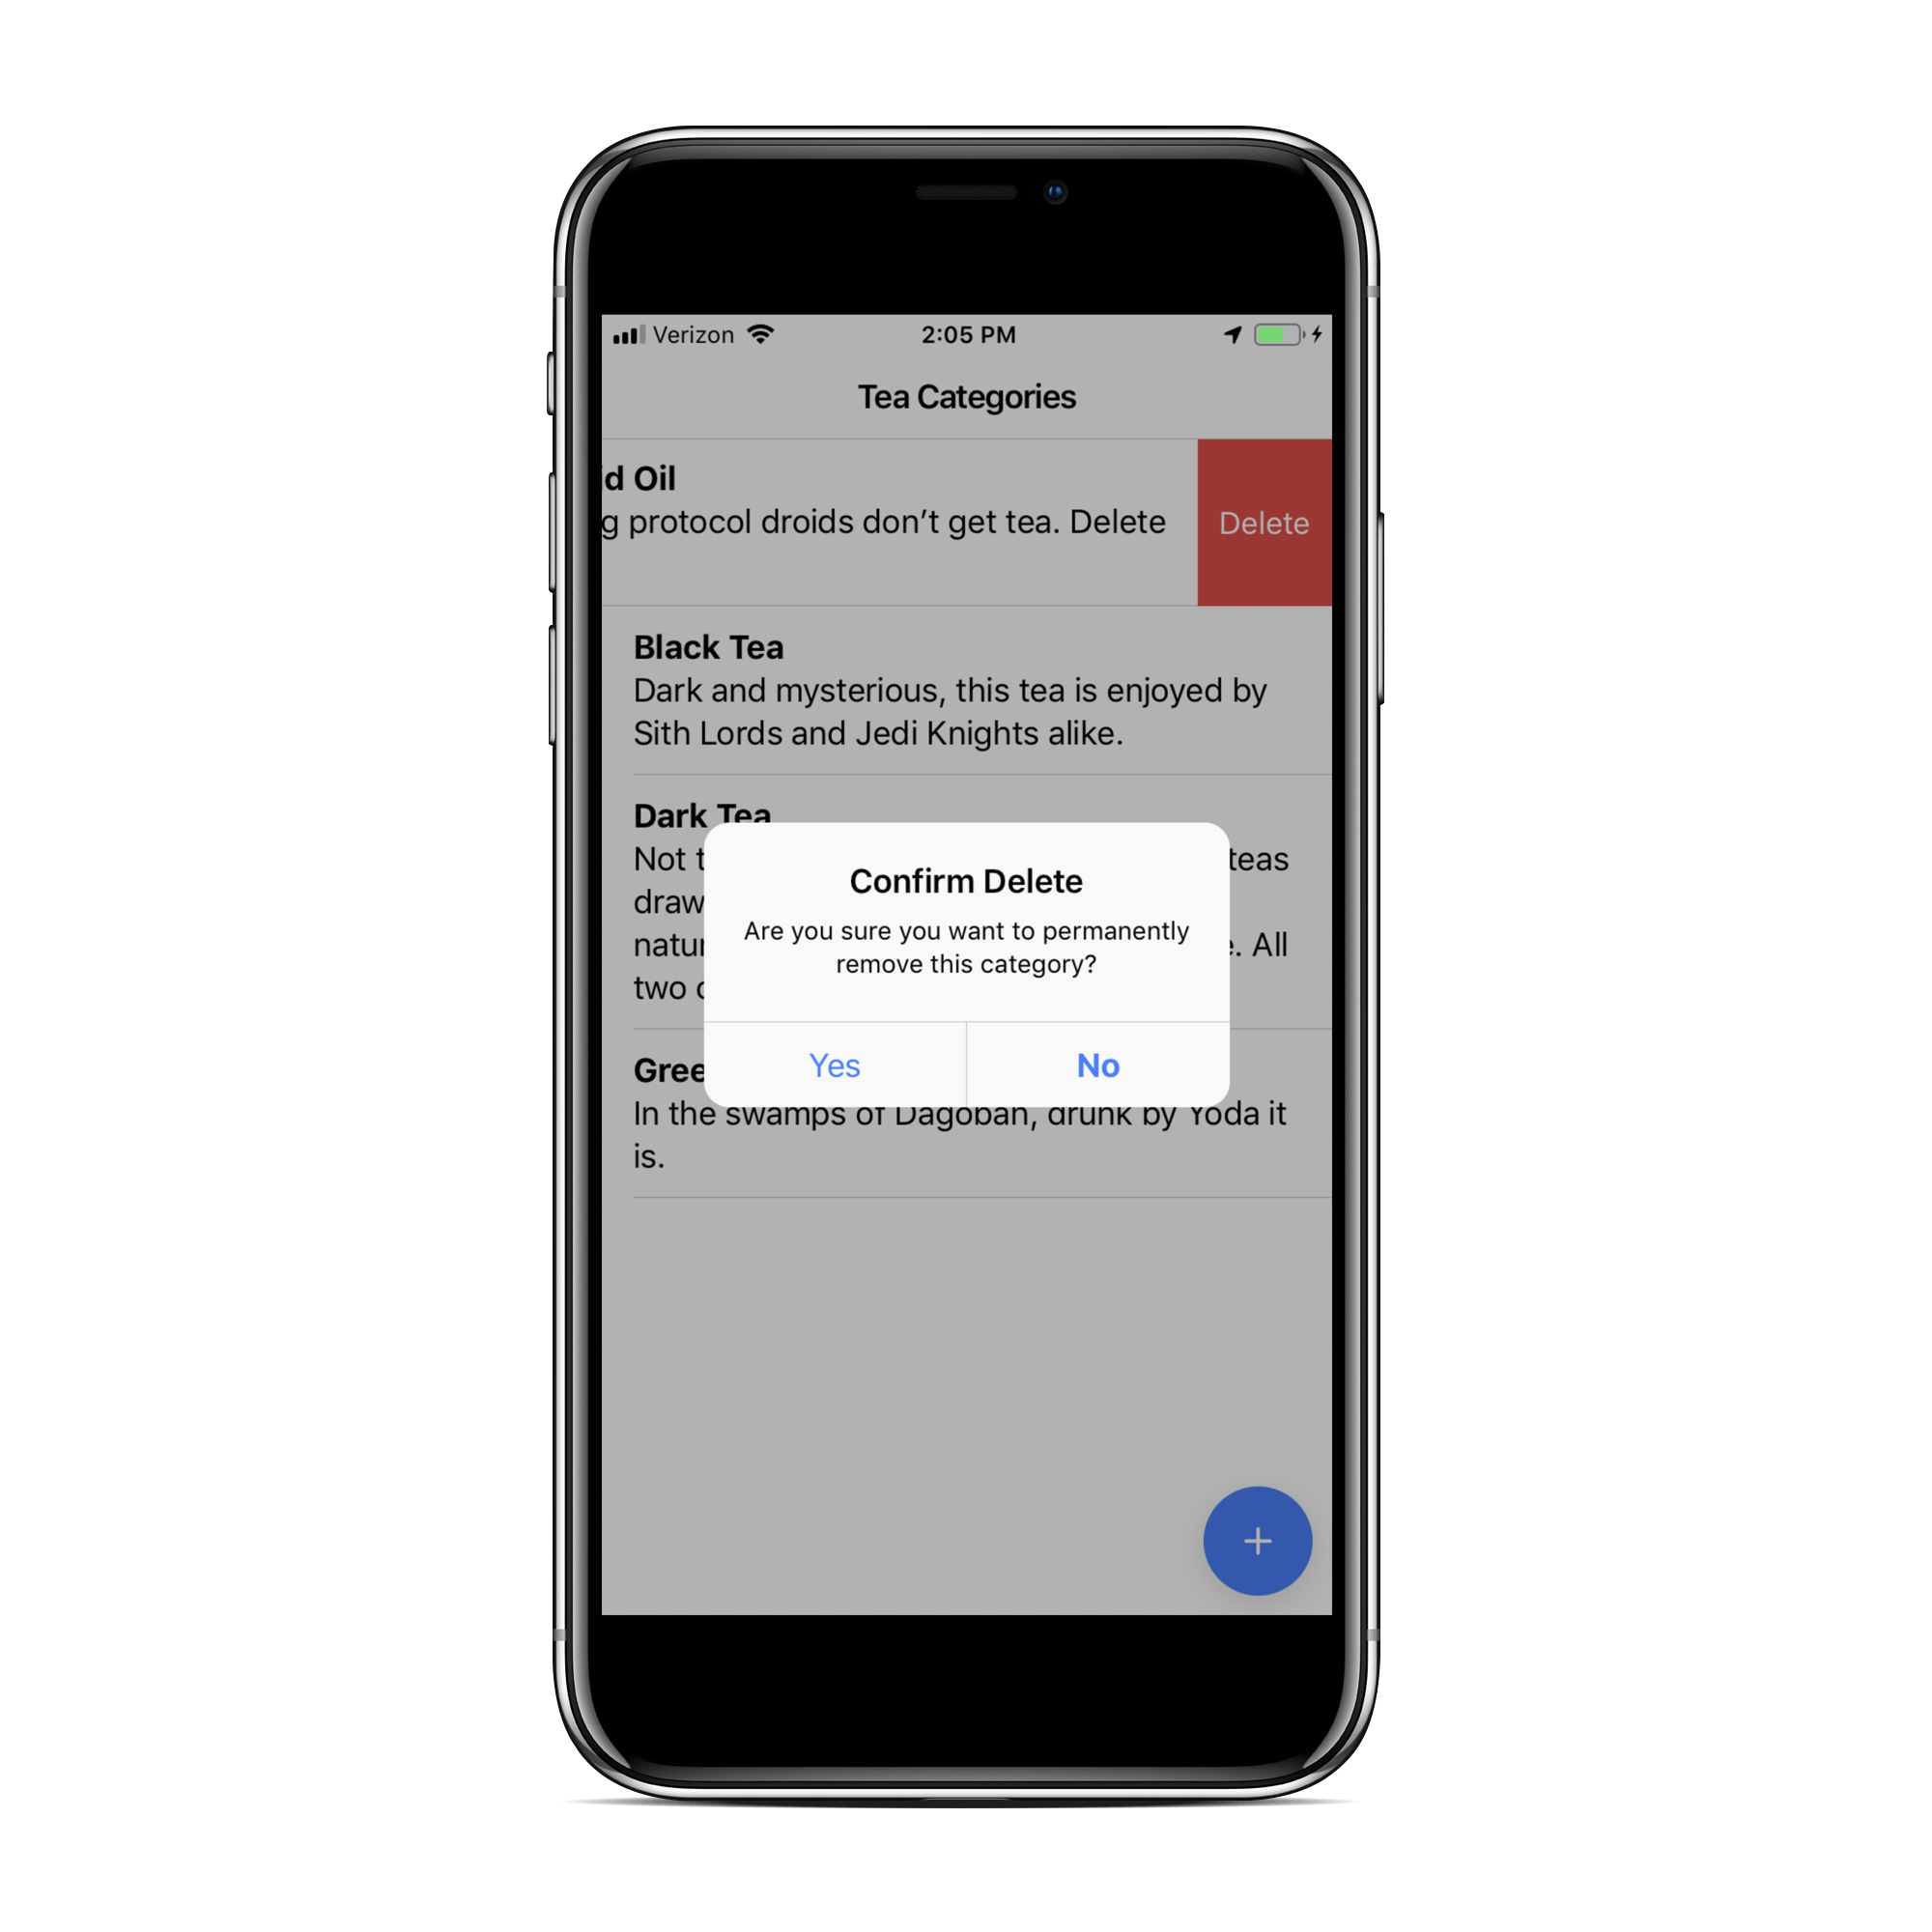
After the user confirms the deletion, Android Oil is removed from the Tea Category list:

Conclusion
In this article, we explored the Ionic Native Offline Storage plugin’s complete offline experience by implementing the full set of CRUD operations available. We also explored best practices by architecting our application to separate data storage concerns into a separate service class. This shields the rest of our application from being concerned with details about how the data is stored and will allow us to easily expand our application in the future to use features such as synchronizing our offline data with a cloud-based data service. These are just some of the scenarios that can be supported in your application using the Offline Storage plugin.
If you are interested in exploring how Ionic Native can benefit your application development and aid you in delivering the best experience to your users, please contact one of our Solutions Architects (like me!) to schedule a demonstration.


