Navigating Lifecycle Events!
Enrique Oriol is the CTO of a Barcelona-based startup and frequently writes about Ionic in Spanish on his blog, where this post originally appeared. He also teaches Ionic 2 at Udemy.
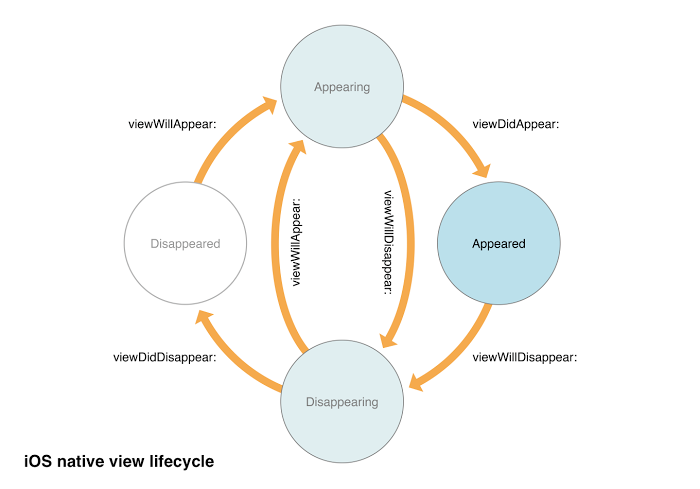
In native apps (iOS, Android), views have a well structured lifecycle that allows you to perform actions on key points of their execution. Ionic 2 has a similar feature: Navigation Lifecycle Event.
In Ionic 2, any view added or removed from a NavController emits certain events. You can take advantage of those events to instantiate the view, refresh content, or store data.
I’ll teach you how to use them in a hands-on code example, but first, let’s dig into the concept!
Lifecycle events
Ionic 2 Navigation events are quite similar to those from iOS. Here’s a diagram that explains how they work:
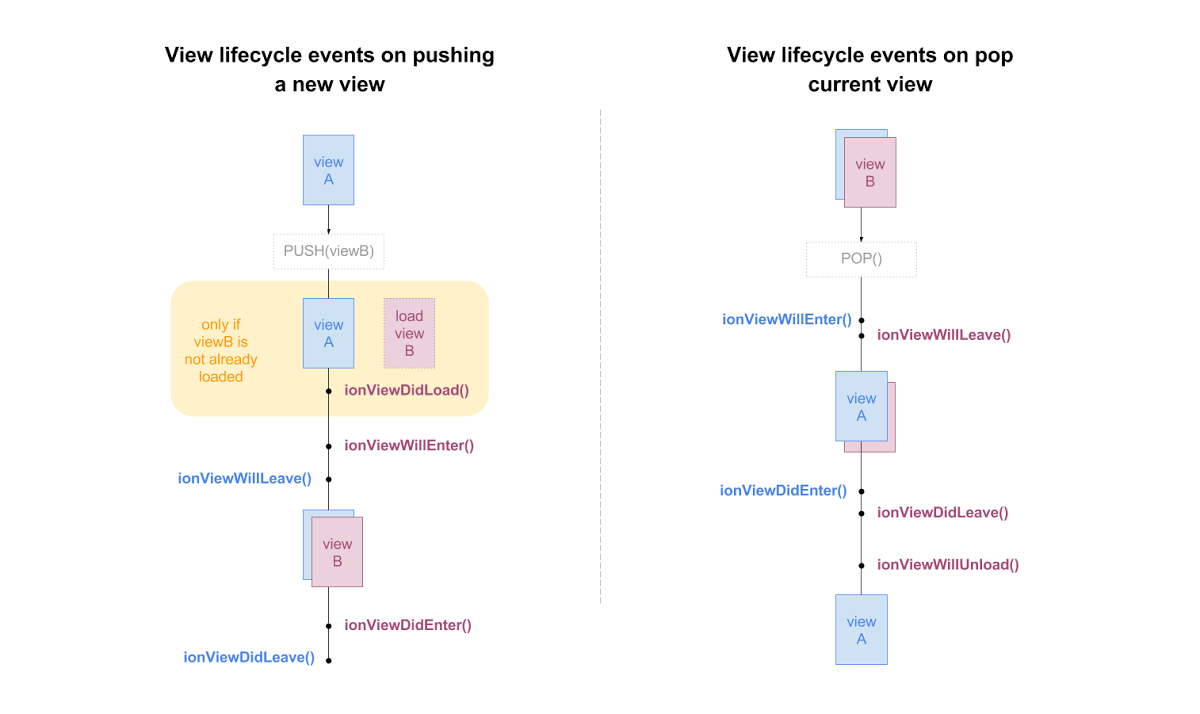
In summary, these are the events:
ionViewDidLoad: Fired only when a view is stored in memory. This event is NOT fired on entering a view that is already cached. It’s a nice place for init related tasks.-
ionViewWillEnter: It’s fired when entering a page, before it becomes the active one. Use it for tasks you want to do every time you enter in the view (setting event listeners, updating a table, etc.). -
ionViewDidEnter: Fired when entering a page, after it becomes the active page. Quite similar to the previous one. -
ionViewWillLeave: Fired when you leave a page, before it stops being the active one. Use it for things you need to run every time you are leaving a page (deactivate event listeners, etc.). -
ionViewDidLeave: Fired when you leave a page, after it stops being the active one. Similar to the previous one. -
ionViewWillUnload: Fired when a view is going to be completely removed (after leaving a non-cached view).
Nav guards
As a bonus track, there are two other powerful methods related to those events: nav guards. Those methods are focused on view access control (with authentication purposes).
ionViewCanEnter: Fired before entering into a view, allows you to control whether the view can be accessed or not (returning true or false).-
ionViewCanLeave: Fired before leaving a view, allows you to control whether the view can be left or not.
It is important to highlight that Nav Guards are executed before any other lifecycle event method.
Hands-on code!
Ambient music player
I’ve always though that the best way to understand something is to put it into practice. That’s why I’m bringing you this funny example: An ambient music player. You can download the full source code from this link.
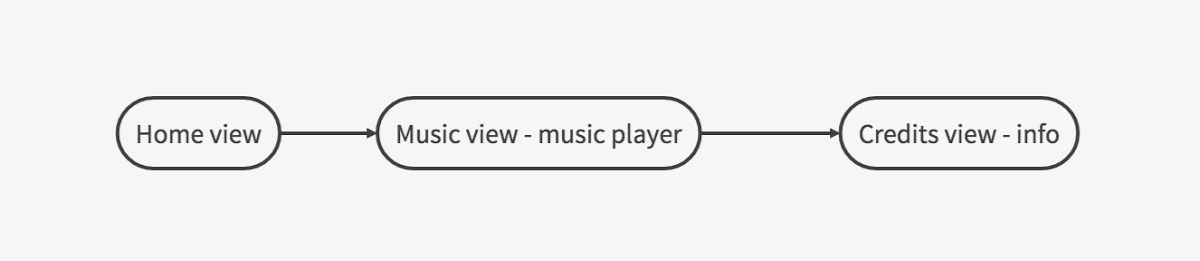
This very simple example consists of an app with three views:
- The Home view allows you to choose the ambient.
- The Music view plays the ambient music. Here’s where you’ll need to use the lifecycle events.
- The Credits view is accessed through Music view, and it simply displays some data.
The navigation flow between views is:
The Music view will play music based on the selected ambient. To make it simple, the howler.js library is used to play the music.
Home view
The main view is quite simple: There’s a list of buttons to go to the different environments, with a background image and a label. Some SaSS came to the rescue to make it prettier.
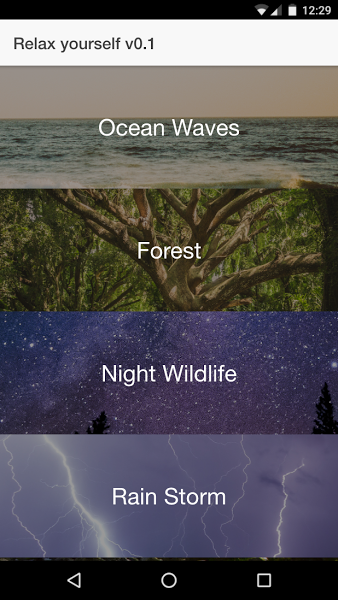
There’s nothing special in the template of this view, but take note that goToMusicPage() is the method in charge of navigating to each ambient.
home.html
<ion-header>
  <ion-navbar>
    <ion-title>Relax yourself v0.1</ion-title>
  </ion-navbar>
</ion-header>


<ion-content>

  <div class="imageBtn" (click)="goToMusicPage('ocean-waves')">
    <div class="image" style="background-image:url('assets/img/ocean-waves.jpg');"></div>
    <div class="label">Ocean Waves</div>
  </div>

  <!-- ...some more DIVs like this ...-->

</ion-content>
In the component code, you can see the details of the goToMusicPage method:
home.ts
import { Component } from '@angular/core';
import { NavController } from 'ionic-angular';
import { MusicPage } from '../music/music';

@Component({
  selector: 'page-home',
  templateUrl: 'home.html'
})
export class HomePage {

  constructor(public navCtrl: NavController) {}

  goToMusicPage(audio){
    this.navCtrl.push(MusicPage, {audio});
  }

}
Music view
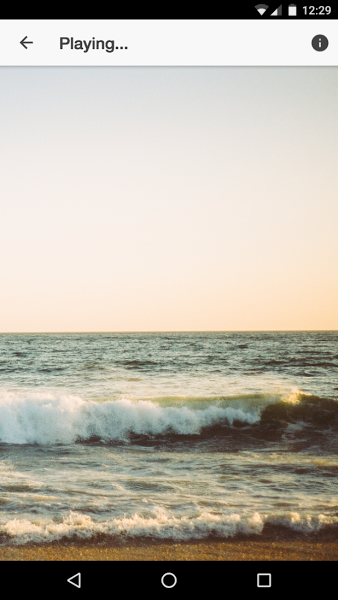
The Music view is even simpler. It only shows an image related with the ambient and a button in the header to navigate to the Credits view.
Yes, there’s music in this view!
It’s worth mentioning that the Music template uses navPush directly to navigate to the Credits view.
music.html
<ion-header>
  <ion-navbar>
    <ion-title>Playing...</ion-title>

    <ion-buttons end>
      <button ion-button icon-only [navPush]="creditsPage">
        <ion-icon name="information-circle"></ion-icon>
      </button>
    </ion-buttons>

  </ion-navbar>
</ion-header>

<ion-content>
  <div [style.backgroundImage]="'url(' + image +')'"></div>
</ion-content>
If there were no audio here, the Music component would be really simple:
music.ts
import { Component } from '@angular/core';
import { NavController, NavParams } from 'ionic-angular';
import { CreditsPage } from '../credits/credits';
import * as howler from 'howler';


@Component({
  selector: 'page-music',
  templateUrl: 'music.html'
})
export class MusicPage {

  music:any;
  image:string;
  creditsPage:any;

  constructor(public navCtrl: NavController, public params: NavParams) {
    this.creditsPage = CreditsPage;
  }

  /* lifecycle events */
  //TODO: add lifecycle events to load, play, pause and stop audio
  /* end lifecycle events */
}
However, as you can see, we need to use some lifecycle events to manage audio load and playing.
ionViewDidLoad
When you load any music ambient (push), you need to load its audio in memory, but only once. That’s why we use ionViewDidLoad.
As you see, the ambient name is received as a parameter and used to load the audio and get the background image.
export class MusicPage {
  /* ...some stuff ...*/


  /* lifecycle events */

  ionViewDidLoad() {
    let audioFile = this.params.get('audio');
    this.music = new howler.Howl({ src: [`assets/music/${audioFile}.mp3`]});
    this.image = `assets/img/${audioFile}.jpg`;
  }

  //TODO: add lifecycle events to play, pause and stop audio
  /* end lifecycle events */
}
ionViewWillEnter
Every time Music becomes the active view, its audio must be played. I’m doing this inside ionViewWillEnter to make sure it also works when coming back from Credits view.
Note: ionViewWillLeave would also work.
export class MusicPage {
  /* ...some stuff ...*/

  /* lifecycle events */
  ionViewDidLoad() {/*...*/}

  ionViewWillEnter(){
    this.music.play();
    this.music.loop(true);
  }

  //TODO: add lifecycle events to pause and stop audio
  /* end lifecycle events */
}
ionViewDidLeave
Every time the Music view stops being the active view, its audio must be paused. You can do this inside ionViewDidLeave, so it also works when entering Credits.
Note: ionViewWillLeave would also work.
export class MusicPage {
  /* ...some stuff ...*/

  /* lifecycle events */
  ionViewDidLoad() {/*...*/}
  ionViewWillEnter() {/*...*/}

  ionViewDidLeave(){
    this.music.pause();
  }

  //TODO: add lifecycle events to stop audio
  /* end lifecycle events */
}
ionViewWillUnload
Finally, it’s good to make sure that when you go back to the Home view, the audio from Music has completely stopped. That’s what we’re doing inside ionViewWillUnload.
export class MusicPage {
  /* ...some stuff ...*/

  /* lifecycle events */
  ionViewDidLoad() {/*...*/}
  ionViewWillEnter() {/*...*/}
  ionViewDidLeave() {/*...*/}

  ionViewWillUnload() {
    this.music.stop();
    this.music = null;
  }

  /* end lifecycle events */
}
Credits view
The Credits view is a simple excuse to show you the usefulness of the lifecycle events. It’s so simple that a screenshot shows you everything:

Results
You’ll find a video with the results below. Turn up the volume!
I hope you enjoyed this little experiment. Let me know in the comments below if you have any questions!


