Connect Using Ionic Remote
If you are not using an integrations with a supported third-party Git host, Your source code can be pushed directly to Appflow's internal Git service through the ionic cli's link subcommand.
It is recommended that you use a Git hosting service (GitHub, Bitbucket, etc.) to manage your primary app source code. The ionic remote is only used to interact with Appflow services.
Unable to connect your Git repositories to Appflow due to your company's security policies? Check out the Self-hosted option.
Prerequisite
You will need to download the ionic cli to connect to Appflow's internal Git service.
Link your Repository

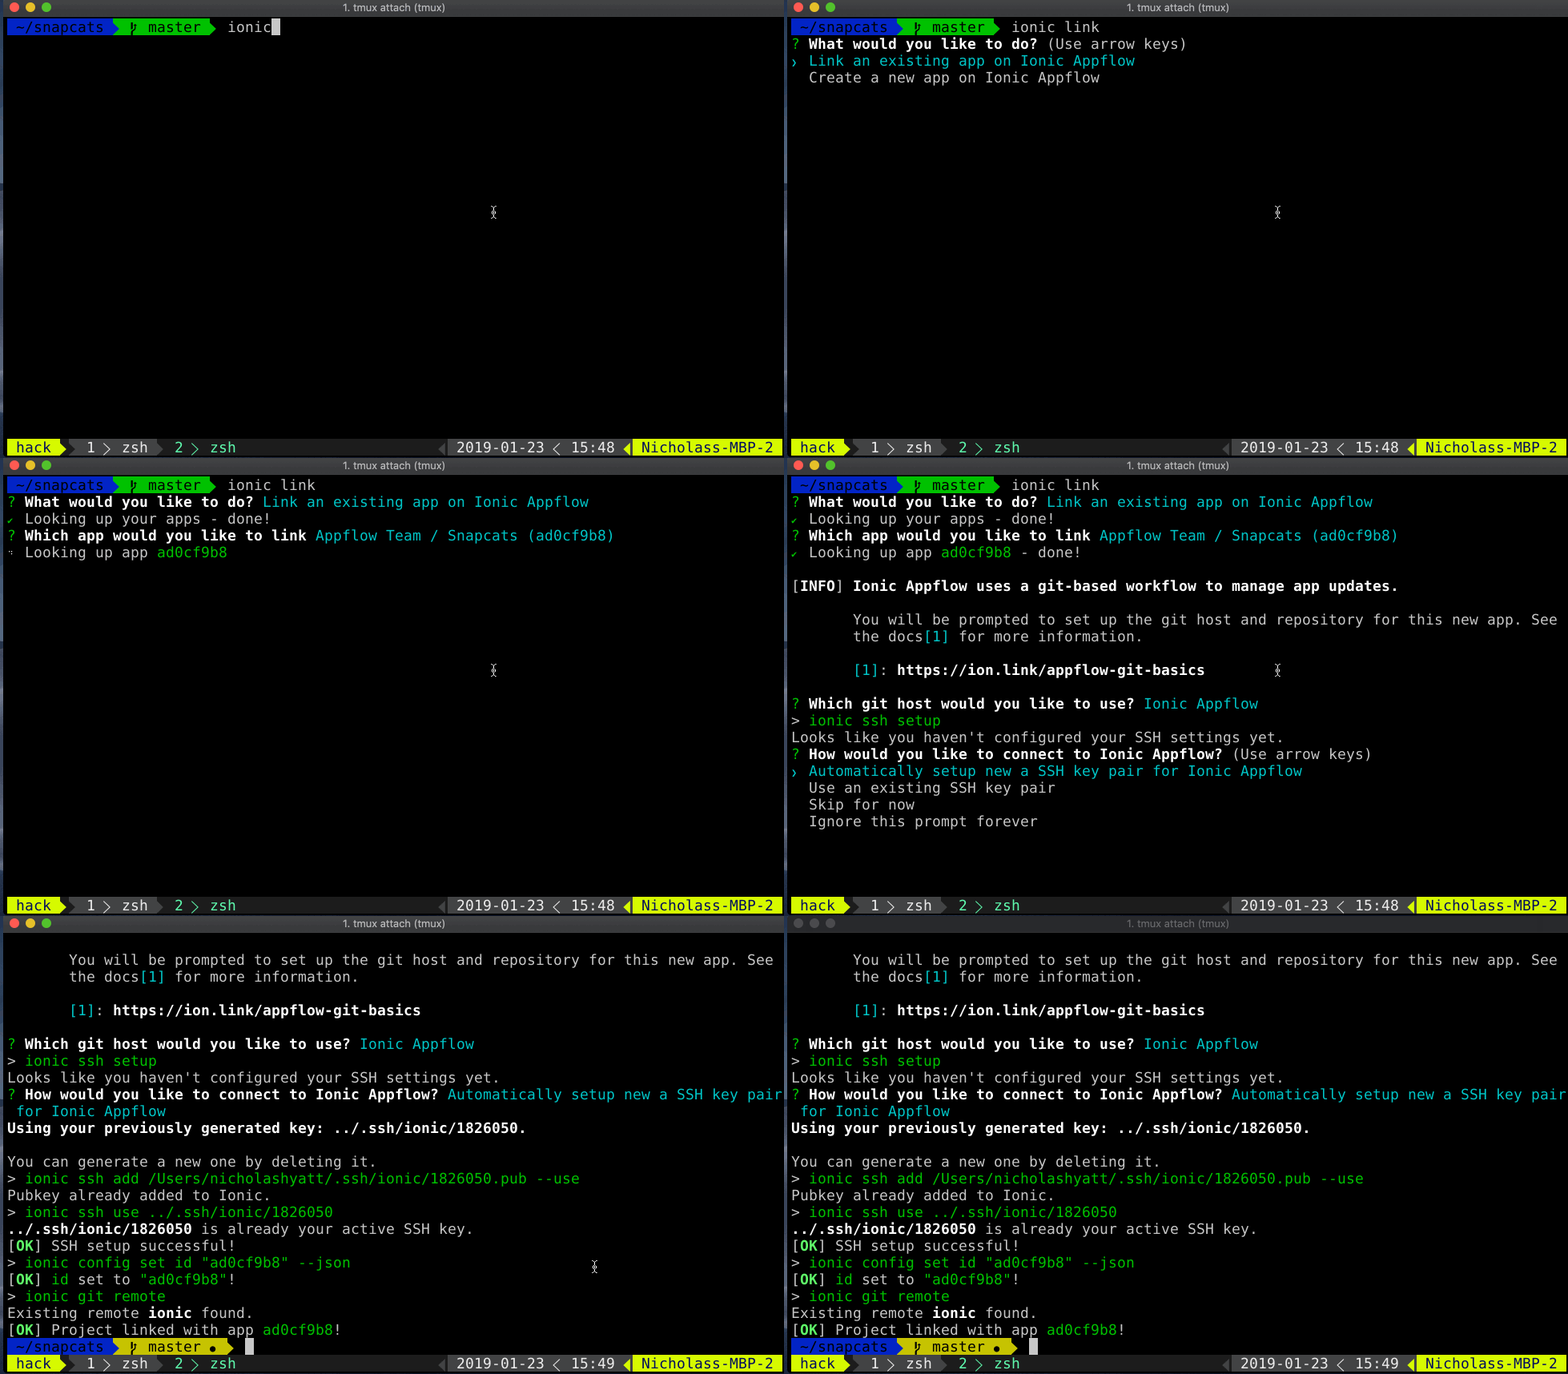
To link your local repo, simply run ionic link in the root directory of your existing project
and choose Ionic Appflow as your git remote. This will allow you to select the Dashboard app you'd like to link to,
create an ionic remote in your local git configuration, and create or use
an existing SSH key pair for authentication when pushing changes to Appflow.
You can learn more about git remotes here.
Establishing Connection to an Appflow-Linked Repository
If your repository has previously been linked to Appflow using the ionic link command. The connection to Appflow's internal Git service can be re-established with the following command:
$ ionic git remote
Configure your SSH keys
Ionic remote authentication is done via public/private SSH key pairs for the most secure authentication possible.
You'll need to upload a public key to Appflow to authenticate yourself. This can be automatically done during the ionic link process or manually.
Once you've selected the correct app and the Ionic Appflow remote, you will be prompted to create an SSH key pair
or use an existing one. If you're not familiar with SSH keys we suggest letting the CLI automatically create
and add them for you. Otherwise, you can choose to use an existing key and provide the CLI with a path to
the public key on your local machine. You can also upload an existing public key in the Appflow Dashboard in
the personal Settings area, which you can find by clicking your profile icon on the lower left side of the Dashboard.