Building a Native Superapp with Micro Frontends and Federated Capacitor

This is a guest post from Simon Grimm, Ionic Developer Expert and educator at the Ionic Academy, an online school with 70+ video courses focused entirely on building awesome mobile apps with Ionic and Capacitor!
Thanks to the advancements in web development, everyone can build powerful web applications with micro frontends (MFEs). But what about native apps? Can we use the same approach to build a native app with micro frontends?
In this tutorial, we will learn how to build a native superapp with micro frontend architecture and the help of Federated Capacitor.
What is a Superapp?
A superapp is a native app that is built with web technologies. It is a single app that combines multiple apps or micro frontends into one. This allows us to build a single app that can be extended with new features over time, and multiple teams can work on different parts of the app in parallel. One way to approach this is to integrate Ionic Portals into an existing native iOS or Android app and display web frontends seamlessly inside the native app.
Another approach is using Module Federation inside a web project to combine different micro frontends into one web “wrapper” app. That’s what we are going to do – but we will also make that superapp work as a native mobile app!
Setting up the Superapp with Module Federation
To get started, we create a new folder and add 3 projects with Module Federation by using the create-mf-app community package:
mkdir superapp
cd superapp
# Run 3 times
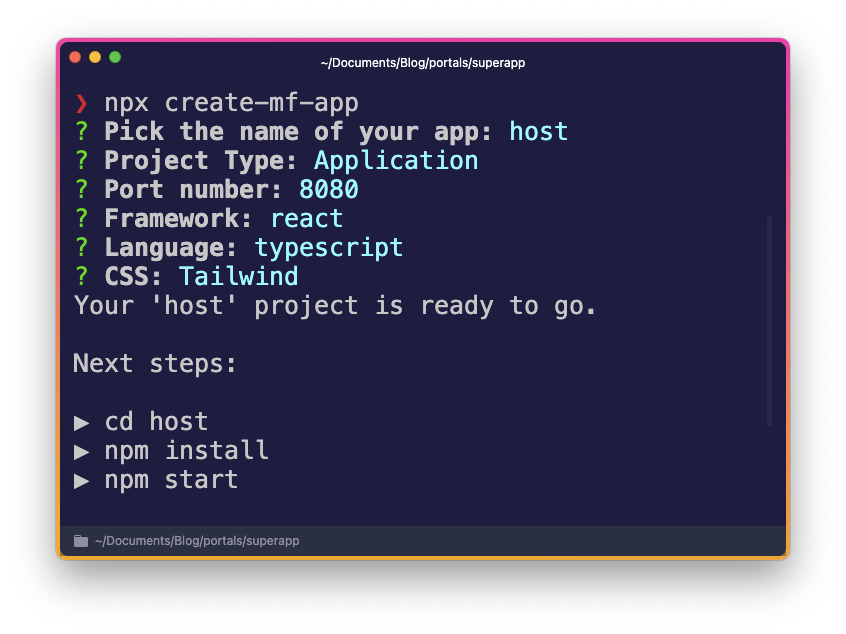
npx create-mf-appFor the first app, we create a host app that will be the shell for the other apps.
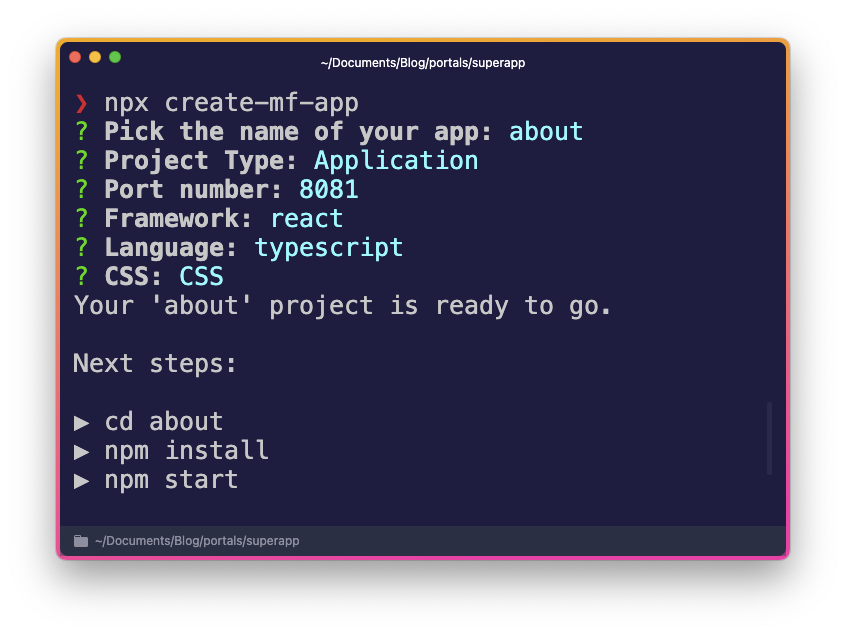
The second micro frontend will be an About app or page using React. Make sure that you specify a different port than the shell app!
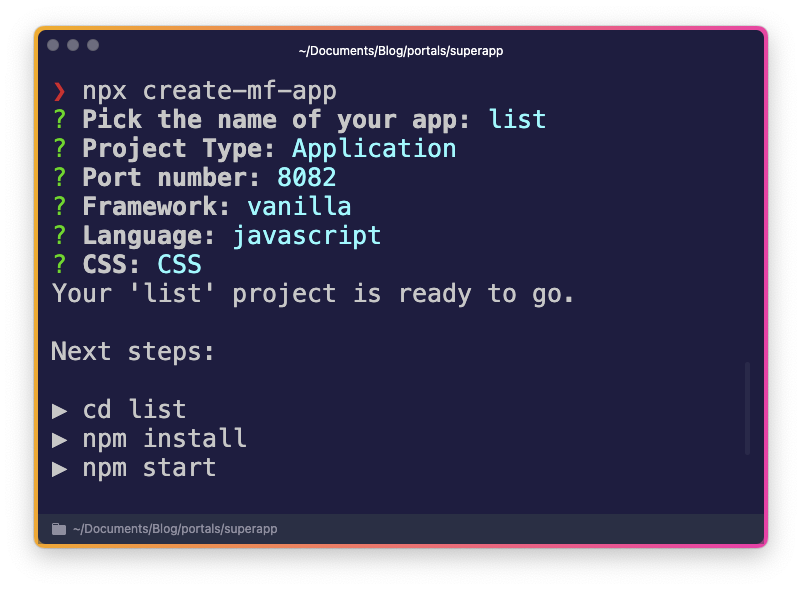
The third micro frontend will be a List page using Vanilla JS. Again, specify a different port so we can run all three apps at the same time.
In this example, I’m using React and Vanilla JS, but you can use any framework you like. Additionally the create-mf-app command uses Webpack, but you could also use Module Federation with Vite instead!
Starting the Micro Frontends
Now that we have our 3 projects, we can start them all at the same time. Make sure to run the commands in the correct folder, so you will need three terminals and dive into each folder, install the dependencies and start the app:
cd host
npm install
npm run start
cd about
npm install
npm run start
cd list
npm install
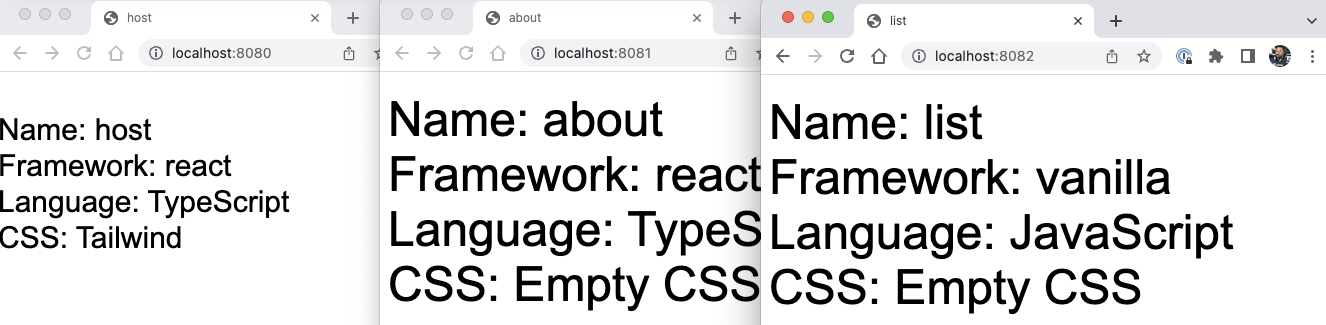
npm run startIf you correctly defined different ports, you should now see three very simple projects up and running!
This is the basic architecture for our superapp, and now we just need to combine them into one app.
Exposing the Micro Frontends
To combine the micro frontends, we need to expose them to the outside world. This is done by using the Module Federation Plugin in Webpack, which is already configured for us in the webpack.config.js file of each project. Let’s add some code to the different projects and then expose them to the host app!
Creating an About Component with React
First, we create a super simple about component, so add a new file at about/src/About.tsx and insert:
export default () => {
  return <div className="bg-blue-600 p-8 text-white">My cool about page</div>;
};
This means we won’t expose the whole app but just one component for now.
To do this, we now need to update the about/webpack.config.js file and add our component to the exposes property of the ModuleFederationPlugin:
module.exports = (_, argv) => ({
  // Remove the output, required for Federated Capacitor later
  // output: {
  //   publicPath: "http://localhost:8081/",
  // },

  plugins: [
    new ModuleFederationPlugin({
      name: "about",
      filename: "remoteEntry.js",
      remotes: {},
      exposes: {
        './About': '/src/About'
      },
      // ... everything else is the same
  ],
I have additionally removed the output property because this later breaks Federated Capacitor. You can now restart your about app, and you should be able to access a new URL at http://localhost:8081/remoteEntry.js.
This is the entry point for our micro frontend, and we will need this URL later to load the component into our host app. But let’s do the same for the list app first!
Creating a List Component with Vanilla JS
Like before, we changed some code on our micro frontend. This time we also changed the app to accept an element in a function and render the HTML inside of that element, which is a different way of using our micro frontend.
Get started by changing the list/src/App.js file to:
import "./index.css";

export default (el) => {
  el.innerHTML = `
  <div class="container">
    <h3>List</h3>
    <ul>
      <li>Item 1</li>
      <li>Item 2</li>
    </ul>
  </div>
  `;
};
Additionally, update the CSS file at list/src/index.css to:
body {
  font-family: Arial, Helvetica, sans-serif;
}

.container {
  font-size: 3rem;
  margin: auto;
  max-width: 800px;
  margin-top: 20px;
}

li {
  margin-left: 20px;
  color: #fff;
  font-size: 1rem;
}
And again, we now need to update the list/webpack.config.js file to expose our component:
module.exports = (_, argv) => ({
  // Remove the output, required for Federated Capacitor later
  // output: {
  //   publicPath: "http://localhost:8082/",
  // },

  plugins: [
    new ModuleFederationPlugin({
      name: "list",
      filename: "remoteEntry.js",
      remotes: {},
      exposes: {
        './List': './src/App.js',
      },
      // ... everything else is the same
  ],
If you applied all changes correctly, you can find the new entry point for the list app at http://localhost:8082/remoteEntry.js.
Combining the Micro Frontends with a Host App
Now that we expose both of our micro frontends, we can use the URLs and load them into our host app. For this, we need to update the host/webpack.config.js file and add the URLs to the remotes property of the ModuleFederationPlugin:
plugins: [
    new ModuleFederationPlugin({
      name: "host",
      filename: "remoteEntry.js",
      remotes: {
        about: "about@http://localhost:8081/remoteEntry.js",
        list: "list@http://localhost:8082/remoteEntry.js",
      },
      // ... everything else is the same
  ],
This makes our micro frontends available in the host app, and we can now load and use them in our app.
To do so, bring up the host/src/App.tsx file and add the following code:
import React, { useEffect, useRef } from "react";
import ReactDOM from "react-dom";

import About from "about/About";
import List from "list/List";

import "./index.scss";

const App = () => {
  const listRef = useRef(null);

  useEffect(() => {
    List(listRef.current);
  }, []);

  return (
    <div className="mt-10 text-3xl mx-auto max-w-6xl p-4 bg-green-500">
      <div className="text-white  p-4 mb-4">My Host App</div>
      <About />
      <div ref={listRef} />
    </div>
  );
};
ReactDOM.render(<App />, document.getElementById("app"));
We can simply use the About component as is, but we need to use the List component differently. Because it is a Vanilla JS component, we need to use a useRef hook and pass the element to the component.
At this point, the app would work but Typescript isn’t happy, so let’s fix that by defining the types for the components. Create a new host/src/remote-declarations.d.ts file and add:
declare module 'about/About';
declare module 'list/List';
Now run the shell app with npm run start and you should see the following:
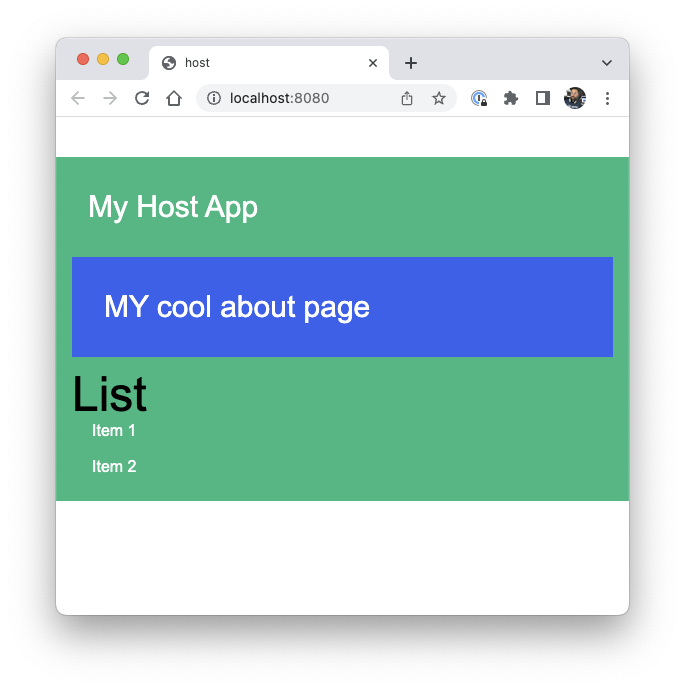
Congratulations, you have successfully combined two micro frontends into one app!
Adding Capacitor to the Host App
Now that we have our superapp, we can add Capacitor to it and make it a native app.
The problem is that we can’t load micro frontends from localhost on a native device, so we need to build the apps and load them from the device. And we need a tool that can bundle the micro frontends and load them correctly. Welcome to the world of Federated Capacitor!
To get started, we add Capacitor to our host app and add the native platforms:
npm i @capacitor/core
npm i -D @capacitor/cli
npx cap init

## Add native platforms
npm i @capacitor/android @capacitor/ios
npx cap add ios
npx cap add android
While running the init command, make sure to use dist as the web asset directory of the Capacitor app.
Federated Capacitor
To make our Superapp work with Capacitor, we need to add the Federated Capacitor plugin to our project. This is part of the Ionic Enterprise SDK, so you will need to sign up for a paid account to get access to it. If you have a native key, you can log in with the Ionic CLI, initialize the project and install the plugin after setting up your access key:
ionic login
ionic init
ionic enterprise register
npm install @ionic-enterprise/federated-capacitor
To configure Federated Capacitor, we need to open the host/capacitor.config.ts file and define our shell app and the different micro frontends:
import { CapacitorConfig } from '@capacitor/cli';

const config: CapacitorConfig = {
  appId: 'com.example.app',
  appName: 'host',
  webDir: 'dist',
  server: {
    androidScheme: 'https',
  },
  plugins: {
    FederatedCapacitor: {
      liveUpdatesKey: '',
      shell: {
        name: 'shell',
      },
      apps: [
        {
          name: 'about',
          webDir: '../about/dist',
        },
        {
          name: 'list',
          webDir: '../list/dist',
        },
      ],
    },
  },
};

export default config;
Now we need a way to create a special build so we don’t break our local development environment. For this, we will first install two additional packages:
npm i -D cross-env npm-run-allThen we update the host/package.json file and add new scripts which build our MFEs, and then build the host app with the CAP_BUILD environment variable set to true:
"scripts": {
    "build": "run-p build:about build:list && cross-env CAP_BUILD=true webpack --mode production",
    "build:about": "cd ../about && npm run build",
    "build:list": "cd ../list && npm run build",
    // ... everything else is the same
  },
Finally, we can access the CAP_BUILD environment variable in our host/webpack.config.js file and change the remotes property of the ModuleFederationPlugin depending on the value:
const isCapBuild = process.env.CAP_BUILD;

const remotes =
  isCapBuild == null
    ? // Configuration for when developing locally
      {
        about: 'about@http://localhost:8081/remoteEntry.js',
        list: 'list@http://localhost:8082/remoteEntry.js',
      }
    : // Configuration for when building for Capacitor
      {
        about: `about@about/remoteEntry.js`,
        list: `list@list/remoteEntry.js`,
      };

const deps = require('./package.json').dependencies;
module.exports = (_, argv) => ({
  // NOT NEEDED ANYMORE
  // output: {
  //   publicPath: 'http://localhost:8080/',
  // },
  plugins: [
    new ModuleFederationPlugin({
      name: 'shell', // <- Update to shell
      filename: 'remoteEntry.js',
      remotes, // <- Use our object
      // remotes: {
      //   about: "about@http://localhost:8081/remoteEntry.js",
      //   list: "list@http://localhost:8082/remoteEntry.js",
      // },
      // ... everything else is the same
  ],
This means for local development we will use the localhost URLs like before, and if we build for Capacitor we will use the relative URLs and Federated Capacitor will do the magic! Now we just need to build all of our apps and sync the code into our native apps:
npm run build
npx cap sync
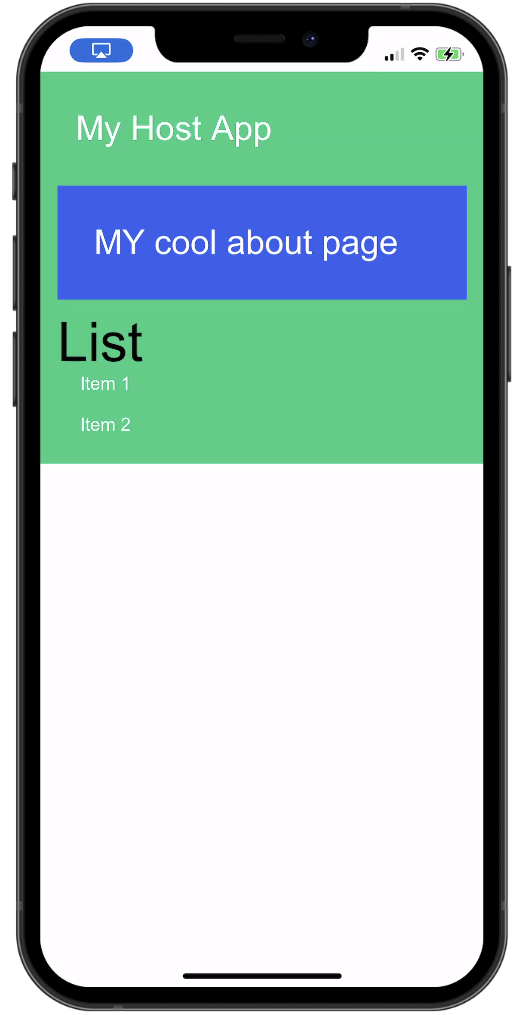
npx cap open iosOnce done, you can run the app on a simulator and you should see the same app as before – but now it’s not just a website but a native superapp!
Note: I went through this process 4 times and encountered problems with every try, so if you are stuck, clean your dist folders, run builds and sync again and use remote debugging to check for any specific error messages of your native app!
Live Updates with Appflow
We’ve covered a lot of ground already, but here’s one more thing that we can do with our superapp: live updates! If you combine this approach with live updates from Ionic AppFlow, you can update your native app without going through the App Store or Play Store.
And not just your whole app, but also the individual micro frontends! This means that different teams can work on different parts of one app and ship updates independently of each other.
Parting Thoughts
In this tutorial, we learned how to build a native superapp with micro frontend architecture and the help of Federated Capacitor.
We started by creating three projects with Module Federation and then combined them into one web app. On top we installed Capacitor and made it a real native app with Federated Capacitor!
While this is a very simple example, it shows the power of micro frontends and how we can use them to build native apps with Capacitor, especially with multiple teams working on different parts of one app.
If you enjoyed this tutorial, also check out how you can use Capacitor to build native iOS and Android apps with the web.