Making API Calls In a Capacitor Project
Capacitor is a versatile cross-platform native runtime for web apps with a variety of official and community-created plugins to supercharge your development. However, if you can’t find what you’re looking for, you have the opportunity to build your own plugin or connect to a service using the available HTTP plugin. I recently ran into this when trying to connect my Capacitor project to Segment.io (a popular data collection and ETL tool) so I decided to document the process of using the HTTP plugin for you to be able to build your own 3rd party integrations!
Setup
In this tutorial we will be setting up an Ionic Angular project with Capacitor and sending button click tracking data to Segment.io using the Capacitor HTTP Plugin via a POST request. Before we get started we’ll need to set up a few things:
- Segment.io account: https://app.segment.com/signup
- Ionic (Getting Started): https://ionicframework.com/docs/
- Capacitor (Getting Started): https://capacitorjs.com/docs
Code
Below is some starter code if you would like to follow along, or you can view the entire completed project if you just want to see how to integrate with Segment:
- Starter Project: https://github.com/GamegineerLabs/Ionic-Capacitor-API-Starter-Project
- Completed Project: https://github.com/GamegineerLabs/Ionic-Capacitor-API-Completed-Project
Configuring Segment
In order for us to send data to Segment, we will need to configure it to accept our HTTP POST request and get the proper write key to incorporate into Capacitor’s HTTP plugin.
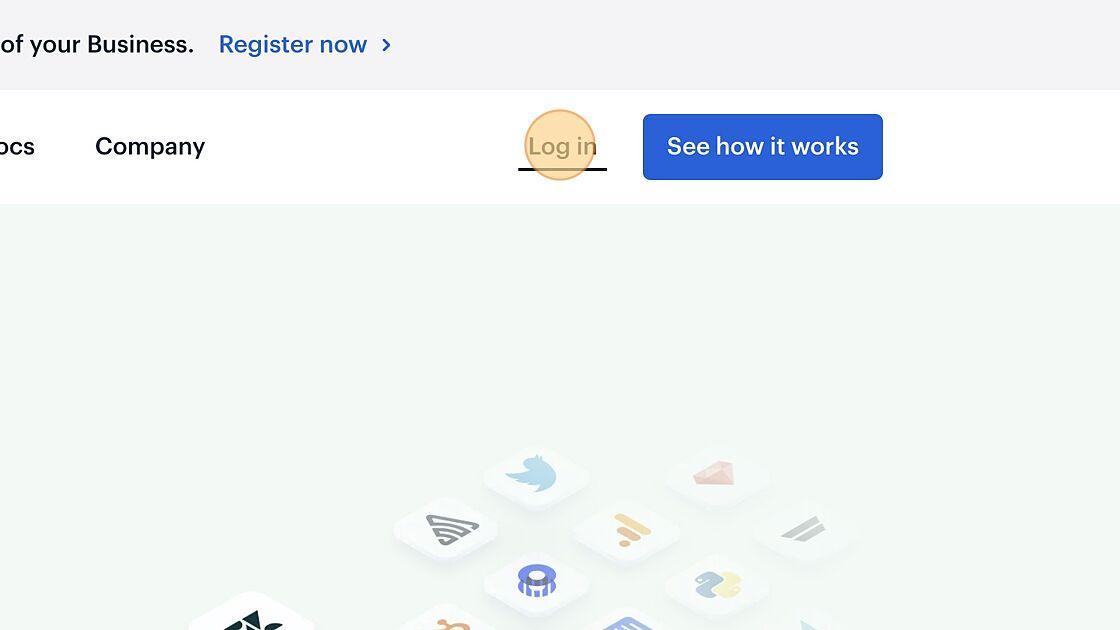
1. Navigate to https://segment.io/
2. Click “Log in”

3. Login
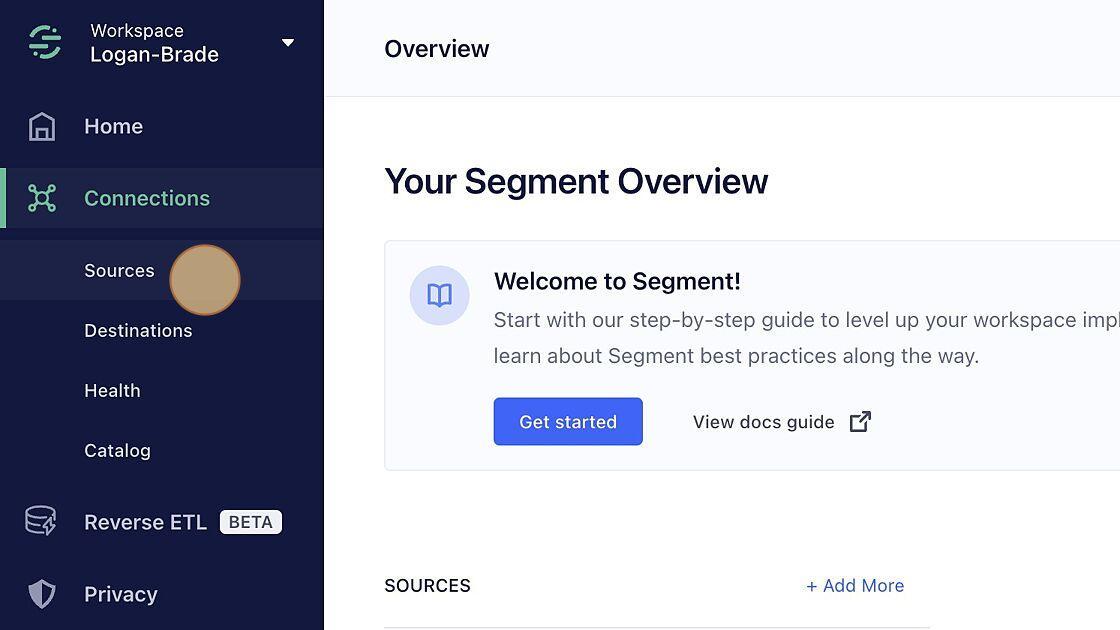
4. Click “Sources”
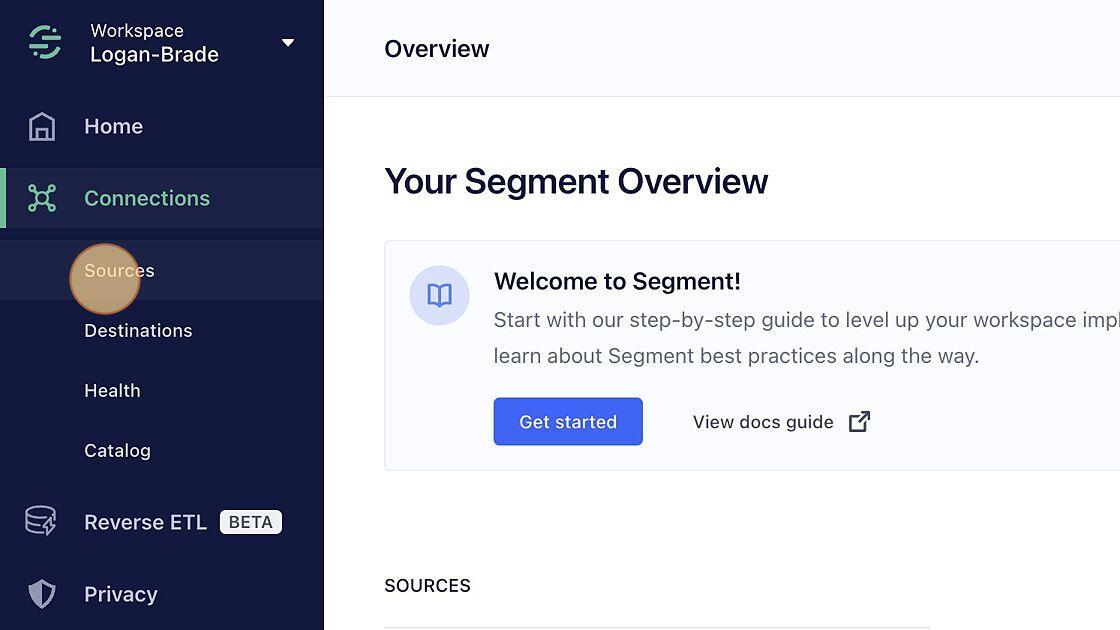
5. Click “Add Source”
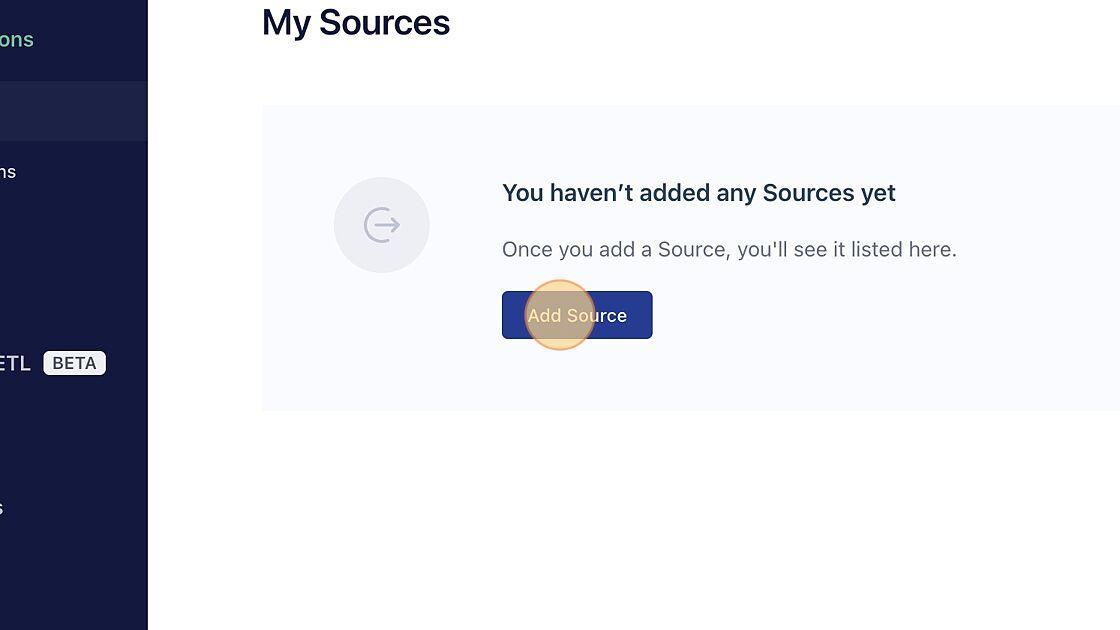
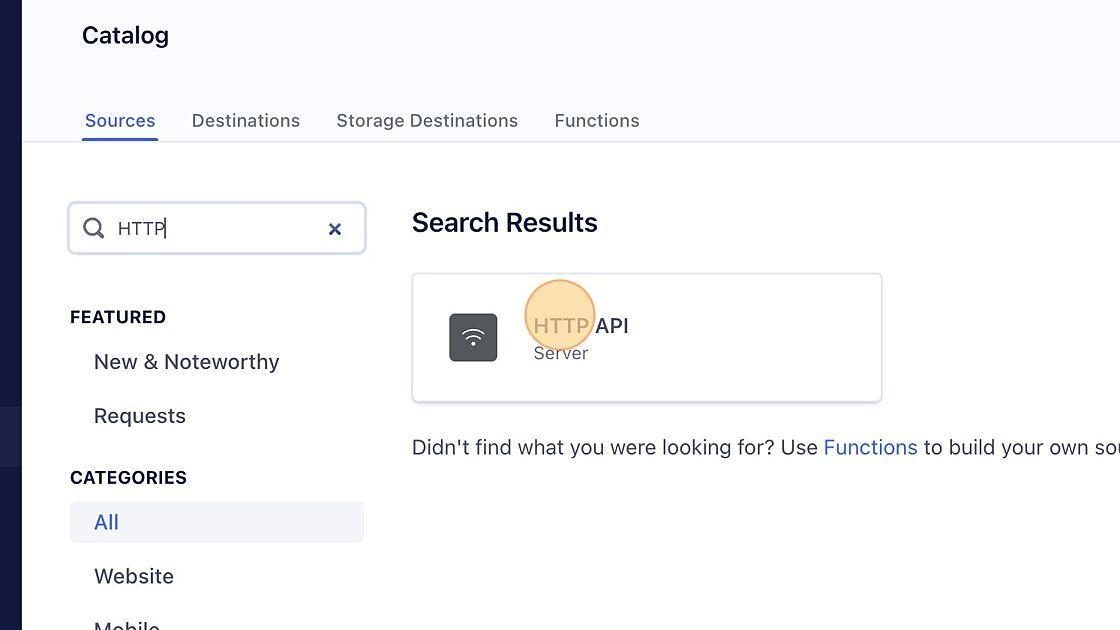
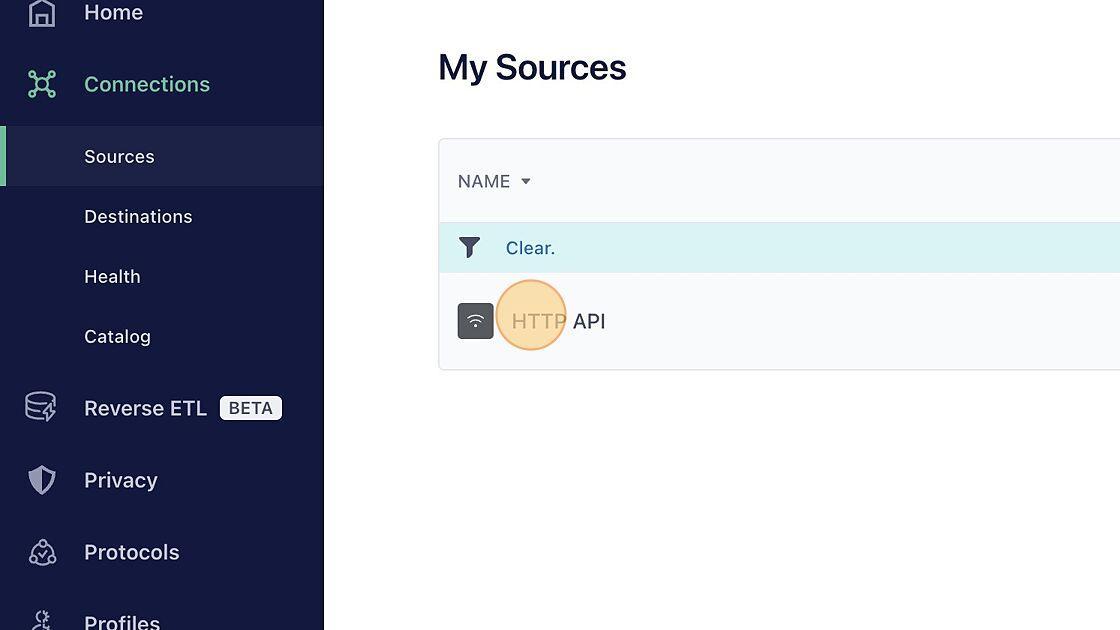
6. Click the “Filter Sources” field.
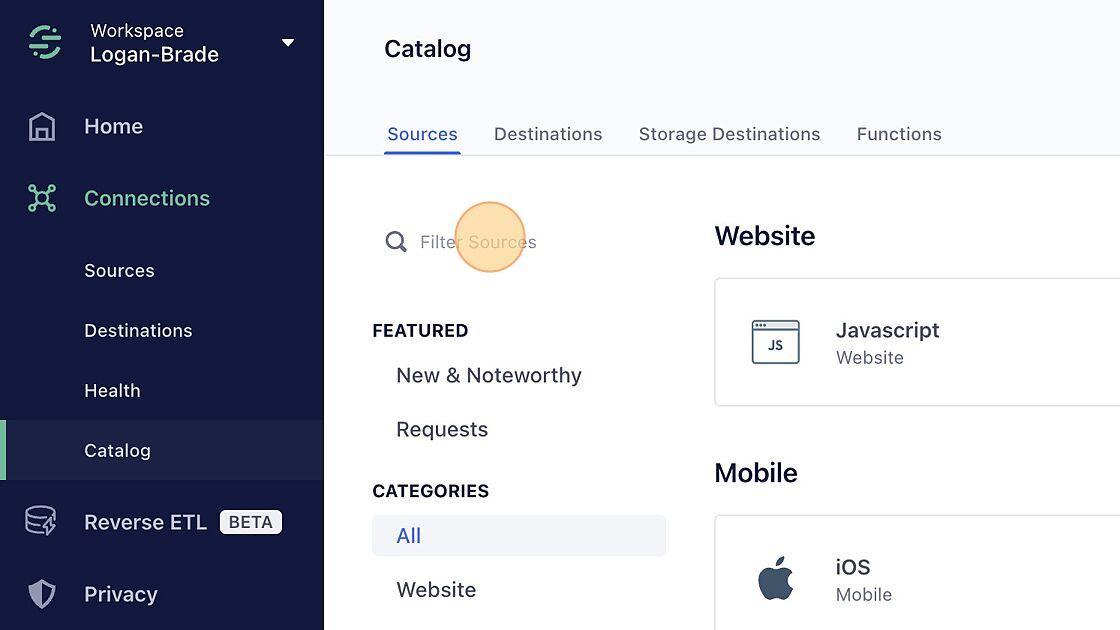
7. Type “HTTP”
8. Click “HTTP API”
9. Click “Add Source”
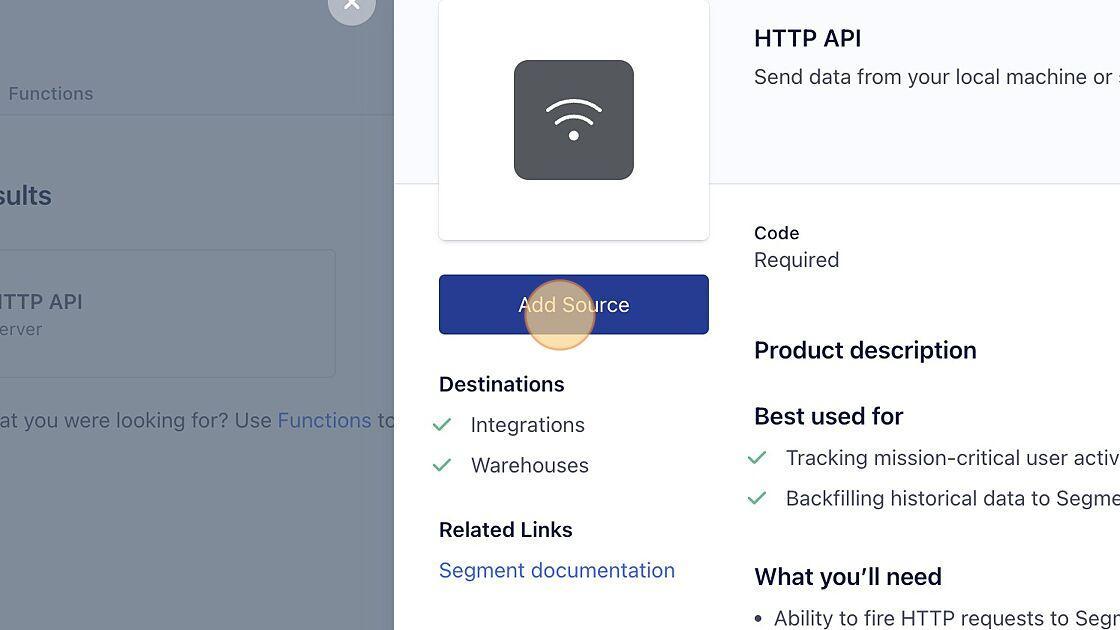
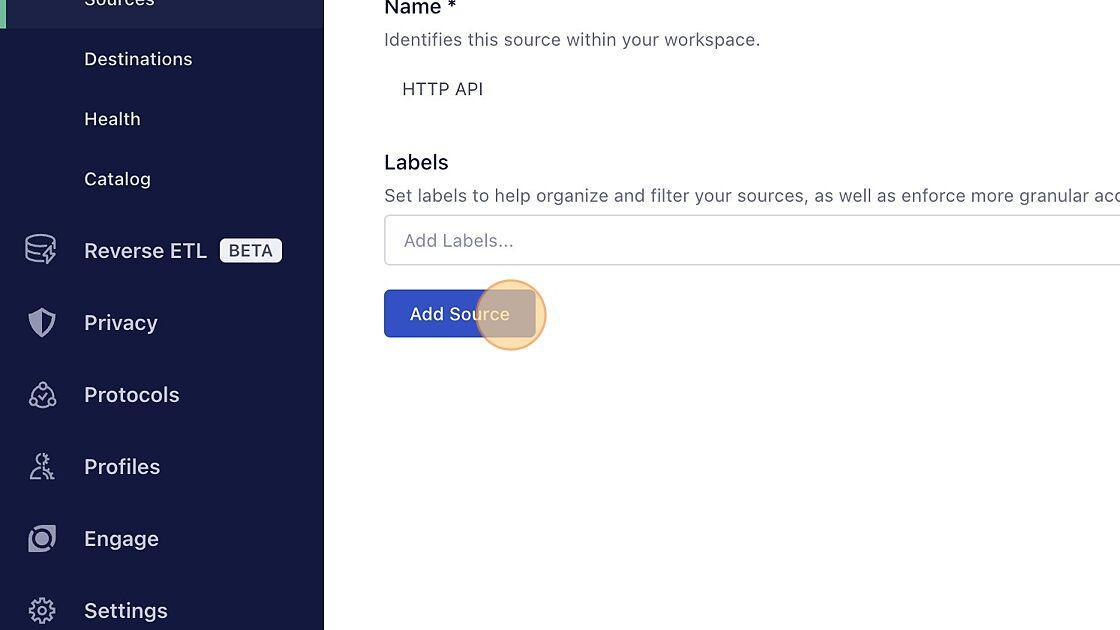
10. Click “Add Source”
11. Copy your write key
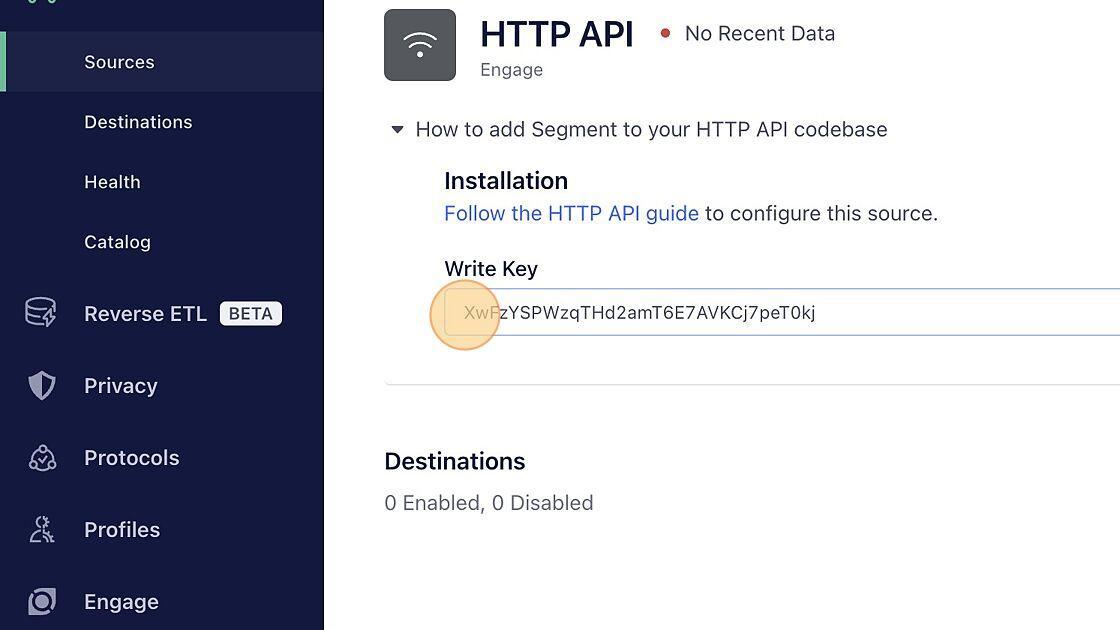
12. Combine your copied write key and Segment password but separated with a colon (i.e. XwFzYSPWzqTHd2amT6E7AVKCj7peT0kj:password)
13. Base64 Encode the above copied write key and password
Creating the Project
1. Setup the project with the following commands in terminal and go through the prompts (alternatively clone the starter project from Github, run npm install, and skip to step 9)
ionic start httpExample blank --type=angular --capacitor2. Change directory to your newly created project:
cd httpExample3. Create an http service (This will hold our code that’ll do the POST request):
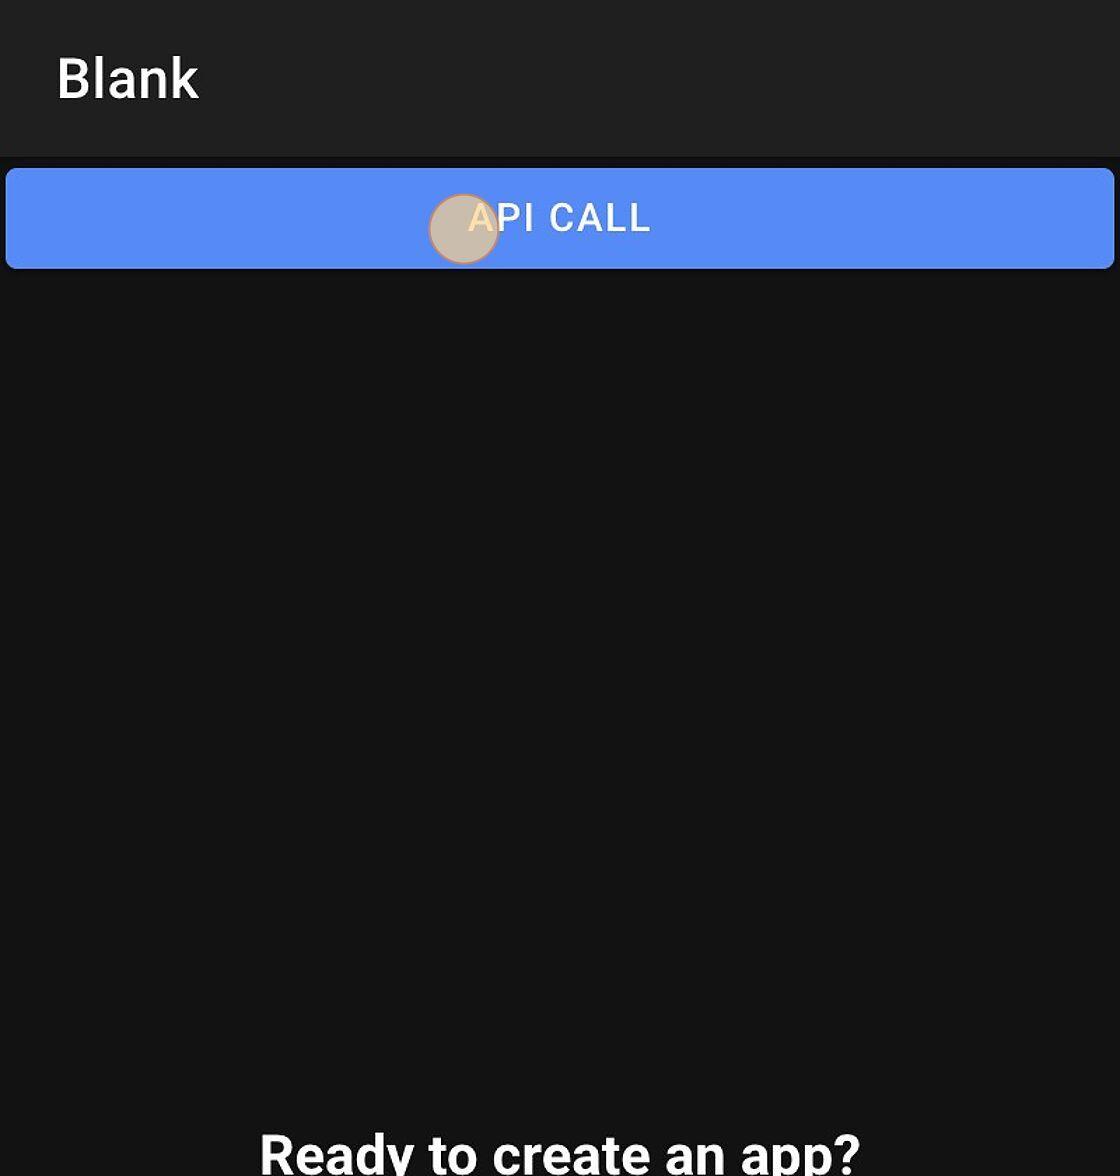
ionic g service services/http4. Open the project in your IDE and add the following Ionic button component to home.page.html in src/app/home:
<ion-button expand="block" (click)="nativeCall()">
API Call
</ion-button>
5. With the Ionic button added, home.page.html should look like this. It will show an error for nativeCall() but we will address that in the next step!:
<ion-header [translucent]="true">
  <ion-toolbar>
    <ion-title>
      Track Button Click
    </ion-title>
  </ion-toolbar>
</ion-header>

<ion-content [fullscreen]="true">
  <ion-header collapse="condense">
    <ion-toolbar>
      <ion-title>Track Button Click</ion-title>
    </ion-toolbar>
  </ion-header>

  <ion-button expand="block" (click)="nativeCall()">API Call</ion-button>
</ion-content>
6. Add the following function to home.page.ts:
nativeCall() {
 console.log('Button Pressed!');
}
7. home.page.ts should now look like this:
import { Component } from '@angular/core';

@Component({
  selector: 'app-home',
  templateUrl: 'home.page.html',
  styleUrls: ['home.page.scss'],
})
export class HomePage {

  constructor() {}

  nativeCall() {
    console.log('Button Pressed!');
  }
}
8. Next we’ll need to build our application and add the native platforms:
//Building our application
ionic build

//If you are creating/testing this for mobile, make sure to add //the native platforms
ionic cap add ios
ionic cap add android
9. Once that is completed, we should be able to test our application to make sure everything is working so far and that it will reload as we are making changes!:
//This will run our application in your browser on localhost:8100
ionic serve

//This will run our project in the XCode Simulator
ionic cap run ios -l --external

//This will run our project in the Android Studio Simulator
ionic cap run android -l --external
*Note: As a M1 Mac user I did run into issues with the Android Studio connection so make sure NPM has the right permissions (you should not have to use sudo when running Ionic CLI commands), you have Java installed, the Gradle JDK configured to the right JDK and emulators configured in Device Manager. With our project set up and working, you’ll notice that we currently have a button that doesn’t do anything but log out “Button Pressed!” Now that Segment has been configured, and our project is set up, let’s connect our project to Segment to change that!
Connecting the Button to Make an API Call
1. Go to http.service.ts and import CapacitorHttp and HttpOptions from @capacitor/core. We’ll also need to import ‘from’ from rxjs to turn our response into an Observable that we can listen to:
import { CapacitorHttp, HttpOptions } from '@capacitor/core';
import { from } from 'rxjs';
2. Next we need to create a method that calls the Segment API in http.service.ts (Make sure to update Authorization with ‘Basic’ and your Base64 encoded writeKey:password):
doPost(url: string) {
//Options that are necessary to make the POST request
 const options: HttpOptions = {
   url,
   headers: {
     Authorization: 'Basic writeKey:password',
     'Content-Type': 'application/json'
   },
   data: {
	//This is a test data object to be tracked so try this or create your own!
     userId: "019mr8mf4r",
     event: "API Called",
     properties: {
       name: "Button Was Clicked",
       "Tag": 'Capacitor'
     },
     context: {
       "ip": "24.5.68.47"
     }
   },
 };
 return from(CapacitorHttp.post(options));
}
*Note: Without Content-Type, the data won’t send to the API on mobile.
3. With that method in place, our completed http.service.ts should look like this:
import { Injectable } from '@angular/core';
import { CapacitorHttp, HttpOptions } from '@capacitor/core';
import { from } from 'rxjs';


@Injectable({
 providedIn: 'root'
})
export class HttpService {

 constructor() { }

 doPost(url: string) {
   const options: HttpOptions = {
     url,
     headers: {
       Authorization: 'Basic writeKey:password',
       'Content-Type': 'application/json'
     },
     data: {
       userId: "019mr8mf4r",
       event: "API Called",
       properties: {
         name: "Button Was Clicked",
         "Tag": 'Capacitor'
       },
       context: {
         "ip": "24.5.68.47"
       }
     },
   };
   return from(CapacitorHttp.post(options));
 }
}
4. Now that our http service is in place we’ll need to call it home.page.ts by importing HttpService:
import { HttpService } from '../services/http.service';5. Then we’ll need to update our constructor to properly add HttpService:
constructor(private httpService: HttpService) {}6. Lastly, we’ll need to update nativeCall() to call doPost() with the Segment Track URL in http.service.ts and listen to the response:
nativeCall() {
 this.httpService.doPost('https://api.segment.io/v1/track')
   .subscribe(
     (res: any) => {
       console.log(res);
 }
   );
}
7. With HttpService setup and nativeCall() update home.page.ts should look like this:
import { Component } from '@angular/core';
import { HttpService } from '../services/http.service';

@Component({
 selector: 'app-home',
 templateUrl: 'home.page.html',
 styleUrls: ['home.page.scss'],
})
export class HomePage {

 constructor(private httpService: HttpService) {}

 // nativeCall() {
 //   console.log('Button Pressed!');
 // }

 nativeCall() {
   this.httpService.doPost('https://api.segment.io/v1/track')
     .subscribe(
       (res: any) => {
         console.log(res);
   }
     );
 }
}
With everything in place, it’s time to confirm that our code works and that we are successfully sending data to Segment!
Confirming the Code Works
1. With our project running from a previous step, navigate to http://localhost:8100/home in your browser or use the mobile emulators.
2. Click “API CALL”
3. In a new tab, navigate to https://segment.com/
4. Click “Log in”
5. Click “Sources”
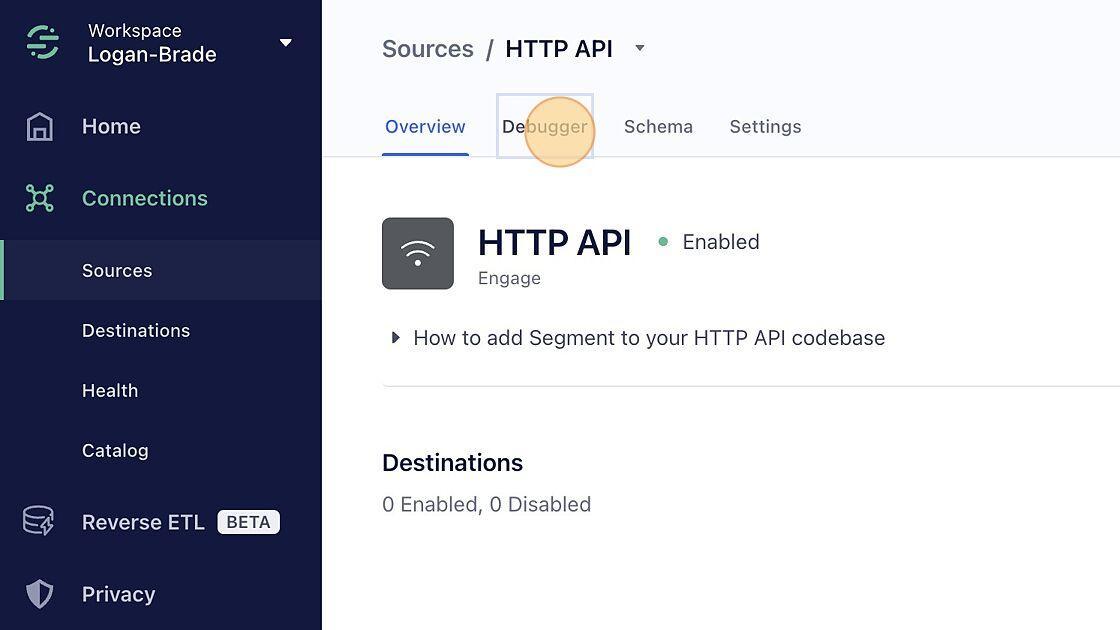
6. Click “HTTP API”
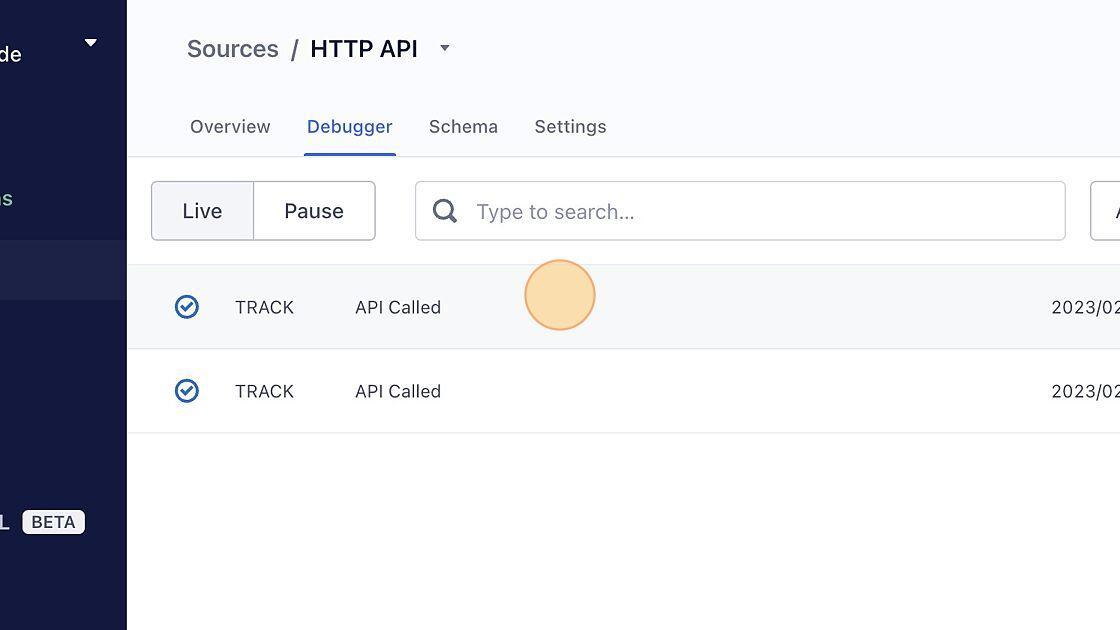
7. Click “Debugger”
8. In the debugger menu you should be able to see our button tracking calls in near real-time!
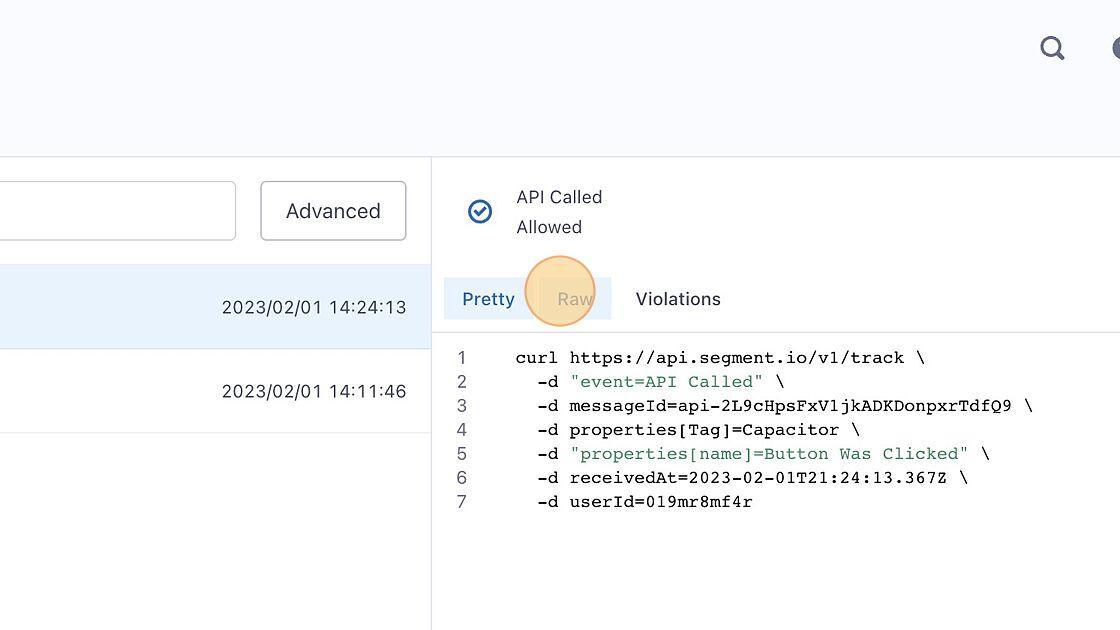
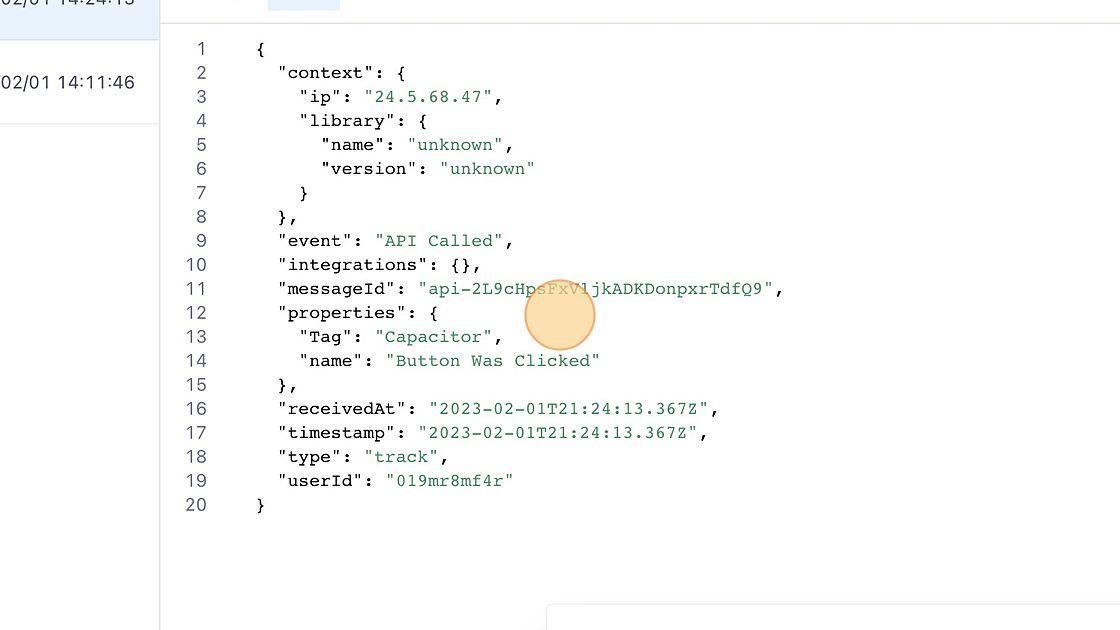
9. Click “Raw” to see what data is being passed from our Capacitor project
Summary
Even without a Capacitor-Segment plugin, Capacitor provided an excellent tool that allows for integration with Segment with just a little configuration and a few lines of code. In this tutorial we walked through how to do the configuration in Segment, demonstrated the code necessary to integrate to a 3rd party API, and verified data was being sent to Segment.
Be on the lookout for more blog posts and video content around the HTTP plugin in the future (and check out our extensive library of tutorials in the meantime on the Ionic Blog). I’ve got some unique projects in the pipeline to show off just how versatile Capacitor & the HTTP plugin are and you don’t want to miss it!